|
|
#16 |
|
IT'S ALIVE!
Join Date: Dec 2009
Location: Richmond, VA
Posts: 811
Rep Power: 16  |
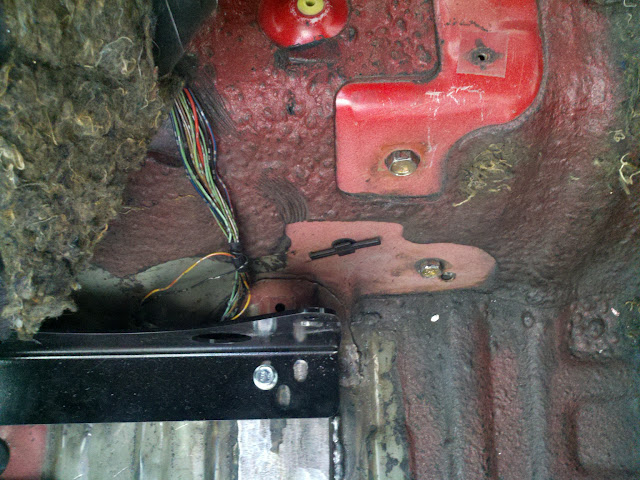
Small update. I finished the block off plates pictured above (painted black). I also decided to do the same thing with the vents along the windshield. I don't have heat or AC so there really isn't any defrost function anymore and the vents aren't needed. Ordered, received and installed Kirk Racing "race" roll bar. Removed the stock restraint system and reinstalled ~90% of the interior (still waiting on a few items). Work has been keeping me out of the car so progress has been slow. I did receive this though...
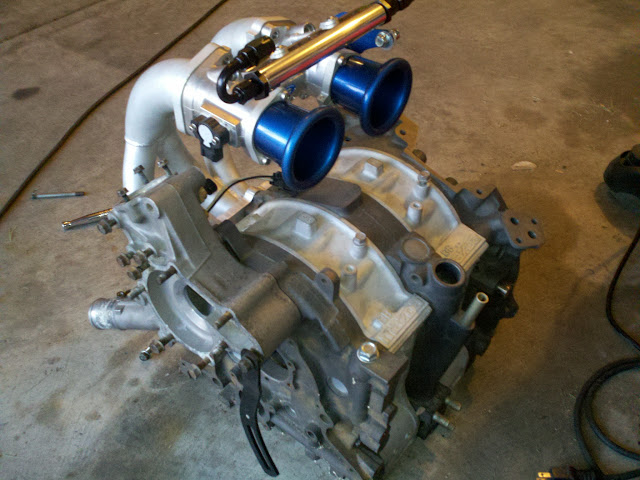
 The most expensive single item I'v purchased so far (aside from the car itself): 55 mm IDA-style throttle bodies from EFI Hardware (purchased through Tweakit). Logan and I felt these were the best option out there. |
|
|
|
|
#17 |
|
RCC Addict
Join Date: Feb 2008
Location: VA
Posts: 1,812
Rep Power: 19  |
I love those parts. I was going this route with a build a few years ago and ordered a few things from Tweakit from EFI Hardware - the quality really is great and it's sad we have to go to AU to get these kind of parts!!
Looking forward to a fire up video! |
|
|
|
|
#18 |
|
S4 Owner
Join Date: Jun 2008
Location: Tottenham, ON, Canada
Posts: 48
Rep Power: 0  |
I want more, hurry up man!
__________________
1985 Mazda RX7 GSL 13B, Holley etc 1997 Mazda MX6 LS - DD lowered on 17s |
|
|
|
|
#19 |
|
IT'S ALIVE!
Join Date: Dec 2009
Location: Richmond, VA
Posts: 811
Rep Power: 16  |
Ha, I didn't know anyone was actually following this! Funds are low right now so I've had to slow down a bit. I can't do too much without the intake manifold anyway.
I've been focusing on the interior while I save up some money. I've completely removed the stock restraint system, and I've got a Kirk Racing roll bar out getting powdercoated that will likely go in tomorrow. Since I no longer have a rear wiper and the OEM service panels are NLA I went and made my own out of .025" aluminum again. I may have stripped all the luxury out of this car but that doesn't mean it has to look like crap.  A shot of the interior in its current state:  After the roll bar it's just seats and harnesses and the interior is done. |
|
|
|
|
#20 |
|
IT'S ALIVE!
Join Date: Dec 2009
Location: Richmond, VA
Posts: 811
Rep Power: 16  |
I haven't really worked on the car since before the holidays but I'm back into it shortly.
Picked up a OMP WRC seat w/ brackets and a Sparco 345 Steering wheel w/ hub adaptor yesterday. I test fitted the seat in the car and it still seems too high to me. My head is about 3/4" from the headliner so I fear there won't be enough space with a helmet. I plan on cutting out the stock seat mounting locations and mounting the seat directly to the floor. This should get me about 1-1/4" more headroom. Question is, will I screw something up by cutting these out? |
|
|
|
|
#21 |
|
IT'S ALIVE!
Join Date: Dec 2009
Location: Richmond, VA
Posts: 811
Rep Power: 16  |
Finally some pictures and one to elaborate more on my current issue:
Aeromotive FPR:  Sparco 345 wheel and Sparco hub (temporarily installed in this picture):  OMP WRC seat - the narrowest seat with high thigh bolsters I could find for <$1000:  Test fitting the seat in the car. It fits well but with my helmet on I'm still touching the headliner (damn sunroof cars) so I'm going to have to work on the floorpan.  So here's the area in question:  Is the front mounting point a structural part of the car? I've read people claim both sides and, honestly, I'm not convinced it is. Sure it's boxed in but the metal is like 20 ga at most (I can bend it with my fingers). I can go in cutting things but I want to do this "the right way." Firs thoughts are to cut out the rear mounts (the rear culprits) and run some flat stock to connect them and notch out and re-box the front mount with some more flat stock. This should create two strong, flat points to mount the seat. Unfortunately: 1) I don't have a welder, 2) I don't know how to weld, and 3) I don't have a means to get the car to someone with a welder who knows how to weld. |
|
|
|
|
#22 |
|
RCC Addict
Join Date: Feb 2008
Location: VA
Posts: 1,812
Rep Power: 19  |
Nice seat....
You're fine with cutting those "boxed" rails out. We do it regularly on miatas when mounting the seat to the floor is necessary... generally, we'll drill the spot welds out, pull the entire rail out of it (as you noticed, its pretty flimsy stuff - especially when you start cutting it) and then weld the holes shut. Once the new seat configuration is mounted and in the way we want, we'll add thicker square tubing brace farther forward or wherever it will clear the front upright of the seat... The problem of not having a welder or access to one is going to be a setback though. I know you've got to have some good shops in your area of OH.. OH is the land of welders, lol... |
|
|
|
|
#23 |
|
IT'S ALIVE!
Join Date: Dec 2009
Location: Richmond, VA
Posts: 811
Rep Power: 16  |
Well I ultimately broke down and purchased a welder. It's a cheap little 110V unit but it's enough for whatever I need right now. After a couple weeks of practiced I figured I was ready and I started work on the new seat mount.
Here is the new seat mount tacked in place. The cross bars are 1/8" flat stock and the end pieces are made from 16 ga sheet. The "vertical" bar was originally going to be part of the mount (hence the seam weld) but I have since decided it isn't needed and its only purpose was to serve as a jig.  Once everything was fit into place I cut it out and made the anchor points. These are 2" sections of 1" x 1/4" flat stock welded to the back. I then drilled two holes in each and tapped them to M6 x 1.00. There are two holes because for whatever reason the holes in the bottoms of the seat brackets are at different widths depending on how you mount them.  I still have a little ways to go on the welding...  Finally, test fit on the seat.  The new mount is now fully welded into the car and I've removed the temporary brace but it got dark and the pictures started to suck. Testing fitting the seat in the car shows a total height reduction of about 1". I know it seems like nothing but at least my head is no longer touching the headliner with a helmet on. I figure I'll ream out the holes in the brackets a little to gain another 3/8" and I should be good. All that's left is to measure/cut/weld some 16 ga. sheet to box everything in. |
|
|
|
|
#24 |
|
RCC Addict
Join Date: Feb 2008
Location: VA
Posts: 1,812
Rep Power: 19  |
1" can mean everything...
Looks good though... |
|
|
|
|
#25 |
|
IT'S ALIVE!
Join Date: Dec 2009
Location: Richmond, VA
Posts: 811
Rep Power: 16  |
It's been a long couple of weeks and completing the seat mount took much longer than I had anticipated.
Getting ready to box everything in...  ...and done. No in-process shots because the welds are exceedingly ugly. Apparently it's quite hard to weld 1/8" flat stock to the floor. I'm still practicing!  A shot that shows how everything fits with the seat in and the carpet down:  The seat is literally as low as it can go. I reamed out the lowest rear hole in the brackets and now the seat is basically resting on the bottom plate of the brackets (< 1/16" clearance). Without a helmet there's about 2 to 2-1/2" clearance between my head and the headliner. I took these next two shots to show where I want to anchor the lap belts. Door side:  Transmission side:  I want to use the stock lap belt anchor points as there are reinforced from the factory. My concern is that the mounting points are too wide. The factory anchor points are about 1" from the seat on the transmission side and 3" from the seat on the door side. With me in the seat and a mock lap belt (old guitar strap) the angle is about right (> 45 degrees from horizontal). I can always make new anchor points, which are more inward and use backing plates but I'd like to avoid putting more holes in the floor! Thoughts? Also if anyone has an old/cheap/expired 5 or 6-point harness lying around they don't need I'd gladly take it off your hands. |
|
|
|
|
#26 |
|
IT'S ALIVE!
Join Date: Dec 2009
Location: Richmond, VA
Posts: 811
Rep Power: 16  |
Progress has been slow. With Spring comes lots of stuff to do around the house...
I made a battery tray for the ETX18L I picked up a while back. It bolts to the floor in the passenger's side storarge bin.  I decided to replace the entire stock fuel system (not just the FPR and fuel pump). Originally I was just going to add a new bulkhead connecter (thanks Force13B) for the new fuel pumo but I quickly discovered the fuel lid for the FC was already crammed tight. I decided to hack off the stock feed and return lines and add my own AN fittings so I fit the connector. With a little modification to the fuel pump support the new fittings go right in.    No one sells a female 6 AN to 5/16" barb fitting so that's why there is a female-to-female adatpor in there. 5/16" is required because that is the outlet diameter of the fuel pump (Aeromotive Stealth 340). The new bulkhead connector should fit on the other side of the feed line just behind the existing connector. The fuel pump, submersible fuel line and fuel-safe clamps are ordered and that will complete the fuel pump assembly and then I get to make the lines. Fuel question: I'm hoping for about 225 whp when all is said and done. Right now I have two ID1000 injectors mounted downstream of the TB to accomplish that goal. I know I can bump up fuel pressure but is this still feasible or am I going to need more fuel flow? The other option I've devised is to run four ID725's staged in a primary/secondary setup: two in the stock primary location (need aftermarket fuel rail) and the other two just downstream of the TB (secondary). My concern would be not enough fuel getting into the secondaries as the TB feeds all four runners. |
|
|
|
|
#27 |
|
IT'S ALIVE!
Join Date: Dec 2009
Location: Richmond, VA
Posts: 811
Rep Power: 16  |
Been waiting on parts/supplies so I haven't gotten much done lately.
The new fuel pump (Aeromotive Stealth 340):  Does anyone know if the supplied rubber/foam sleeve is fuel safe? The Aeromotive pump isn't really drop-in due to its smaller size. I plan on using stainless steel tie downs to hold it to the stock fuel pump support. If I can use the foam/rubber sleeve that should keep the noise down. It's also annoying Aeromotive "recommends" 10 ga wire for the fuel pump, yet the pigtail harness they sent me has 16 ga wire. Since the pump current draw should always be <20 amps I'm actually going with 12 ga wire. The new bulkhead connector is in. It's a tight fit!  Not pictures is the new fuel pump wiring. 12 ga from the new relay in the passenger's foot well all the way back to the fuel pump. It follows the stock antenna cable's path to the driver's rear strut tower. I need to find a 1.25" diameter grommet with a .25" hole for the fuel tank service cover since I destroyed the stock one and I can't find a part number anywhere. If anyone knows this I would be grateful! The rest of my fuel system re-work has also arrived. Pictures later: -2 feet of Gates 5/16" submersible fuel line -Fuel line clamps (no worm clamps!) -40 feet of -6 AN braided stainless steel line -Aeromotive fuel filter -Too many hose ends and misc fittings to count The wife has a friend in town this weekend so that means I should have plenty of "alone time" with the RX-7. |
|
|
|
|
#28 |
|
I have radioactive semen
Join Date: Jul 2008
Location: in a bottle of Glenfiddich
Posts: 250
Rep Power: 18  |
nonsense, dude! hell, you've given me an idea or two regarding my Gen II. i, too, am building on a 4-port setup, but there are a few little differences here and there because it may or may not remain N/A.
however, i love the way yours is coming together. i really dig your IDA throttle. i came pretty close to buying one, too, but i eventually went with TWM. i can't wait to see what Logan comes up with for your intake manifold. just keep up the good work, brother! i'm sure i'm not the only one following. 
|
|
|
|
|
#29 |
|
IT'S ALIVE!
Join Date: Dec 2009
Location: Richmond, VA
Posts: 811
Rep Power: 16  |
Updates!
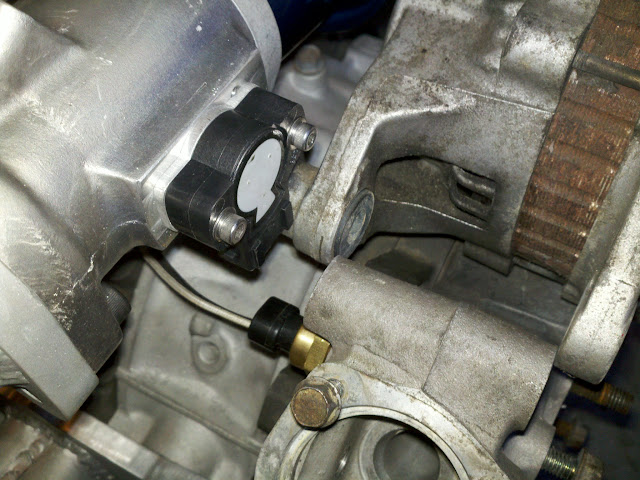
Got the fuel pump assembly completed. I'm still not sure about the foam/rubber sleeve but I'll pull it in a few weeks to see how it's holding up - it's ~1/4 submersed in gasoline.  Cut out the stock fuel lines. There's really not a whole lot there. I'm going to try to reuse the stock brackets with a little modification.  New parts to go in:  I ended up making a bracket to mount the FPR. Bare steel for now, but I will be painting it black.  The new fuel filter actually fit in the stock location. It's a little smaller in diameter than the stock filter but I added some foam insulating tape to the stock bracket and everything is nice and snug.  You can see the lines in the picture above. I need to get some more fittings as I was too optimistic with all the straight hose ends. I actually need like 3 90 degree ends and one 30 degree and that should be enough to finish up. Plans changed a little because THIS came in and I had a chance to mock everything up!   My custom aluminum intake manifold arrived (thanks Logan!). The port sizes are matched to my throttle bodies and engine. Some quick mock-up pictures:    I grabbed the alternator and sure enough there's some interference with the TPS sensor and the airhorns.   A minor setback. The alternator is getting relocated to the driver's side of the engine where the P/S and A/C used to be with an XTreme Rotaries bracket. Hopefully that won't interfere with the steering column since it's designed with Aussy cars in mind. There's also going to be a tight fit between the TPS sensor and water temp sensor leads. One last mock up shot with the injectors for shits.  Oddly enough the manifold doesn't fit on my old 6-port engine that I'm using as a dummy while I lay out everything on-car. I'm not sure if the bolt pattern is slightly different or if some of the studs are bent. I'll mess with the studs so it'll fit and I can continue. Immediate to-do list (in no particular order): -Install intake onto dummy enigne and wire injectors and TPS. -Finish fuel lines. -Build airbox and install/wire IAT sensor. -Relocate/wire alternator. -De-power steering rack. -Wire starter |
|
|
|
|
#30 |
|
Rotary Fanatic
Join Date: Jan 2010
Posts: 253
Rep Power: 16  |
stupid question but why 4 port as oppose to 6 port?
btw i really love the build its making me wish i had done the N/A set-up instead of turbo now. |
|
|
 |
| Bookmarks |
|
|