|
|||||||


| Show your rotary car build up. Show off your Rotary Car build! |
 |
|
|
Thread Tools | Display Modes |
|
|||||||
| Show your rotary car build up. Show off your Rotary Car build! |
|
|
|
Thread Tools | Display Modes |
 03-30-2015, 12:22 PM
|
#1 |
|
The Newbie
Join Date: Nov 2012
Posts: 29
Rep Power: 0  |
FD budget..ish track day build
My friend recommend this forum and after looking around a bit I decided I liked it, has a nice laid back feel compared to rx7club. Anyways, I think I'm gonna stick around, so I might as well post a build thread. I'll start with the history/copy over earlier build threads and bring it up to modern day.
I bought the FD in 2011 I picked up the FD for 3000$, it idled a little ruff and isn't the most beautiful specimen, I started out with a full rebuild using the atkins rebuild kit. I also deleted and simplified as much as I could(some regrets here). anyways here's the car  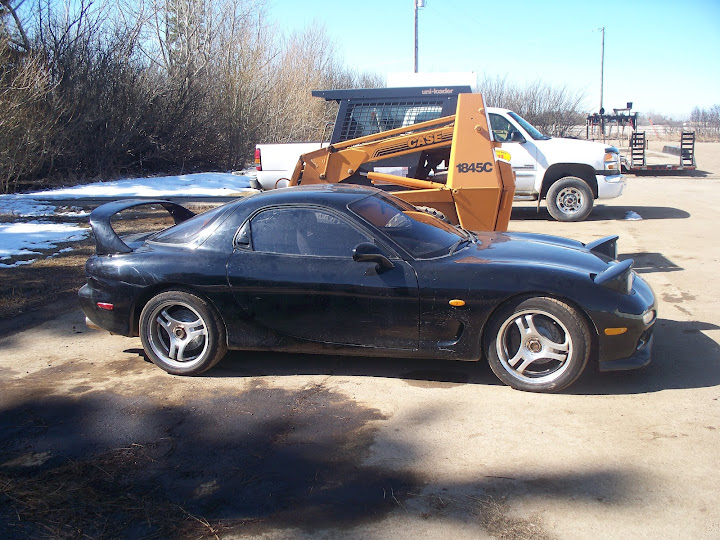 Started pulling it apart and pulling the engine early summer 2012. 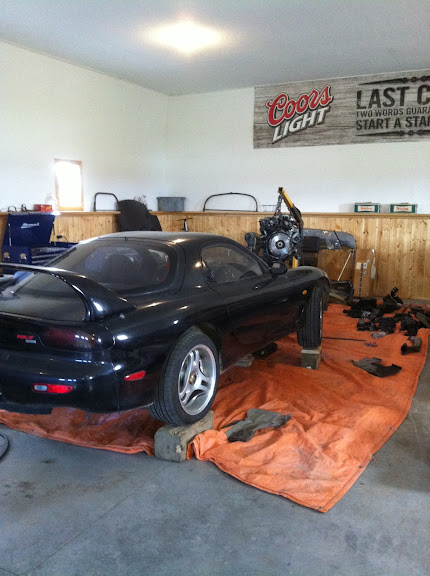  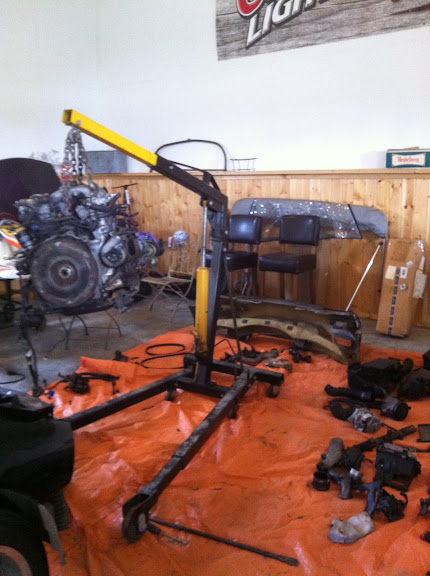  The project got pushed to the side for most of the summer as I ended working on my truck alot more than I wanted. In September I got to pulling the engine apart.      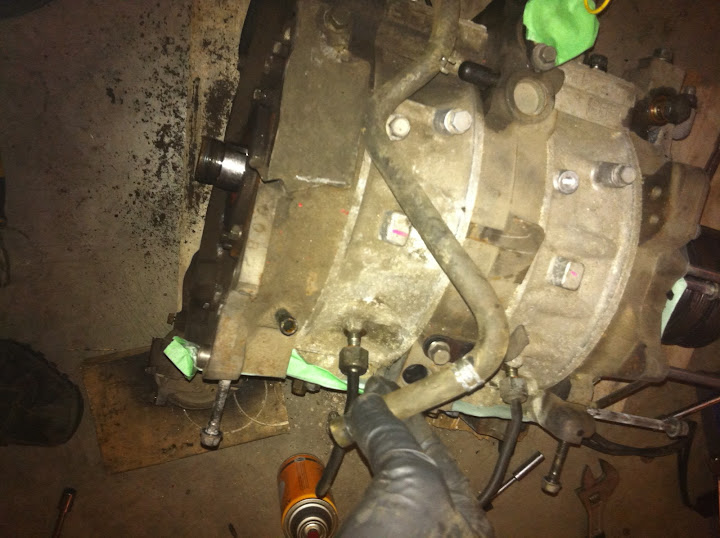 at the end of September I disassembled the engine The iron's 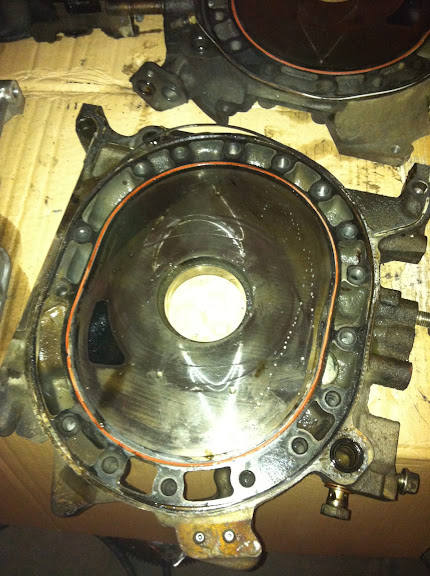  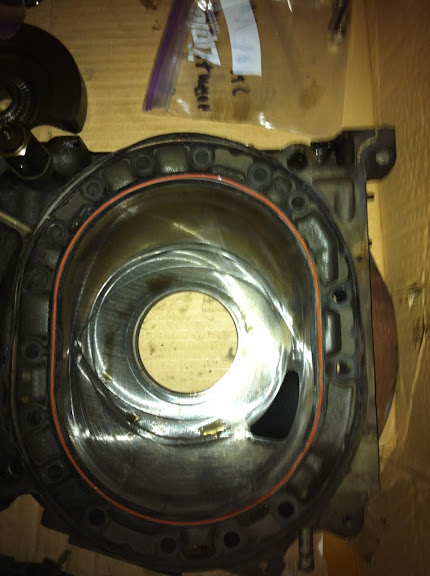 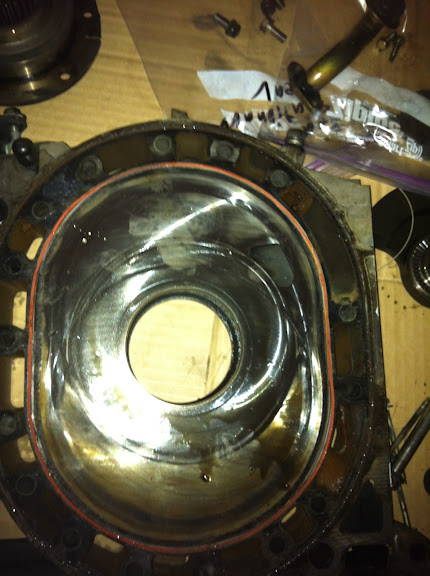 Some serious carbon build up on the rotors 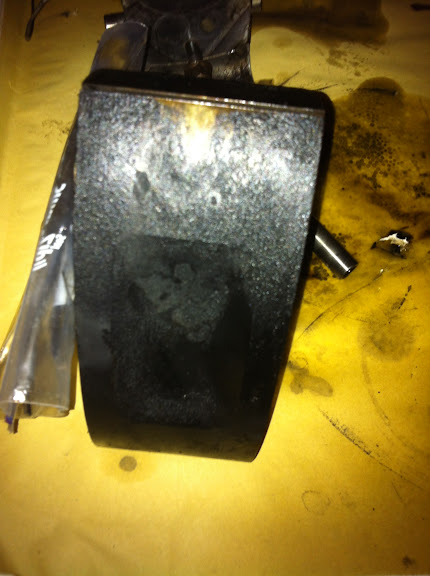 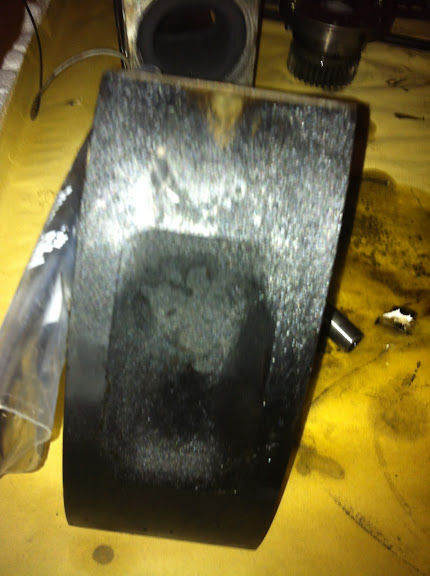 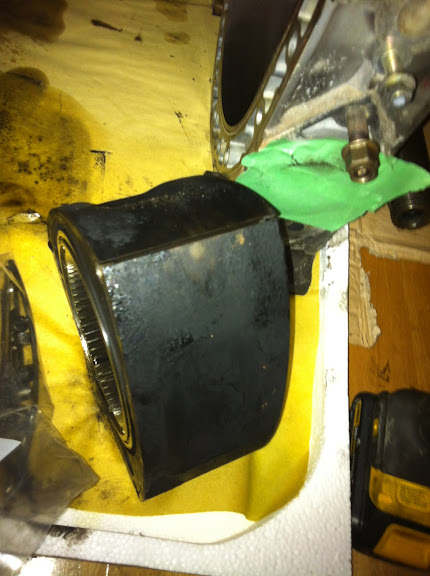 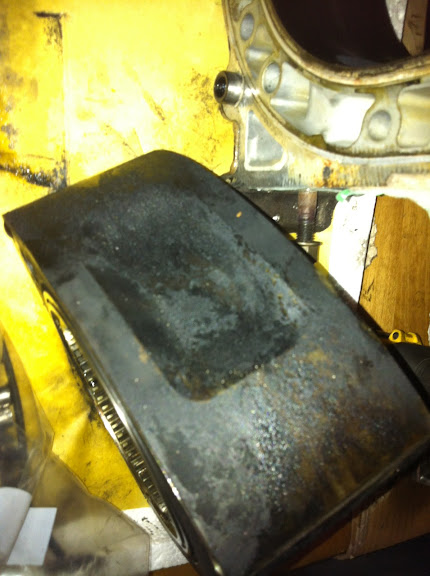 And the housings     and the engine in pieces 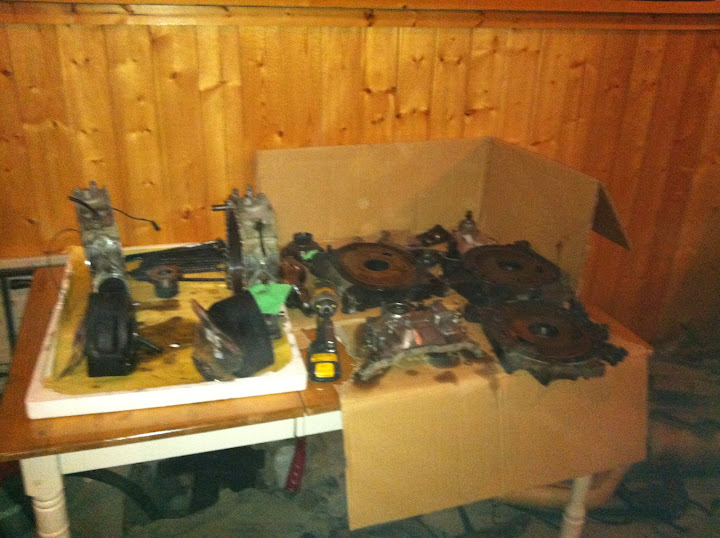 here's the pictures from cleaning still needs some more cleaning but starting too look alot better   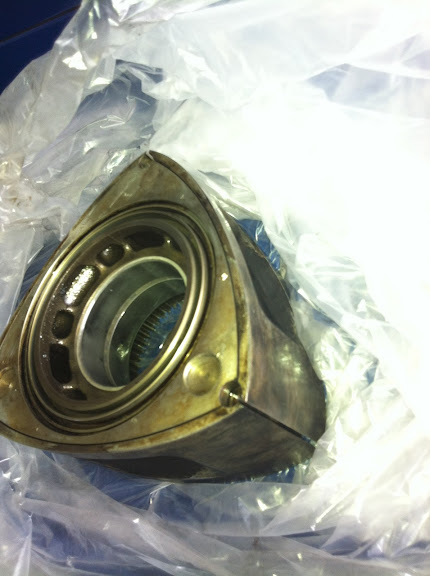  mostly just cleaned the crap off the outside at this point  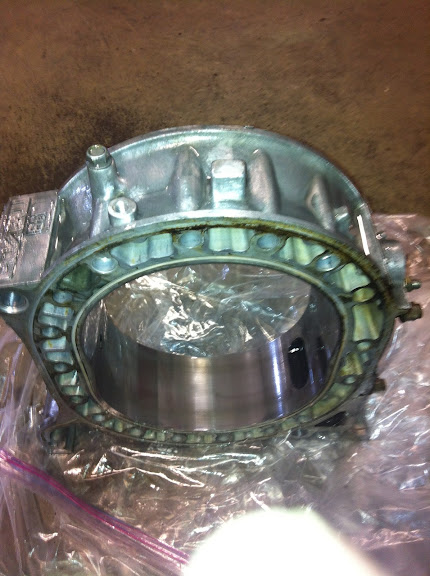 and two months later with next to no work on the car finally got back at it. finished cleaning the engine, assembling the rotors and painting the engine in one weekend. Started by moving all the parts and parts washer from the unheated barn into the heated shop. 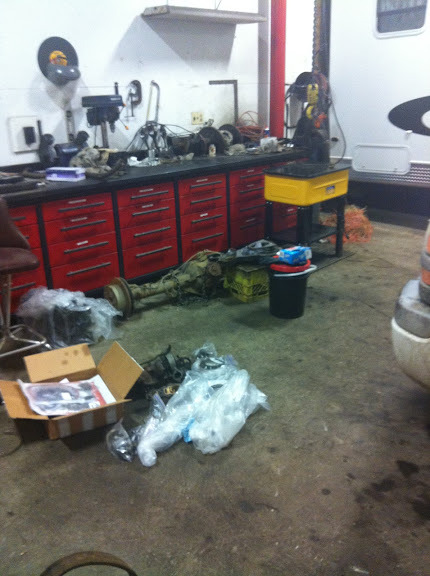 Prepping the rotors. Side seals ruffed into place on the front rotor  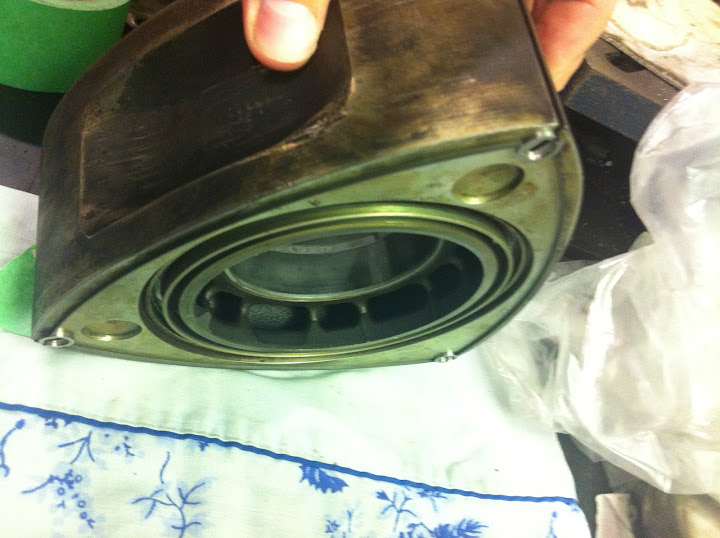 Then both rotors 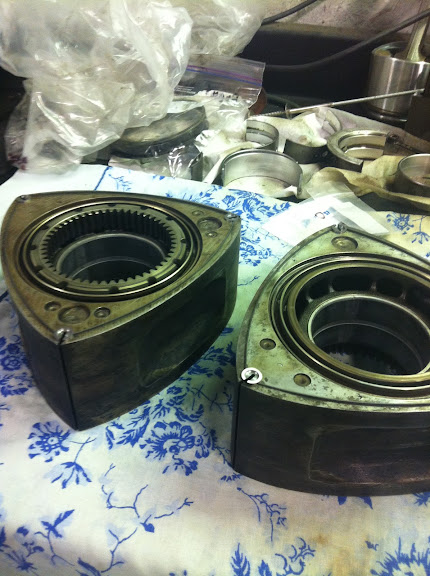 Then grinding the side seals  oil control rings installed in the front rotor  Then both rotors  all seals lubed up and apex seals and springs set in place on the front rotor. basically ready to drop into the engine  Then both rotors 
|

|

|
|
03-30-2015, 12:23 PM
|
#2 |
|
The Newbie
Join Date: Nov 2012
Posts: 29
Rep Power: 0 |
Front iron painted, that's alot of taping for very little painting.
  stopping point for that day, front housing taped off and ready for paint the next day  got the front housing painted  centre iron painted 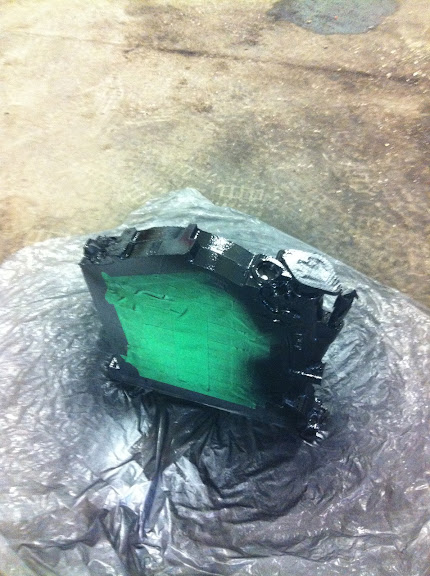 rear iron taped up and ready for paint  front iron with the tape removed  And a preview of what it could look like once finished.  Weekend Later I started assembly of the engine. Parts laid out 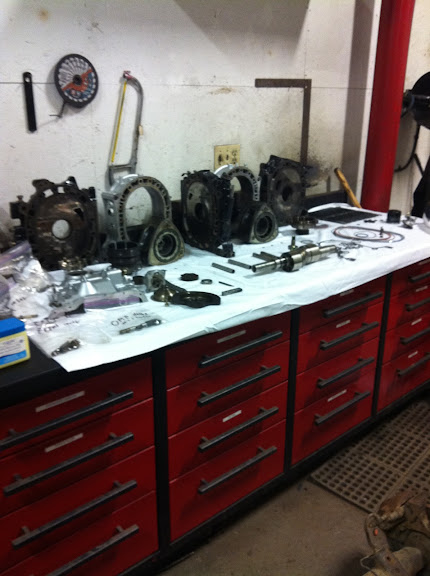 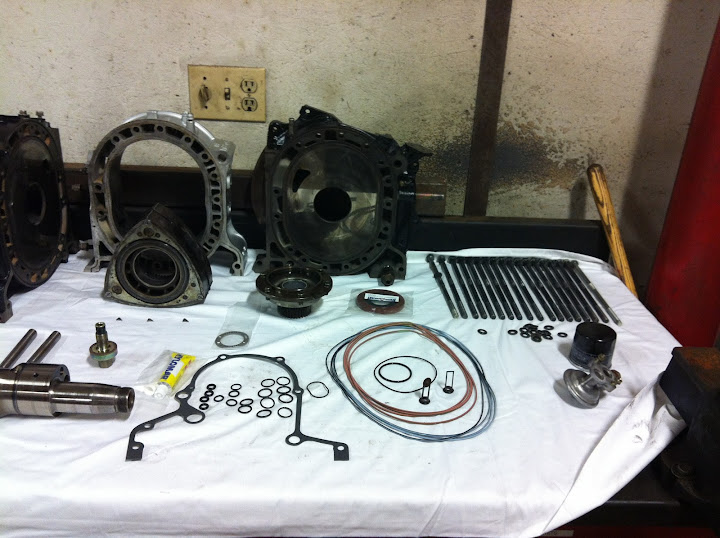 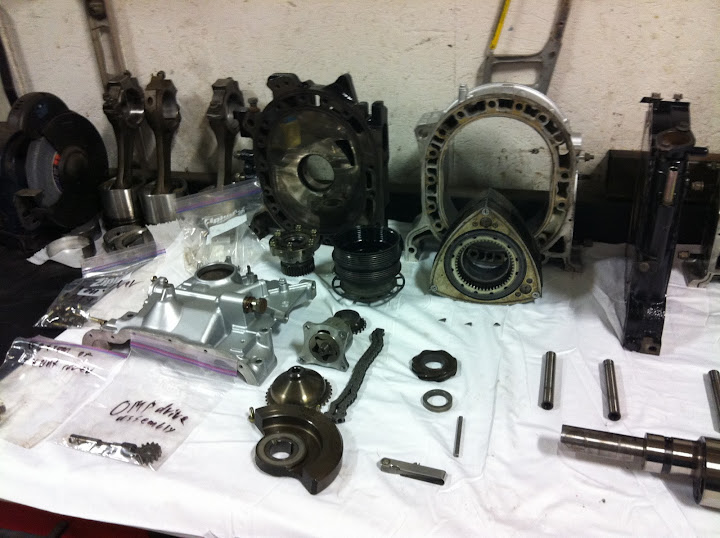 First housing on and rotor dropped in  Few less parts in the pile  E shaft dropped in  Top housing on and rotor dropped in   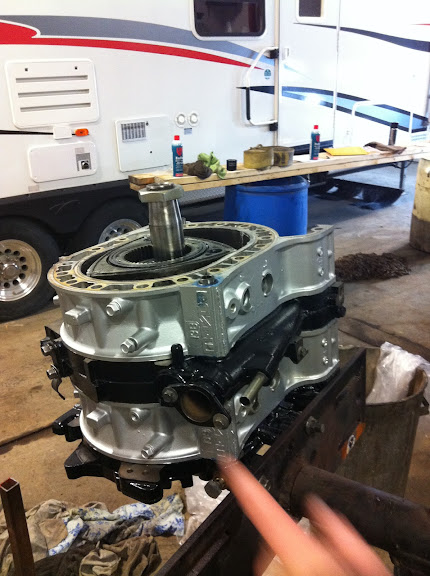 Even fewer parts left on the table  last iron on  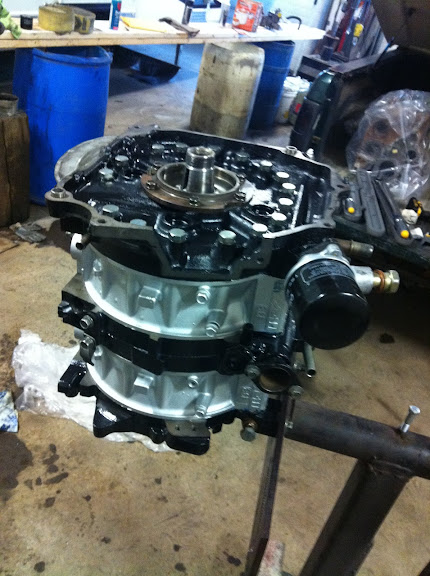 Starting to run out of engine parts  oil pump on 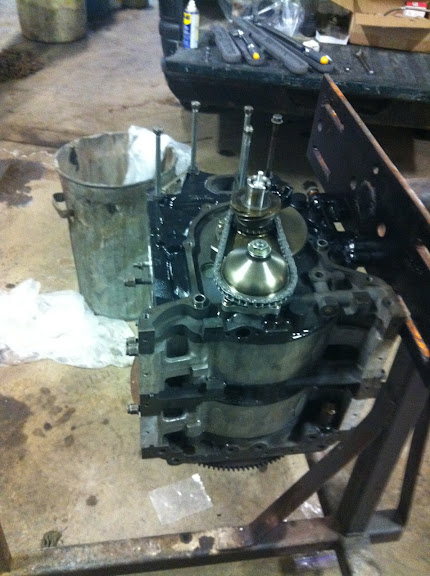 front cover on and water pump studs in  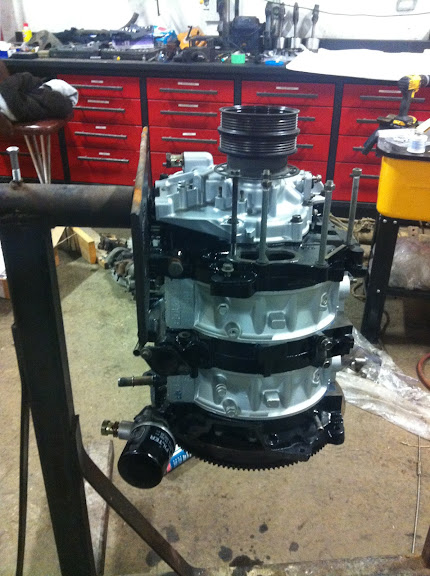 Oil pan on  Water pump painted 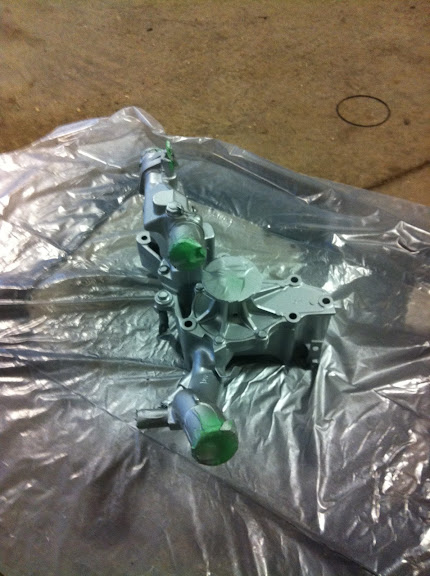 water pump on and put on my longer term engine stand. I didn't like leaving the engine hanging off two bolts. started my non sequential mods. These are the twins I picked up from a friend. The previous owner said the second turbo wasn't boosting. based off of the condition of the vacuum hoses the turbos likely weren't the problem but at least this way I know the turbo's work. plugging the holes with some bolts just cause I'm lazy.   UIM cleaned off a bit 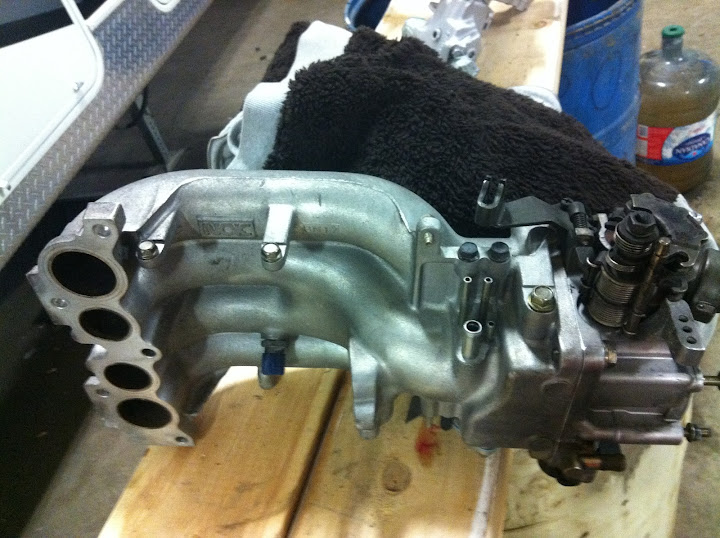 double throttle or whatever its called deleted as well as the thermo whatever. 
|
|
|
|
|
03-30-2015, 12:30 PM
|
#3 |
|
The Newbie
Join Date: Nov 2012
Posts: 29
Rep Power: 0 |
finished assembling the turbo's on the engine.
used some midpipe, never cared what brand. and an aftermarket intake as well as a Mishimoto rad    I got it running on a power FC and ran it with no waste gate restriction for most of last year at a bunch of local events, with no restriction it ran about 6psi of boost. Here's some pictures and a video link or two      http://www.youtube.com/watch?v=I5EL4...ature=youtu.be |
|
|
|
|
03-30-2015, 12:37 PM
|
#4 |
|
The Newbie
Join Date: Nov 2012
Posts: 29
Rep Power: 0 |
So far this brings us to the end of 2012 I was always running hot, even at 6psi, on the track, I would regularly see 100 degrees C coolant temps and air temps into the 60 and 70's.
This lead to that winters project of upgrading the intercooler with a greddy front mount kit I picked up from a friend, the idea was that bringing the air temps from 60-70 down to a more reasonable 30 or so should reduce the overall combustion temp and hopefully help the coolant system. anyways here some more stuff. Here's the start point, a friend of mine stole a bunch of parts.   my battery blew up during 2012 track day season, you can see the mess the battery made. lots of cleaning and repainting to do   Alright, got back at it again. Started by tearing the car apart. Dropped the wheels and took the front bumper off Here's the future home behind/in the crash bumper. I already installed this intercooler on a friends car before he decided to go wild with his build. We had to cut into the crash bumper so I will probably have to again, I'll see what I can do though.   Crash bumper taken off and rad taken out, spilled some coolant   I'll miss you my friend, maybe even ore if it had worked right in the first place.  This is the rad I was using before, I'll stand it up more straight rather than having it at the stock tilt.  Power steering cooler gone  Power steering pump gone  AC compressor gone    Pulled out the steering rack to de-power it   One of the boots was fucked  Steering rack de-powered and almost put together, needs a new boot before I put it all the way back together.  Started test fitting the intercooler.   The brackets I gotta fab up and weld on  
|
|
|
|
|
03-30-2015, 12:41 PM
|
#5 |
|
The Newbie
Join Date: Nov 2012
Posts: 29
Rep Power: 0 |
here's some pics I dug up of the install into my friends car.
It was done pretty quick, I think I can do a better job 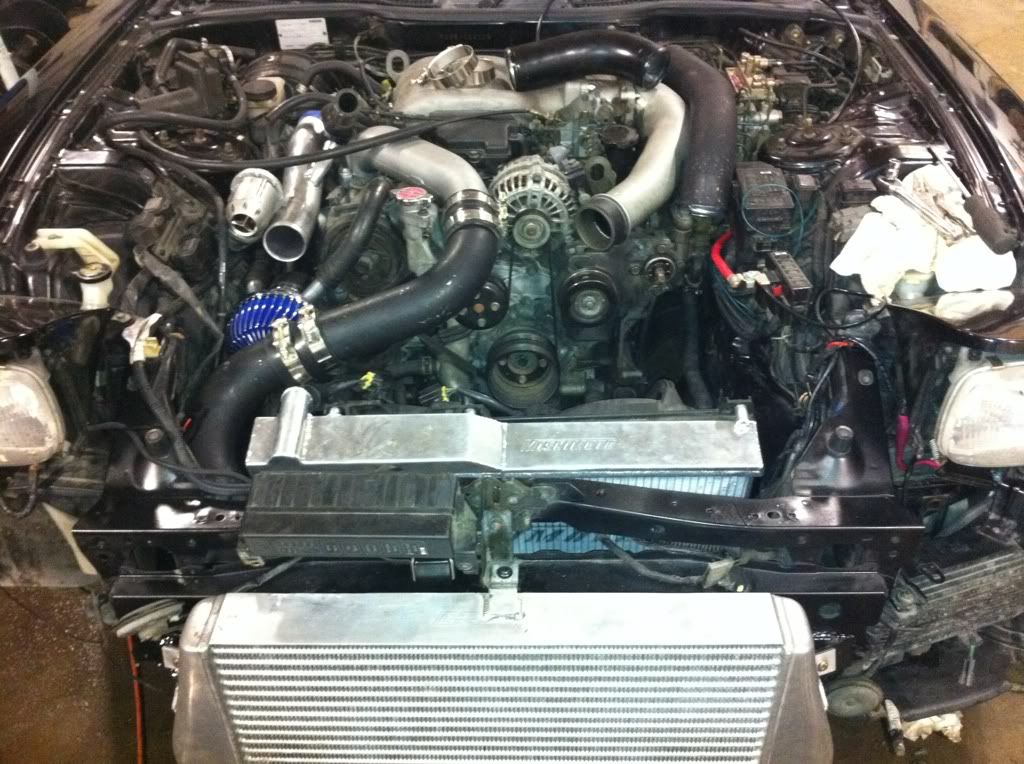 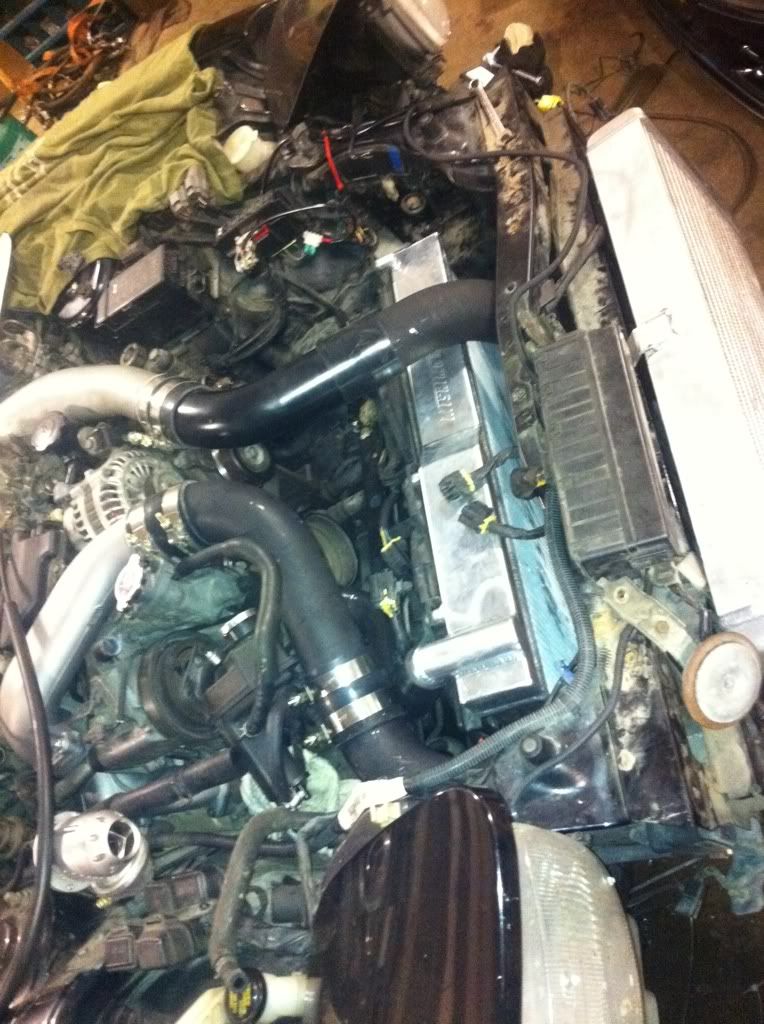 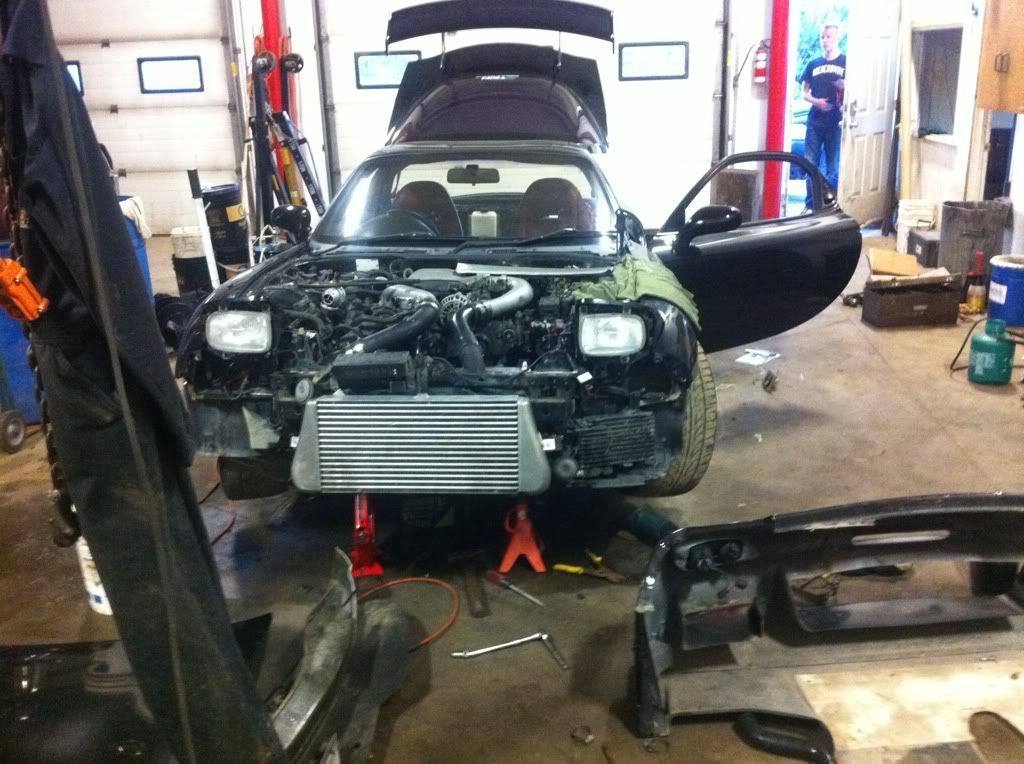 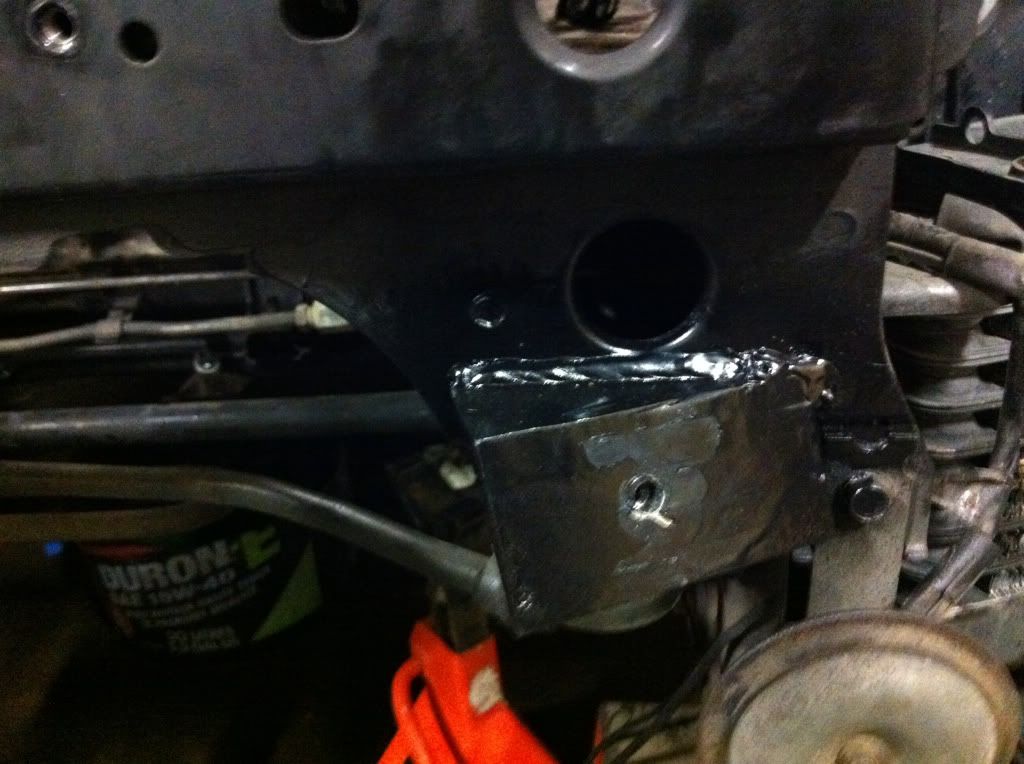 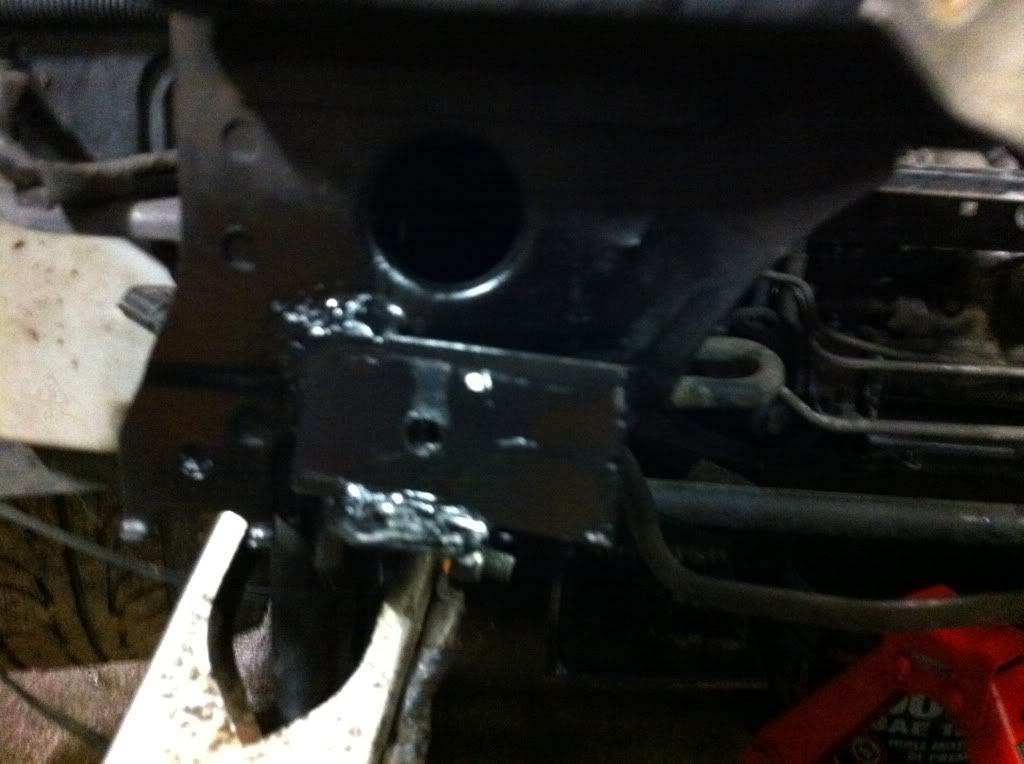  Back to my build started cleaning and painting various battery acid tainted parts.  not my best work but they will hold the intercooler well enough and they are hidden so, good enough. they are ugly but the pictures make them look far worse.   I figure with the power steering and AC gone this could be a good place for a battery, is it bad for a battery to be that close to the engine/ heat? Present time edit: I went with a better plan for the battery  got the bumper mostly cut away to fit, might still take a little trimming. I don't like how small the bumpers airflow path is, it only exposes a small chunk of the intercooler to airflow and the rad is even taller. Tempted to just cut away alot of the bumper lol, but that would be haggard and look like shit.    got a new boot and the steering rack put back in. I think it needs an alignment pretty bad now lol. spent the rest of today trying to get my rad mounts figured out. got them tacked in place then decided I didn't like how low it was so I raised them at the last minute and welded everything in. they are still lower then the bottom of the front bumper but they are higher then the rest of the bottom of the car.    with the start of next week, well maybe even tomorrow afternoon, I have to get back to real life,school etc. So tomorrow will probably be putting as much together as I can and rolling it out the door followed by a massive clean up. I'm the guy who pulls stuff out when I need it and doesn't put anything back until I'm done, so I have tools spread out everywhere as well as both useless and needed parts.   hopefully tomorrow I can get the top rad brackets and rad hoses figured out. |
|
|
|
|
03-30-2015, 12:46 PM
|
#6 |
|
The Newbie
Join Date: Nov 2012
Posts: 29
Rep Power: 0 |
didn't really get a whole lot done today. lots of cleaning, painted the rad mounts and got the bumper finished up and put on.
the rad is still missing top brackets. the charge air piping I'm not a big fan of as they don't line up real good. Something for me to try to figure out later though. They definitely need to be cleaned up and repainted though.  the charge air piping aren't the best but here it is all together  Front bumper cut away and back on  The upper rad hose solution. a cut stock hose.  the lower rad solution, or at least temporary solution, will be these two pieces cut and joined in the middle.  a little higher then the rest of the car but I will need to figure out a new under-tray solution as the stock one will no longer work.  a picture from below as I was down there   lots of room between the rad and the engine  Now that I'm finally done finals and school for 8 months its time to get back to work. didn't get a whole lot done this weekend, basically just got the stock undertray modified to work with the new setup and got the bottom rad hose made up. to do list before its driving: -Upper rad mount -Battery mount (questions and discussion below) -Add coolant -Some fine tuning of the intake piping -Need to figure out the intake setup to do list for after its driving: -Idle air valve -boost controller -Stereo and speakers -buy spoiler -Rims(RPF1's) and tires -probably some other stuff. Alright on to getting this thing running. the next major hurdle is the battery in my mind. I see two decent options that should be fairly clean. Option 1 mount the battery between the engine and rad against the LH frame rail. this is fairly close to the stock position, I still foresee some fucking around to get the power cable hooked up but shouldn't be the end of the world. The easiest way I see to make something like this work would be to use something along these lines.  And where it would go    This would be fairly easy to implement, the only difficulty would be extending the wiring but 'a necessity with either option. Negatives would be the heat the battery would see. Could maybe use an optima battery arn't they supposed to take heat better? Option 2 mounted right behind the rear seat in the trunk, as close to the seat as possible.   Wires would have to be extended through the car and stuff which is a pain. and I probably would be to lazy to vent it outside unless you guys convince me to, I've never really researched it I just know they are supposed to vent outside but tons of people seem to without issue. as for the actual mounting There are these 4 bolts that go through to mount stuff underneath. I'm picturing building a plate to connect them all and then welding on some studs to go up from the plate through the rug to the battery box.   I would replace their brackets with my plate. something like this would work good.  making some parts for a friends FD   back to my build Spent the last two night fabricating a bracket to hold the battery and this is the final result.  the bottom bit bolts to the two rear seat supports, and the batter tray will bolt to it with the rug between the two. the tray will also hide the holes in the rug so it will look fairly clean. The battery cable should be in tomorrow plan is to route the negative to the strut bar mount for grounding.   the positive will also run by there and up through the car hidden pulling the panels off I pulled one of the back speakers as the first project after its back on the road is installing deck and speakers. it was in pretty rough shape.   also found some mystery wire. this was not the wire connected to the speaker lol  the bottom of the back seat was in pretty rough shape as well. some of the wires on one edge had rusted away. where would someone find these or get these redone? I imagine it would take someone with the right tool 15 seconds to do.  
|
|
|
|
|
03-30-2015, 12:54 PM
|
#7 |
|
The Newbie
Join Date: Nov 2012
Posts: 29
Rep Power: 0 |
picked up a spoiler from a local guy who has a pretty slick LS swapped FD. slapped some cheap can tire paint on the spoiler supports . I'm kindof on the wall, I like it in some ways and others I'm kind of meh. If it grows on me enough in the next few weeks I'll get the supports painted properly.
   I swapped out the old toe link's last night, it seemed to have fixed my largest rattle from my 10 min test drive. however I managed to fuck up the length of one pretty hardcore and the rear left must be pointing inward by at least 3 degrees. Whats the best way to align it myself for now? just change the toe link that is out until the front of the rim distances match the rear distances or what? should I just pull that toe link out and try again with the length matching?     I ended up buying my friends old deck and some speakers that should work for my rears. Its older, was new in 2010 or 2009 or so, has the same software as my kenwood flipout deck, its not slow in the menu's, maybe a little bit if your controlling an ipod through it but for what I paid I can't really go wrong, it will get me going sound wise at least   I'll have to figure out what to do harness wise. I'll probably pull out the sealed connectors from the old decks harness and solder them on to this harnesses plug. that way I can do all the soldering out of the car. the deck is max output of 4 X 50 Watts Continuous output 4 X 22 Watts http://www.cnet.com/products/kenwood...ble-din/specs/ front speaker wise I'm not sure what to do, all the ones I grabbed to look at were too deep for my situation. I will probably need to build an adapter of some kind. I hate putting wood into my doors but I don't really know what material I would use other than mdf, any suggestions? how should I drive the fronts? with the deck outputs listed above should I get an amp for the fronts? I also ordered this http://store.secondskinaudio.com/dam...-feet-80-damp/ should be more than enough to do most of this tiny car, I'm actually surprised how light it is, 32 pounds for the whole 80 sq-ft. If I can get rid of or at least seriously reduce all the resonating and rattling panels by only adding 32 pounds that's a win in my books. well after a long night the sounds system is well on its way to being installed. I started out by test fitting and mounting the rears. I got 4 of them and only need two, all of them had the plastic trim starting to pull off so I took two and glued and clamped everything while I kept working on other stuff. tomorrow morning I will swap those in place of the two I used for testing. I'll probably use a small amount of rtv on the back to stick them to the brackets and some foam on the fronts to seal against the side panels. I pulled out the harness from the aftermarket deck after labeling the few things left unlabeled. I then pulled out the harness for the new deck and started figuring out the wires. the color coding was the same so this was extremely easy. I soldered and shrink wrapped everything out of the car.  the front speakers were alot more of a pain in the ass. the speakers were just too deep and they didn't have the same bolt pattern so I couldn't just use a spacer. they came with some little plastic plate with a ton of holes in crap in it so I started cutting that apart until I got something I could use.  the speaker needs to be mounted to the plate differently. I didn't have anything lieing around that would work very well so besides getting the stock speaker wires repositioned (I forgot to buy speaker wire so I decided against replacing it) this was as far as I made it with the fronts. I'll need to pick up some little bolts and nuts from home depot in the morning. with the adapter in the the speakers fit like a glove.   the self taping screws I used to test the first side out are a horrible long term solution. I'll grind away enough room for a bolt head use a little bolt instead. By far the least troublesome install I've ever done. everything worked perfectly on the first test, and I tested all four speakers with no issues. the lack of a sub simplifies things quite alot. So i tucked the wires and put the deck in its place.  The rims showed up The fronts are a pretty aggressive fitment, with coil-overs and a little more low it will probably need a little more camber and a fender roll, my fender roller has been shipped as well.   My sound damper is supposed to be delivered on Monday so I'll spend early next week on that. Should I just fill in around stock sound damper, or should I pull off the stock stuff and replace it? I'm guessing the 2014 high quality aftermarket stuff is better quality than 1992 Mazda assembly line stuff. Also on the agenda for this weekend is pull all the plastic trim panels and repaint them, I'm excited to see how that turns out. Another agenda Item is to drain and refill tranny and diff fluid as I don't know when it was last changed and I'm sure its time. The rims showed up The fronts are a pretty aggressive fitment, with coil-overs and a little more low it will probably need a little more camber and a fender roll, my fender roller has been shipped as well. My sound damper is supposed to be delivered on Monday so I'll spend early next week on that. Should I just fill in around stock sound damper, or should I pull off the stock stuff and replace it? I'm guessing the 2014 high quality aftermarket stuff is better quality than 1992 Mazda assembly line stuff. Also on the agenda for this weekend is pull all the plastic trim panels and repaint them, I'm excited to see how that turns out. Another agenda Item is to drain and refill tranny and diff fluid as I don't know when it was last changed and I'm sure its time. The rims showed up The fronts are a pretty aggressive fitment, with coil-overs and a little more low it will probably need a little more camber and a fender roll, my fender roller has been shipped as well. My sound damper is supposed to be delivered on Monday so I'll spend early next week on that. Should I just fill in around stock sound damper, or should I pull off the stock stuff and replace it? I'm guessing the 2014 high quality aftermarket stuff is better quality than 1992 Mazda assembly line stuff. Also on the agenda for this weekend is pull all the plastic trim panels and repaint them, I'm excited to see how that turns out. Another agenda Item is to drain and refill tranny and diff fluid as I don't know when it was last changed and I'm sure its time. The rims showed up The fronts are a pretty aggressive fitment, with coil-overs and a little more low it will probably need a little more camber and a fender roll, my fender roller has been shipped as well. My sound damper is supposed to be delivered on Monday so I'll spend early next week on that. Should I just fill in around stock sound damper, or should I pull off the stock stuff and replace it? I'm guessing the 2014 high quality aftermarket stuff is better quality than 1992 Mazda assembly line stuff. Also on the agenda for this weekend is pull all the plastic trim panels and repaint them, I'm excited to see how that turns out. Another agenda Item is to drain and refill tranny and diff fluid as I don't know when it was last changed and I'm sure its time. The rims showed up The fronts are a pretty aggressive fitment, with coil-overs and a little more low it will probably need a little more camber and a fender roll, my fender roller has been shipped as well. My sound damper is supposed to be delivered on Monday so I'll spend early next week on that. Should I just fill in around stock sound damper, or should I pull off the stock stuff and replace it? I'm guessing the 2014 high quality aftermarket stuff is better quality than 1992 Mazda assembly line stuff. Also on the agenda for this weekend is pull all the plastic trim panels and repaint them, I'm excited to see how that turns out. Another agenda Item is to drain and refill tranny and diff fluid as I don't know when it was last changed and I'm sure its time. |
|
|
|
|
03-30-2015, 12:57 PM
|
#8 |
|
The Newbie
Join Date: Nov 2012
Posts: 29
Rep Power: 0 |
alright update time.
random picture of my friends GTR with my two beater rotaries.  disassembly my steering wheel reference picture for reassembly.  more disassembly     deleted the turbo timer that came with the car.  I thought it was cool how it came with this patch cable to install.  got rid of a few of the mystery wires I have in the car. there are still a few more that were going to the rear of the car that I want to figure out what they are for. Found this cool retro boost guage ziptied away under the dash. any takers lol  gonna paint the gauge surrounds because the stock chrome stuff was looking pretty crappy.  Picked up the wrong color, didn't realize until the second coat lol  The pieces that turned out good look far better than stock but still not perfect as some scratches show through the paint. refer to sandblasting question above as I don't want to pull this stuff to do it again. My sound damper showed up with a lovely surprise courtesy of UPS.  I also hate how old and crappy this stuff seam, wish I would have ordered some stuff with the sound damper. anything you guys can think of locally that would work as a good replacement?   some pictures of the stock plastic coating coming off.   . .that's all for now. I'm also sound damping the car but I expect most of that will be a minor difference, the only huge difference will be in how the door sounds shutting, which I am really looking forward too. Alright update time, the car is back together. I doubt the sound damper I laid down in the back made a large difference, and there isn't a whole lot of ways to tell as putting the rear interior back in made a huge difference with sound. The sound damper in the door made a huge difference, I don't have a good enough ear to notice the before and after difference driving but their is a huge difference with the door shutting noise. I siliconed the crash support back to the door (a well known cause of the FD's tin door sound) and lined alot of the panels with sound damper. I went from a high pitched tin like door shutting sound to a manly deep door shutting sound. I haven't done the passenger door yet but I don't think the crash support let go on that side yet as it isn't quite as bad as the drivers door was. I'll try to remember to take some pictures because I really suck at that. I actually managed to grab very few pictures. here is one of the very few. installing the battery box is a bit of a pain but doable. the carpet is pretty thick so it squeezes it a bit but I still think it looks decently clean.  I switched to side battery terminals because the top ones were breaking on me, I think I posted this already earlier, I was careful when I was tightening them to. I wiggled the cable and was tightening until the clamp was tight on the post, either way this still happened.     I'm going to try to keep this weeks projects short and sweet. my list for this week includes: 1. sound deaden the passenger door. 2. fix my headlight covers. I broke one of the front tabs two weeks ago and built up a bunch of epoxy to strengthen all the tabs, but I built up to far so that they interfere with the bolt so that they don't sit right. basically just pull them off and grind down some epoxy. 3. fix headlight covers part two, I broke off the rear tabs years ago this weekend I'm going to steal my friends and try to fabricate new tabs, I'm getting tired of them bouncing around. 4. miscellaneous missing bolts and tabs. Missing some tabs from the back of one of the side panels from beside the seat want to get some more of those in their. as well I am missing a bolt from one of my mirrors, so one mirror is loose. 5. lastly once my fender roller shows up I'm going to fix up my front fenders and while its on the lift change out tranny and diff fluid for some synthetic amsoil pic of the front fender  actually took some pictures of the sound deadener install on the passenger door, the clean slate   first piece, a small one on the crash bar.  The first peice for the outer door metal above the crash bar  not really sure looks like I've installed peices above and below the crash bar  I lied, that was just the before picture, here is the installed  my photography skills are off the scale  Bottom right piece in and the crash bar siliconed back to the door.   starting to use up the smaller scrap peices on the outer door.   
|
|
|
|
|
03-30-2015, 01:01 PM
|
#9 |
|
The Newbie
Join Date: Nov 2012
Posts: 29
Rep Power: 0 |
fender roller showed up yesterday, so today I threw the car at the lift and tackled rolling the front fenders.
The fronts were in real bad shape, as the rim at the top was pretty much pointing straight down, they have been since i bought the car. The tires must have been catching on them and pulled them down, that's probably why the old front tires were messed up. the fender roller wasn't ideal for the FD all the positions for the pins seemed to be in posistions so that it would bairly work, if i drilled a new hole through it to change one of the pin locations it would work perfectly. but I was to lazy. either way it took me a bit cause I needed to figure out how to roll the lip back up into stock location in the opposite direction than the fender roller is supposed to go. I got the driver side done pretty easily(forgot to take pictures) and then rolled it up a little past stock while I was at it. By the passenger side I thought enough to actually take some pictures. Before    The painted cracked and chipped really bad on the passenger side as I had to bend it from pretty much straight down. Not sure the best budget way to deal with this as I haven't learnt how to paint worth a shit yet, even rattle canning simple parts I seem to do a shitty job but I've been wanting to learn some bodywork stuff for a long time now. anyways here's some pics     I threw some black silicone to seal it up in the meantime Alright, update time I decided to do the half track day on Sunday so on Saturday I decided to duct in my rad a little better since I've always had water temp issues on the track. and the new setup wouldn't make much of a difference. made the top plate out of scrap aluminum    looks like some horrible childish drawing.  Putting the aluminum under the bumper brackets caused the bumper to lift slightly and fit a little worse, I eventually ground down these points so it wasn't as bad     Getting closer   Thought about painting it black but gonna leave it sandblasted for now, not like the rest of the engine bay looks anywhere near immaculate anyways.  I filled in some of the side and bottom spaces with piping insulation, stayed in place pretty good.    I had a great time at the track I still had overheating issues so I could only run a few laps, 2-4 before it got up to where I felt I should let off (110 Celsius water temp). I could then do slower laps to cool down and get another few good laps in. my best time was a 1:37.36 according to my Go Pro. I also had a little whoopsy that I'll post up when it finishes uploading. As far as temp issues go I'm going to try to switch from 50/50 to straight distilled and water wetter. I also wore my breaks right down, my bad didn't realize they were that low, just in case anyone was wondering why I was squealing all the way around the track. Gonna google rx7club best street pads right now and get some ordered.  Also I've been using a straight atmosphere bleed for my oil system, bought a catch can but the hose sizing isn't even close. Either way my turbo's must be leaking quite a bit cause this is what I fond after the track day. I'll need to hook up the catch can before I come back. never seen much oil before this.     Some Video's from the track day, I was new to this track so I was taking it pretty slow http://youtu.be/dkS0CY3WPvc http://youtu.be/QyuF7PYTDac |
|
|
|
|
03-30-2015, 01:07 PM
|
#10 |
|
The Newbie
Join Date: Nov 2012
Posts: 29
Rep Power: 0 |
Alright on to the more recent stuff, so far is up to the end of the 2014 season and onto my current project.
Turbo    I tore out the DP, the stock twins, etc and did a test fit with my friends manifold made by turblown.    Here is my friends manifold on the engine without the turbo. it keeps everything super low.     Blocked off the rear turbo oil drain.  Since I don't have my manifold materials here, might as well start getting ready to copy.   My early reading week project was to fab up a welding cart and get my welder off the work bench. I didn't take any pictures building it but here is the final result.      This runner is a pain in the ass.   Started practicing little tacks since I hadn't done it before.  Started tacking the first runner together, its shortly after this that things started going wrong on this side. After tacking the pipes enough, I started heating and trying to bend the pipe to match the T4 flange and its a bitch, it also has the nice side affect of ruining all the fitting I had already done but that was to be expected.   I fucked up this runner as well and took to much material away. guess I get to start that over again. on the bright side I managed to get my little 90 to match up with the turbo flange somewhat.  here you can see the gap on the back where I took away to much material   Its also going to take a long time to get the two pipes to come together nicely as they now interfere. 
|
|
|
|
|
03-30-2015, 01:09 PM
|
#11 |
|
The Newbie
Join Date: Nov 2012
Posts: 29
Rep Power: 0 |
I went back out after supper. I managed to close up the gap pretty good on the one runner by fooling around a bit, still a bit of a gap but not nearly as bad. I didn't manage to stretch the other runner much better so I fooled around and centered it.
From the start I knew I would be laying a ton of weld between the pipe and both flanges, this will be because I will grind the flow path smooth and I will have to build up at least past were I intend to grind, this is why I didn't care a lot about the flange fitments, I would have liked them better but I was getting tired of just wasting time. So once I was happy with all the fitment I tacked everything together so that I could do a test fit tomorrow with the turbo on the car. here is some pics. I really should have wire wheeled it before tacking it up, it looks so bad now. I'll have to make sure not to forget that when it comes apart for the final welding. I'm pretty confident it will fit just fine, now I'm trying to find some welding friends who will help me with the important bit for some beer etc.        looks good after some machining. not pretty but it will be strong and work good. the turbo is going into a pretty tight space and it was hard to test fit, I was fairly confident it wouldn't fit after machining. I was however happily surprised. it fits and now its onto fabricatinging the exhaust.  
|
|
|
|
|
03-30-2015, 01:15 PM
|
#12 |
|
The Newbie
Join Date: Nov 2012
Posts: 29
Rep Power: 0 |
Alright this brings me up to modern day. I should win some kind of award for the smallest scroll bar ever in a build thread.
1. Currently I need to build a bracket to hold the wastegate canister as the one that came with the turbo won't work because of how the turbo is clocked. 2. I still need to make up oil lines and coolant lines to the Turbo. 3. I need to buy a wideband, currently looking to find a good canadian source for the innovate motorsports 2 in 1 boost and wideband kit. 4. I need to fab ub the downpipe and midpipe as well as modify my catback, this is waiting on the 3"GT vband flange for the turbo that I mistakenly thought was the same as any 3" vband flange. 5. I'm trying to piece together a fuel system, I have a friends system with some old EV1 1680 secondaries and the stock 550 primaries. this will be my backup plan depending on what else I can piece together. I'm also still trying to find a cheap used datalogit. |
|
|
|
|
| Bookmarks |
|
|
 Linear Mode

