|
|||||||


| RX-7 2nd Gen Specific (1986-92) RX-7 1986-92 Discussion including performance modifications and technical support sections. |
 |
|
|
Thread Tools | Display Modes |
|
|||||||
| RX-7 2nd Gen Specific (1986-92) RX-7 1986-92 Discussion including performance modifications and technical support sections. |
|
|
|
Thread Tools | Display Modes |
 02-27-2013, 10:52 PM
|
#1 |
|
Rotary Fan in Training
Join Date: Nov 2012
Posts: 58
Rep Power: 14  |
FC steering rack rebuild
So it was time for a rebuild on my drift car steering rack (Rebuilding most of the car actually). I figured I'd share the experience for those who may be capable of undertaking this, but just aren't sure of how to do it or what all is involved. I'll try to explain as much as possible about the process. I've rebuilt quite a few steering racks over the years, this is only the second FC one but lots of others, mostly Hondas, some Nissans.
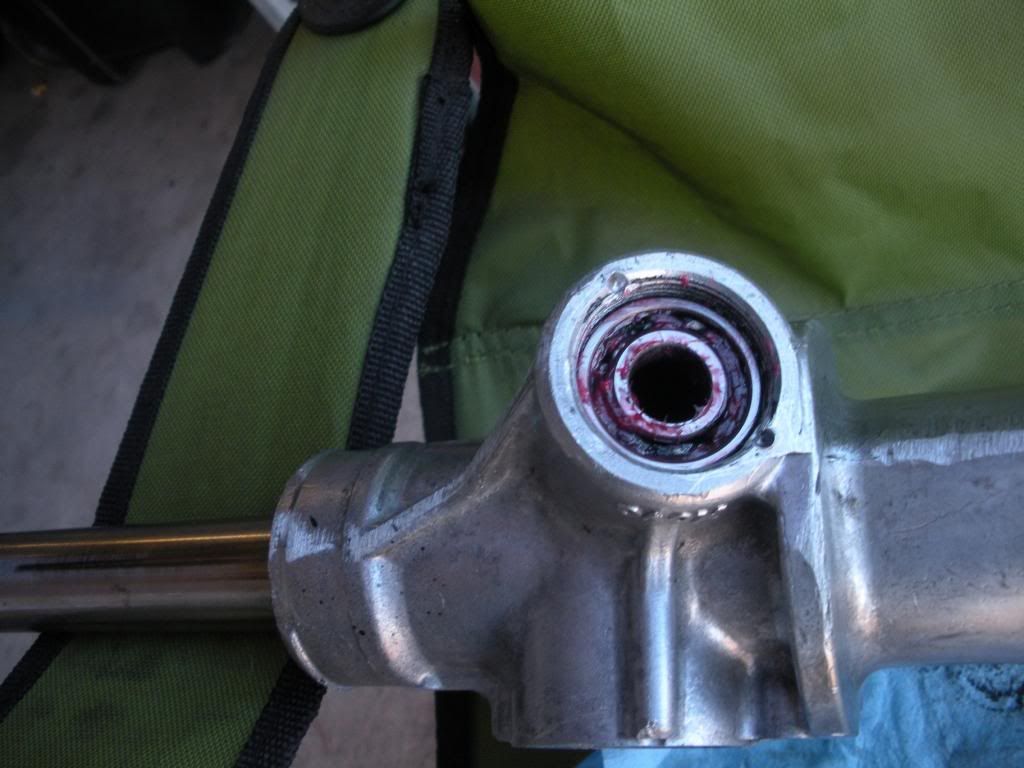
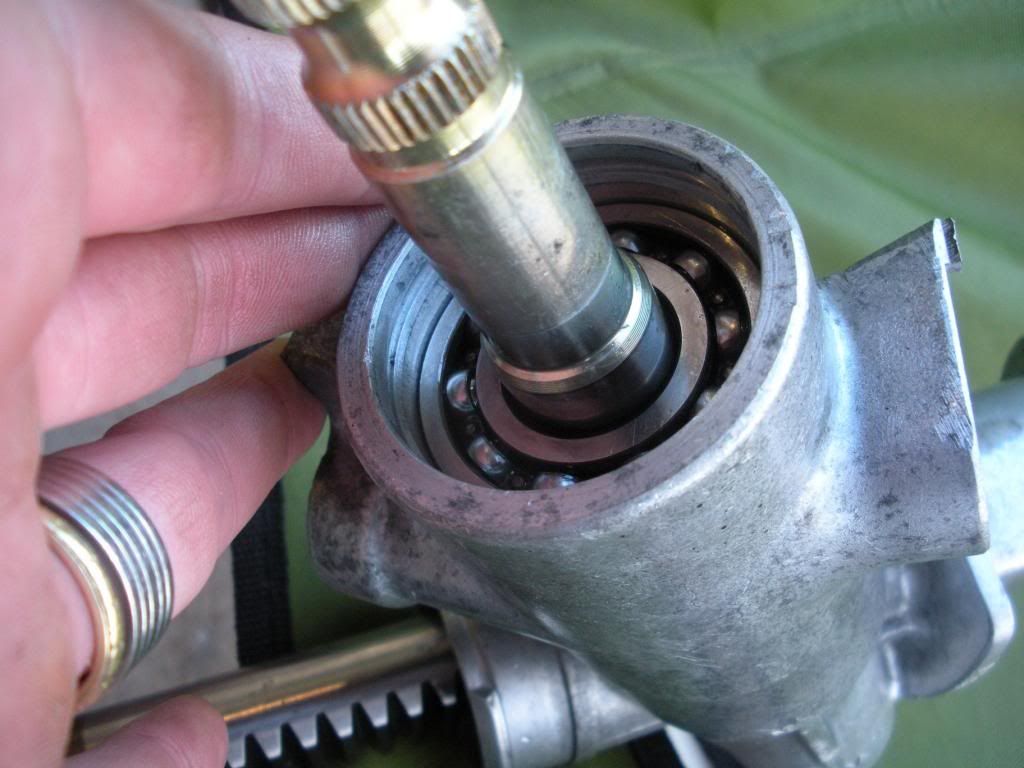
Anyways the first place to start is to order the seal kit. It comes with every seal you need and some you don't. Since steering racks are made by just a few companies there are many that are very similar so the kits may contain parts you don't need as well. I ordered mine from Autozone online, it costs $33.99 at the time of this writing. http://www.autozone.com/autozone/par...ier=17169_0_0_ Important to note that it's called a rack and pinion seal kit when searching for it. You can also find it on rock auto and many other sites. It's all the same kit. I also had ordered the steering rack bushing from J-Auto they cost $45 to me it was worth it, the bushings were pretty ragged and soaked in liquids of unknown origins. There website is here: http://www.j-auto.net/ So after that stuff showed up and I finally had a day off I got after this thing. It started off looking like this. Pretty terrible and dirty as hell. it didn't leak much just mostly seeped a bit on the driver's side under the rack boot. 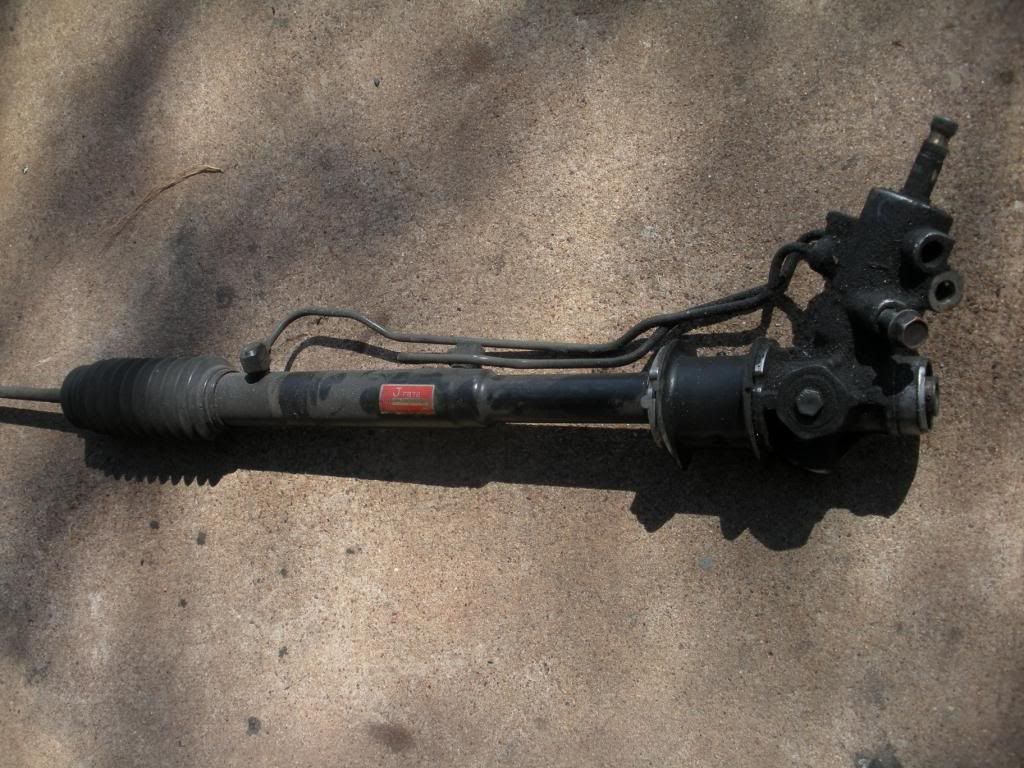 Start by taking the hardlines off. Remember how they go or your steering will not work. 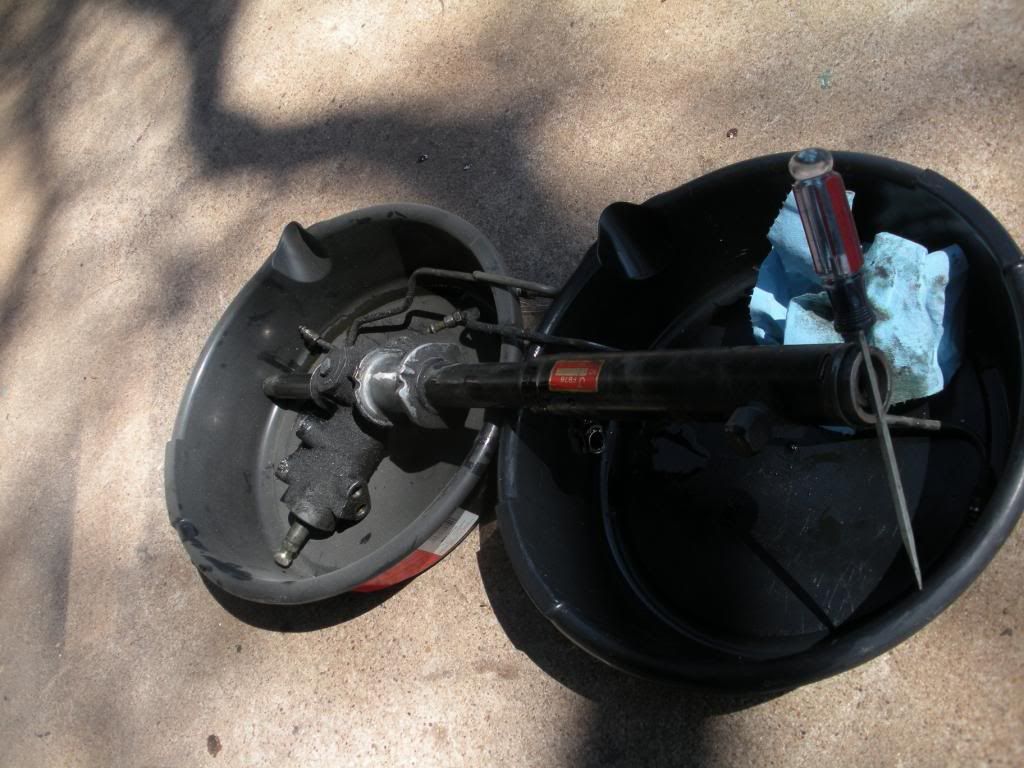 These style rack stoppers can be a pain in the ass to remove, depending on the condition of the rack. If it comes apart properly you can easily turn the end by just putting a screwdriver between the slots. It's not a threaded piece just O-ringed in. the only thing retaining it is the wire clip thingy. Rotate the end till the tail shows up in the access hole. If the end is stuck or doesn't turn then you need to get creative with WD-40 and moving it back and forth till the rust break free. it will eventually spin after you work it for a while. This rack was super easy I could have probably moved it by hand if I had tried that first. 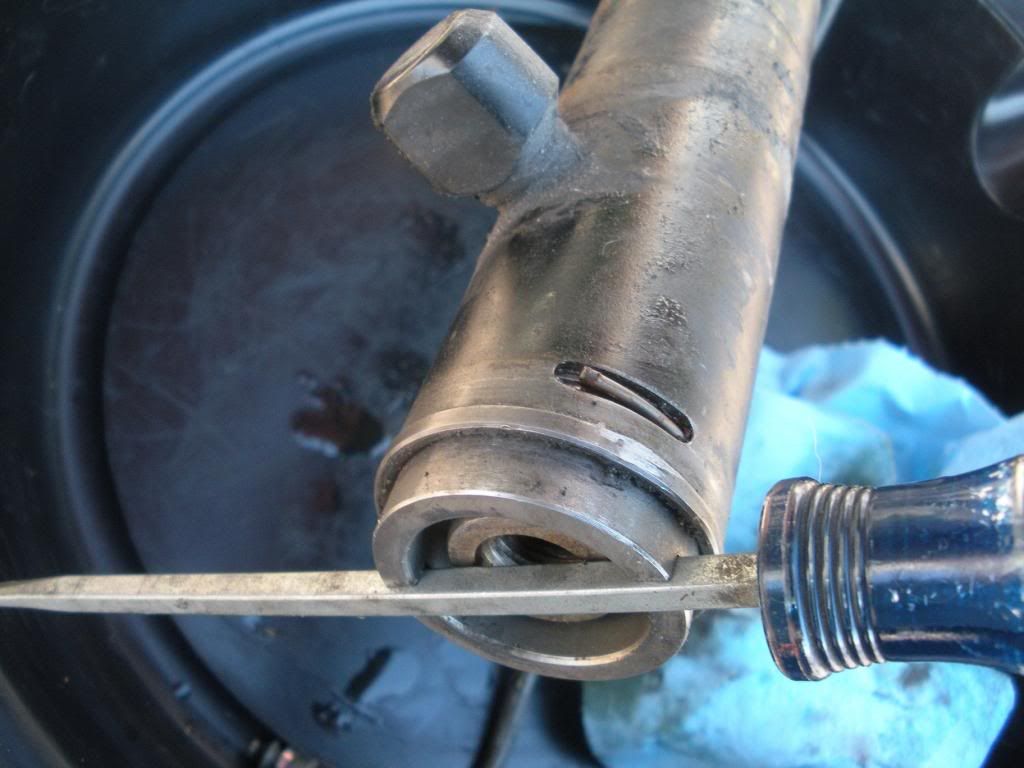 Sometimes you have to help the tail out of the hole, sometimes it pops up like it's suppose too. After it does rotate the rack stopper the opposite way or whichever way makes sense to unwind the wire from the end, like this. 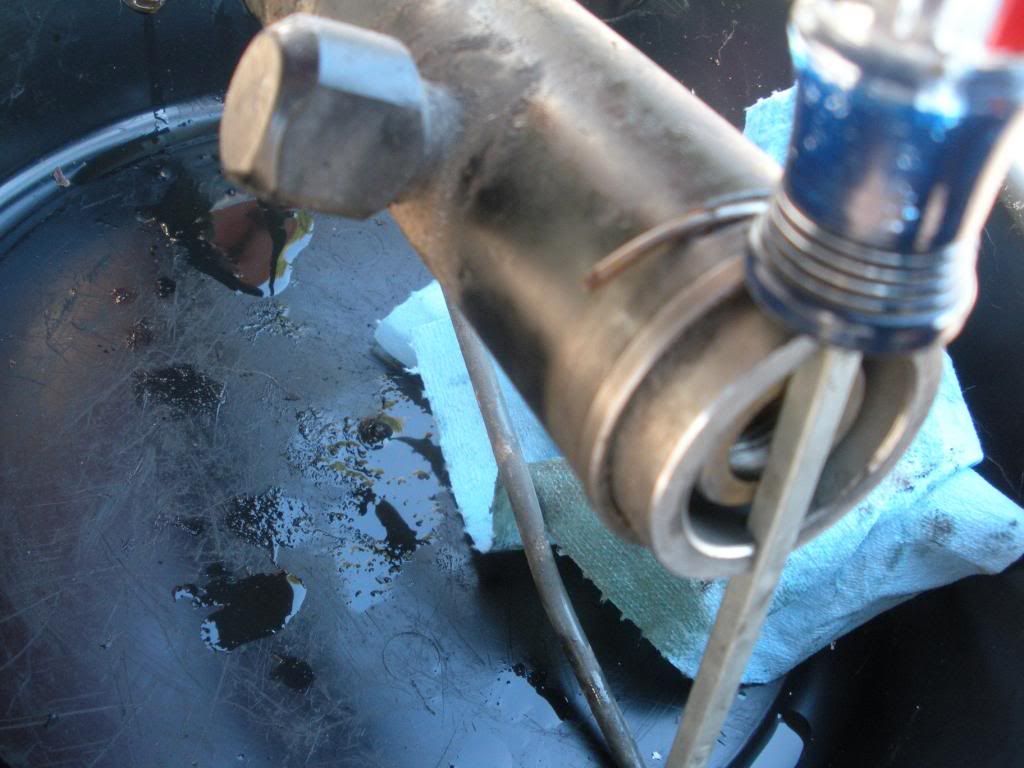 Here's the wire after I removed it. Now that you can see the shape it will make sense when you go to do yours. Basically you unwind it till you get to the part where the "tail" is bent at 90 degrees then you just pull it out with your fingers. 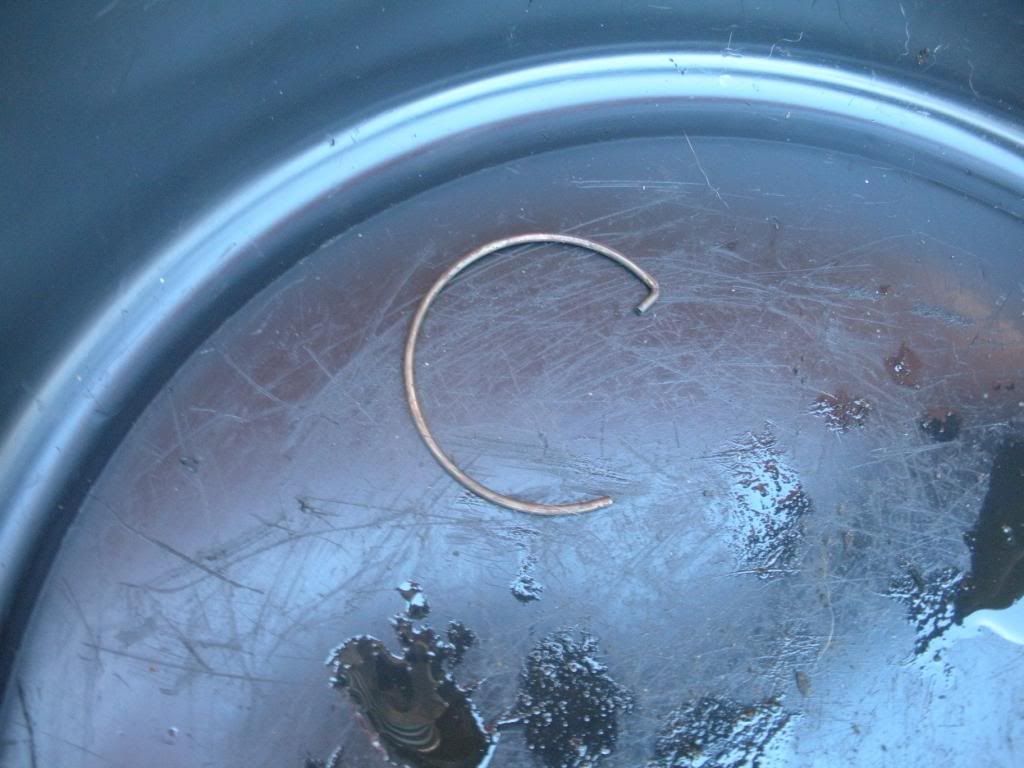 Next remove the rack stopper. If you have a fairly rust one this could prove difficult. It does just pull out though. 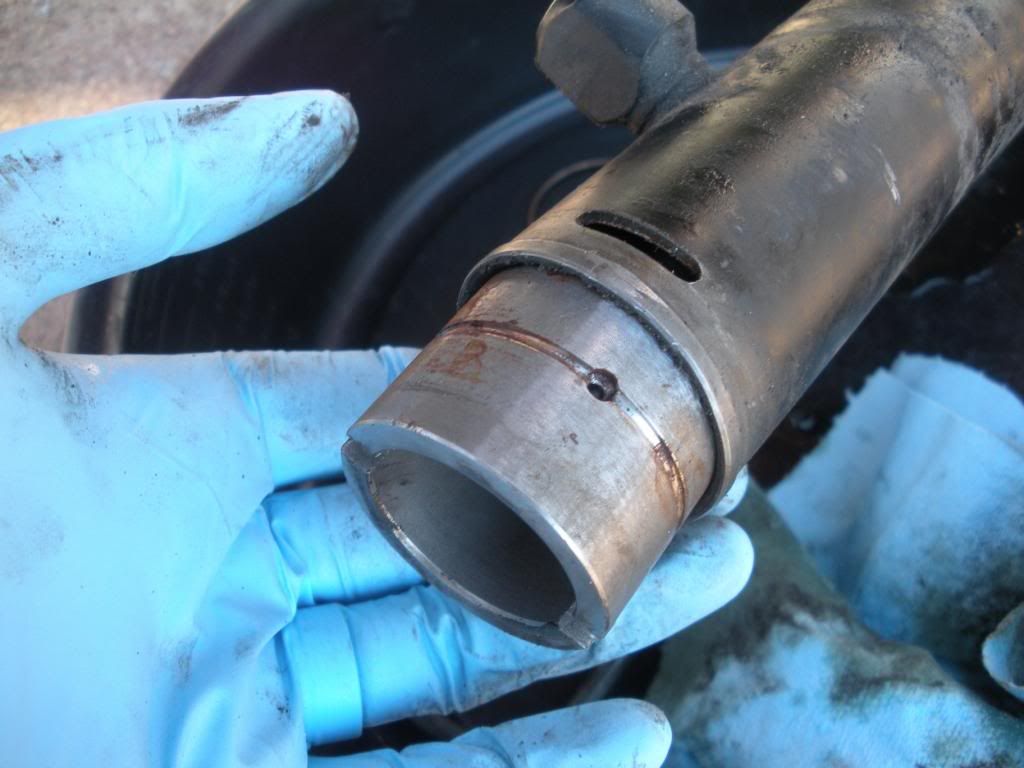 Here's what the rack stopper looks like when it's out. 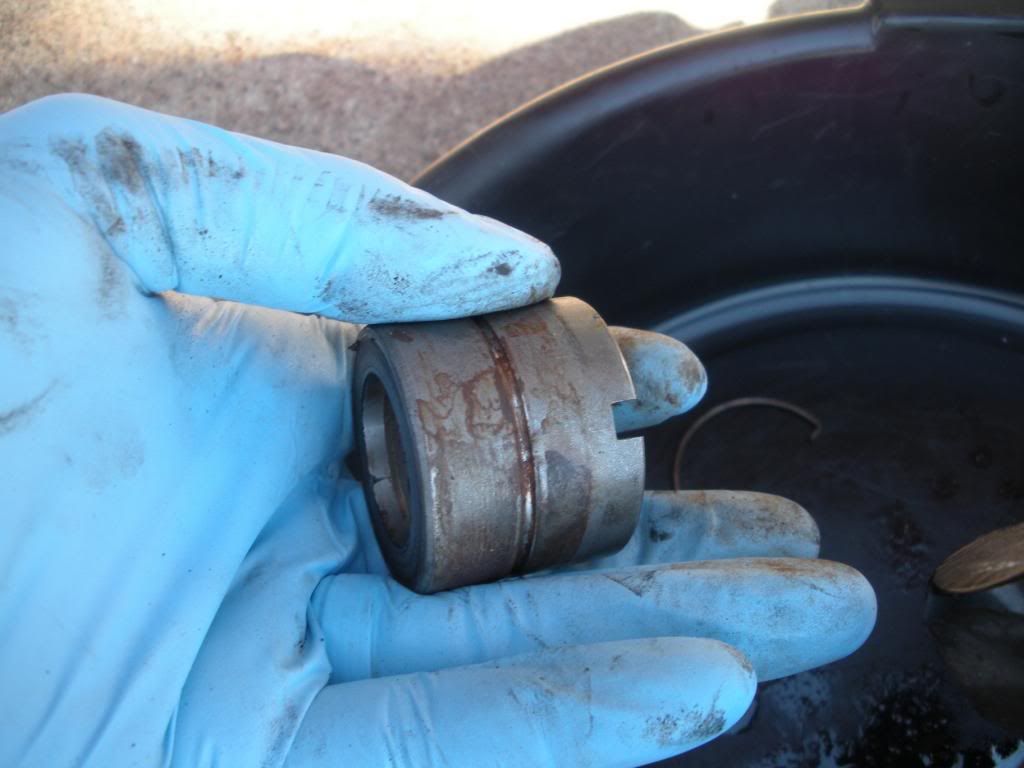 Next I usually pull out the rack support, spring, yoke plug and locknut. This allows all the tension to be relieved between the rack and the pinion (Makes moving the rack back and forth easier). This can be very tight (The big lock nut) it must be loosened before the yoke plug. I ended up using a flathead screwdriver and hammer to loosen this one, it did get all beat up in the process. It was kind of a last resort, due to teh fact I could not find a socket big enough to use an impact gun, which makes it super easy btw. After you spin that off you can unscrew the yoke plug, which is slightly spring loaded (By the spring under it, imagine that  . After you remove those the rack support piece could be stuck in there with grease, don't worry it can just sit there if you can't get it out yet. It won't matter at all and it will probably just fall out during some of the rest of the disassembly. Here's a pic of all those parts layed out. As you can see in the picture the rack support piece was still in the hole. . After you remove those the rack support piece could be stuck in there with grease, don't worry it can just sit there if you can't get it out yet. It won't matter at all and it will probably just fall out during some of the rest of the disassembly. Here's a pic of all those parts layed out. As you can see in the picture the rack support piece was still in the hole.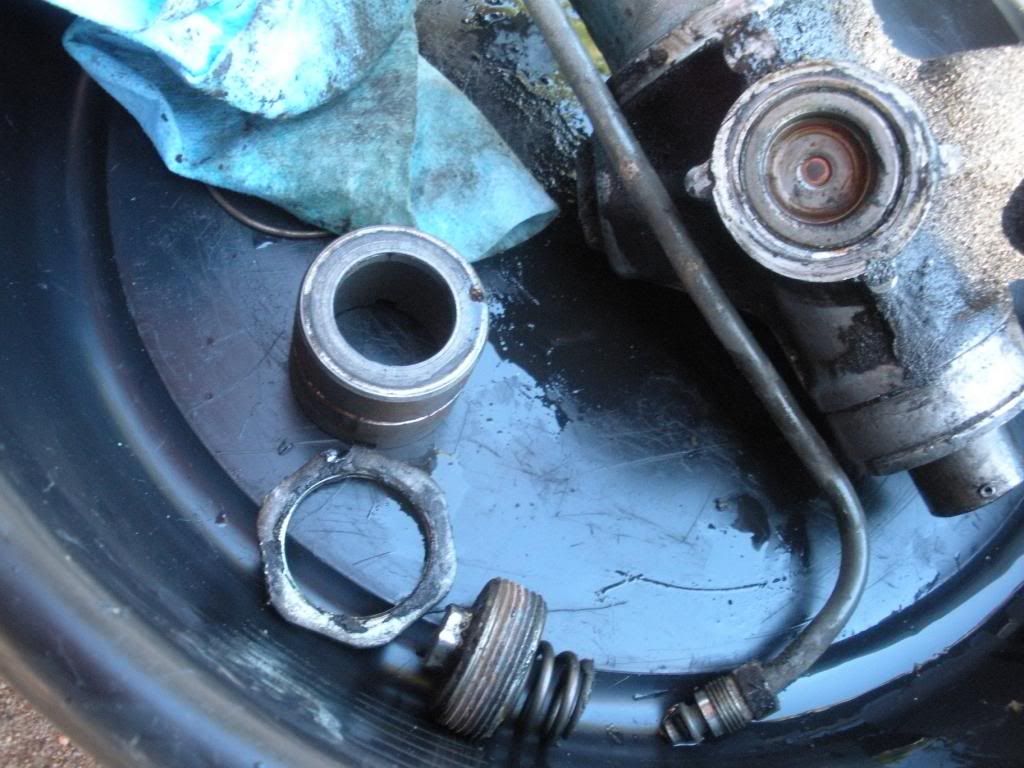 Next you will need to remove the pinion plug. It is staked from the factory. Best thing to do it tap it with an impact gun and loosen it. 24mm I think it was, you'll figure it out. Under that you'll find the lock nut for the pinion. 17mm I believe. Again impact gun is best. If you don't have one then hold the smooth part of the pinion shaft with a vise grip on the otehr end and break it loose with hand tools. After I loosen it I put it back on a couple turns by hand so I can drive the pinion out with a hammer (Lightly though, but not yet, just preperation for the next couple steps). 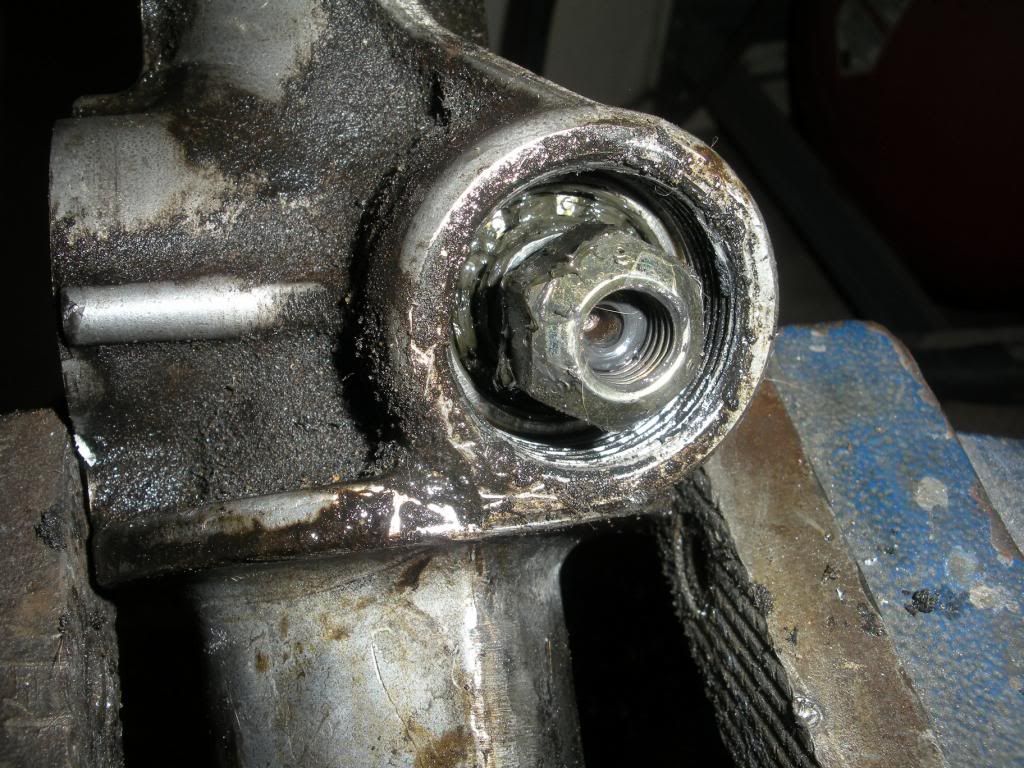 That's what's behind the nut if you were wondering Just a bearing no washers or anything. 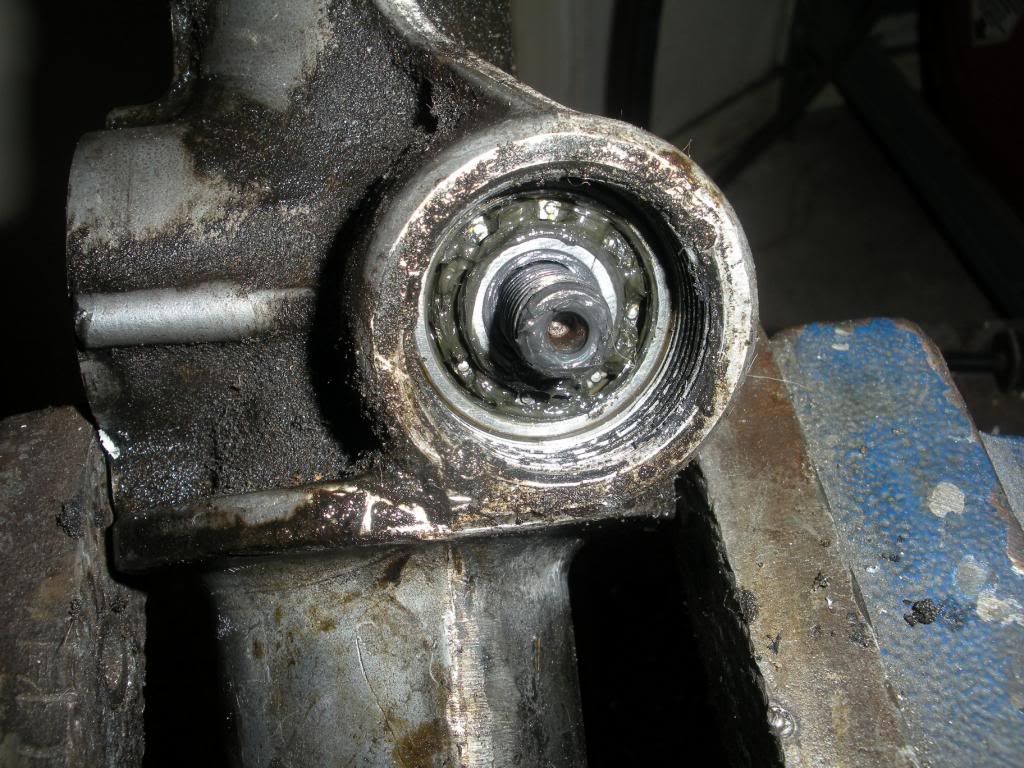 Moving to the top of the pinion we need to remove the dust cover. Just dig it out however you want witha little screwdriver or whatever. there's a new one in the kit. Don't beat up the aluminium any more than necessary though as the new dust cover won't seal well. 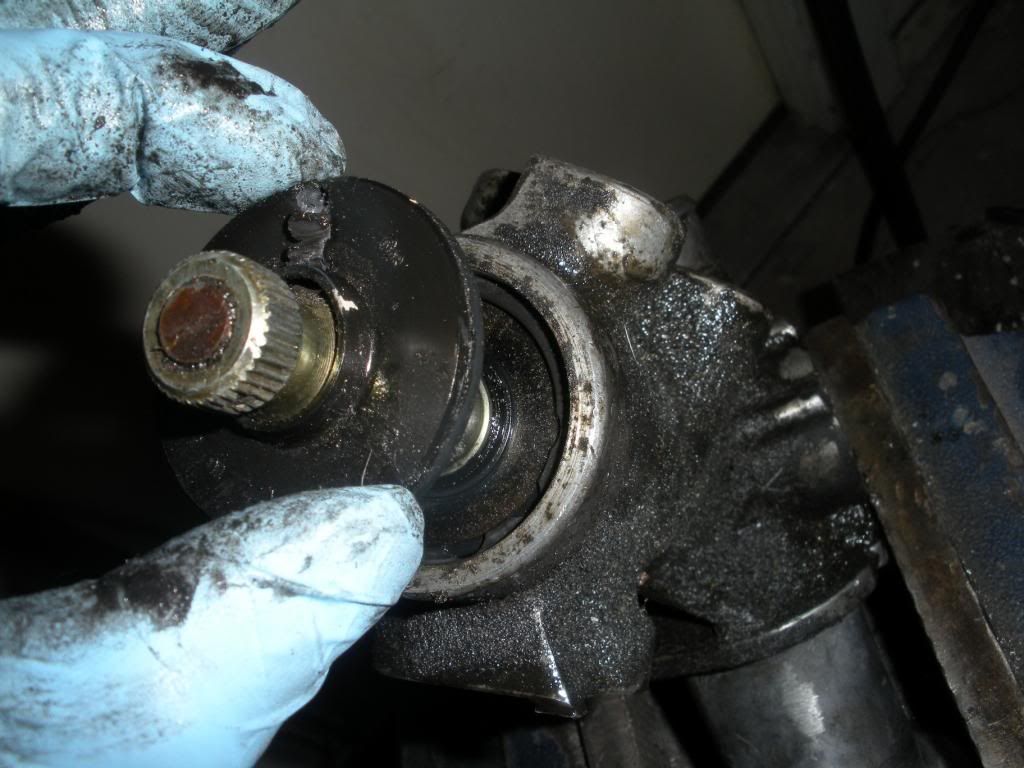 Grab a pair of snap ring pliers and take the snap ring out next. 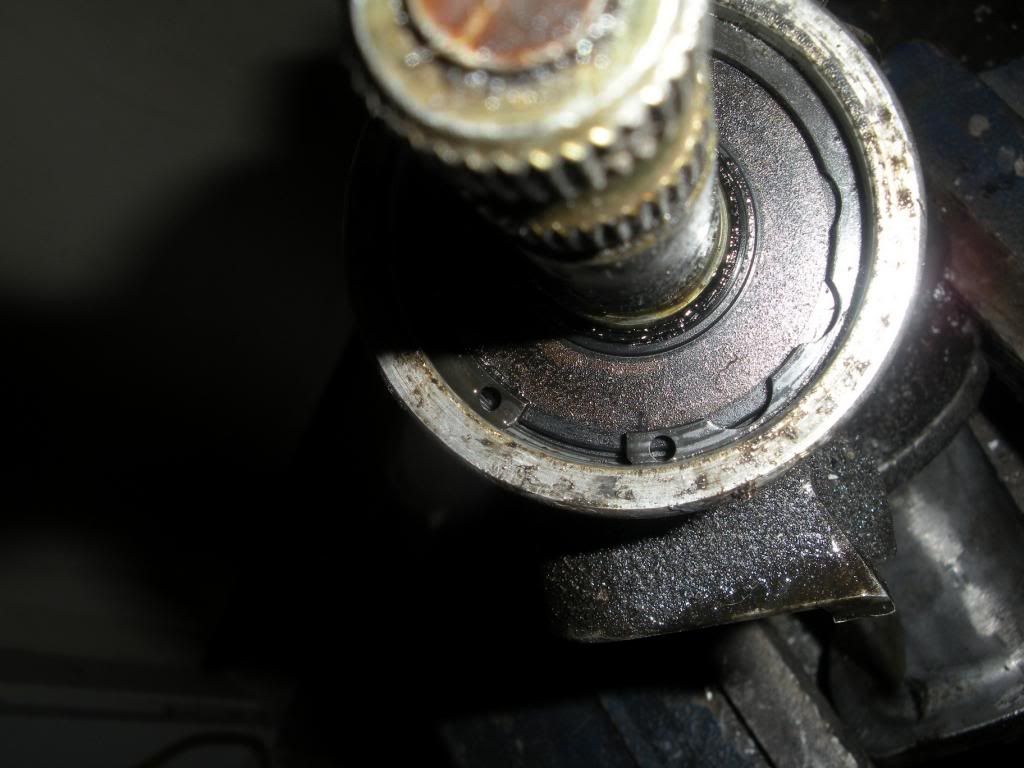 Like so. 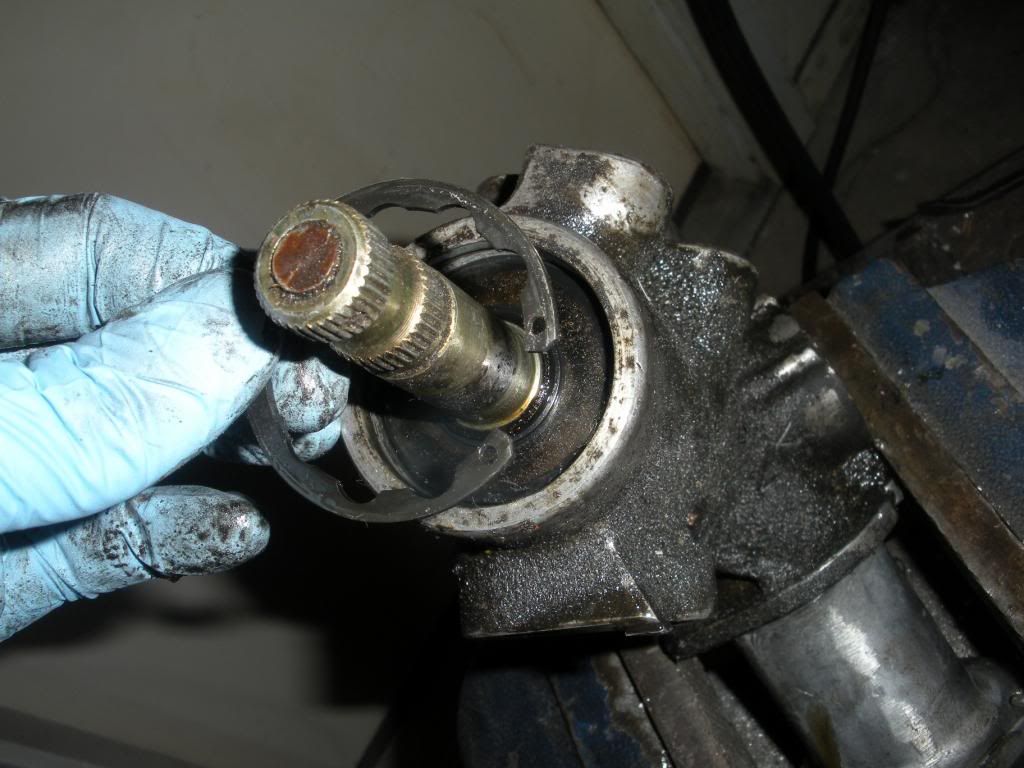 Under the snap ring is the top oil seal. Just leave it there for now, it's about to come out super easy. Now that the snap ring is removed we can proceed with the light tapping on the lock nut with a hammer I talked about a few steps back. tap it a couple times till the pinion starts to move then unscrew the lock nut and remove it. 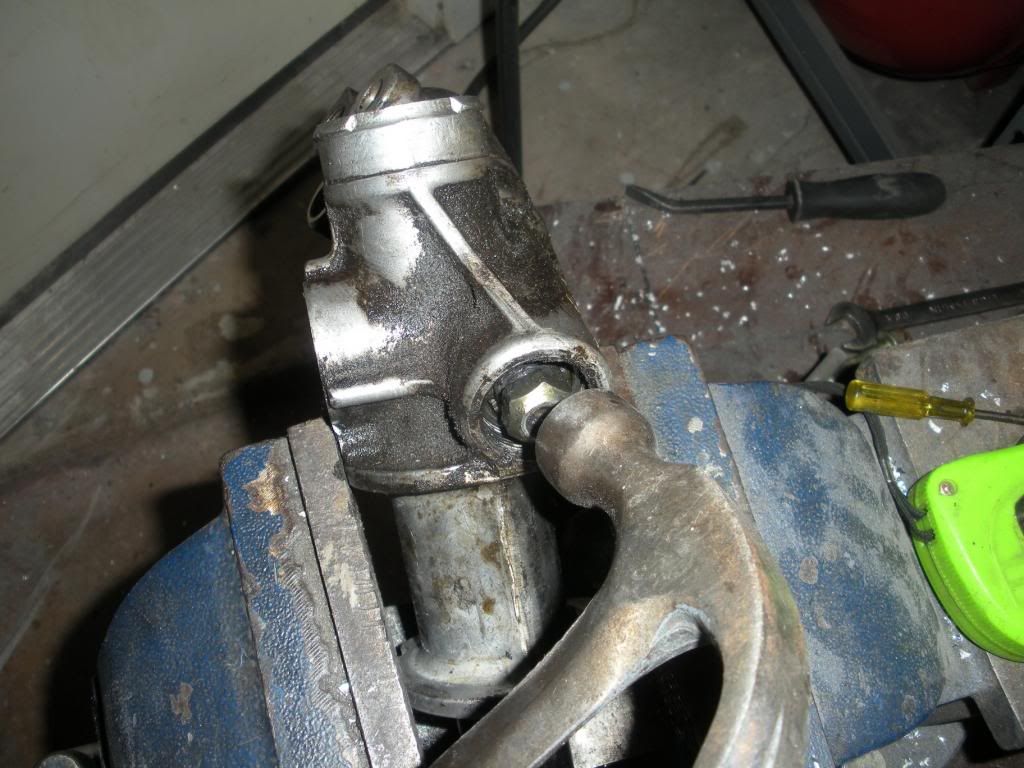 Pull the pinion from it's bore. The top oil seal will be on the pinion. Now just slide it off and throw it away. it's the black part closest to my hand in the picture. 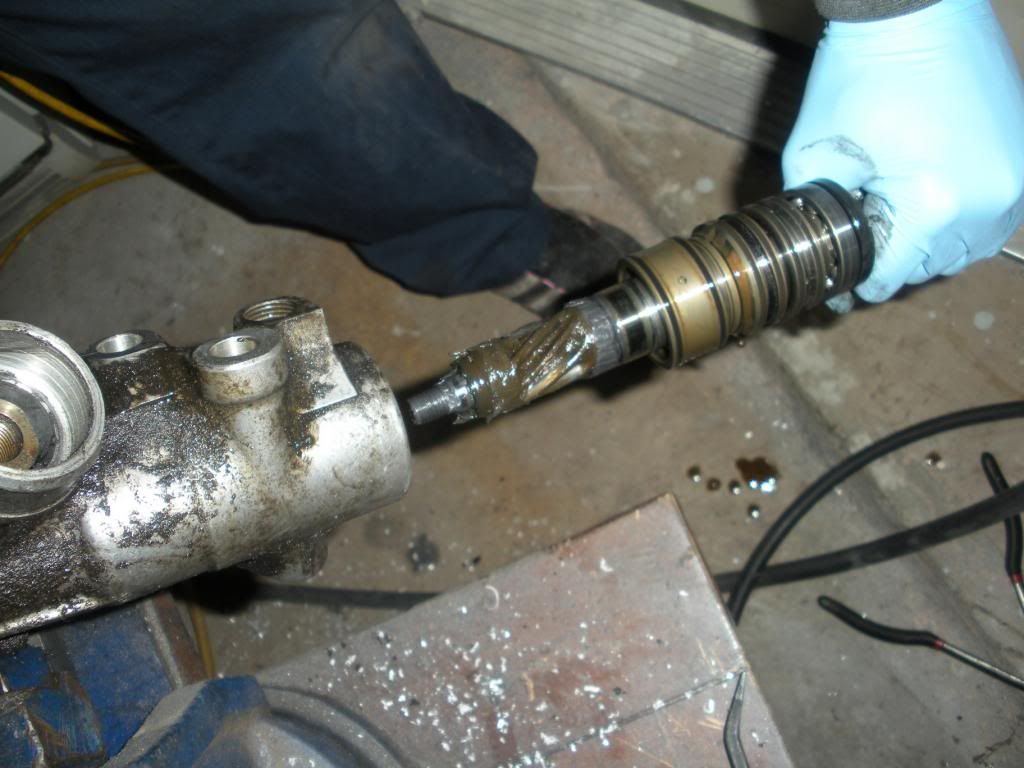
Last edited by StephenSheppard; 02-27-2013 at 10:54 PM. |

|

|
|
02-27-2013, 11:16 PM
|
#2 |
|
Rotary Fan in Training
Join Date: Nov 2012
Posts: 58
Rep Power: 14 |
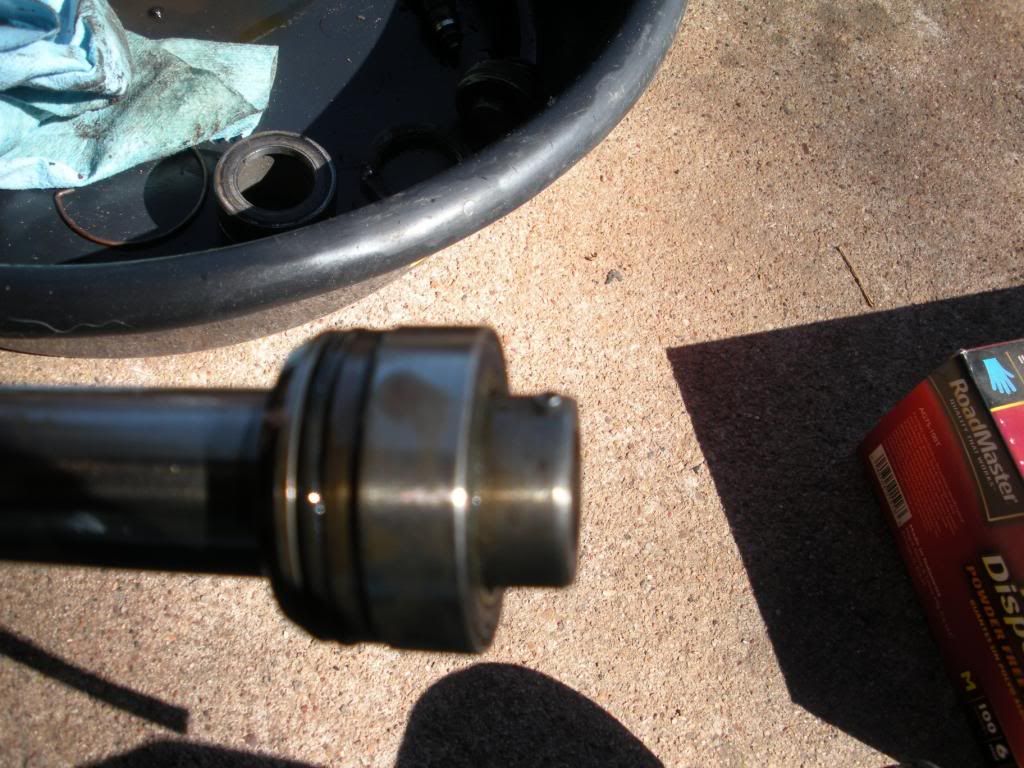
Next what usually happens is the bottom oil seal stays in the pinion bore. Get creative and figure out a way to destroy it so you can remove it. I drive a tiny screw driver between it and the housing and progressively move up to a larger one till the seal collapses and can be grabbed with needle nose pliers or something. There it is down there.
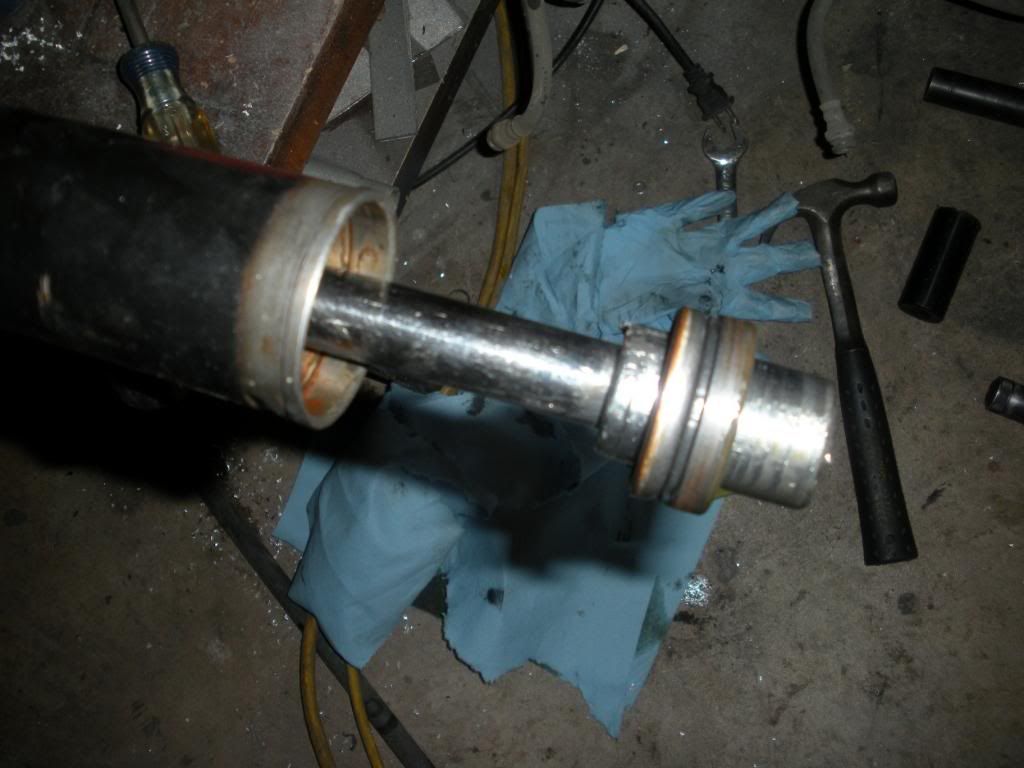
 Here it is after removal, not pretty. 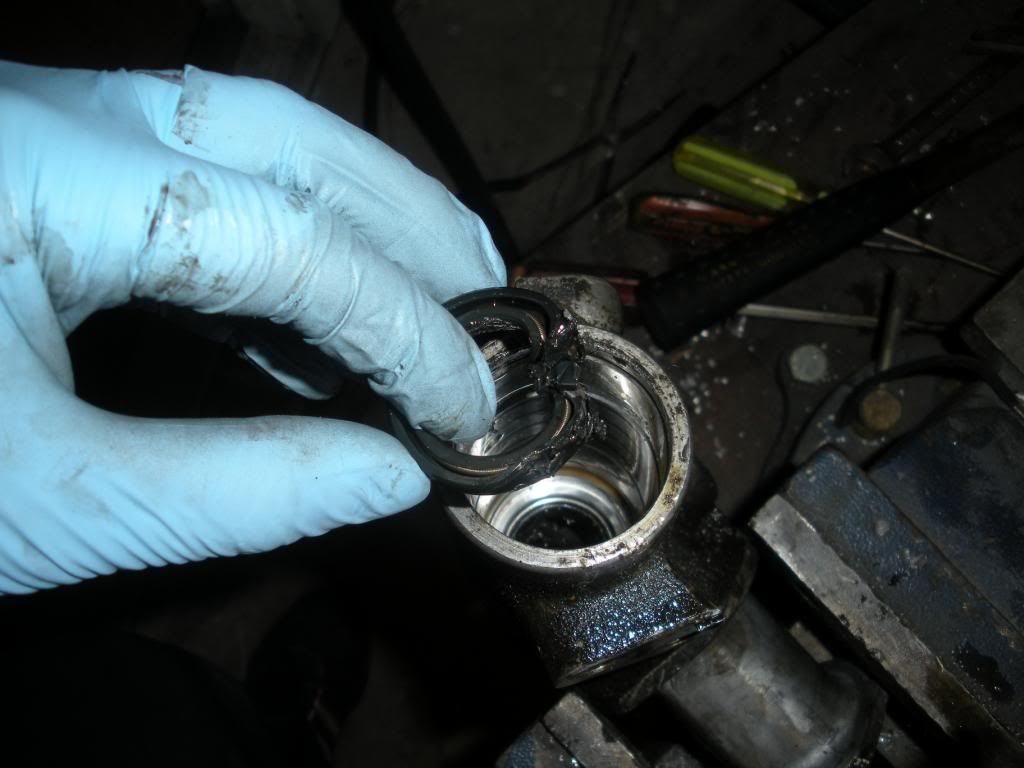 Now you can slide the rack out. The rack bushing (Inside the tube still) May need some motivation to get moving, just use the rack as a slide hammer to pull the rack bushing from it's seat. Here it is just pulled out of the end of the tube. Notice it's right up next to the piston (The slide hammer lol) 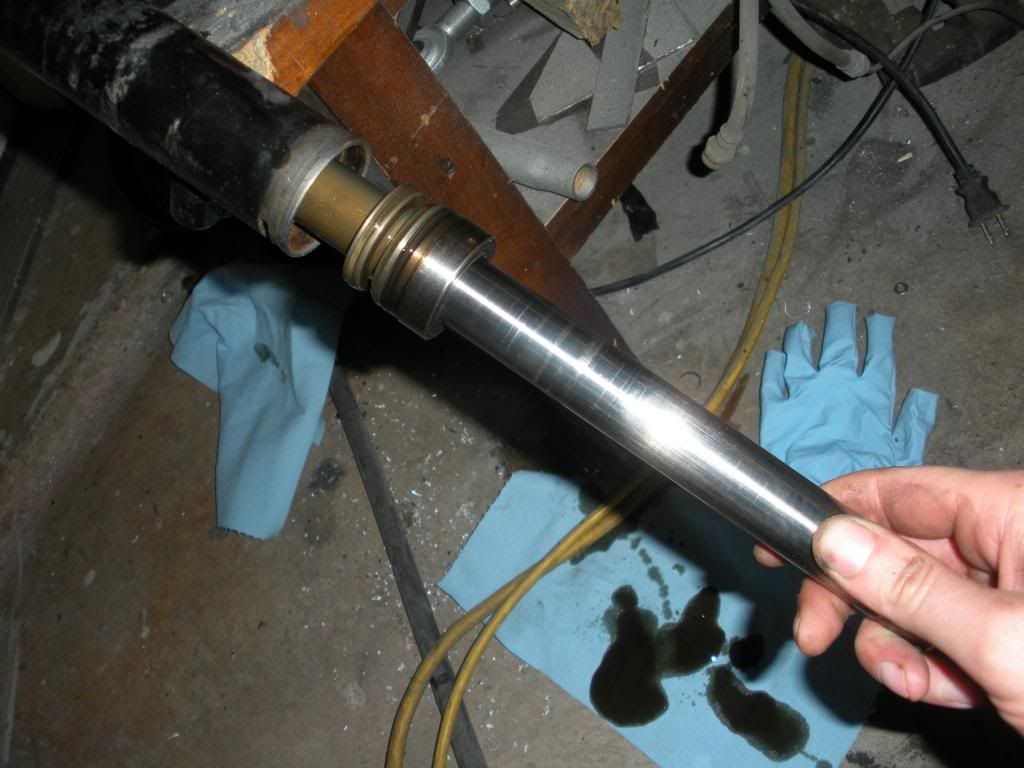 Go ahead and pull the rack completely out at this point. 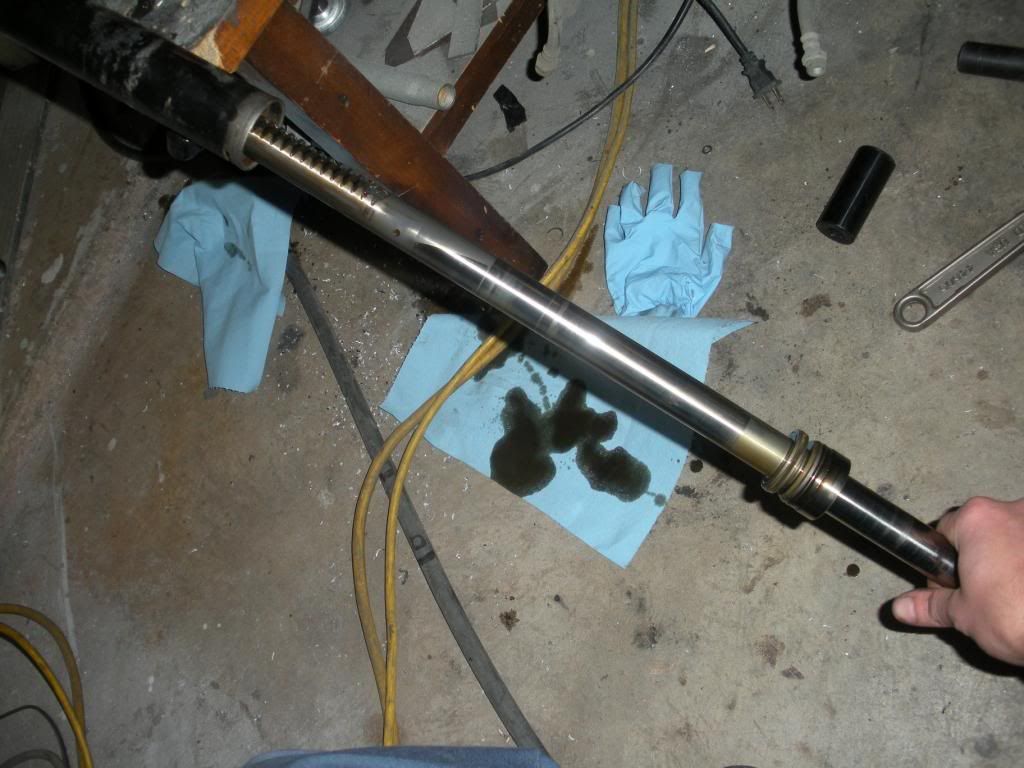 Lots of stuff to clean up. 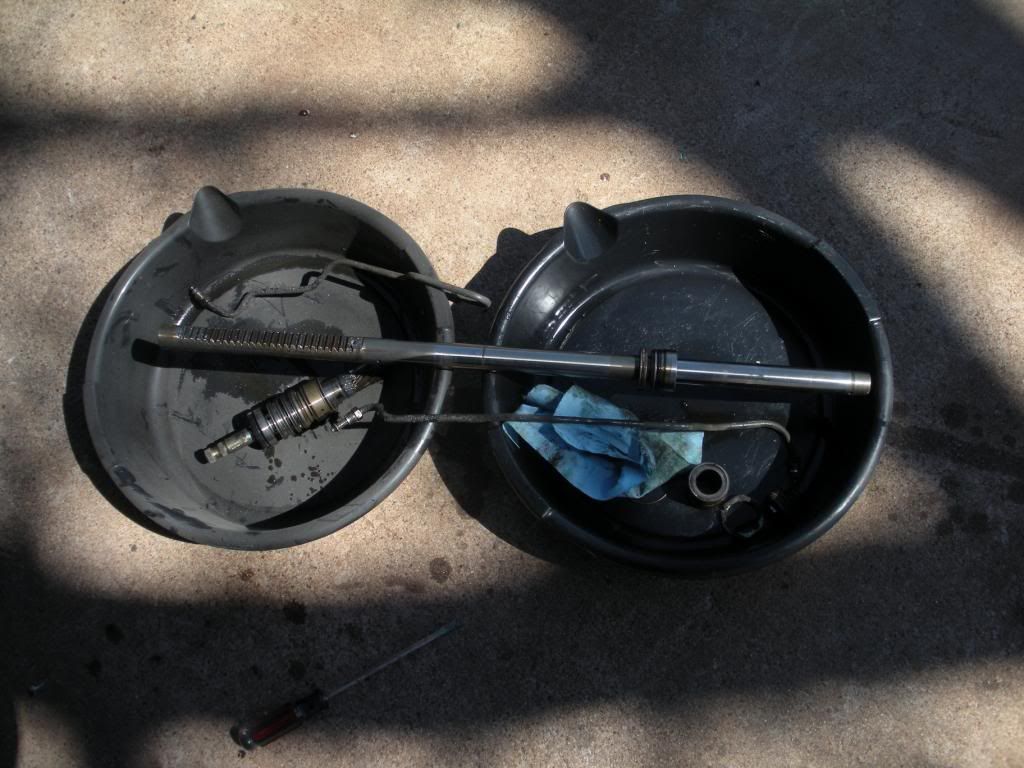 Tried to get you a picture of the seal that's down there in the tube, didn't work out well but trust me it's there also there's a support washer behind it. 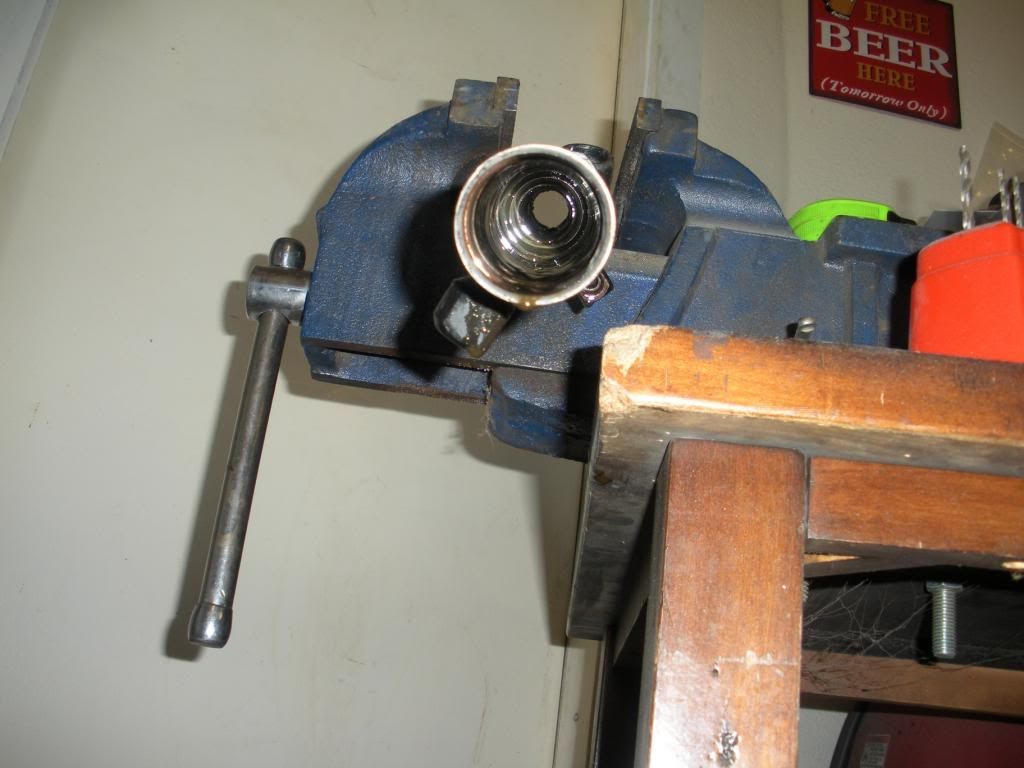 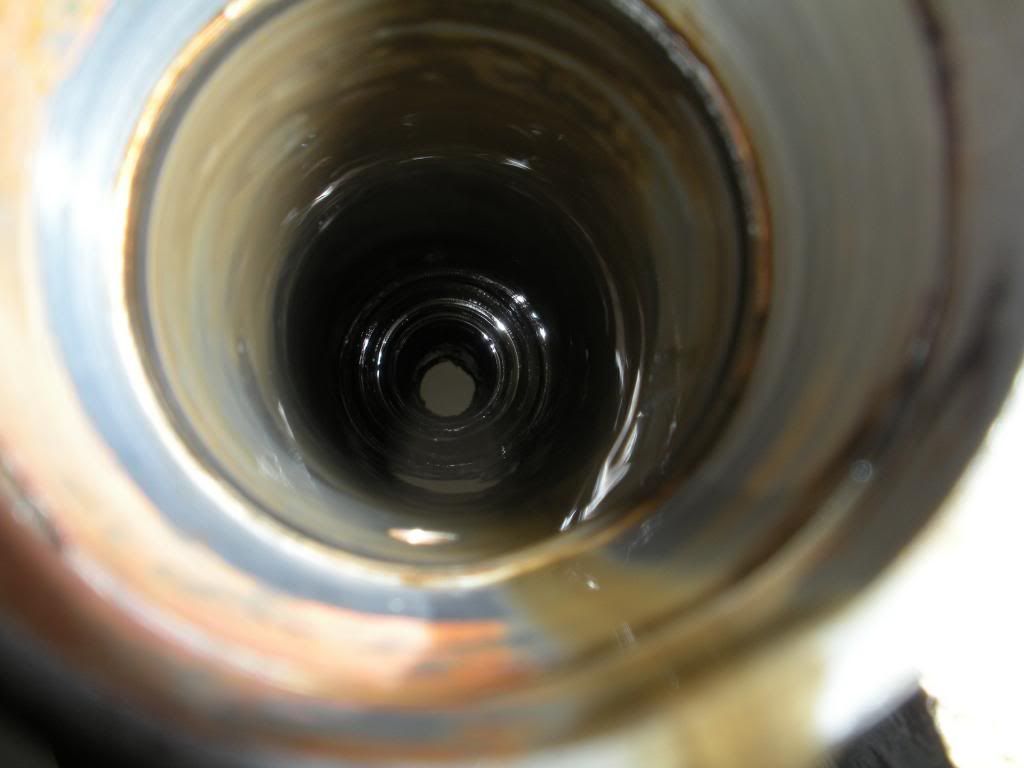 Here's the rack support piece easily coming out now since there's plenty of holes to stick your finger in at this point and push it out. 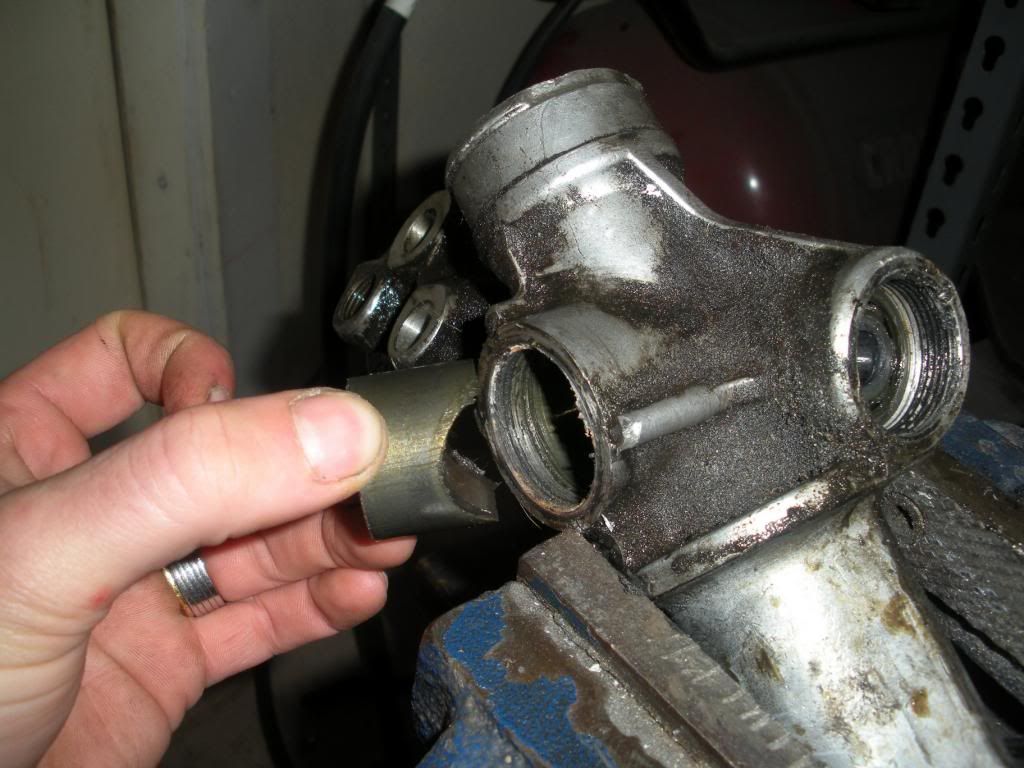 Lots of old grease and stuff in there. 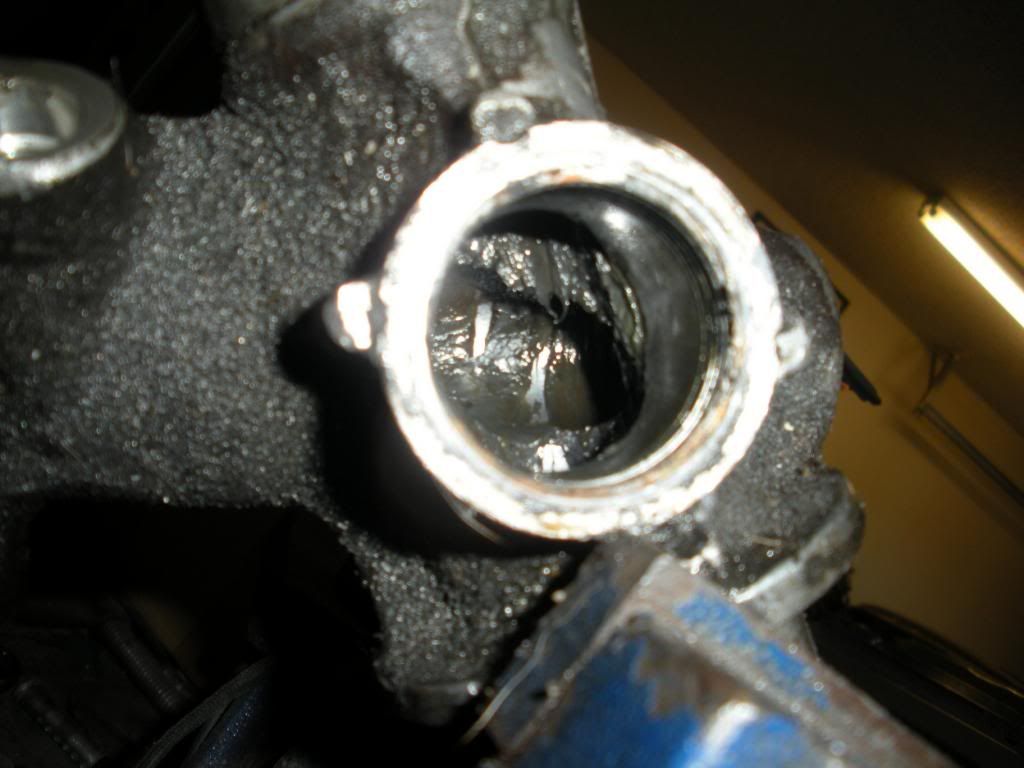 You don't have to remove the bearing unless your replacing it (Does not come with the kit) or you need to remove it to clean the rack out as well as possible. I wanted to clean it our really good so I removed it. 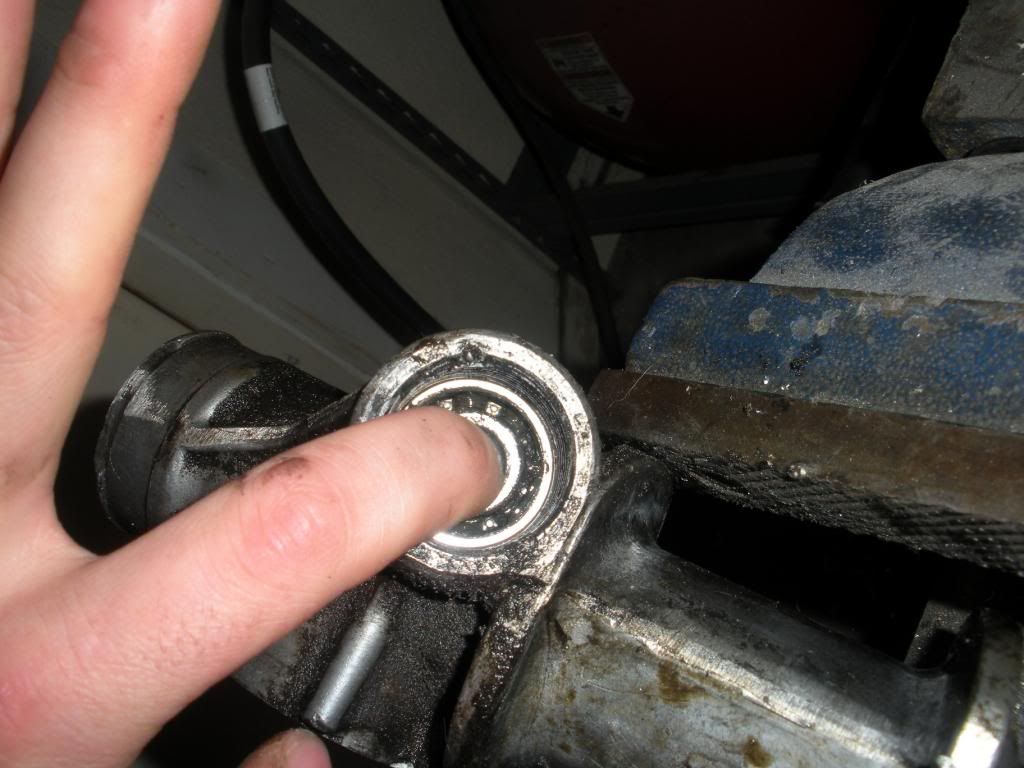 Easiest way to remove it is with a kit like this, which you should have so you can remove your pilot bearings in your flywheel as well. You can see the second to the smallest size is the pilot bearing size. This sucker never fails! You can buy it at Harbour Frieght. I think it's called a "Blind hole bearing puller" or something like that. The smallest size has the bearing on it I just pulled out. 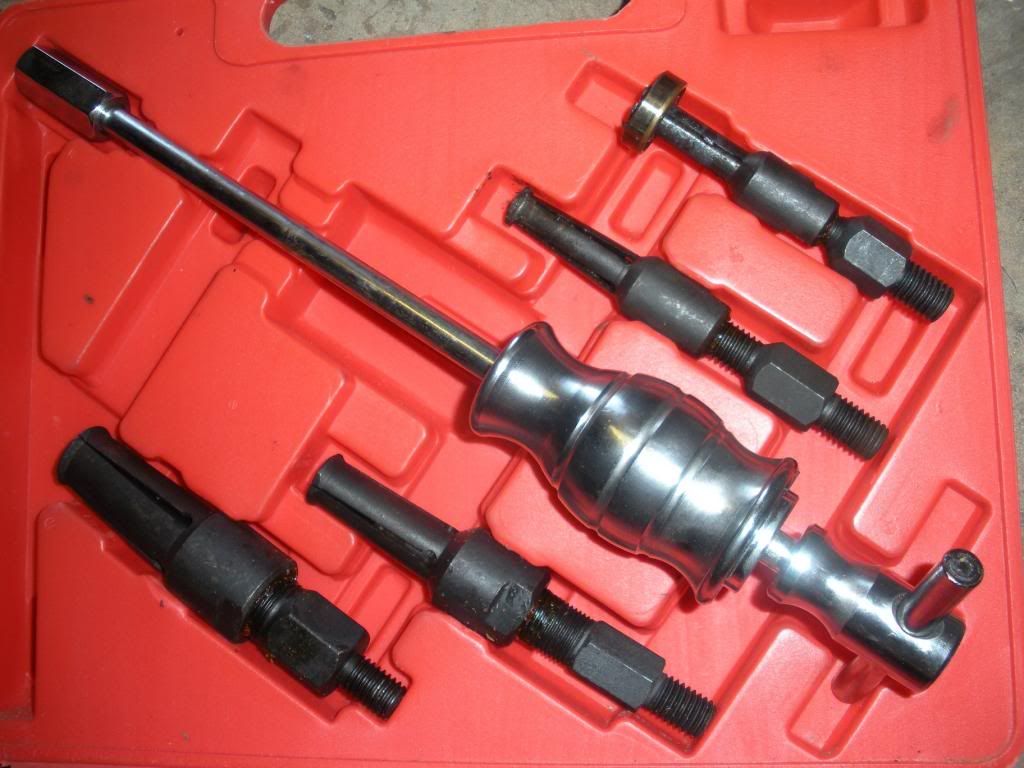 Here's how it works. You insert it through the center of the bearing, then thread the rear piece into the front piece which expands the front piece capturing the center of the bearing. 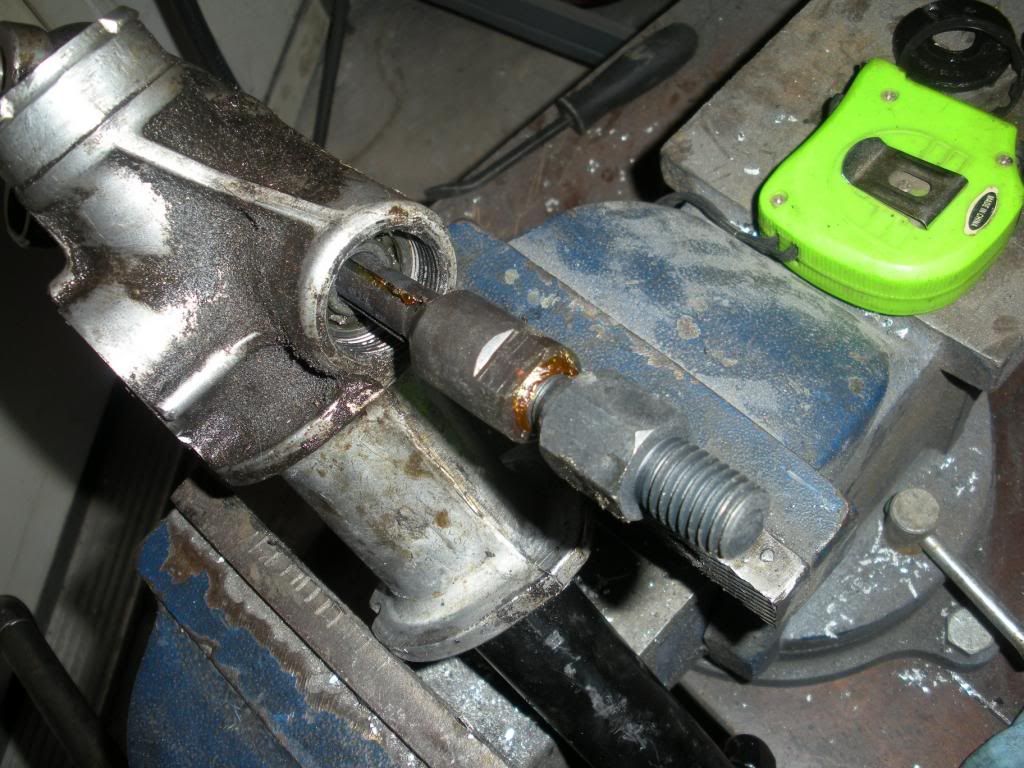 Then thread the slide hammer onto the rear piece and rack the hammer once or twice and the bearing comes out. On pilot bearings (For the transmission) it may take many blows of the hammer to remove the pilot bearing depending on the condition of the flywheel and bearing. 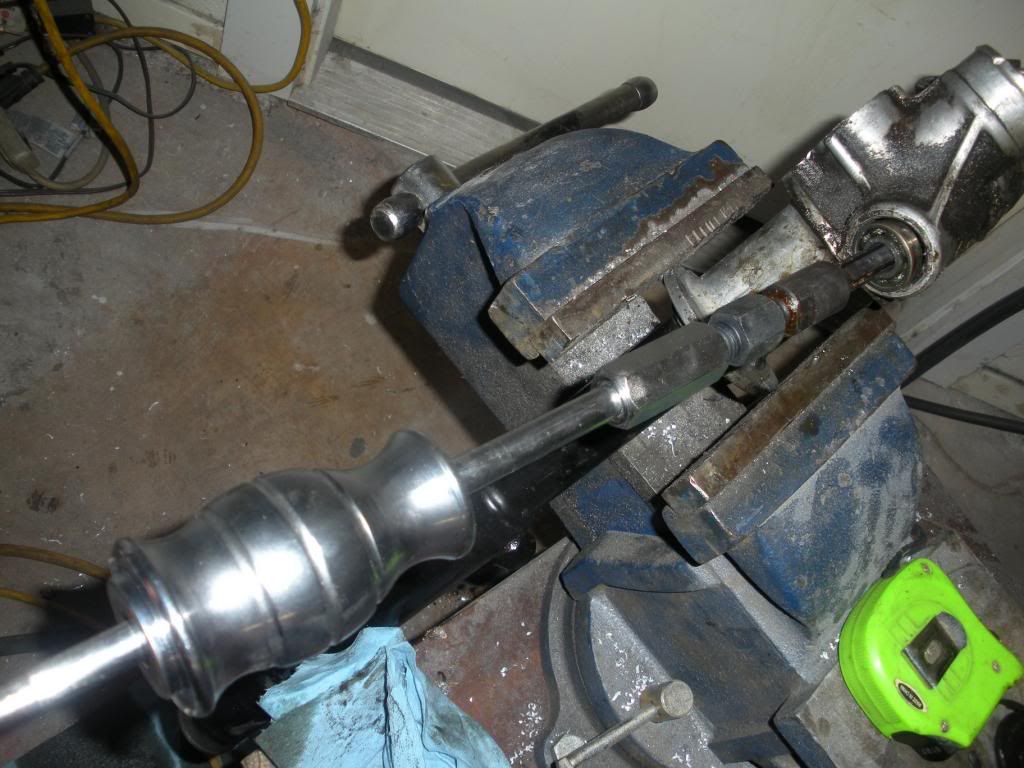
|
|
|
|
|
02-27-2013, 11:33 PM
|
#3 |
|
Rotary Fan in Training
Join Date: Nov 2012
Posts: 58
Rep Power: 14 |
Next is the sometimes tricky part. Remember that seal and washer down in the tube? Needs to come out. I do it by finding a soekt that will clear the bore from the driver's side but hit the washer. This 18mm socket is wierd and tappered so it worked out great. Basically just put a stack of socket extensions on it and hit it with a hammer a couple times and it should come free. Push the whole thing through till it sticks out the passenger side like this.
 Helped push the whole thing through with this tool that's handy, but I have no idea what it's called. 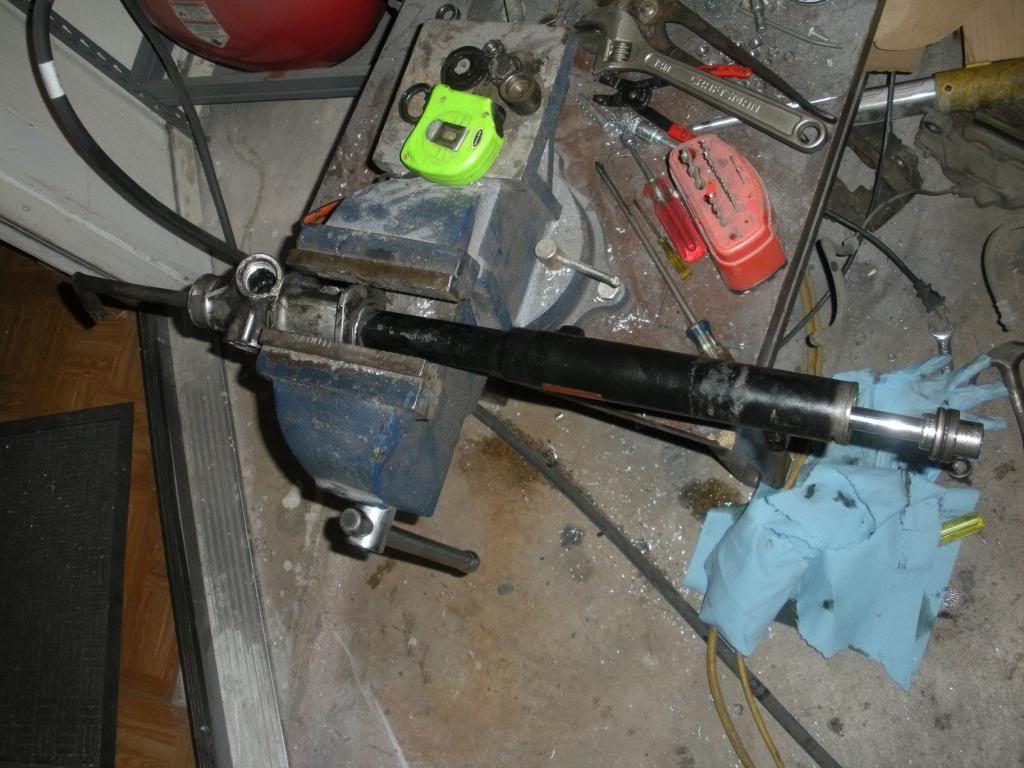 Just a bit too slippery to push the washer and seal off the socket by hand so I just did this and hit it out with my hand. 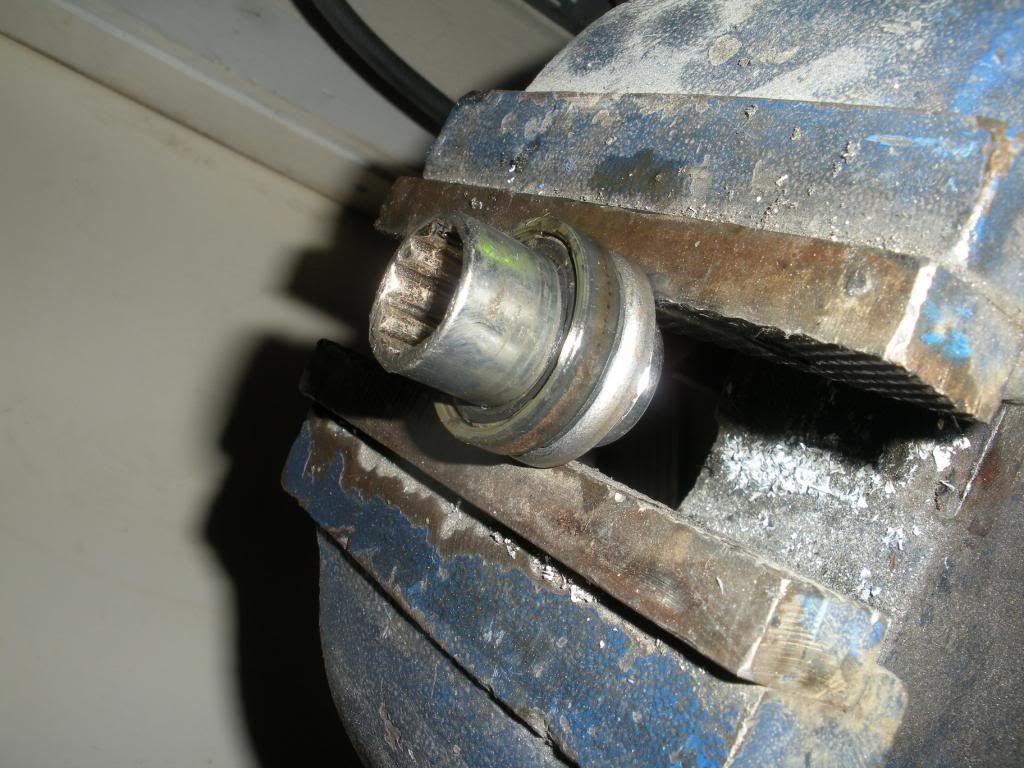 Lot's of dirty down there. 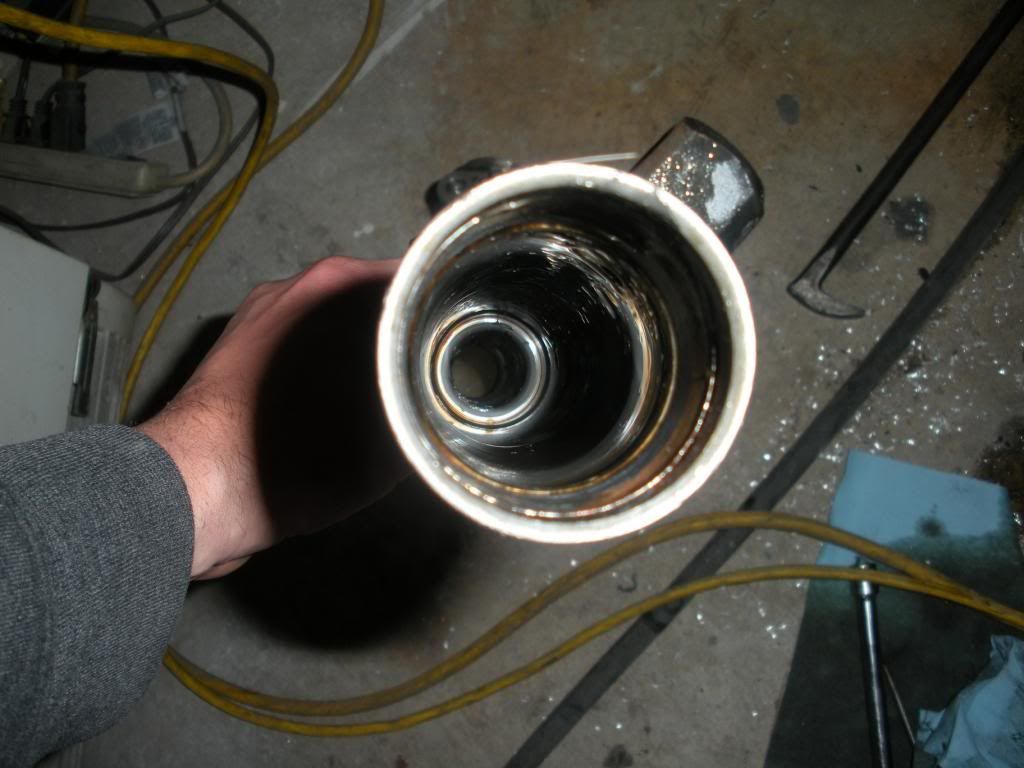 This is a good time to mention that the keen observer will have noticed a needle bearing in the pinion housing bore. Leave it alone under every circumstance possible. If it's damaged then you have to replace it but if it's fine don't mess with it. They are hard to remove. You can submerge this thing and clean it all you want and not ruin that bearing if you dry everything when your done with air or heat or whatever you have. A little bit of this and lots of water, to clean the tube and pinion housing up. How clean you get it is up to you. 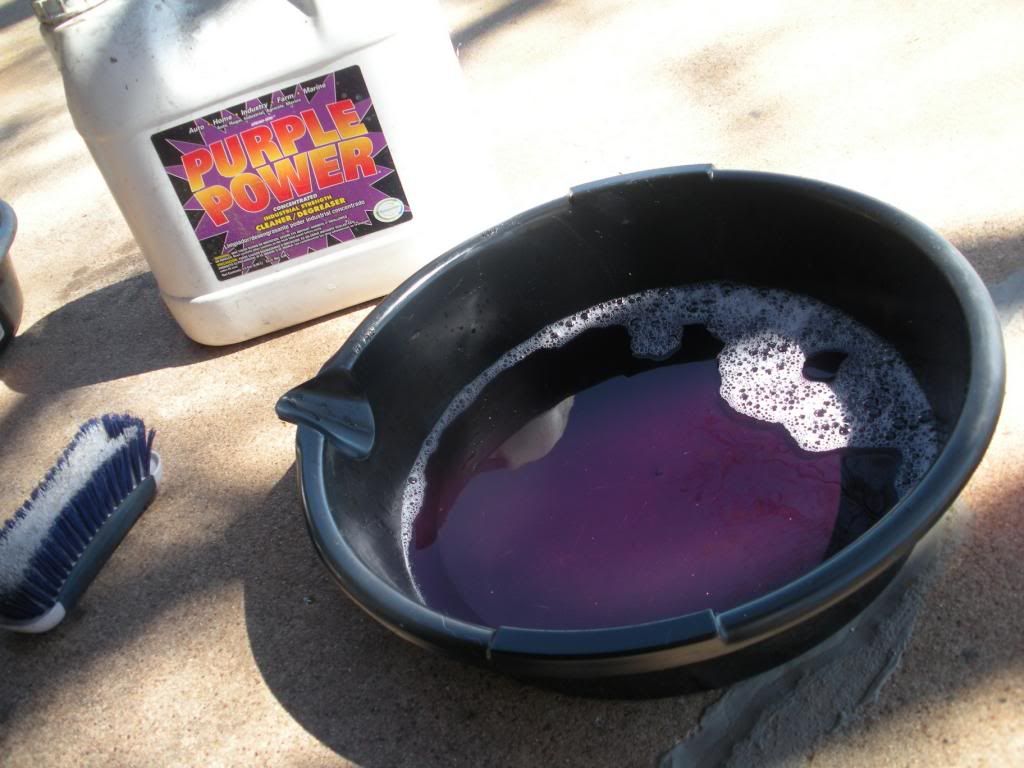 Next I push blue towels through all the holes and remove as much of the old grease as is possible. Then I pour some laquer thinner in a pan and soak some clean blue towels in it, then push those through everywhere till it's clean enough for me. Did I mention you should use lots of latex gloves during this whole tear down because everything is super dirty and nasty. I probably used 30 pairs today honestly, and like 20 blue shop towels. 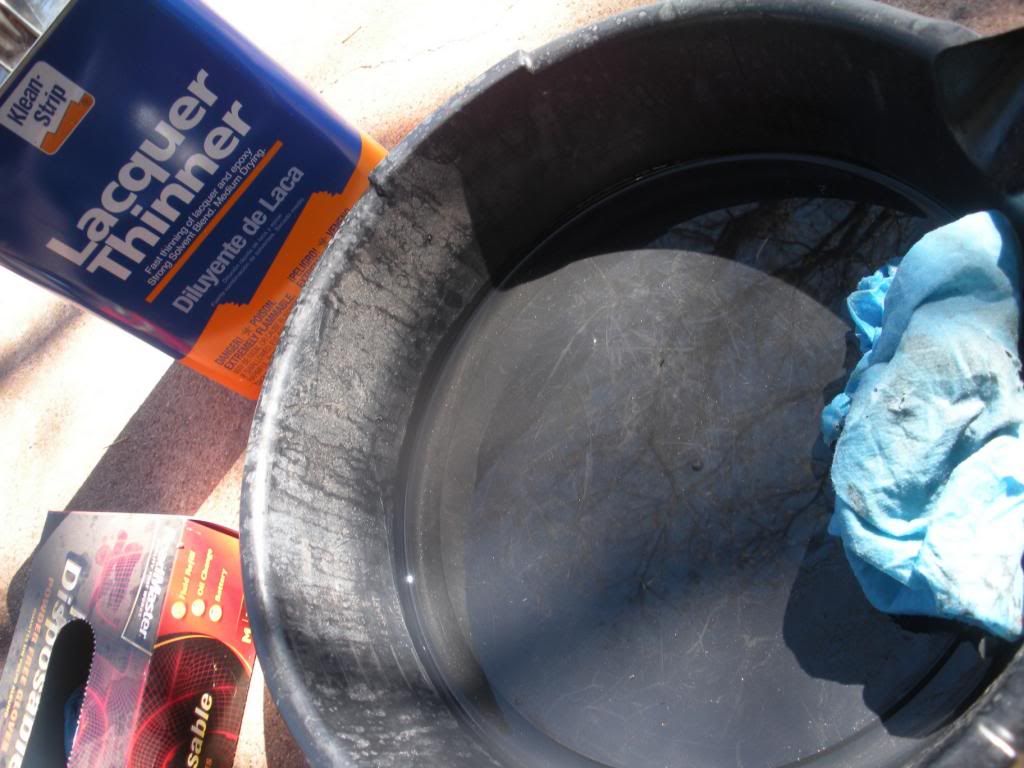 Also remember purple power will oxidize aluminium if it's left to soak or anything like that. Just clean it then rinse thoroughly with water then dry it and you won't have problems. Also Simple green does the same thing. Just a heads up. Pictures of it cleaned up 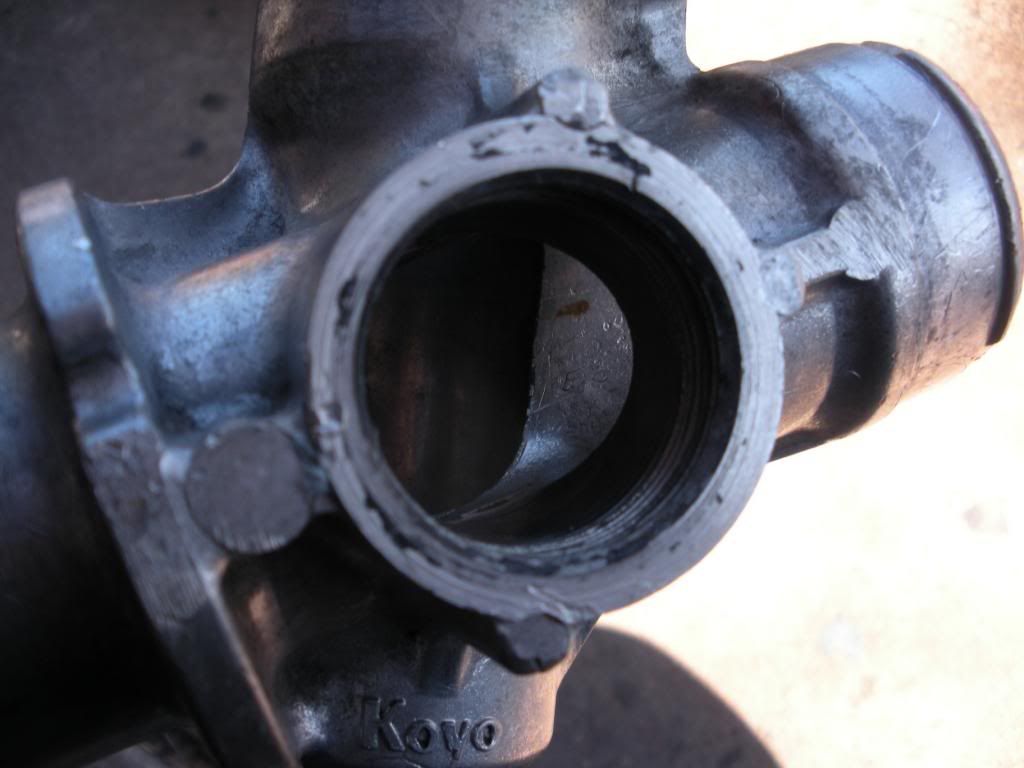 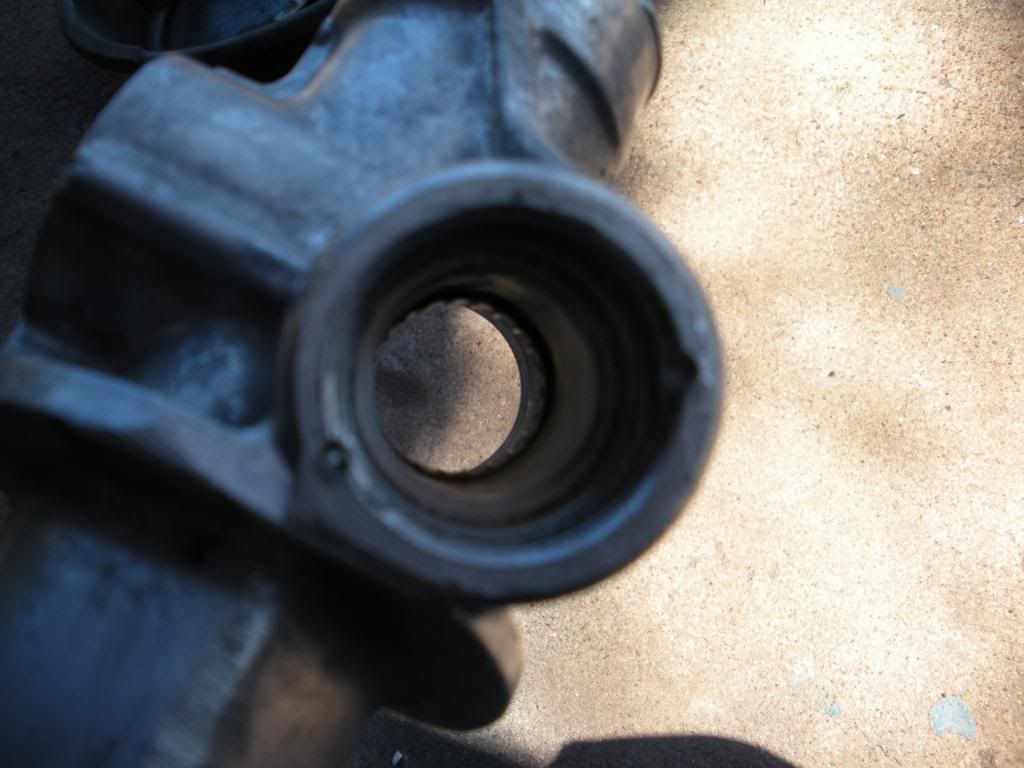 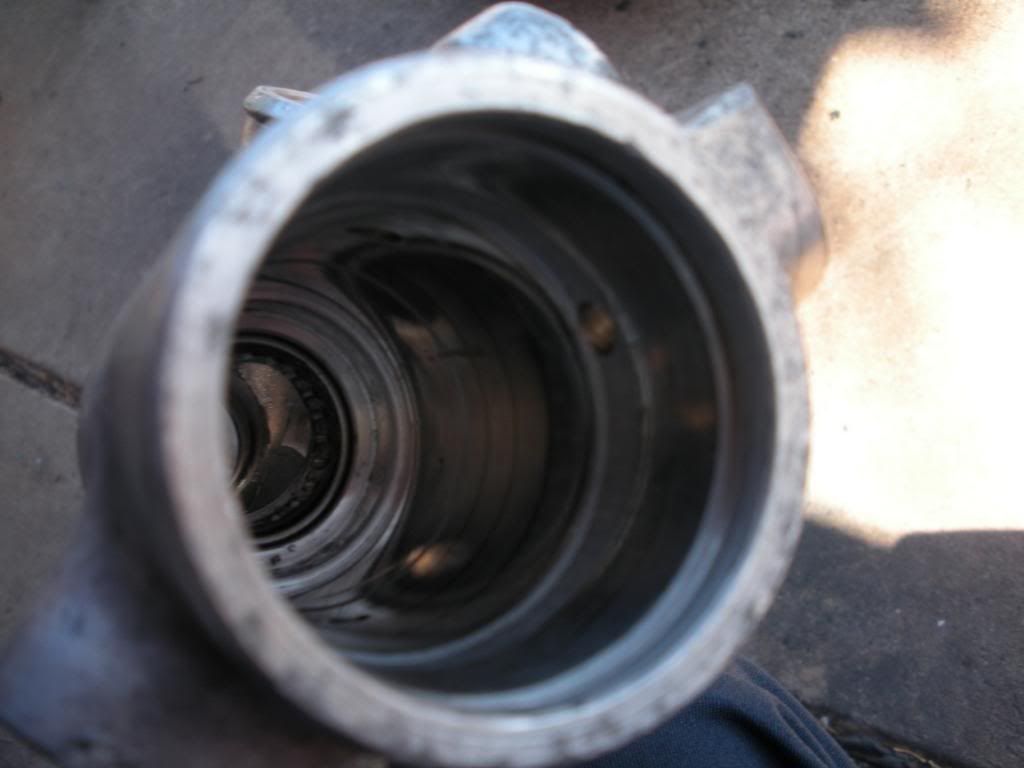 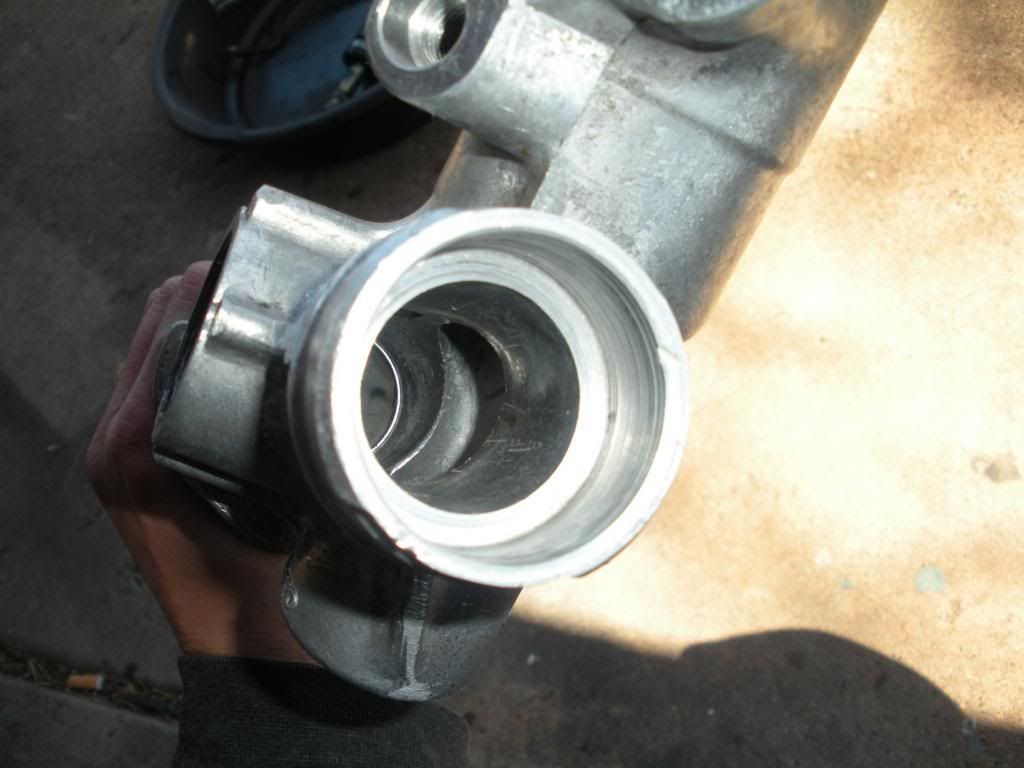 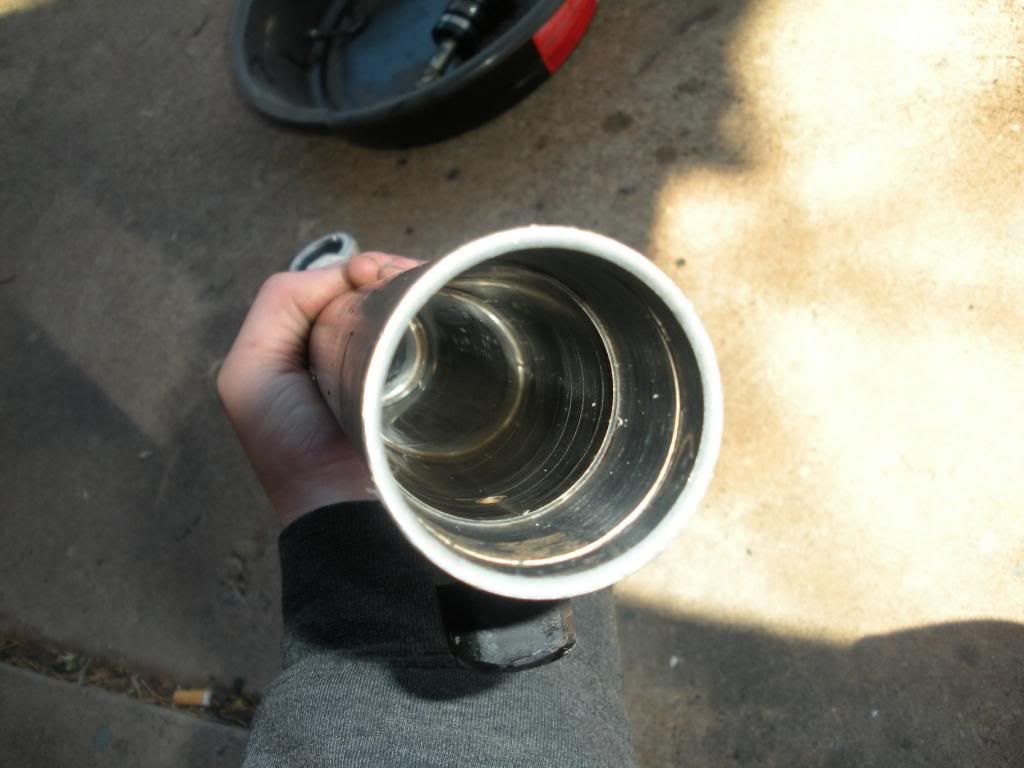 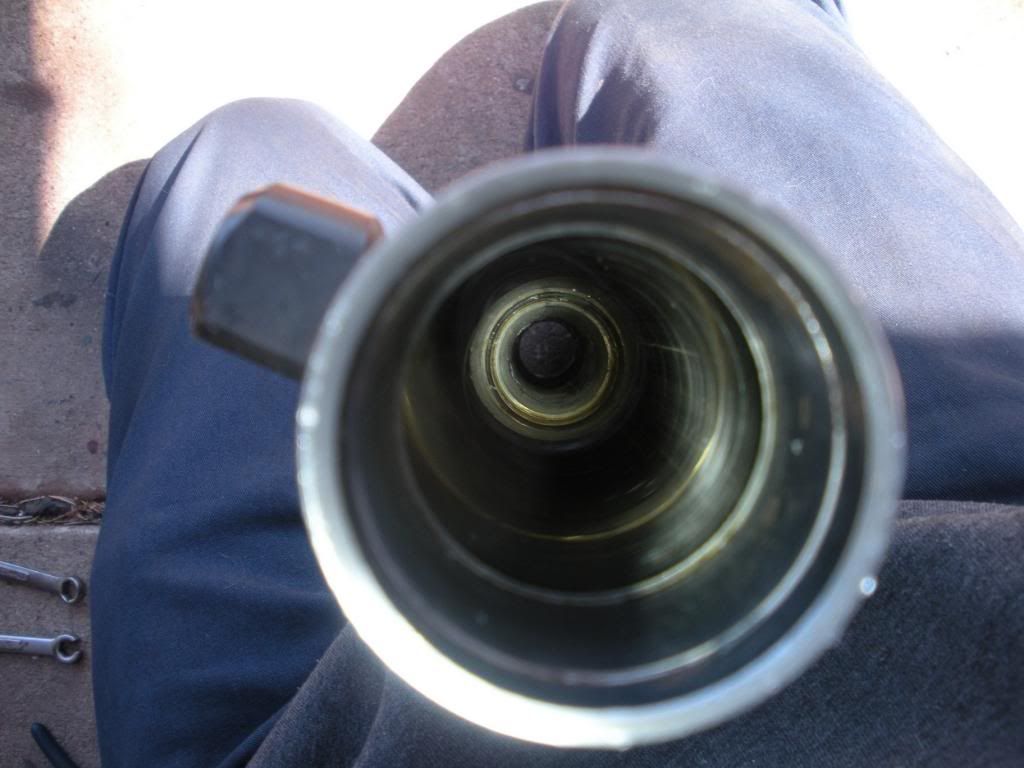 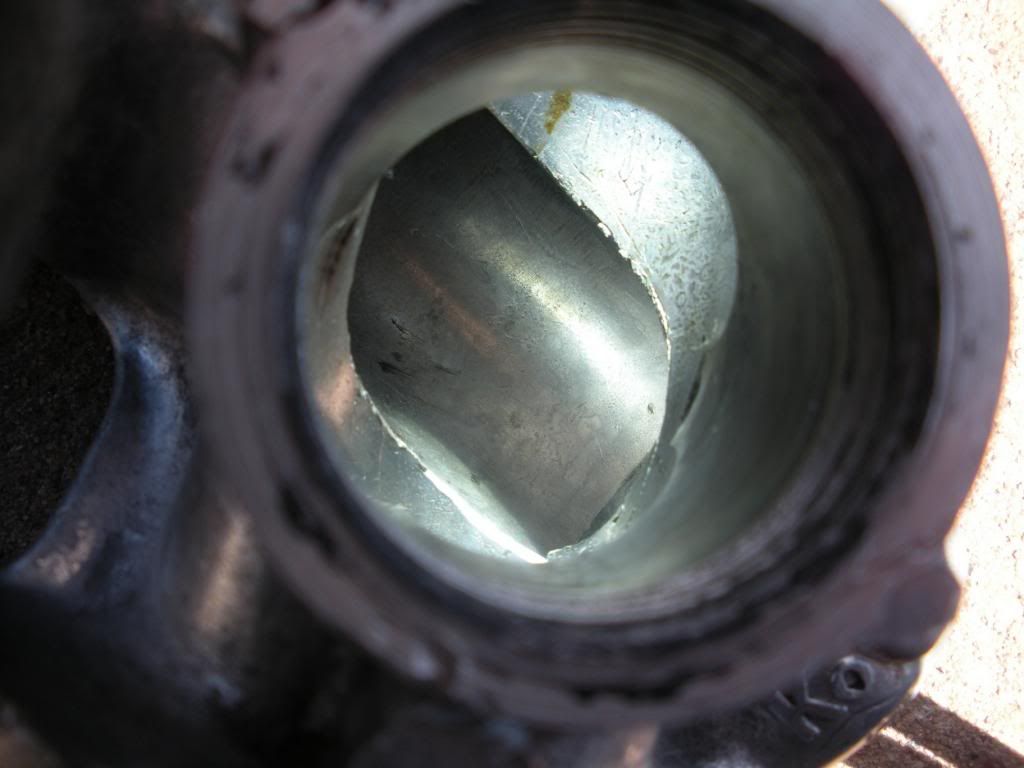 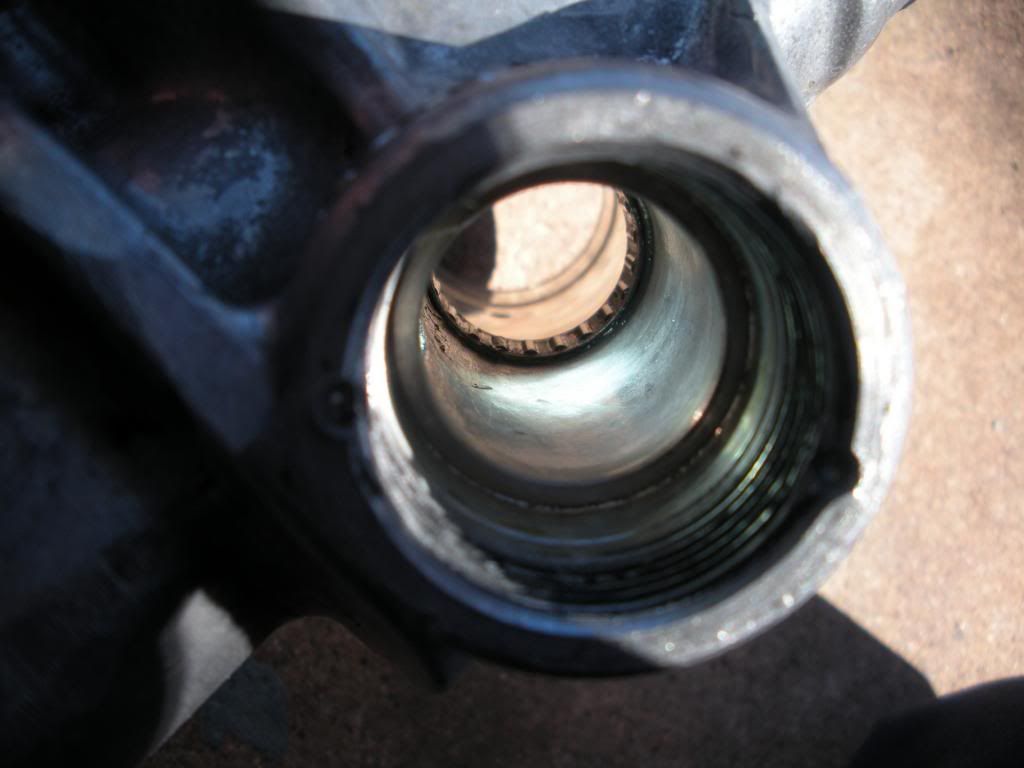 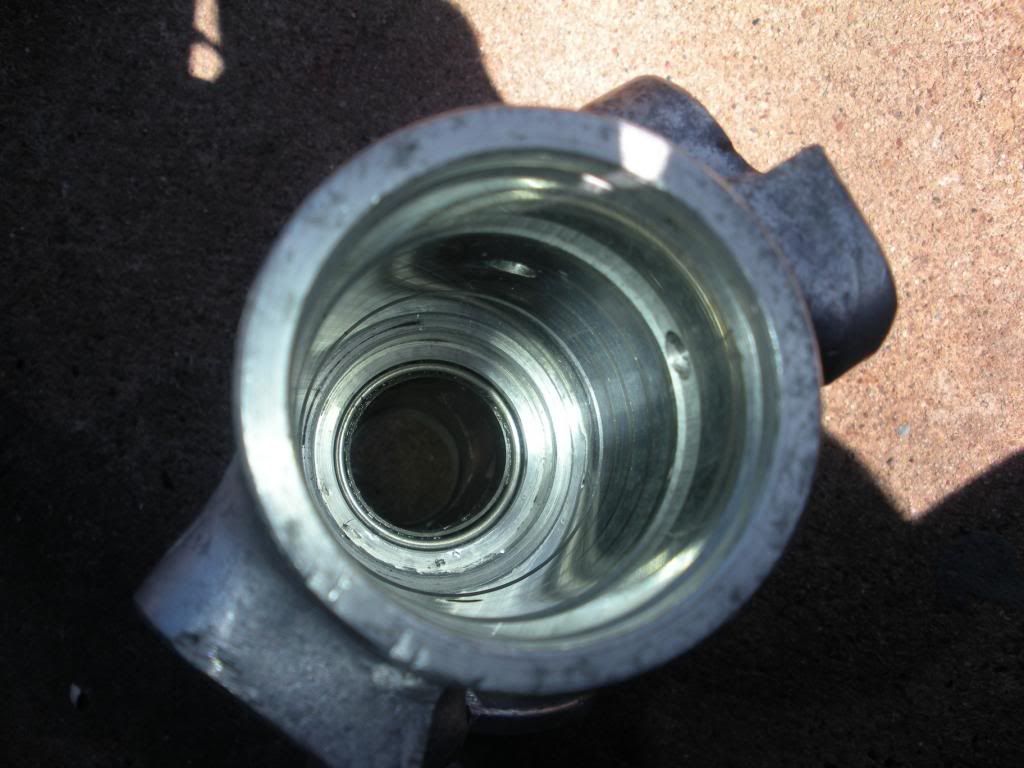
|
|
|
|
|
02-28-2013, 12:10 AM
|
#4 |
|
Rotary Fan in Training
Join Date: Nov 2012
Posts: 58
Rep Power: 14 |
Forgot to mention this earlier but it only matters for assembly not disassembly. See the little roll pin that retains the inner tie rod?
 Hit it with a hammer so is fluch like this (Both ends). 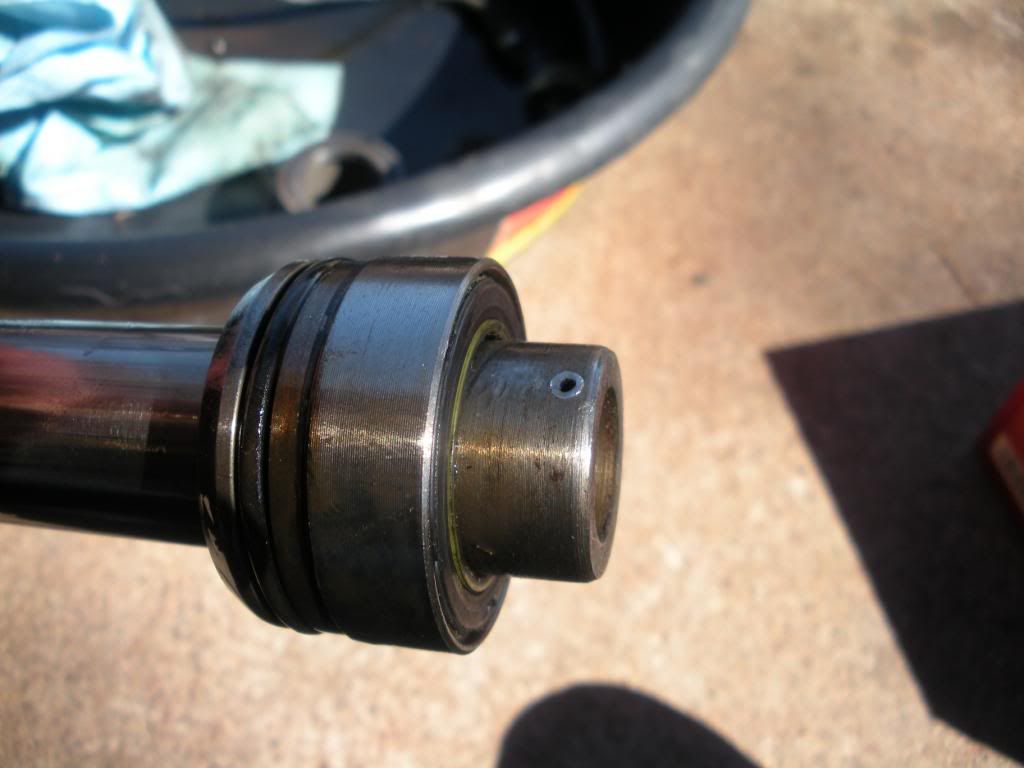 Clean all the parts 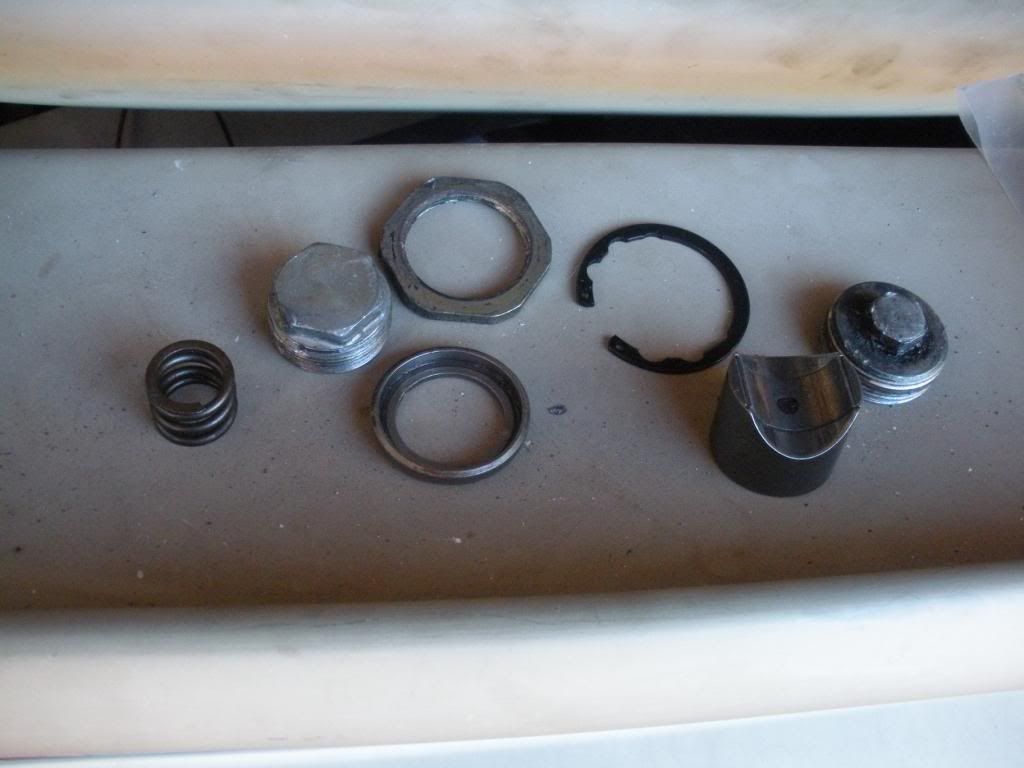 If it's already clean then don't get cleaners and water in the pinion assembly. Just wipe it down with a clean rag. If any of the holes get plugged or rusty you'll be in a bad spot. 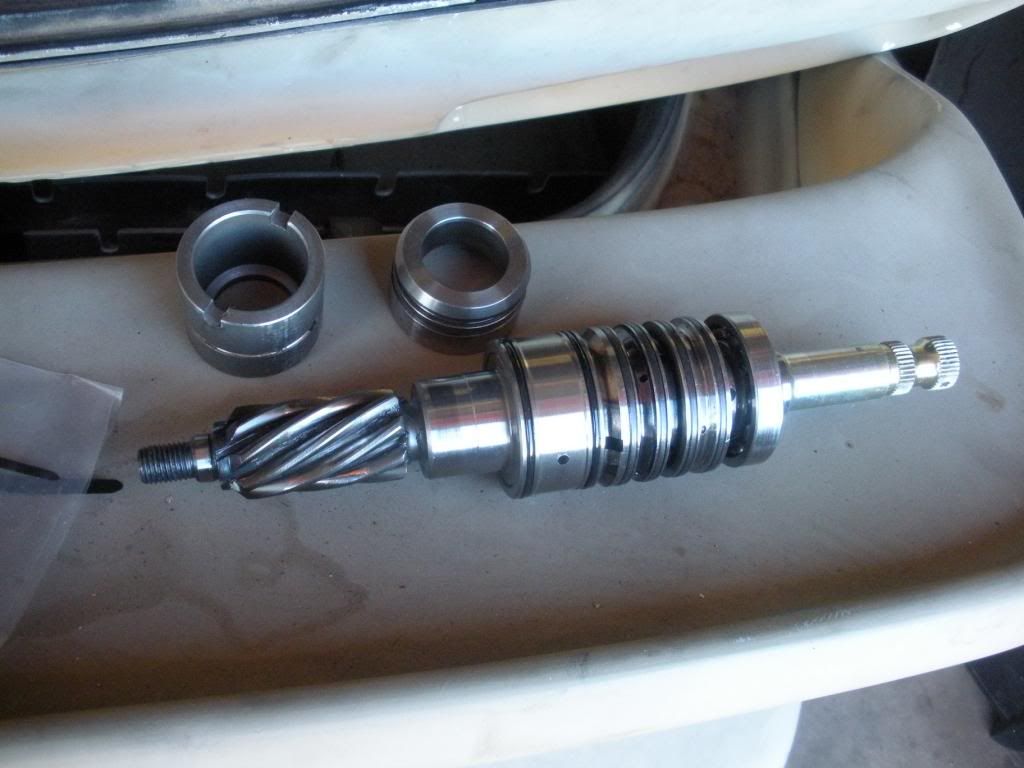 Here's the kit all layed out. For this S4 rack there were two O-rings unused btw. 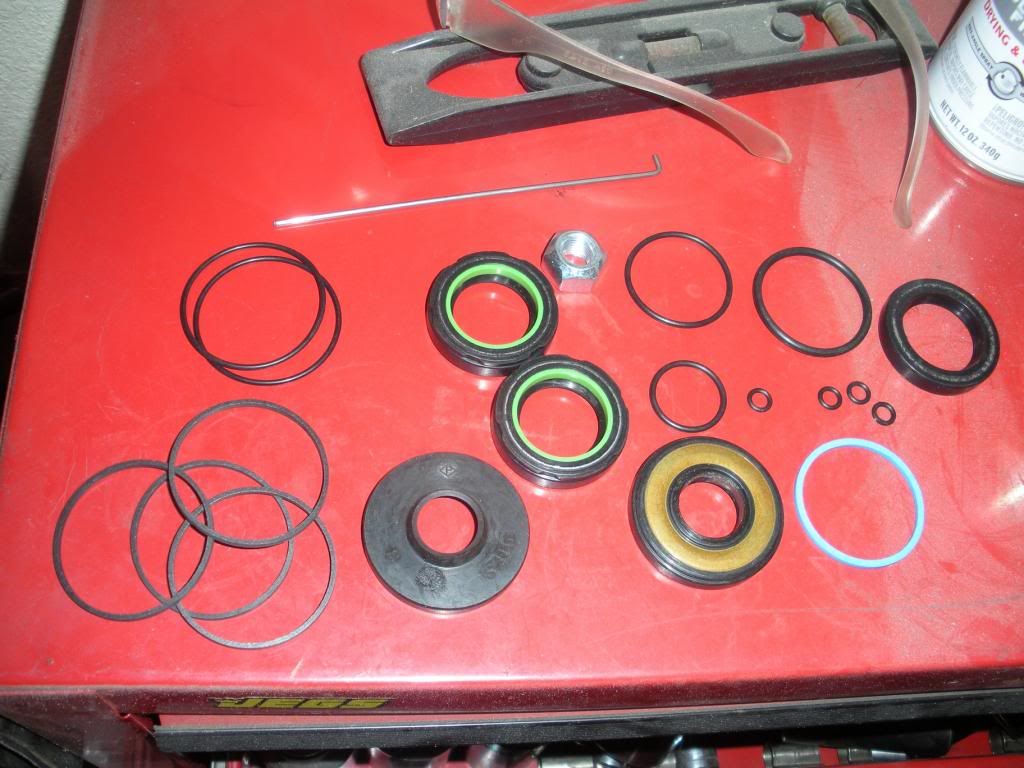 I repainted the tube after cleaning the assembly. This was drying while I cleaned everything else up. I then took all the tape off and clear coated the pinion housing just for fun. 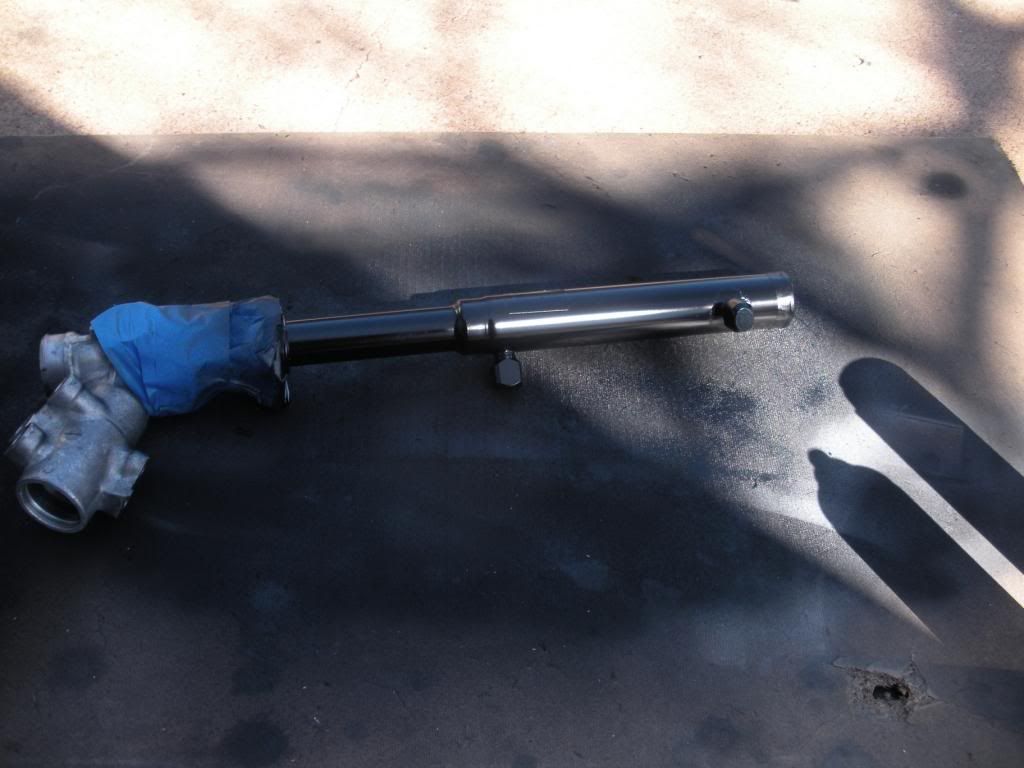 Here's the rack all cleaned up. 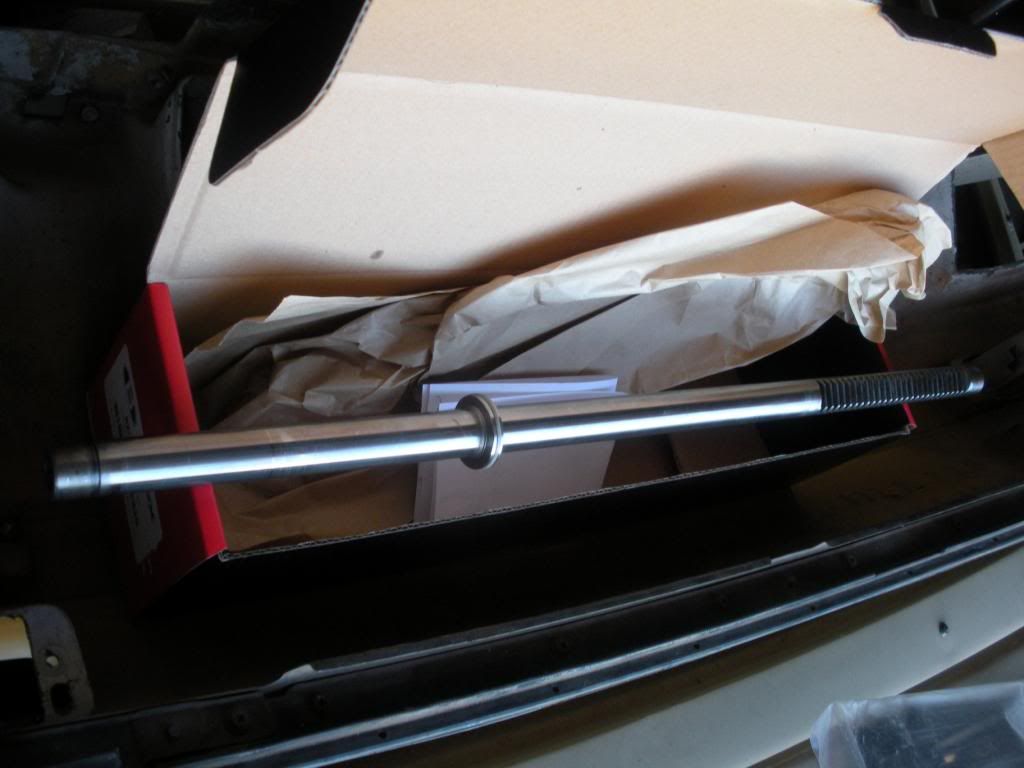 Think gun bore here, needs to be clean, smooth and scratch free for proper operation of the hydraulics. Forgot to mention earlier that when passing towels through this it's just like cleaning a rifle. A very large caliber rifle 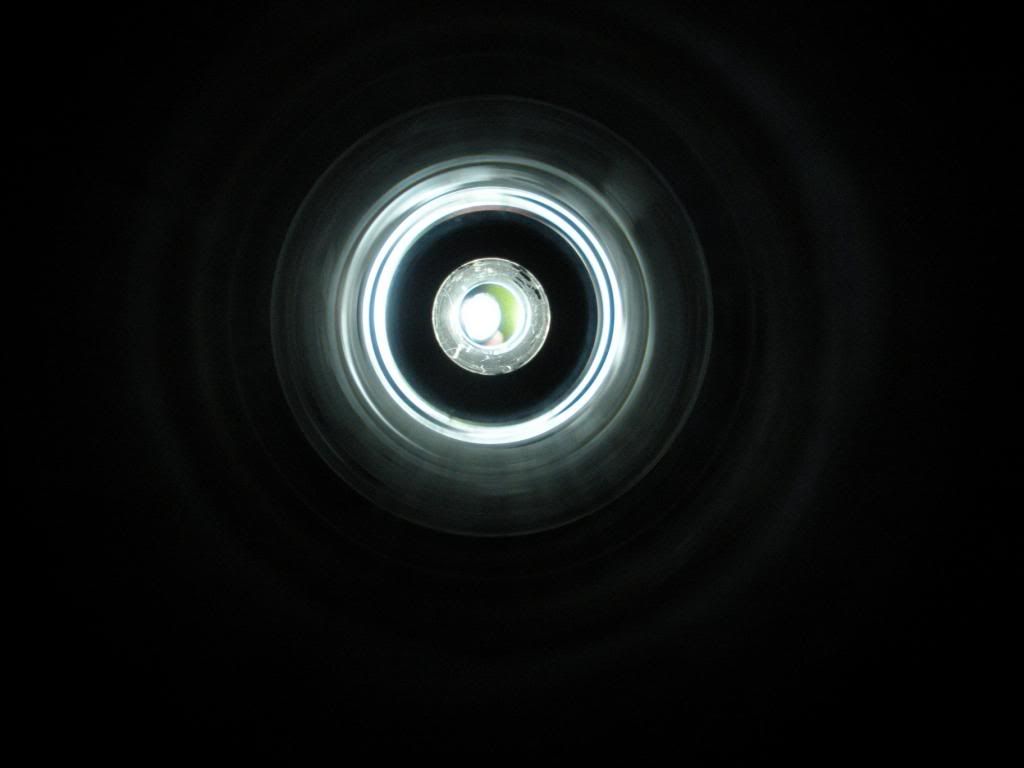 Put some new clean power steering fluid in a little cup or whatever you have laying around. I used a bottom of a ice tea bottle after rinsing it out. You will need it to coat some parts for reassembly. I use valvoline power steering fluid almost all the time since it is almost perfectly clear. Makes it easy to know when to flush the steering system out if the color gets darker. 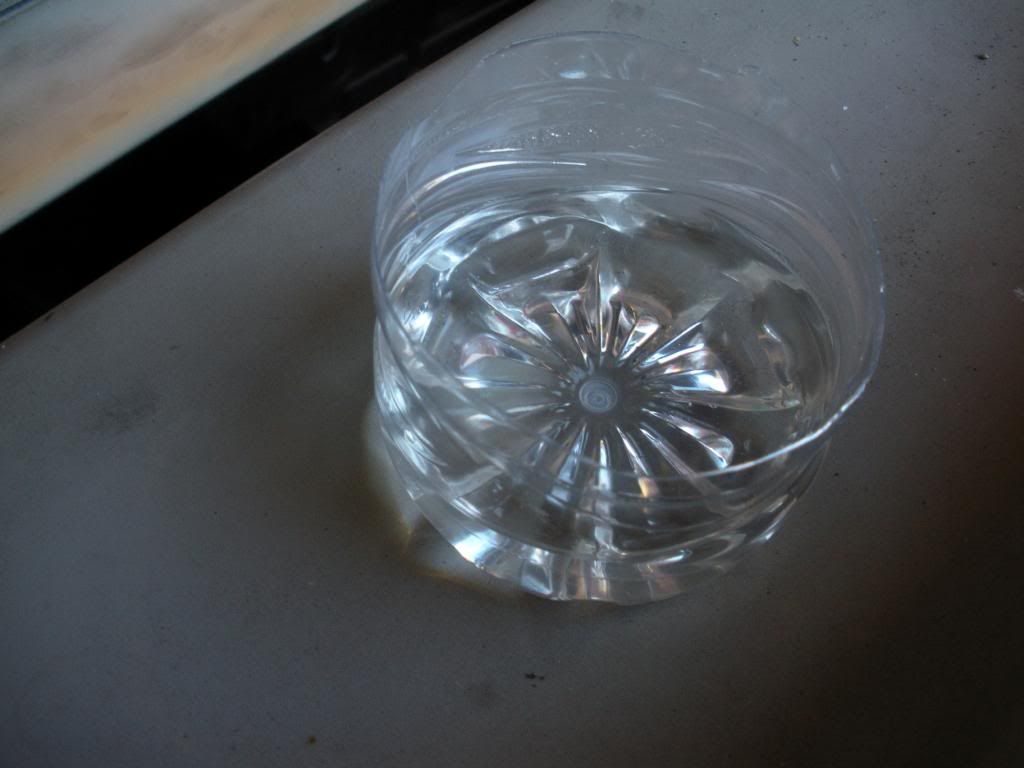 Now for assembly. The Factory Service Manual (FSM) says to use some tool to drive the washer and seal back into the bore of the tube. I don't have it and you don't need it anyways. Place theseal and washer on the rack like so. Lube it all up with power steering fluid so it's slippery. Not pictured at this time, but you should put the new piston seal on before you do this. It's the light blue seal in te picture of the kit. 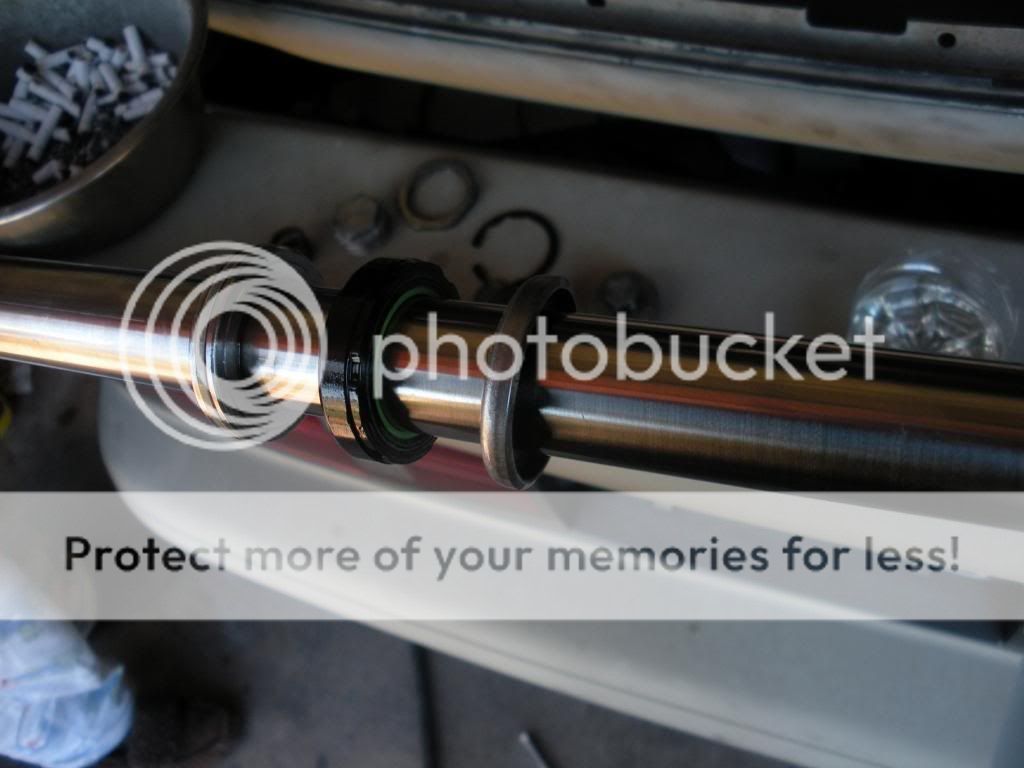 Once you get that in there, again use the rack as a slide hammer and drive the washer and seal into the end of the tube. It will make a different noise when it's seated. Also a quick not is to be sure you don't damage the new piston seal when your first aligning the rack in the tube. Even if it makes a mess use as mush power steering fluid as you need to to be sure that seal gets in there correctly. That and the tube seals (The black ones with the green plastic inside pieces) are the ones that do all the fluid sealing in the rack. If they are damaged you will simply have no power steering. Next install the tube seal and O-ring on the rack bushing and insert it into the tube. Push it down by hand as far as you can, doesn't matter much at this point. Of course lube it up with power steering fluid. 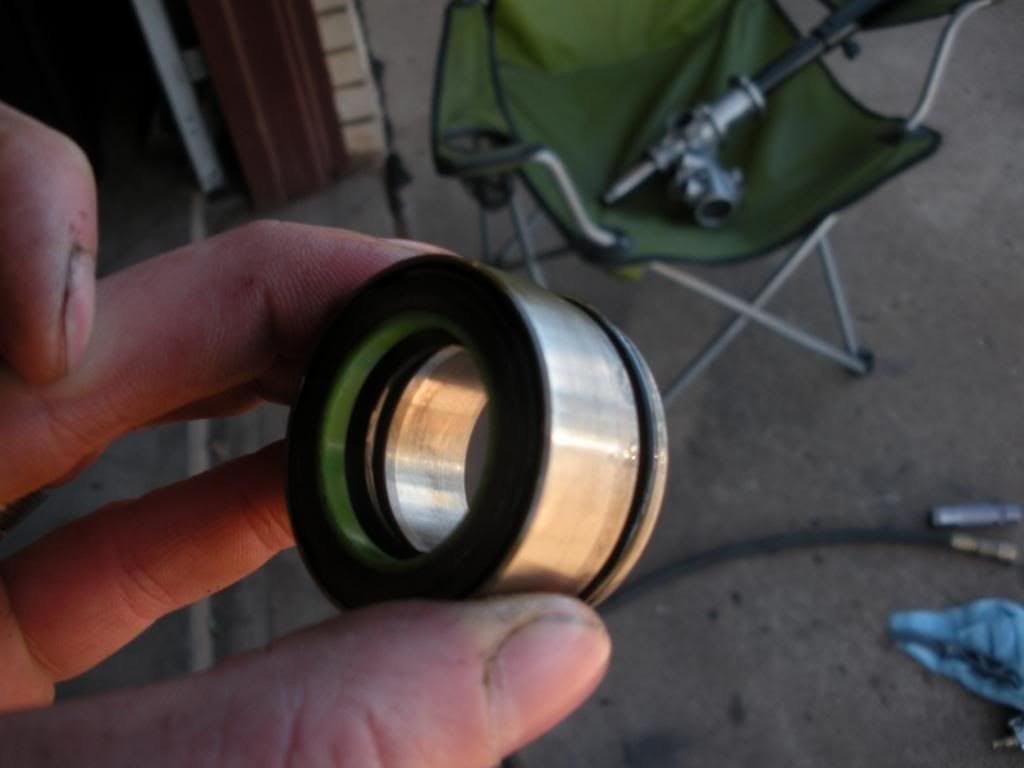 It goes in like this. 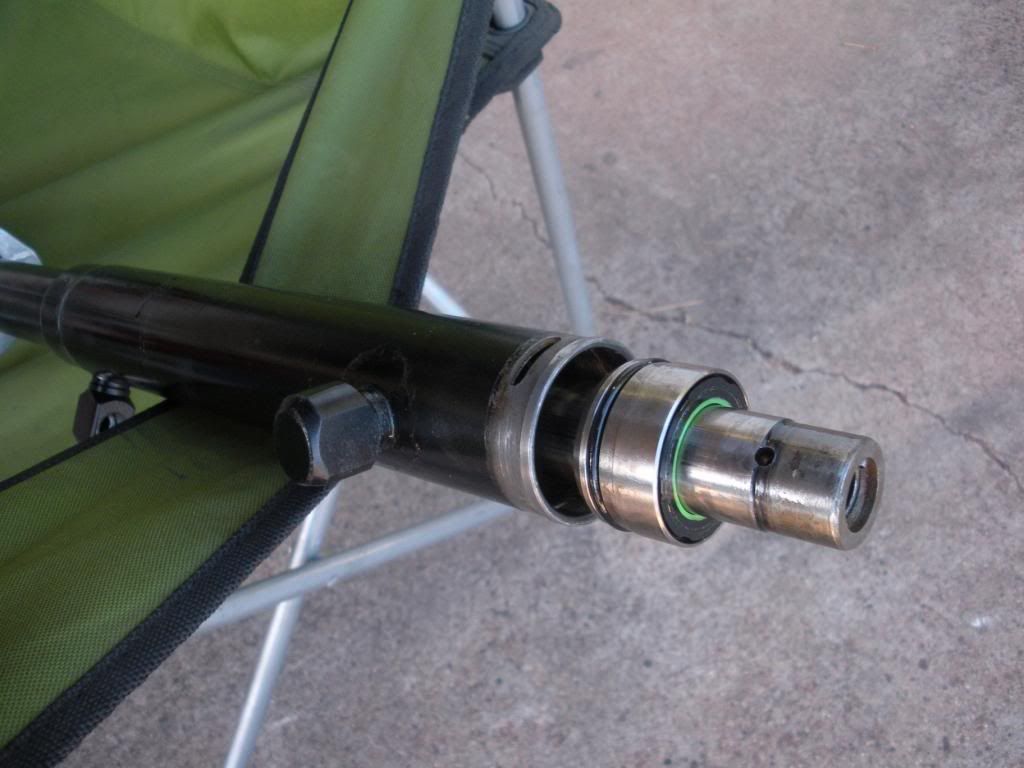 Next is the newly cleaned up rack stopper. It goes in like this. 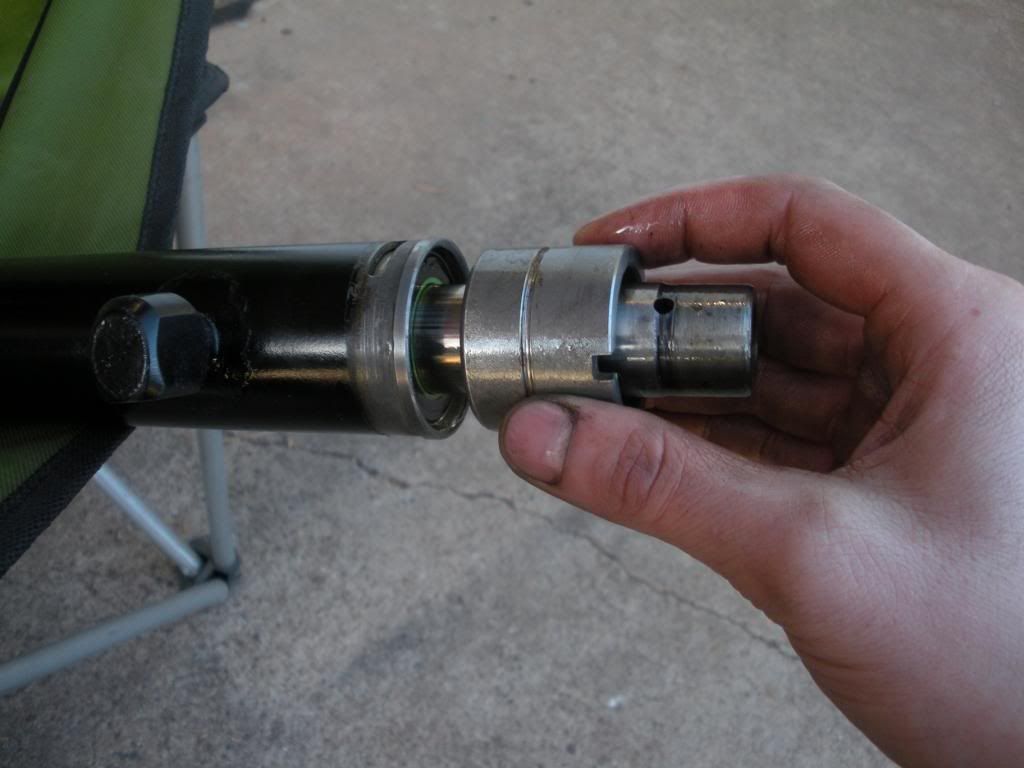 Use the rack stopper to push the rack bushing all the way down till the groove for the wire retainer is visible in the little window like this. 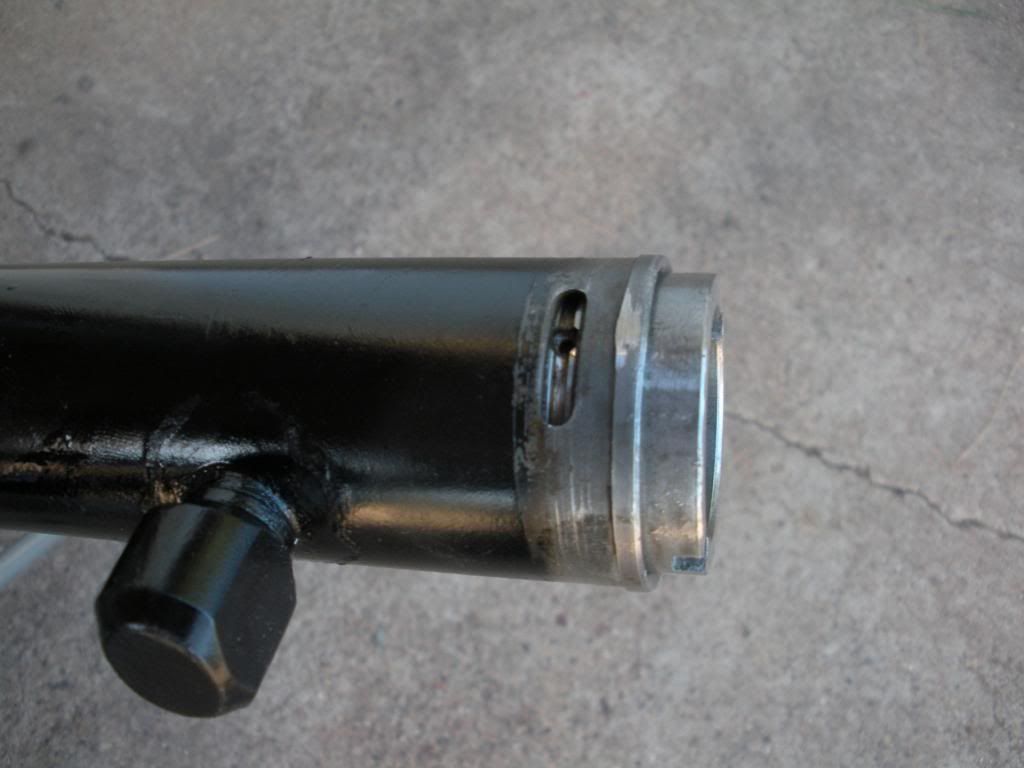 Put the new wire retainer's tail in the hole. 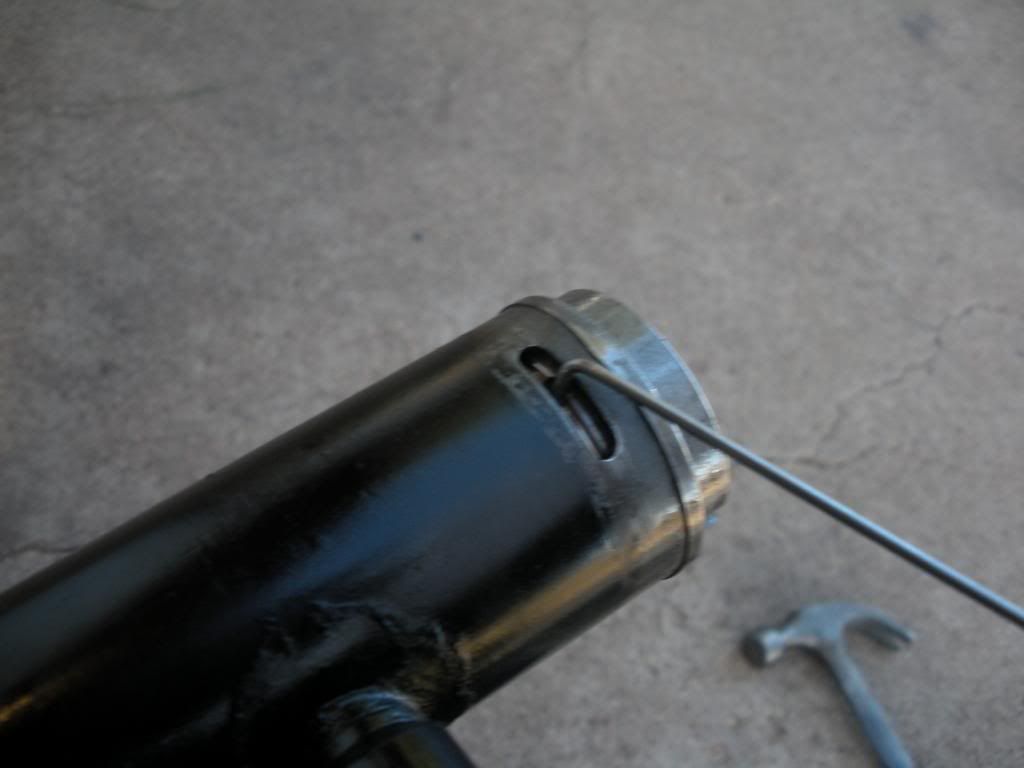 And rotate the rack stopper to feed the wire in.  Get the whole wire in like so. 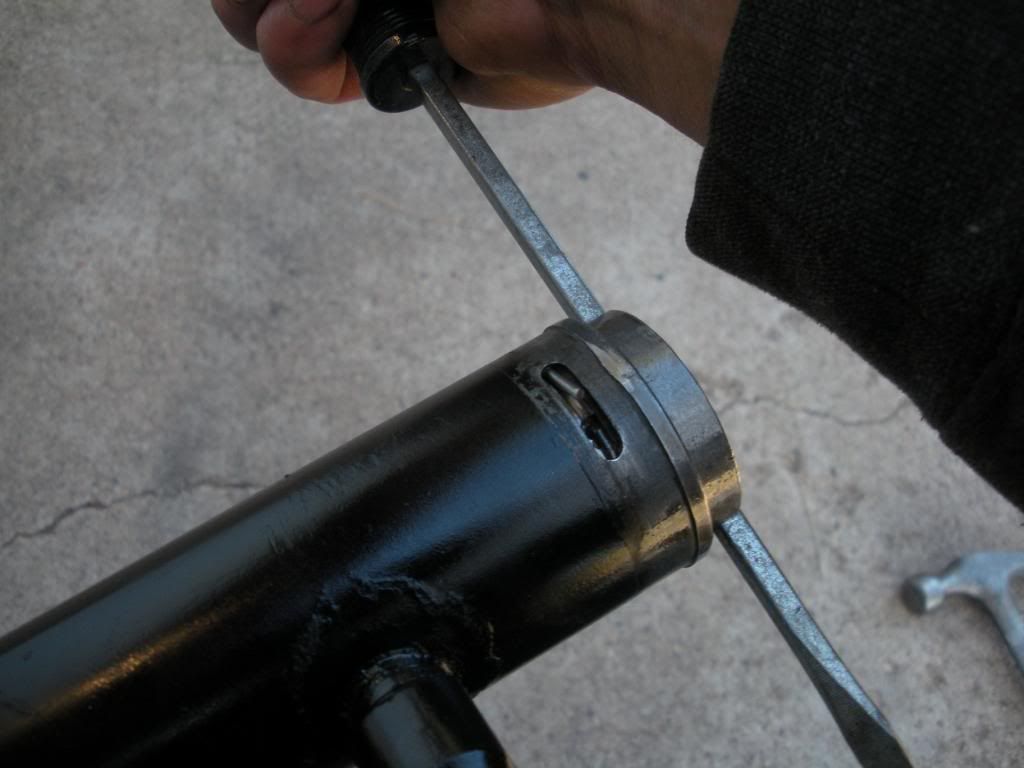 Then rotate the end 180 degrees so the ends are on the opposite side of the little window. 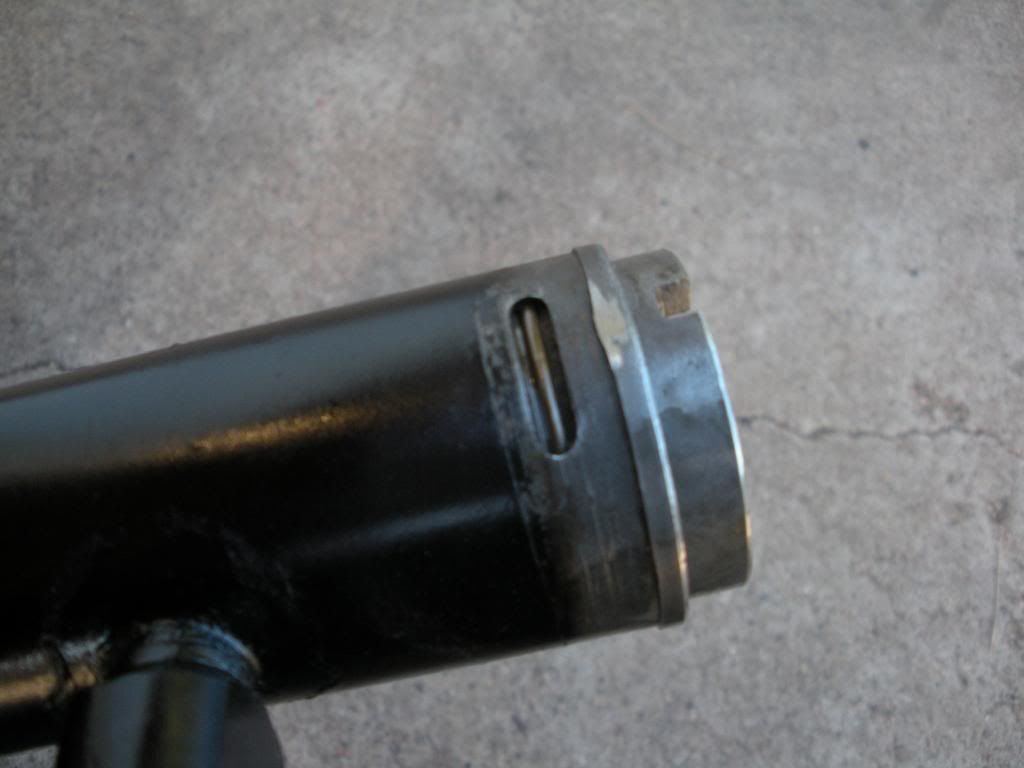 Now that you have the two tube seals and the piston installed. you can check and see if the assembly will more than likely work when you get it all assembled. If you move the rack back and forth in the tube you should easily hear and feel air being pushed out of one of the hard line ports on the tube when you go in one direction, and out the other in the other direction. You may hear suction as well which is normal. If you don't have that at this point then something is wrong. Disassemble it and figure out what happened before moving on. This doesn't guarantee the rack will work flawlessly, but if it can't do that at least at this point then something is terribly wrong. The only grease I use for this stuff, axles, joints, or whatever requires grease. again not only is it a good grease it has a very distinct color to start with, so it's easy to know when it's contaminated. 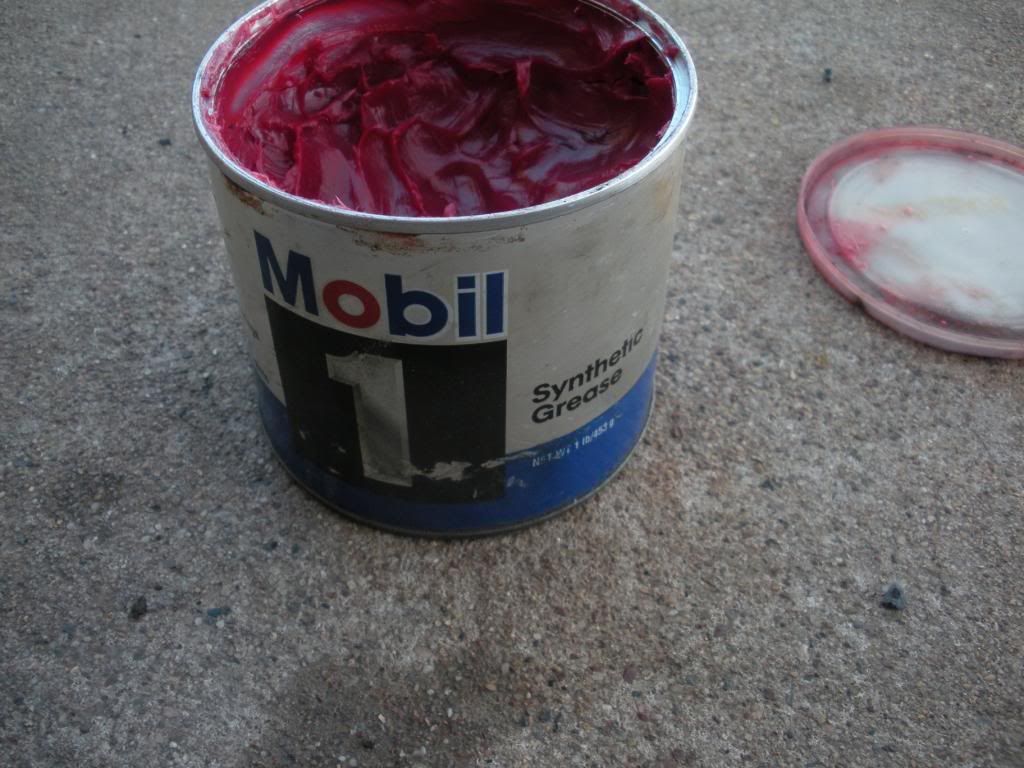
|
|
|
|
|
02-28-2013, 12:31 AM
|
#5 |
|
Rotary Fan in Training
Join Date: Nov 2012
Posts: 58
Rep Power: 14 |
Pack both side of the bearing with grease. Then drop it in the housing.
 Drive the bearing down with a socket that fits the outer edge of the bearing without getting stuck in the housing. 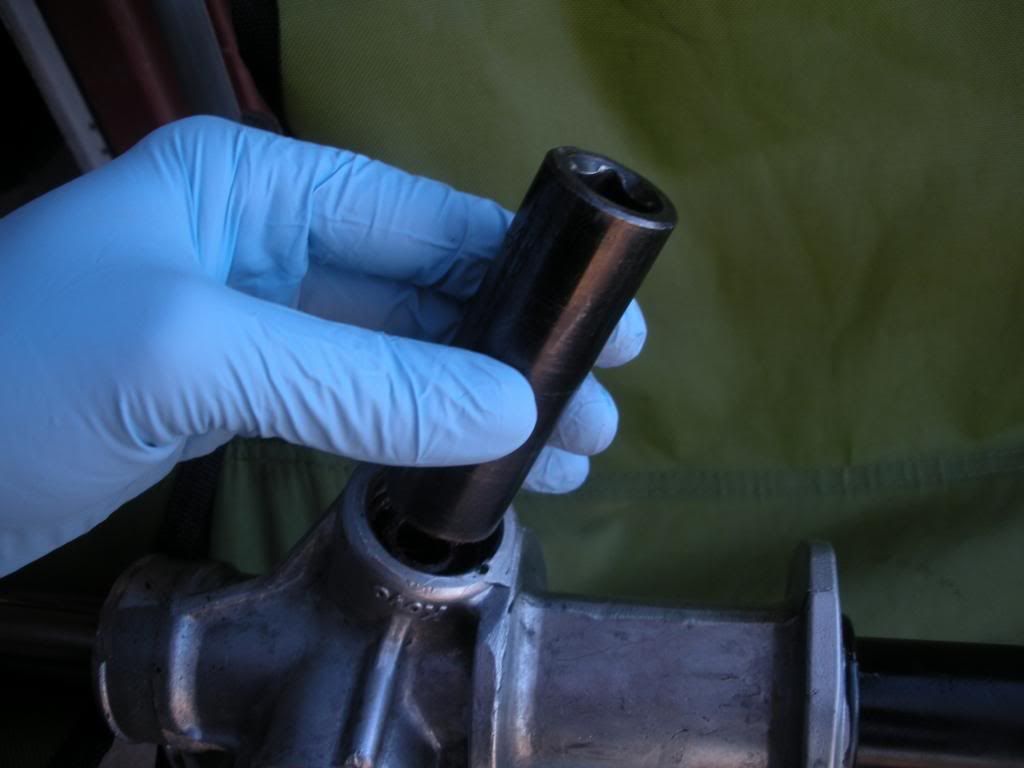 Spin the rack so the "teeth" face away from this hole. 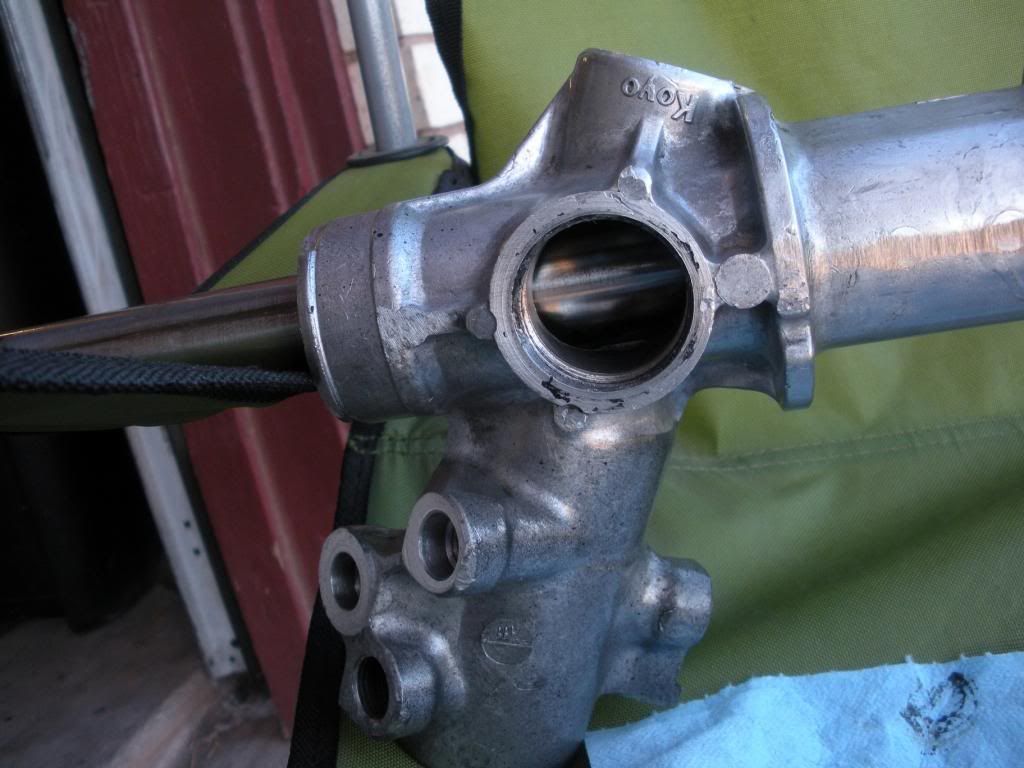 Time to replace all the seals on the control valve assembly. 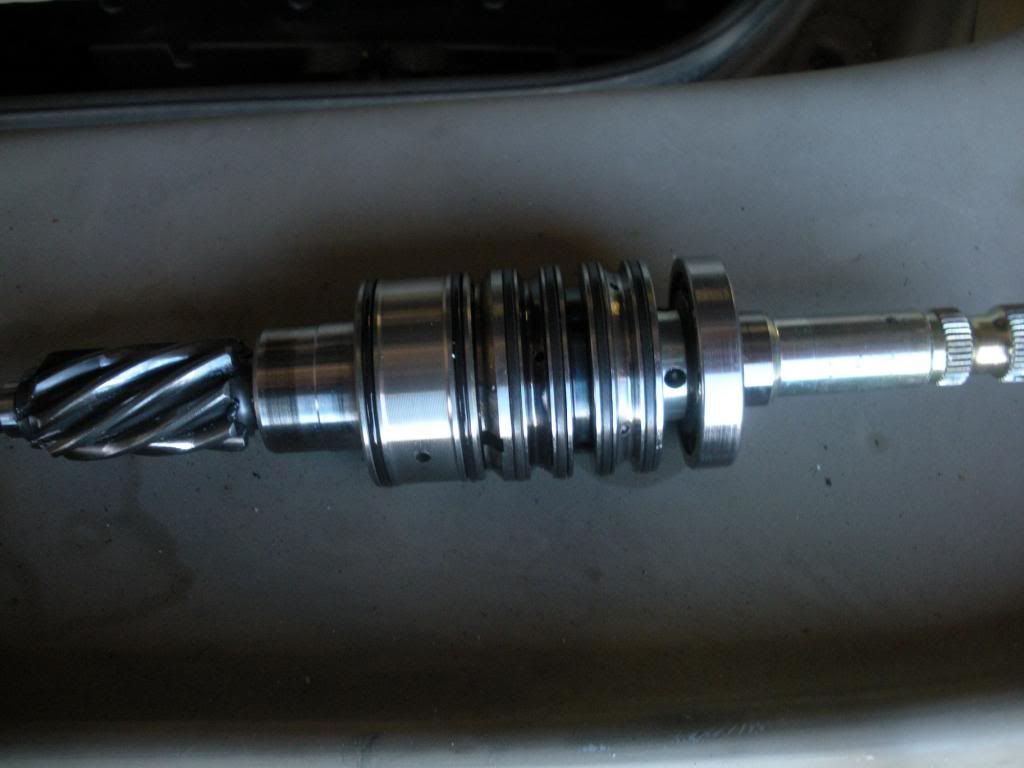 Slide the plunger off the control valve assembly. Take note of teh direction it goes on. One side has a step and taper.  No picture but remove the O-rings from the plunger and install the new ones, power steering fluid for lubricant. Remove the four old O-rings from the control valve assembly. Use something sharp like this dope Gerber pocket knife 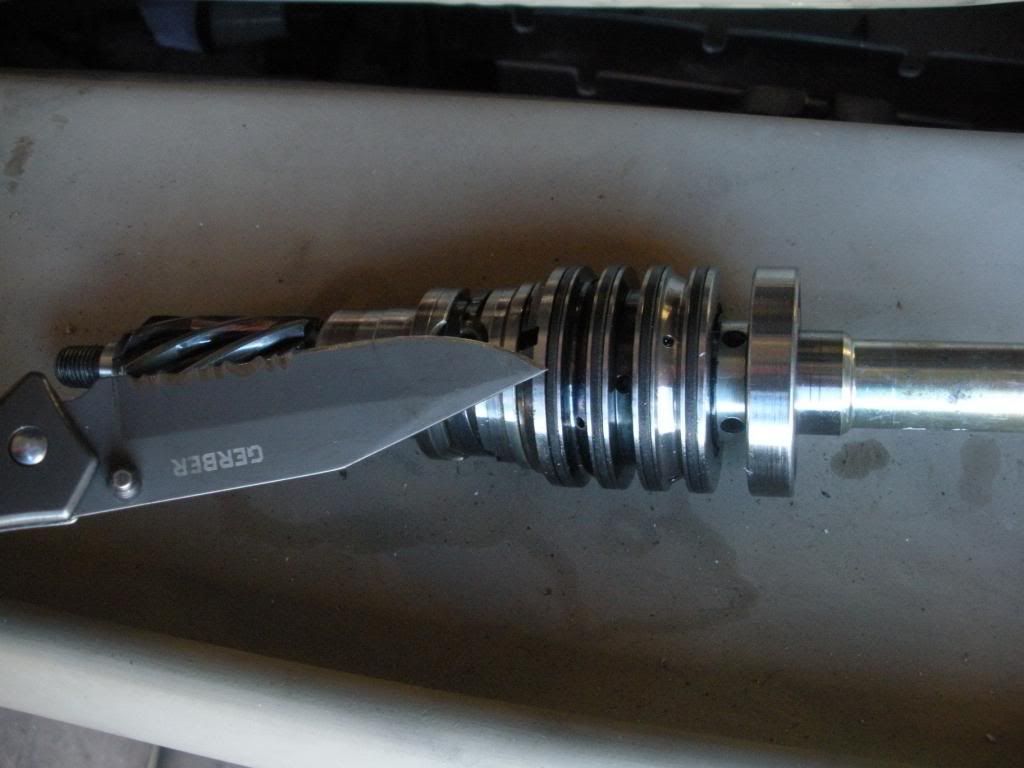 When you install the new O-rings for the control valve assembly put them on one at a time from the gear side. Install the first one then the second one will pass over the first, then the third will pass over the first and second and so on. Use lots of power steering fluid, take caution these O-rings are not super flexible, don't break them! Patience goes a long way here. 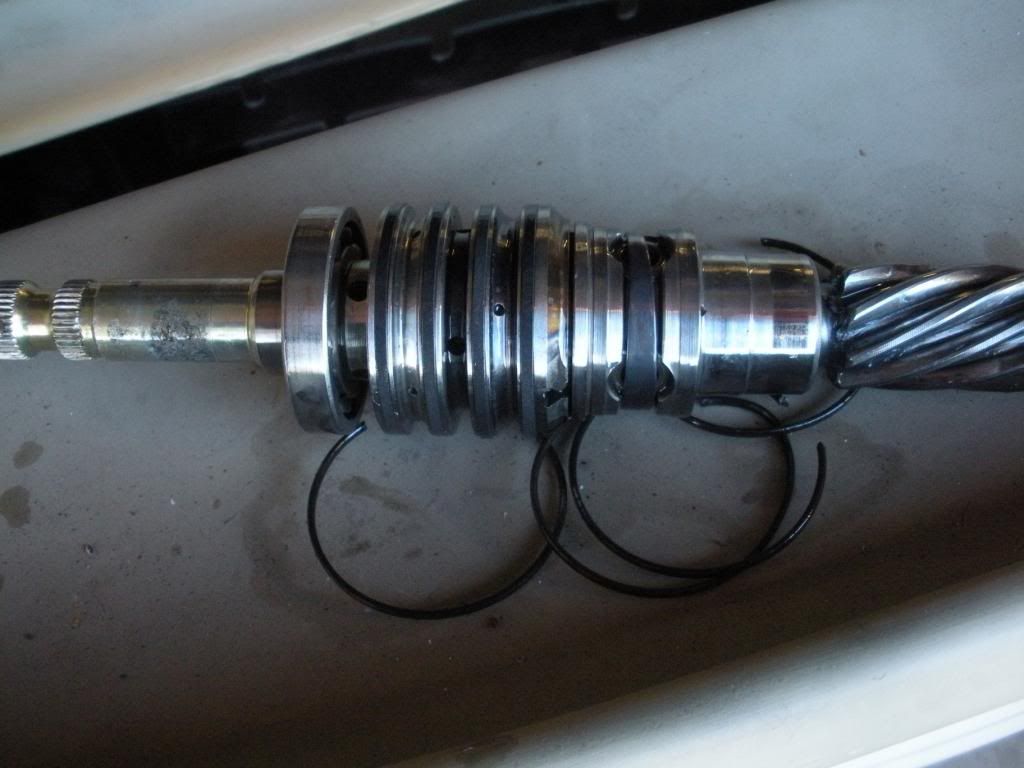 Slide the plunger back on. 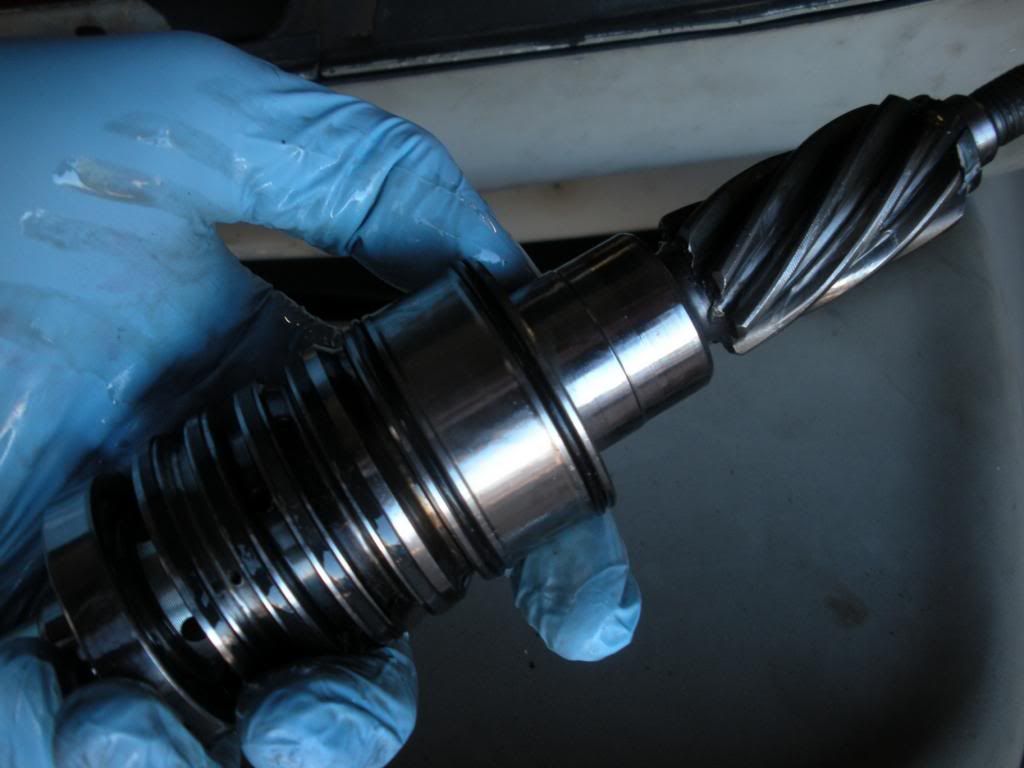 A quick side note on the bearing that's on the control valve assembly (The pressed on one) Check it for free play but don't attempt to remove it unless you are replacing it. Install the new bottom oil seal like this. 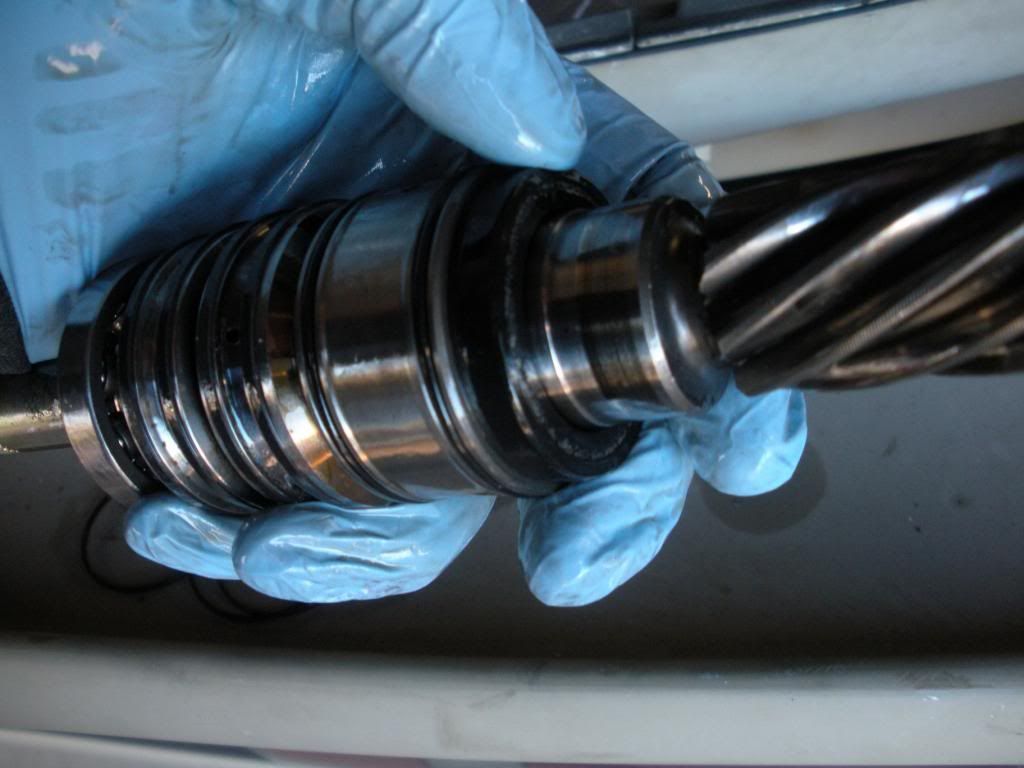 Grease it up like this. Don't grease anything above the bottom oil seal. That's powersteering fluidville silly. don't be scared to stuff some grease down in the pinion housing on the roller bearing and all that way down there if you want. You can't really have too much grease.  Stick it in there. tap it with a hammer a couple times to seat it. remember the pinion gear has to mesh with the rack teeth so be sure that's happening before you go hammering around everywhere. You maye need to spin the rack or the pinion or both to get it aligned. It doesn't matter where it starts at. just put it in there. 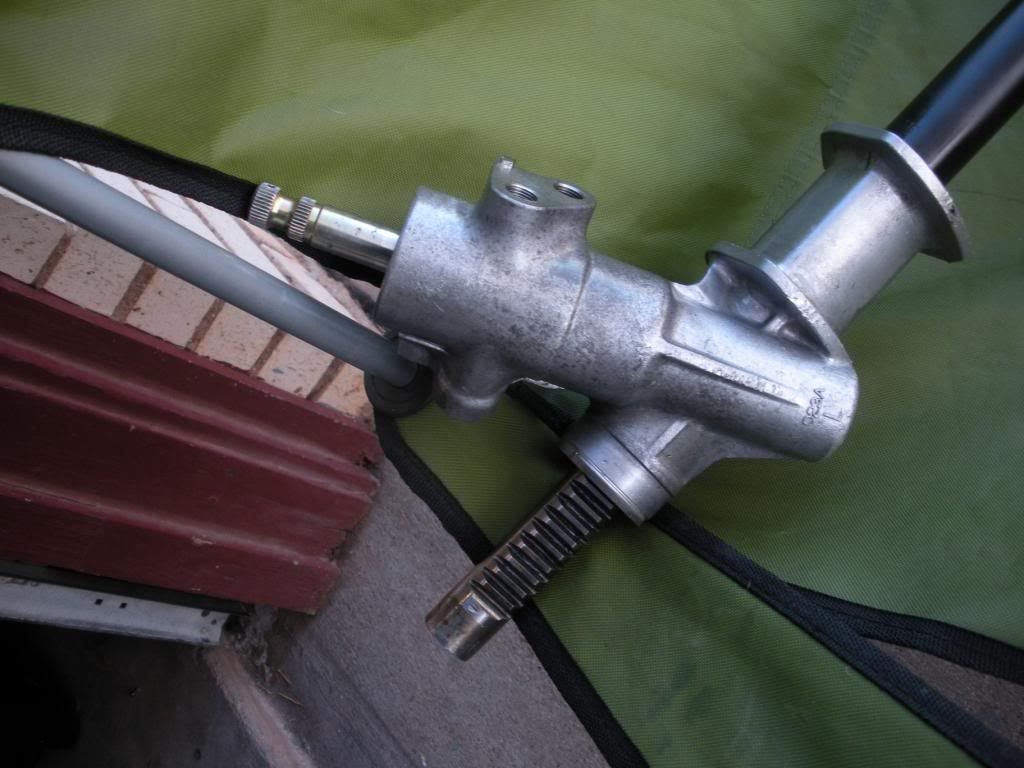 Should look something like this on the bearing side.  Put the new lock nut on. 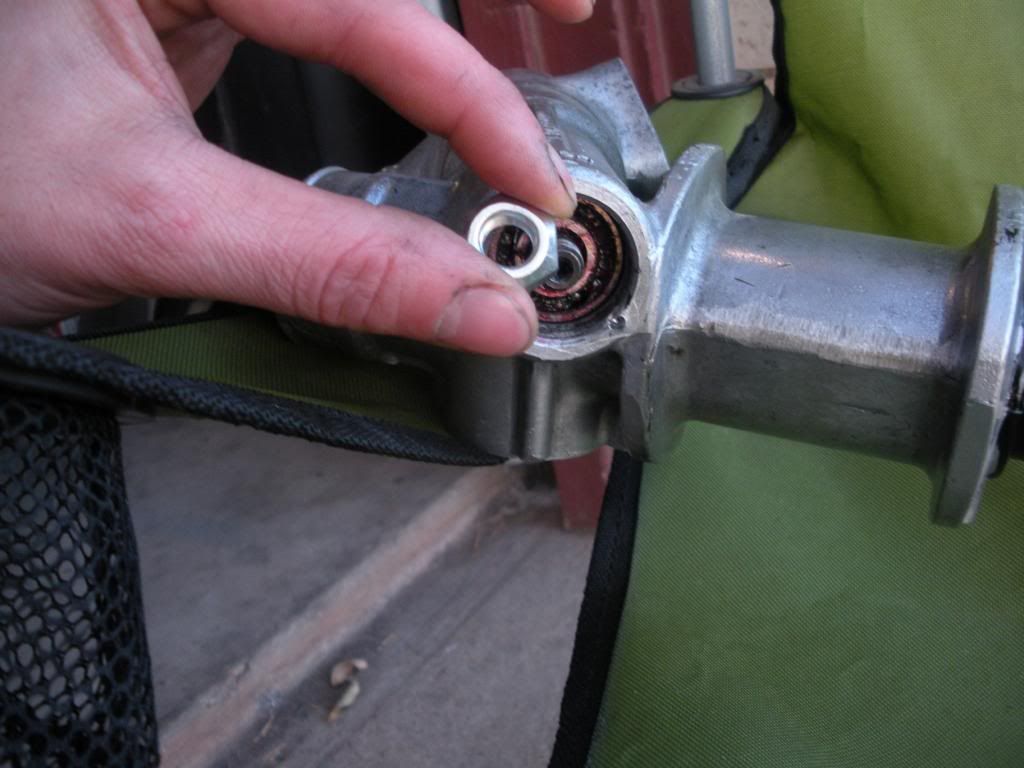 Torque it to 22lbft. 17mm btw. use a vise grip to hold the top of teh pinion while torquing. It will be easy, 22lbft is not very tight. 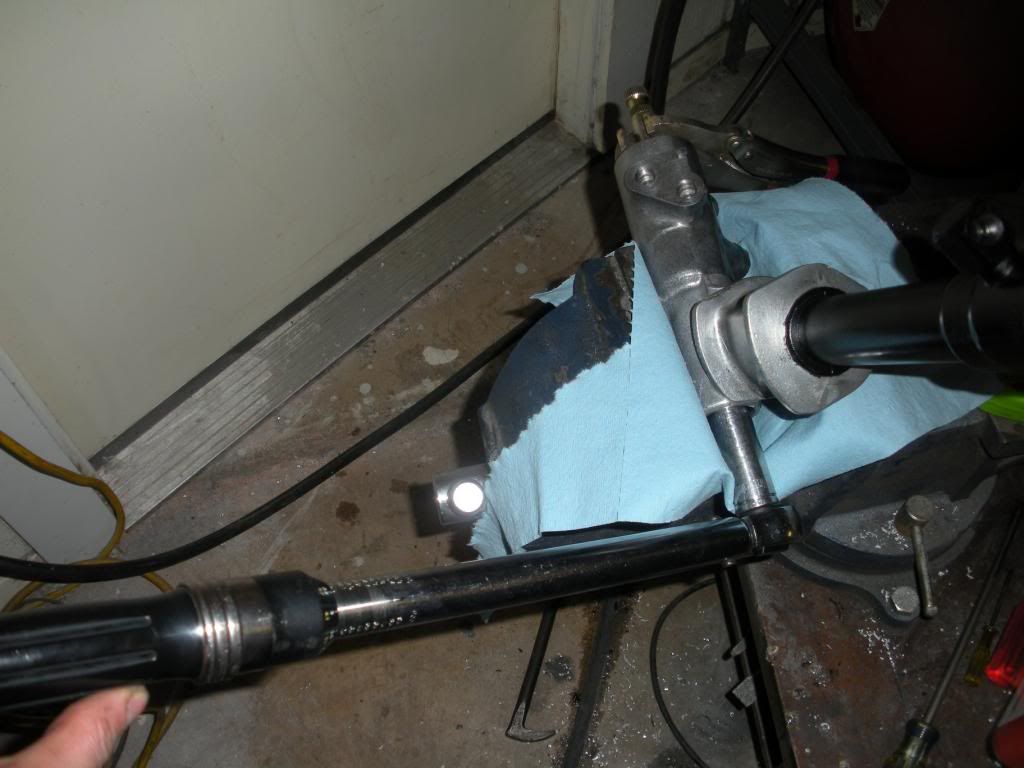 Install the pinion plug. Torque to I think it was 36-50lbft, i went with 45. I also used a bit of red loctite on the threads, since I planned to not restake the aluminium on the housing. If you use loctite you may need to heat teh housing with a propane torch to remove this plug in the future. Or use an impact gun. 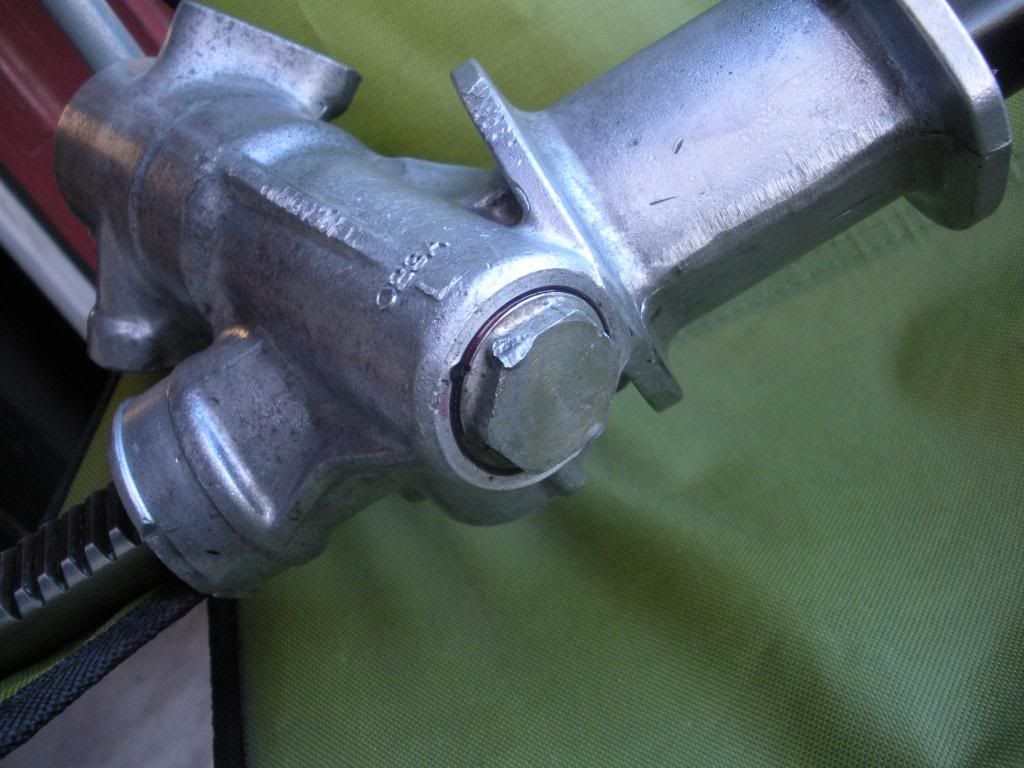
|
|
|
|
|
02-28-2013, 12:52 AM
|
#6 |
|
Rotary Fan in Training
Join Date: Nov 2012
Posts: 58
Rep Power: 14 |
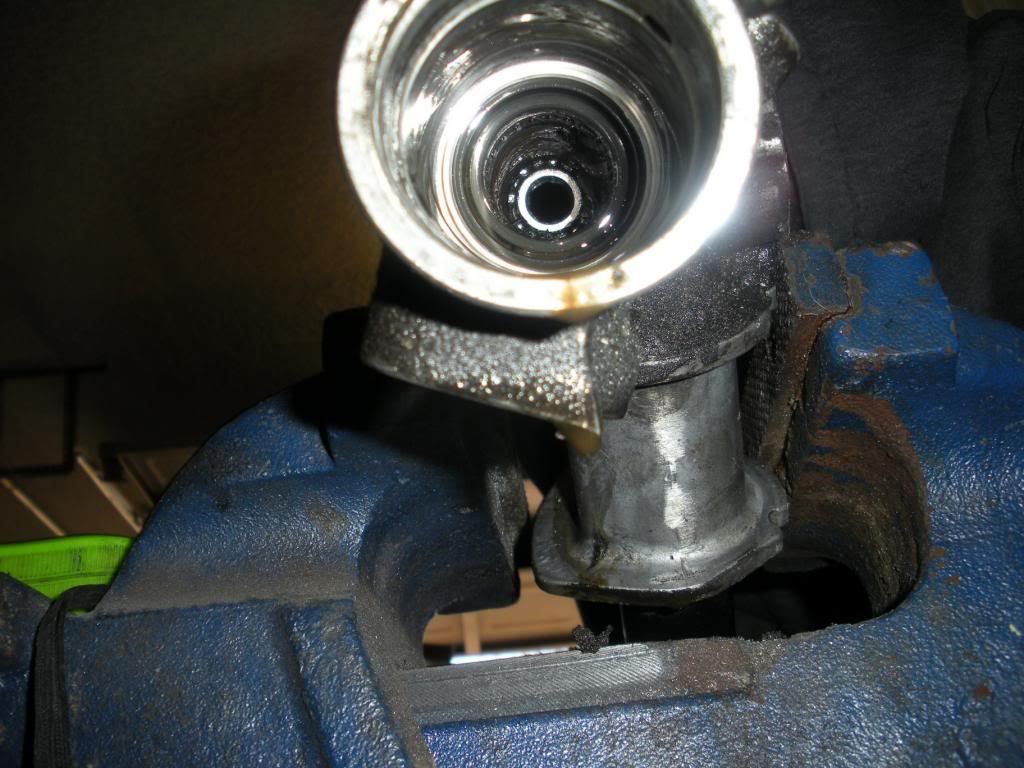
Back at the top of the pinion you should be looking at this.
 Install the new top oil seal. I DON'T KNOW IF IT FITS BUT DON'T ACCIDENTALLY INSTALL THE DUST COVER AT THIS POINT! The dust cover does not have metal showing on the top side. Taht's the best description I can give you. 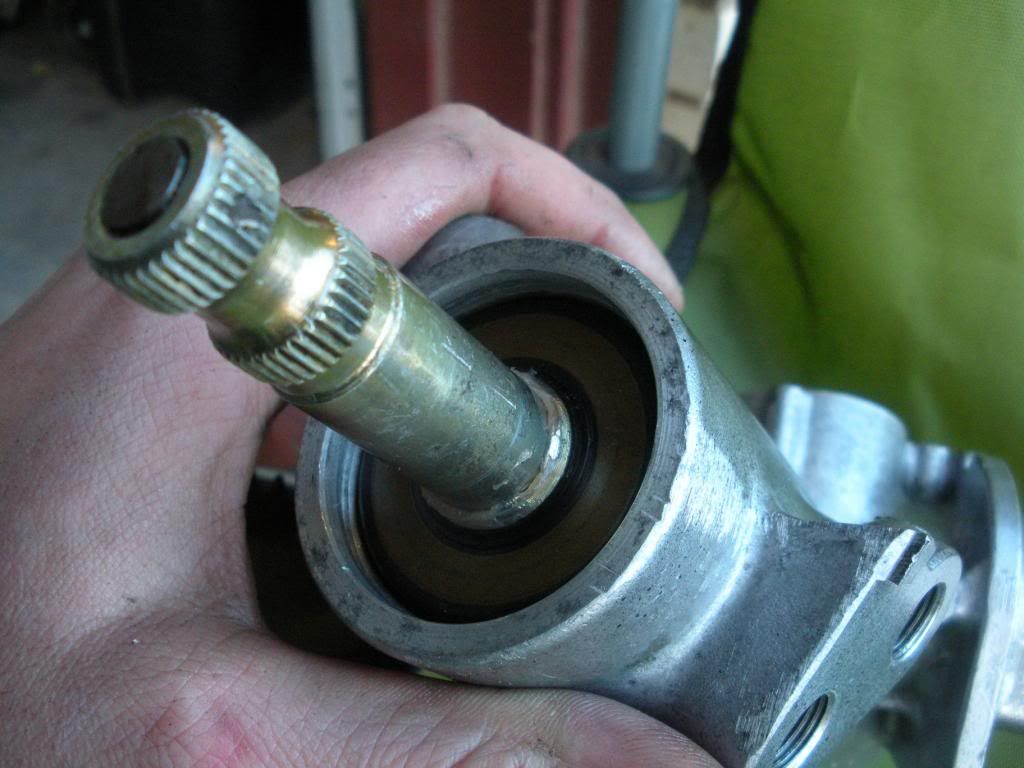 Snap ring is next. 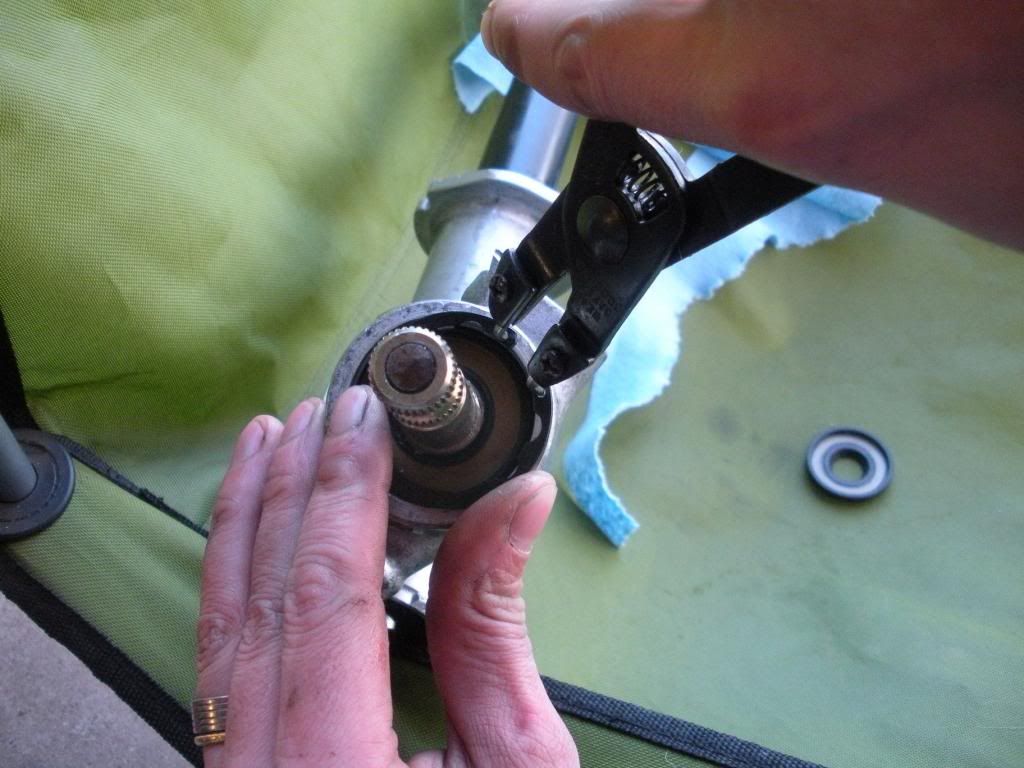 Make sure the snap ring is seated and expanded like this. 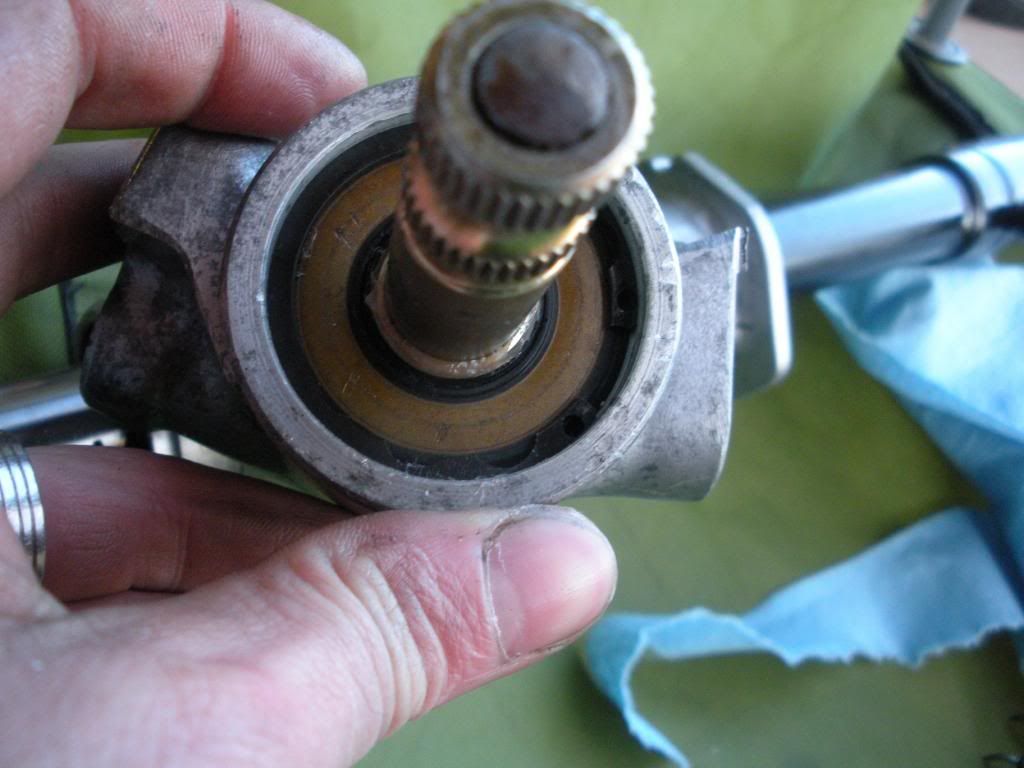 Now install the new dust cover. 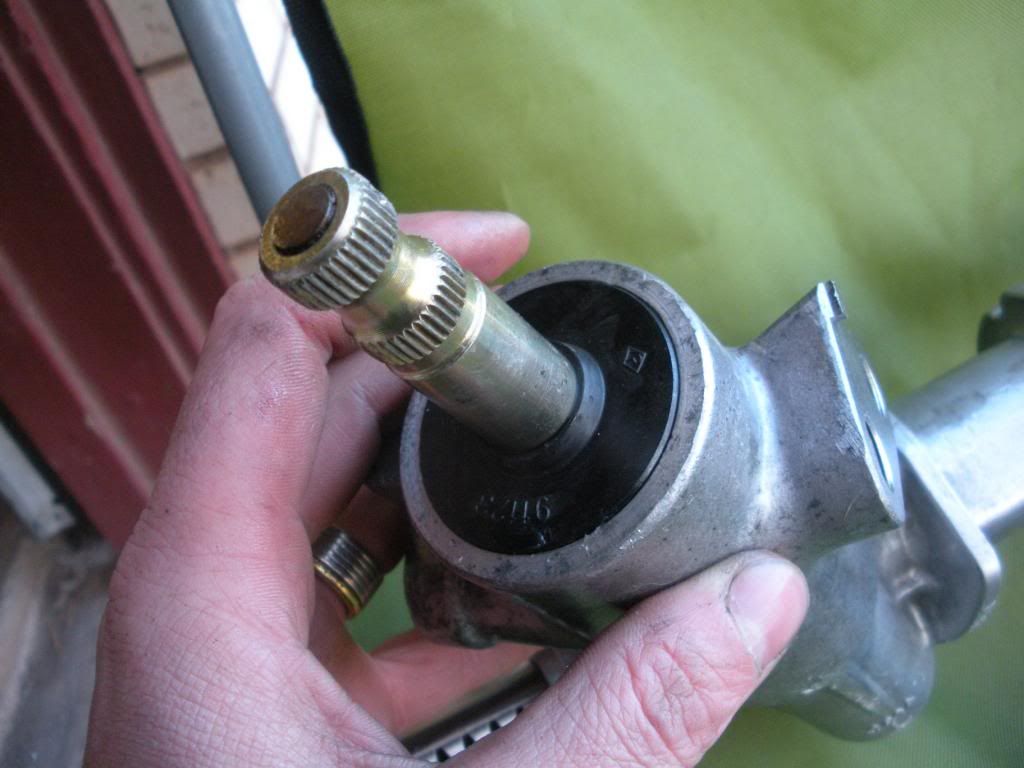 MOAR Grease! 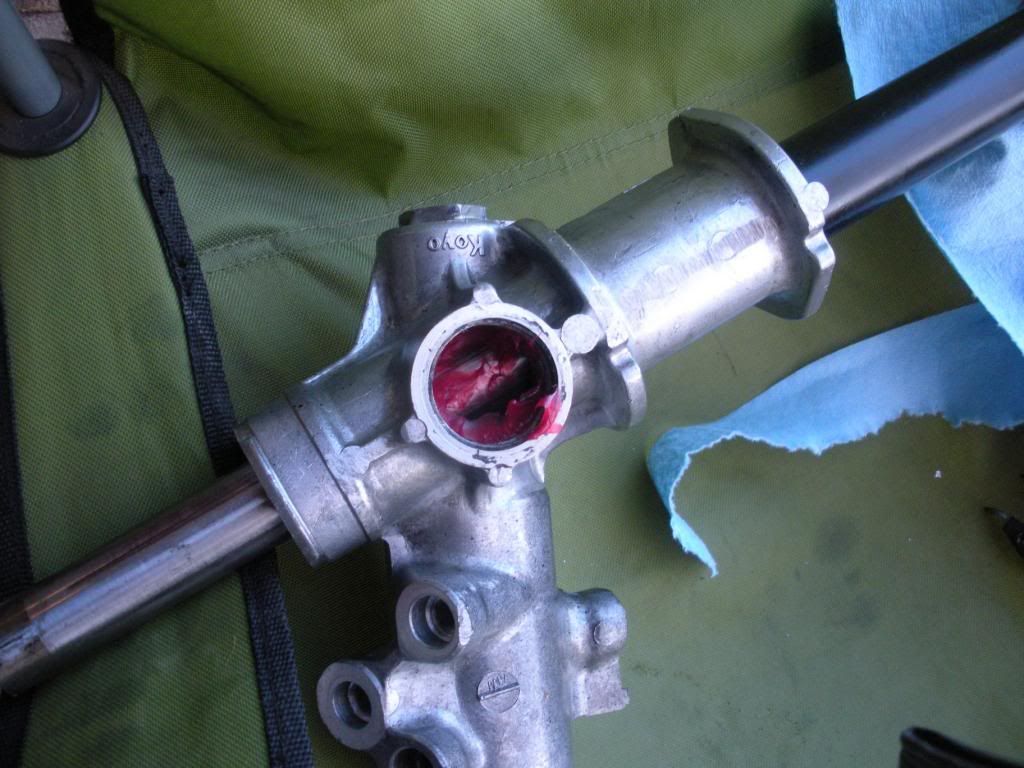 Grease the rack support too. I mean why not? 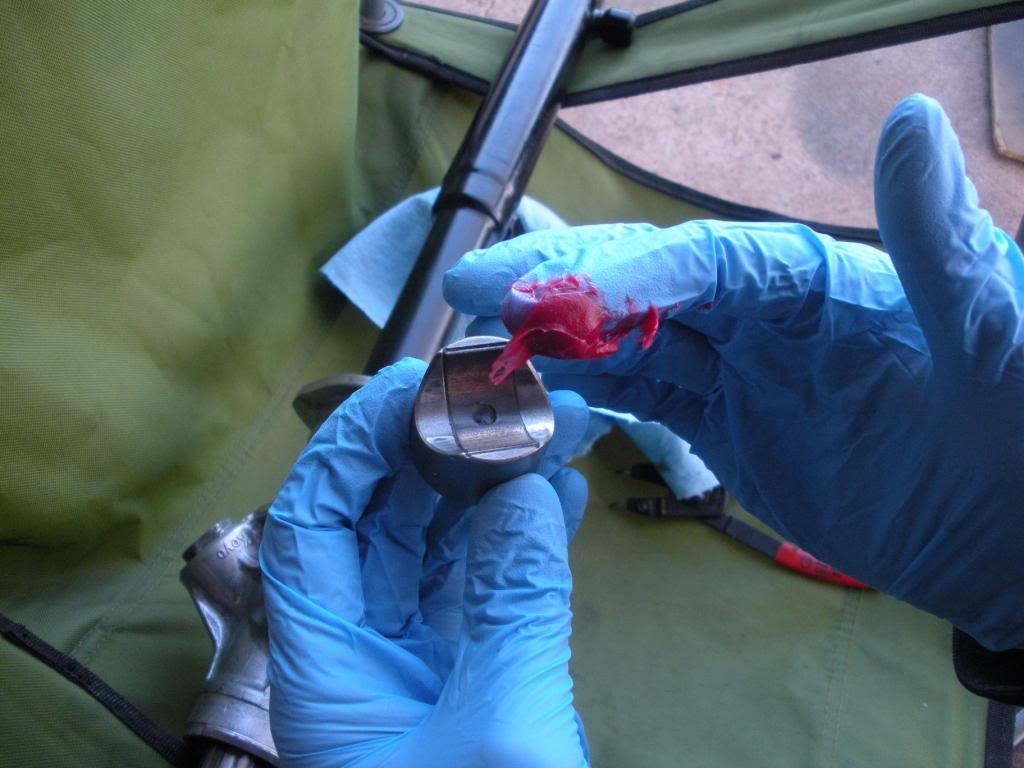 I grease the spring just a little so it doesn't bind. Install that in the backside of the rack support. 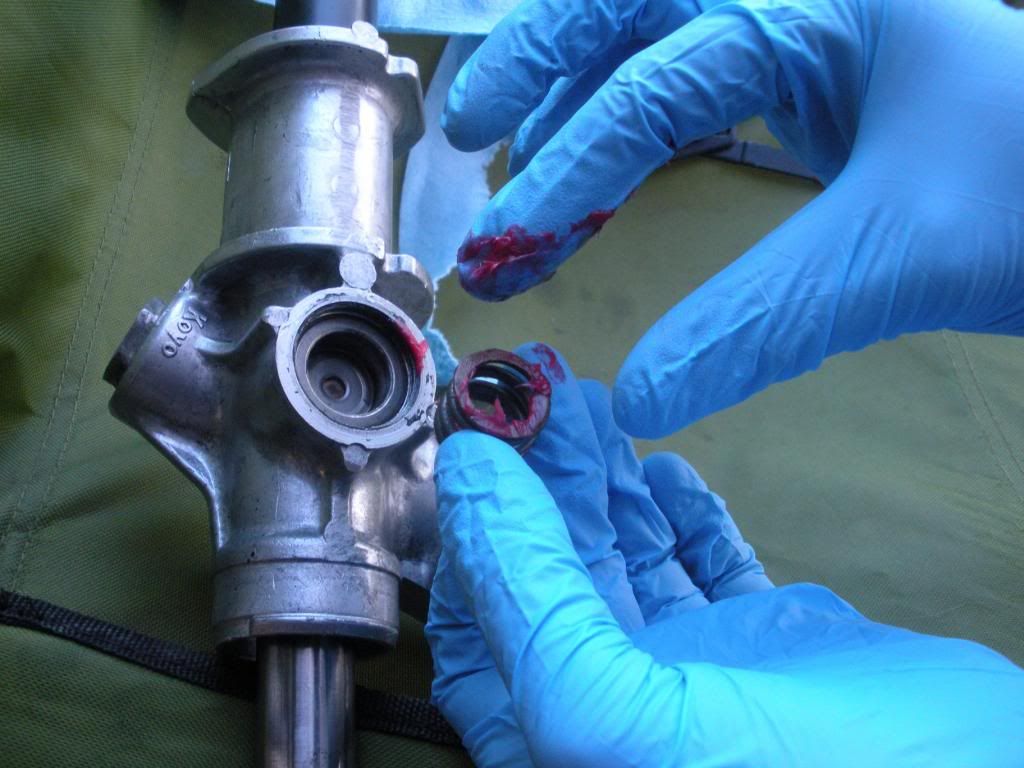 Next install the yoke plug. you do have to push down a bit while attempting to thread it. Don't cross thread this or your rack and pinion will be trash. Just put it in like a couple turns for now. 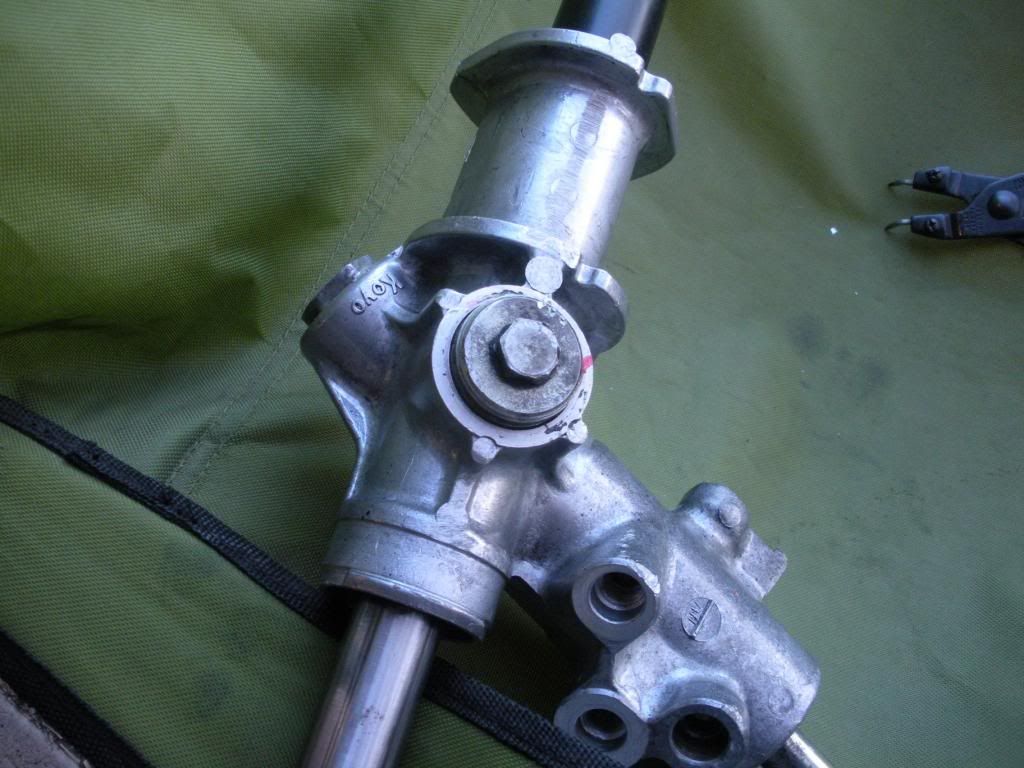 See that down in there? Needs grease! 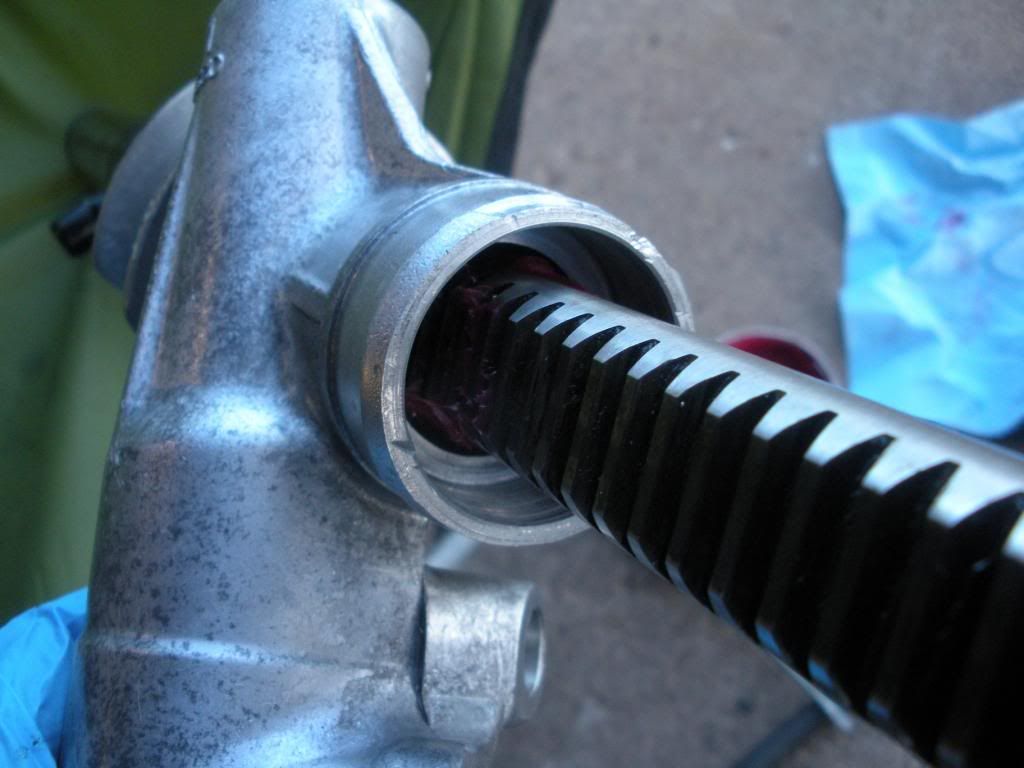 Don't be scared, load that sucker up! Remember you can slide the rack back and forth a couple times and get grease way down in there. 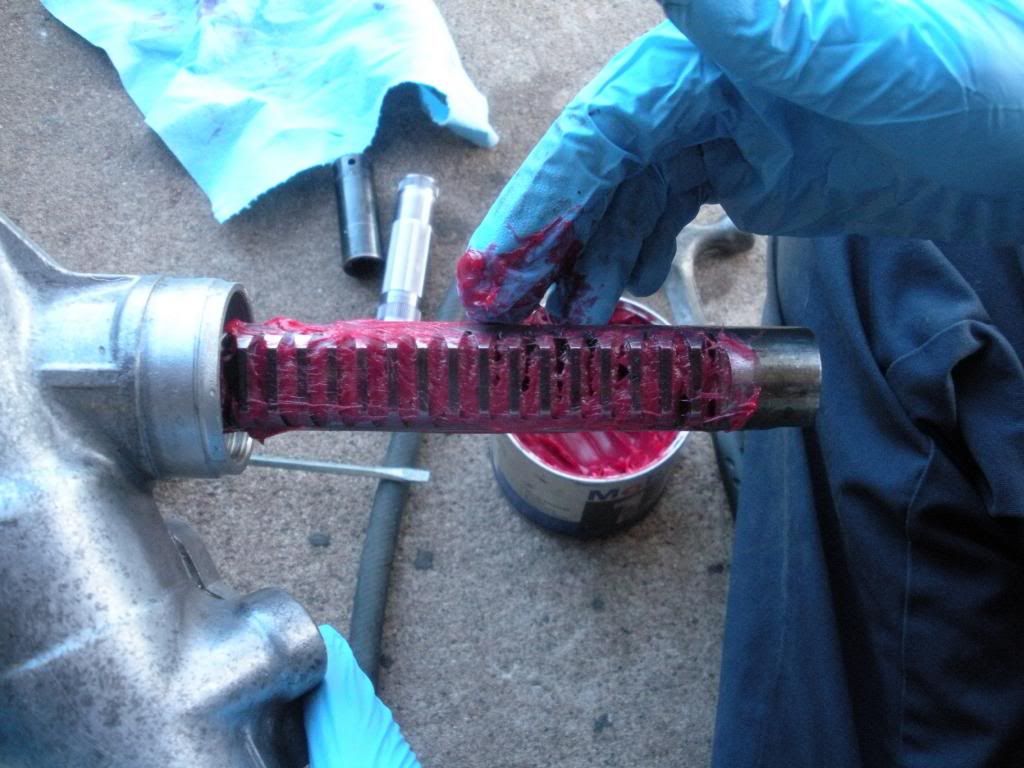 It's important to note that the rack and pinion is divided in three sections as far as lubricants go. The tube: Has powersteering fluid only in it. The aluminium part with the gears and the lower bearing has only grease in it. The aluminium part at the top between the lower and upper oil seals has power steering fluid in it. If there is power steering fluid in teh part where the grease goes then there is something wrong. That's why the two hardlines are external between teh tube and the upper pinion area. To keep power steering fluid where power steering fluid goes and grease where grease goes. Hopefully that will help make sense of this contraption. I put a little loctite on the lock nut for the yoke plug. 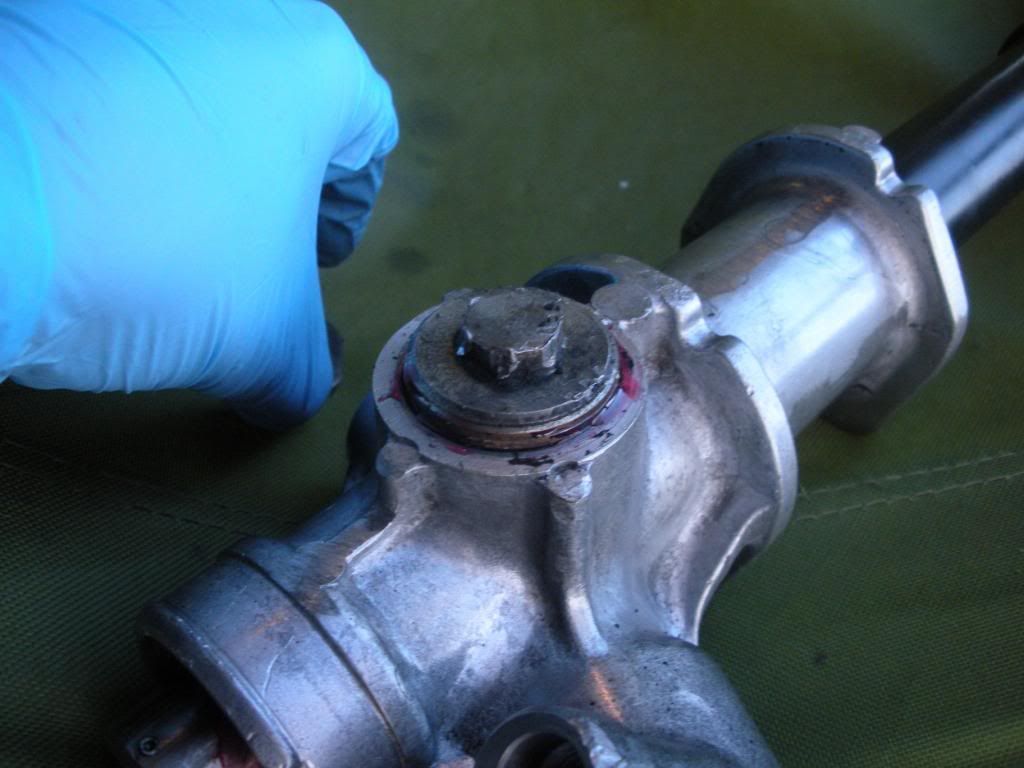 The FSM says to tighten the yoke plug all the way down (14mm btw) and then back it off 25-35 degrees of rotation. Then install the locknut and be sure you hold the yoke plug still at the same time. There's a special tool but a big crescent wrench and a 14mmm wrench will do the job just fine. I actually used channel locks since I couldn't find my big cresent wrench. I know those two pieces on mine look super boot leg. Luckily they face up on FC racks so I can just order them from Mazda new and install them whenever. 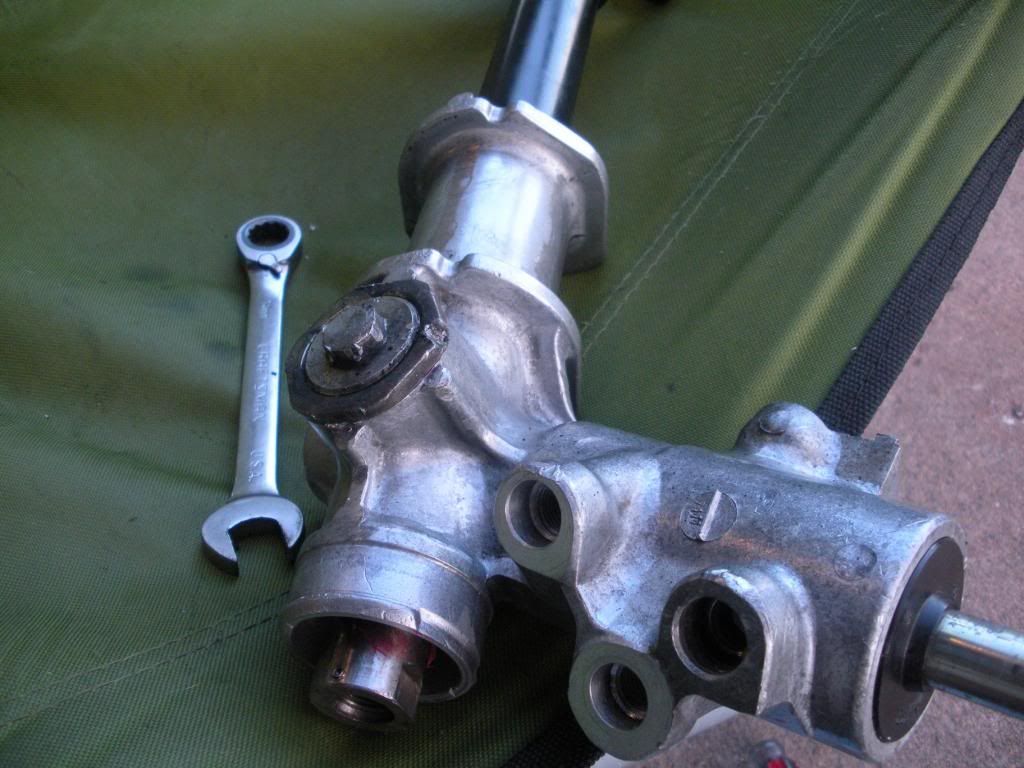 SUPER IMPORTANT NOTE FOR DE-POWERING THE RACK GUYS!!!! That adjustment right there directly effects your steering effort. you can't set it too loose or the rack will eat the housing up but you can loosen it up a little bit. I'm sorry i don't have an angle to give you to back it off to but just play with it on car a bit and see what you like. Basically you don't want to be able to wobble the rack in the housing much at all. If you really grease everything up good you can get away with a bit more than usual. I've done this in the past on Honda racks and had no issue whatsoever even after driving the car for 5+ years. OK back to the power steering stuff. |
|
|
|
|
02-28-2013, 01:04 AM
|
#7 |
|
Rotary Fan in Training
Join Date: Nov 2012
Posts: 58
Rep Power: 14 |
Next i installed the new rack and pinion bushings.
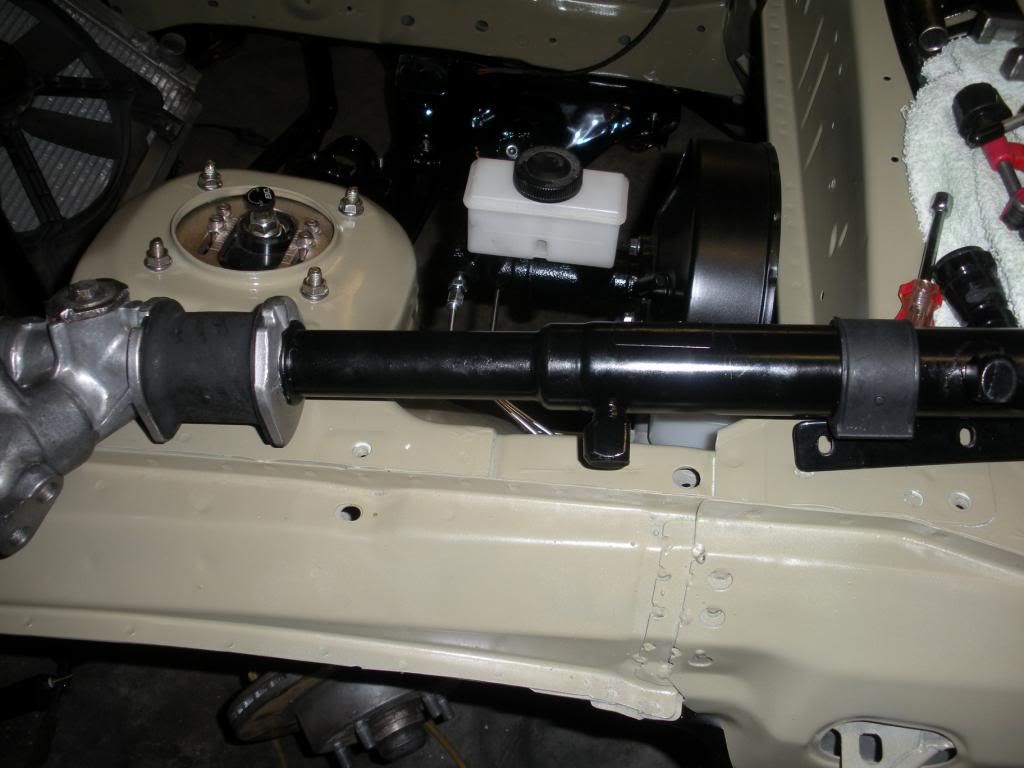 Set the rack in place 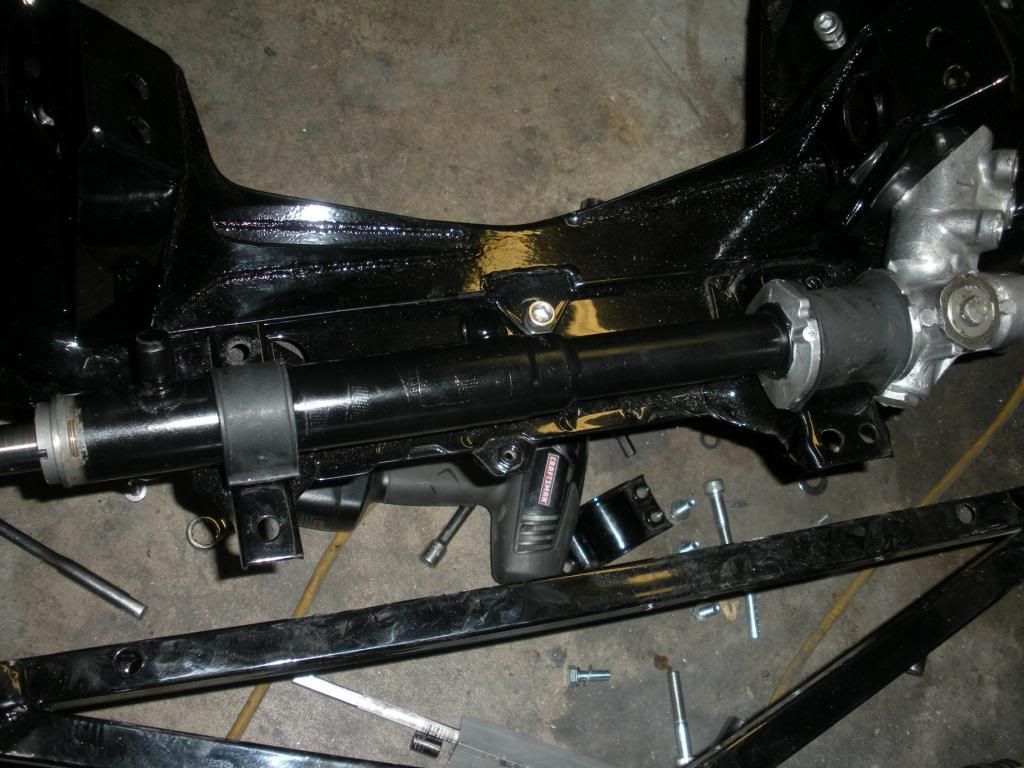 Started all the hardware by hand before tightening and of the clamps down on the tube. Then snugged them up. 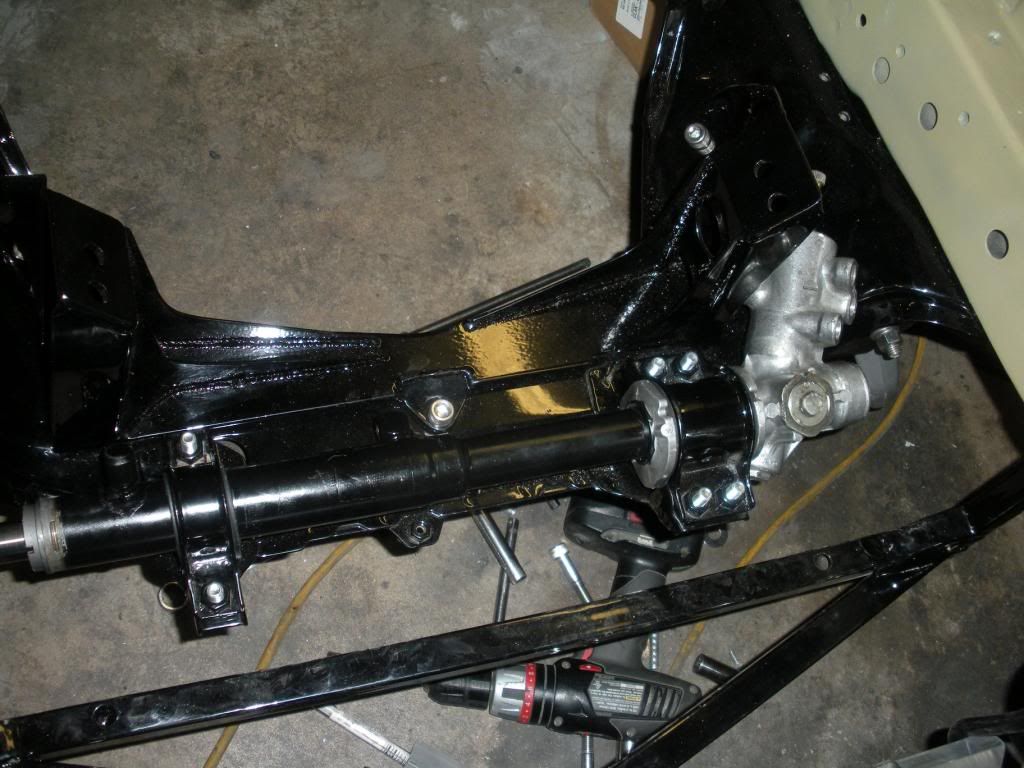 Here's Aeroquip's part number for the rack output if you want to make it into a -6AN jam like I needed. 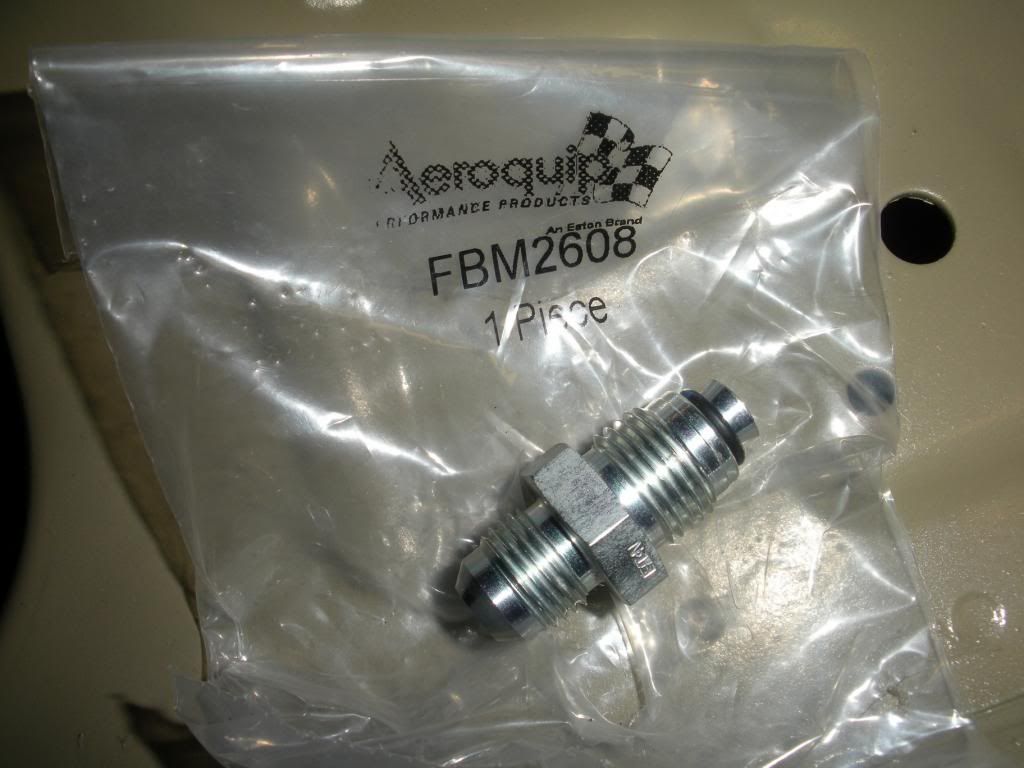 That's what it looks like installed. in case it matters :/ 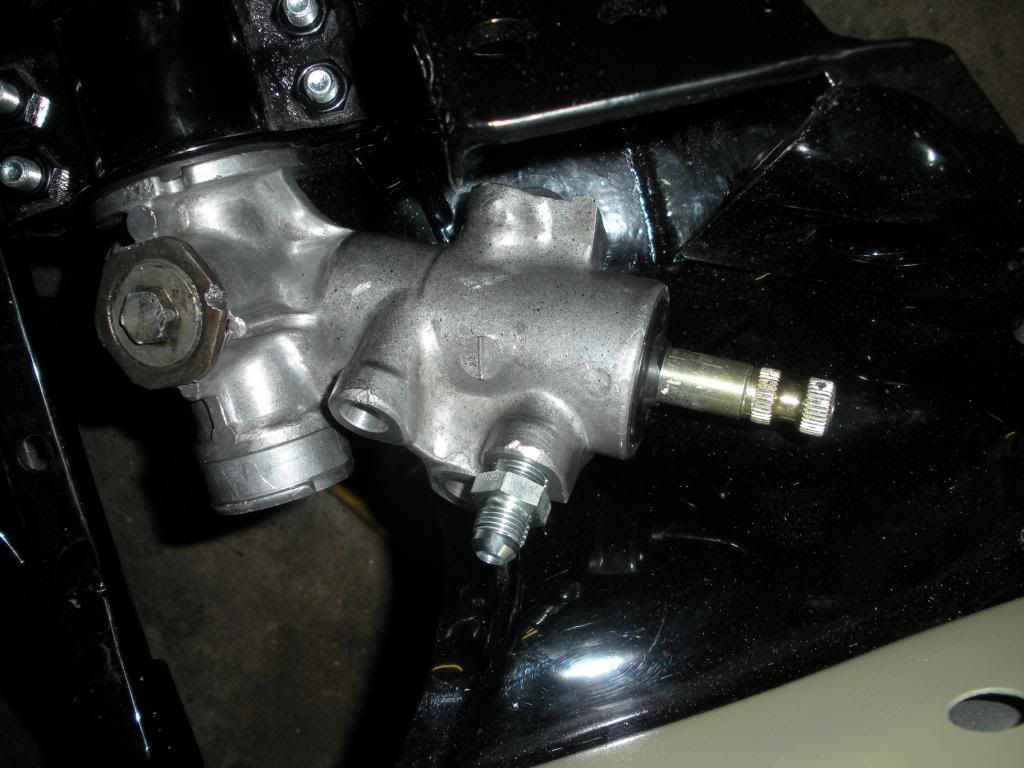 Remember the four tiny O-rings in the kit? They go on the factory hardlines. Don't forget to lube them with a bit of power steering fluid. 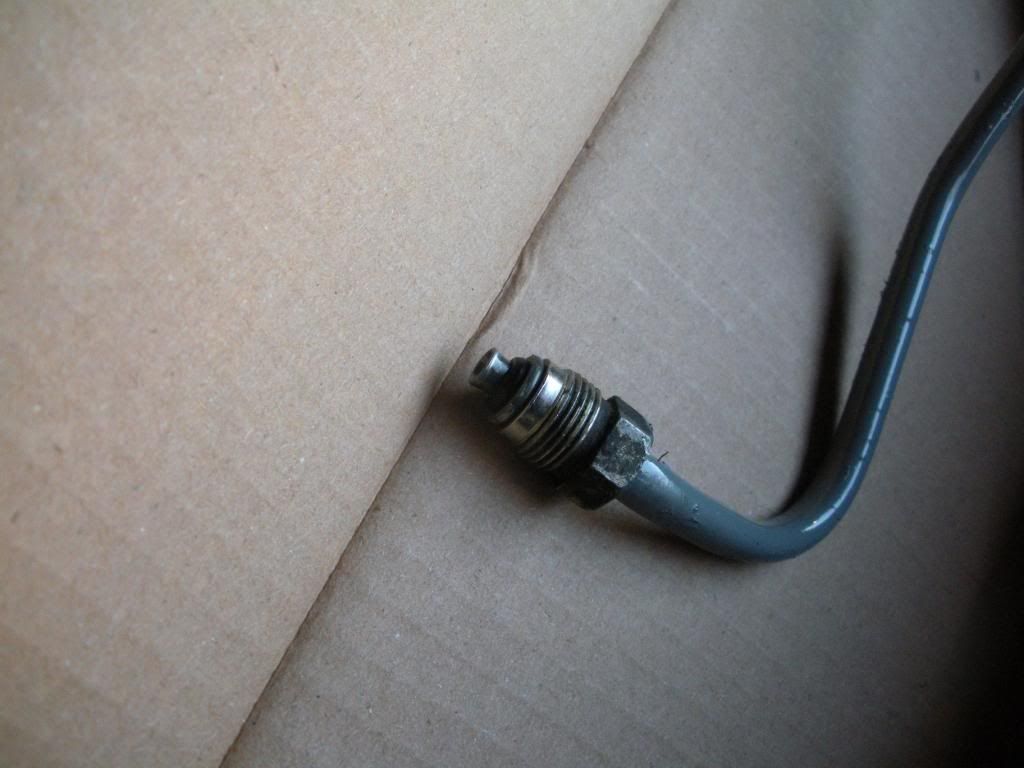 What it looks like installed. 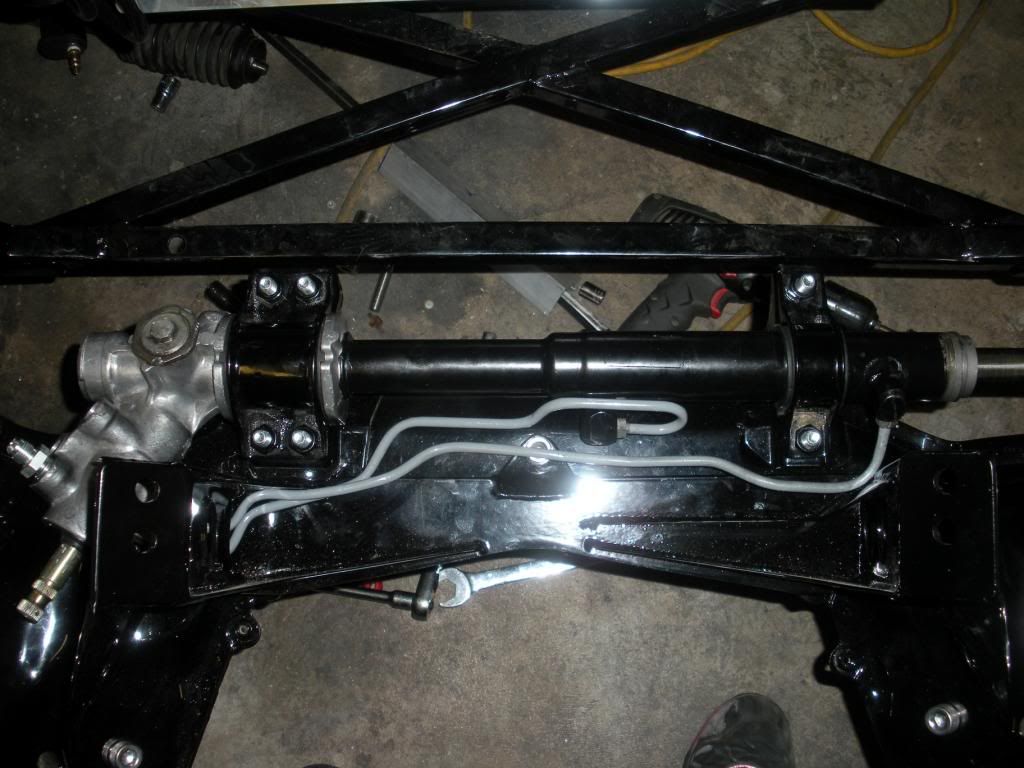 In my case I have a Small block chevy swap engine cradle, which makes installing the hardlines a challenge to say the least. 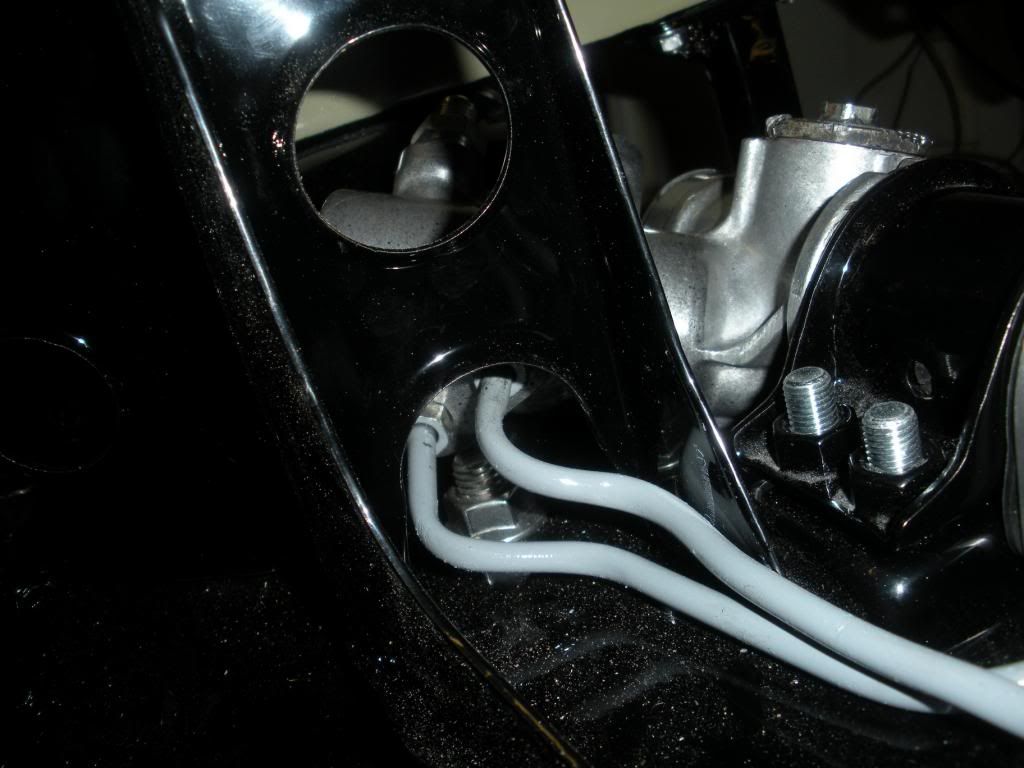 Those were fun to tighten lol 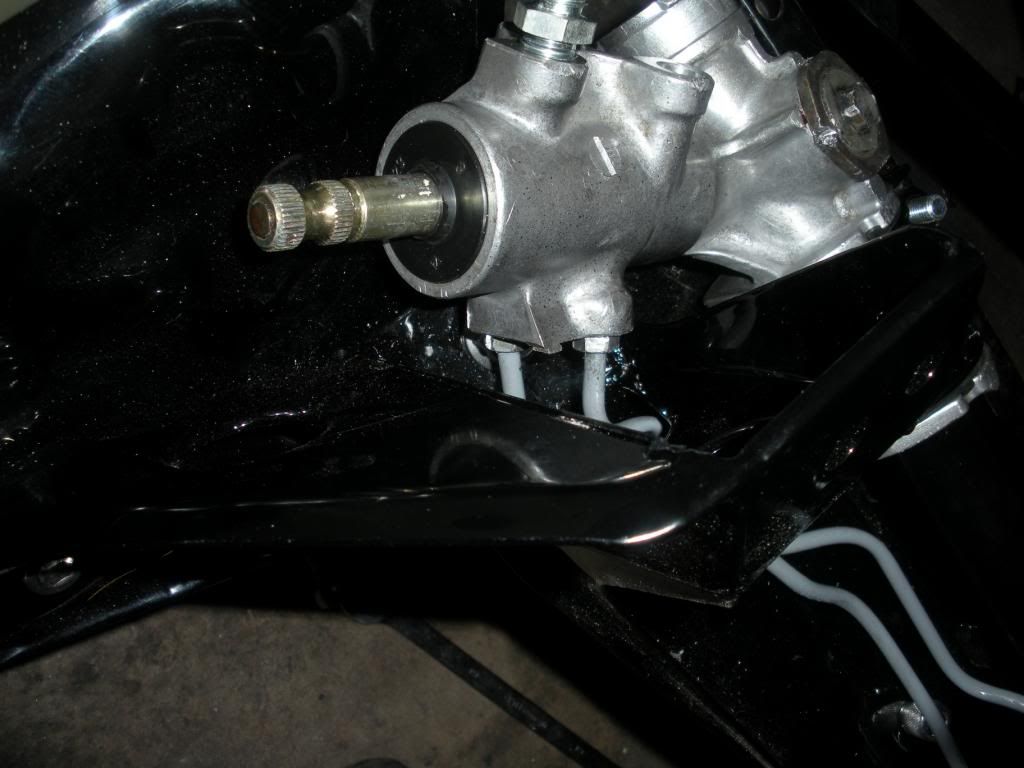 Here's my rack input hose thing I had made out of the end of the factory hose. i cut off the hose behind the crimp fitting and ordered a weld on steel -6AN fitting. Needs to be cleaned up still but you get the idea. That threads into the middle hole on the rack. The bottom hole on my unit is plugged (Forgot to get a pic of that). It's super simple I measured the depth of the hole, then cut a bolt at that hieght, just the threaded part and threw the top away. Then I cut a groove across it with a band saw so it can be driven with a screwdriver. Coated the threads in red loctite and screwed it in. Sits flush with the rack. Simple solution. I just use the input and output and ignore the "feedback" hole or whatever it is. My build thread is in the BAD GUY section  http://www.rotarycarclub.com/rotary_...ad.php?t=16630 THE END. Last edited by StephenSheppard; 02-28-2013 at 01:06 AM. |
|
|
|
|
02-28-2013, 09:30 AM
|
#8 |
|
IT'S ALIVE!

Join Date: Dec 2009
Location: Richmond, VA
Posts: 811
Rep Power: 16 |
Good writeup! I highly recommend this for a sticky; it's a good companion to TTT's de-power how-to, which is missing half the pictures. I recently de-powered my steering rack and had to guess at a few points so this would've been helpful.
My only comment is about the rack support and yoke plug. Almost all the threads/info I've read state to leave that as loose as possible when de-powering the rack. I've not read of any problems occurring but I assume the worst case is when the pinion gear "jumps" a gear on the rack due to the rack deflecting in its housing. I tightened my yoke plug one turn beyond initial engagement so mine is far from "tight." I guess I'll find out if that's enough when I get the car on the ground with 255's up front. |
|
|
|
|
02-28-2013, 10:50 AM
|
#9 |
|
Rotary Fan in Training
Join Date: Nov 2012
Posts: 58
Rep Power: 14 |
Yep, remember you can add tension to the rack if the car "doesn't feel right". I usually move it about a 1/4 turn at a time till it acts like I want it to, on a de-powering situation.
|
|
|
|
|
02-28-2013, 12:06 PM
|
#10 | |
|
IT'S ALIVE!
Join Date: Dec 2009
Location: Richmond, VA
Posts: 811
Rep Power: 16 |
Quote:
Do you use ATF or something similar to lubricate the seals like the FSM requires? I was going to try to slather some 5W30 on the passenger side of the rack to help the rack more easily move through the rack bushing but was wondering if ATF or PS fluid would be a better idea? |
|
|
|
|
|
03-01-2013, 03:47 PM
|
#11 | |
|
Rotary Fan in Training

Join Date: Feb 2008
Location: Dallas, TX
Posts: 44
Rep Power: 0 |
Great write up with excellent pictures!
Having taken apart three different S4 power steering racks while trying to depower a rack for myself I've got a couple of comments to add. wire clip thingy that holds the rack stopper in place - Of my three racks I didn't have a single one come out cleanly even after working them back and fourth. Two broke outright and one was heavily mangled. This part is not available from Mazda by itself. I noticed in Stephen's pictures that it looks like he is using a new straight one when reassembling. It appears that a new one comes with the rebuild kit which is quite handy otherwise you're going to have to find some solid core wire of similar diameter to use. Quote:
An alternative to Purple Power or Simple Green that is friendly to Aluminum would be tide washing detergent (powdered seems to work best) or Pine-Sol. We have had very good luck using both at our shop to degrease aluminum bits. Other notes - When you open up the rack if you notice any rust in any of the bearings, the pinion assembly, or shiny parts of the rack you most likely will need to start looking for a new rack. One that i disassembled clearly had had torn boots for a long time and every polished surface that mated to a bearing showed heavy signs of wear, pitting, and discoloration. Even the gear on the pinion assembly was heavily rusted. If have to put aside the project for any length of time, coat the rack in motor oil/grease/or some other type of petroleum lubricant and wrap it up tight in a garbage bag with some extra lube thrown in for good measure. They will spot rust if left uncoated and sitting around even if taken inside. I'm sure you could carefully clean the rust away with an emery cloth but why risk it. Do the same thing with the pinion assembly. Inspect the support yoke and rake carefully when you dissemble. Two of the three I have taken apart showed extensive wear to the copper insert on the support yoke and show corresponding signs of wear on the rack. If you show any amount of wear go ahead and replace the support yoke. Part number is FB05-32-111 and should run you about $20. I would suspect that in a depowered application that you would see increased wear on this part too. |
|
|
|
|
|
03-01-2013, 08:58 PM
|
#12 | |
|
Rotary Fan in Training
Join Date: Nov 2012
Posts: 58
Rep Power: 14 |
Quote:
|
|
|
|
|
|
03-01-2013, 09:02 PM
|
#13 | |
|
Rotary Fan in Training
Join Date: Nov 2012
Posts: 58
Rep Power: 14 |
Quote:
|
|
|
|
|
|
03-02-2013, 11:56 AM
|
#14 | |
|
IT'S ALIVE!
Join Date: Dec 2009
Location: Richmond, VA
Posts: 811
Rep Power: 16 |
Quote:
|
|
|
|
|
|
03-02-2013, 12:41 PM
|
#15 | ||
|
RCC Addict
Join Date: Mar 2008
Location: Honolulu, Hawaii USA
Posts: 1,813
Rep Power: 19 |
Quote:
1) Simple Green has been quietly decommissioned by the military, because they found out it actually eats aluminum - do a Google search, and you should find plenty on this. 2) Most metals (including steel, iron, and aluminum, etc.) are porous. Using a water-based cleaner (which Purple Power, PineSol, and anything detergent + water) will cause the cleaner to get into the metal. If it can get into the metal, it can get out of the metal. All those cleaners + grease or oils will cause a foamy mess. If you're going to use a degreaser where you're going to put back a lubricant like grease or oil, then use some kind of contact cleaner that will evaporate quickly. Brake cleaner would be ideal. In a pinch, you can use gasoline. Acetone is another option, but it'll eat anything plastic or paint! -Ted
__________________
reted_2000@yahoo.com Technical Advisor FC3S Pro http://fc3spro.com/ Quote:
|
||
|
|
|
|
| Bookmarks |
|
|

 Linear Mode

