|
|||||||


| Piston Engine Conversion Have you replaced your rotary with a V8 or any other type of piston engine? Tell us about it! |
 |
|
|
Thread Tools | Display Modes |
|
|||||||
| Piston Engine Conversion Have you replaced your rotary with a V8 or any other type of piston engine? Tell us about it! |
|
|
|
Thread Tools | Display Modes |
|
|
 02-25-2013, 02:01 AM
|
#1 |
|
Rotary Fan in Training
Join Date: Nov 2012
Posts: 58
Rep Power: 13  |
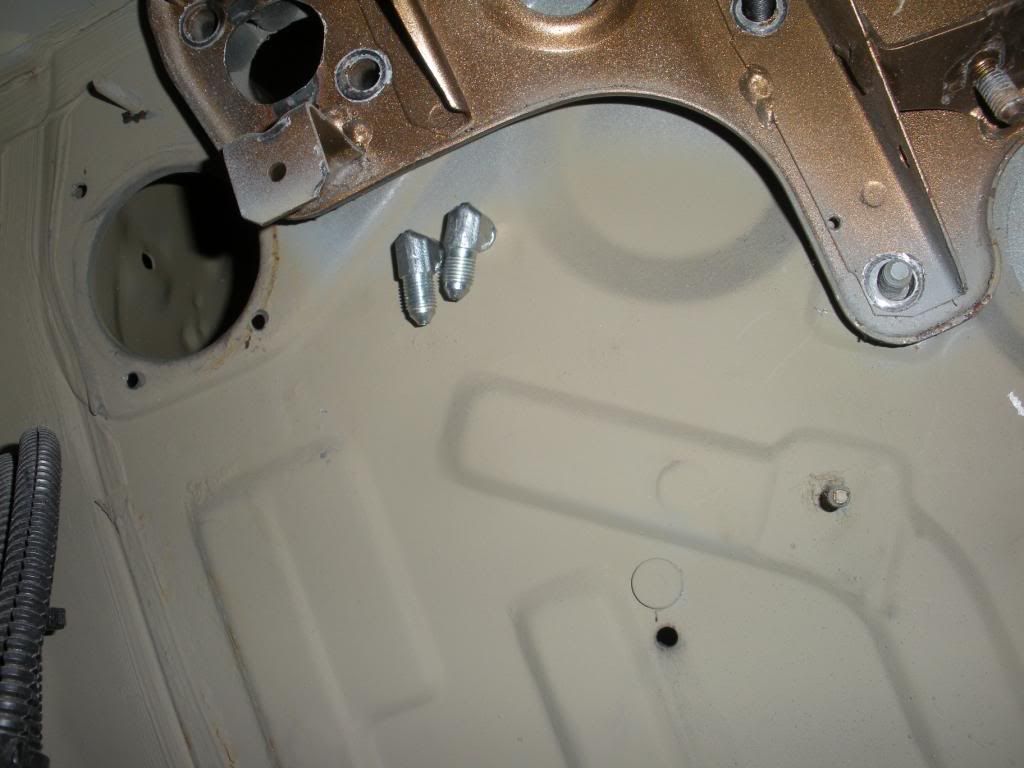
Here's what it looks like on the inside of the firewall in case you were wondering. The bulkheads are 90 degree jams. In this picture they are not pointed in the right direction though. Yes there's tons of clearance to any moving parts.
 Before and after sand blasting the LCAs 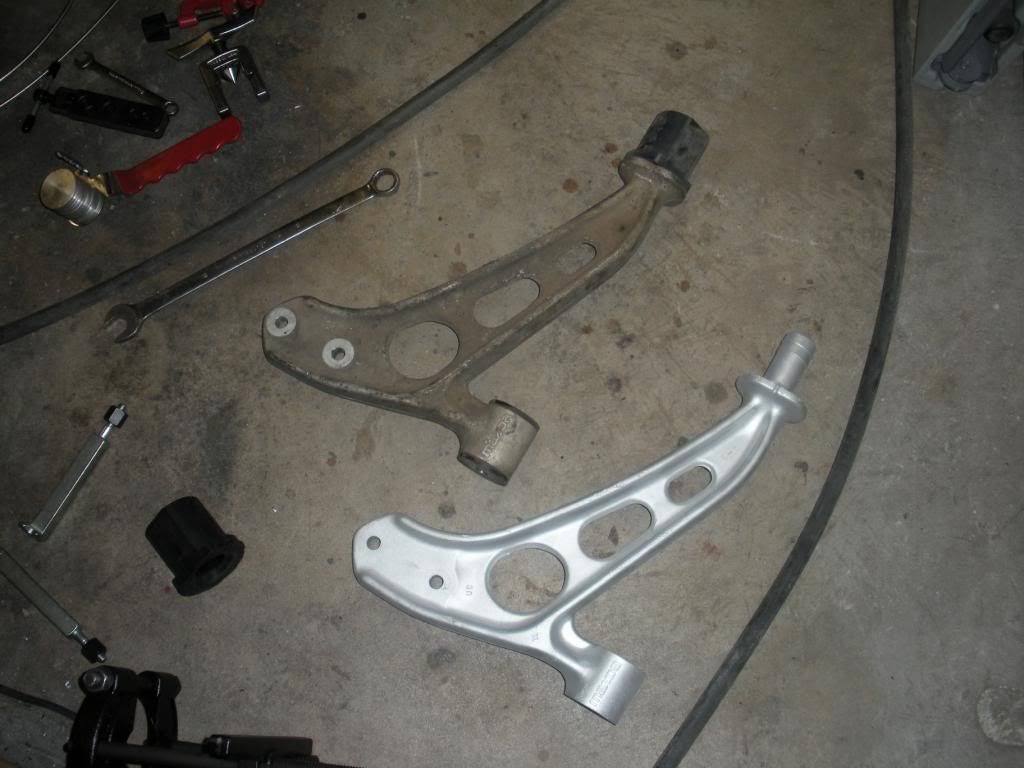 I already had MMR's Delrin bushings in my control arms. They fit so well I had to rig up a bearing puller to get the dam things off so I could sand blast the arms lol. So if you ever wondered, yes they are very nice and fit almost a little to well. Good stuff though. I love the response these bushings add to the car. 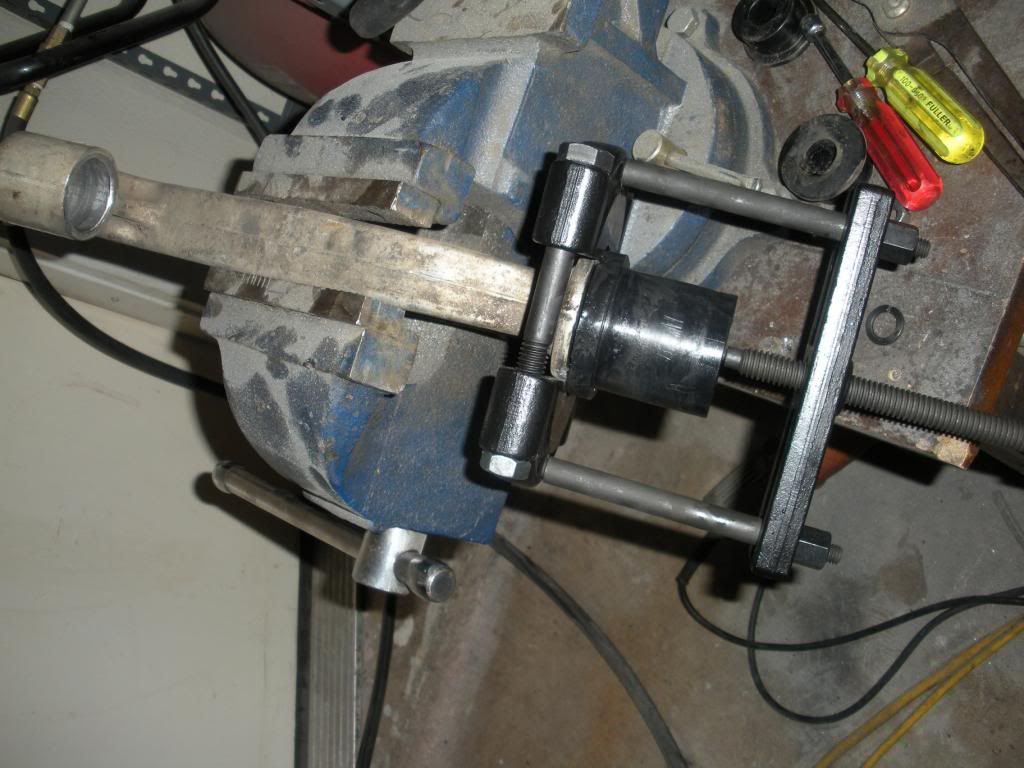 When I was done I clearcoated the arms then reinstalled the bushings. Not sre how the clearcoat will hold up but figured it might be worth a shot. Sexy! 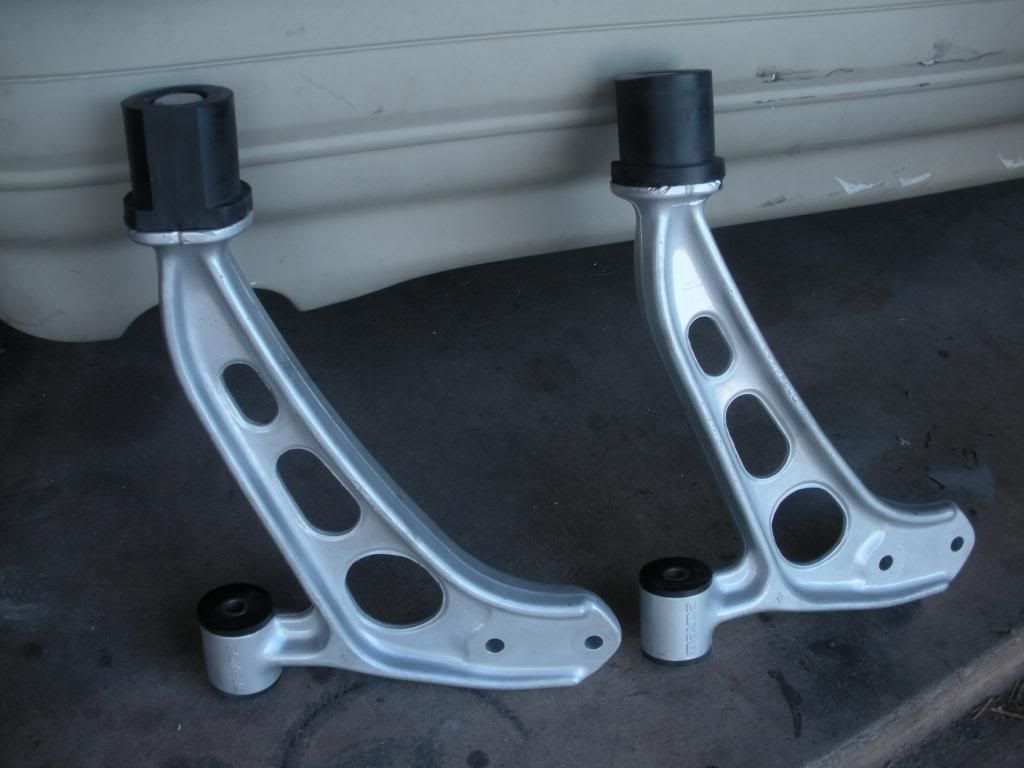 Installed them with new stainless hardware. 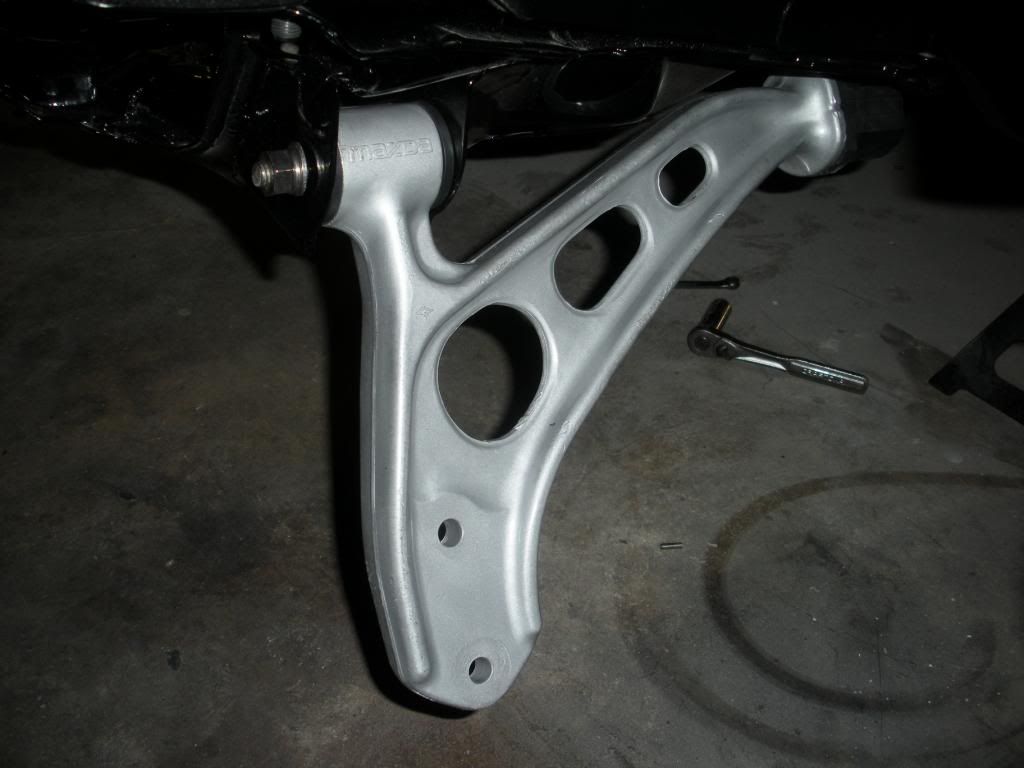 Installed the wiper linkage with new hardware as well. 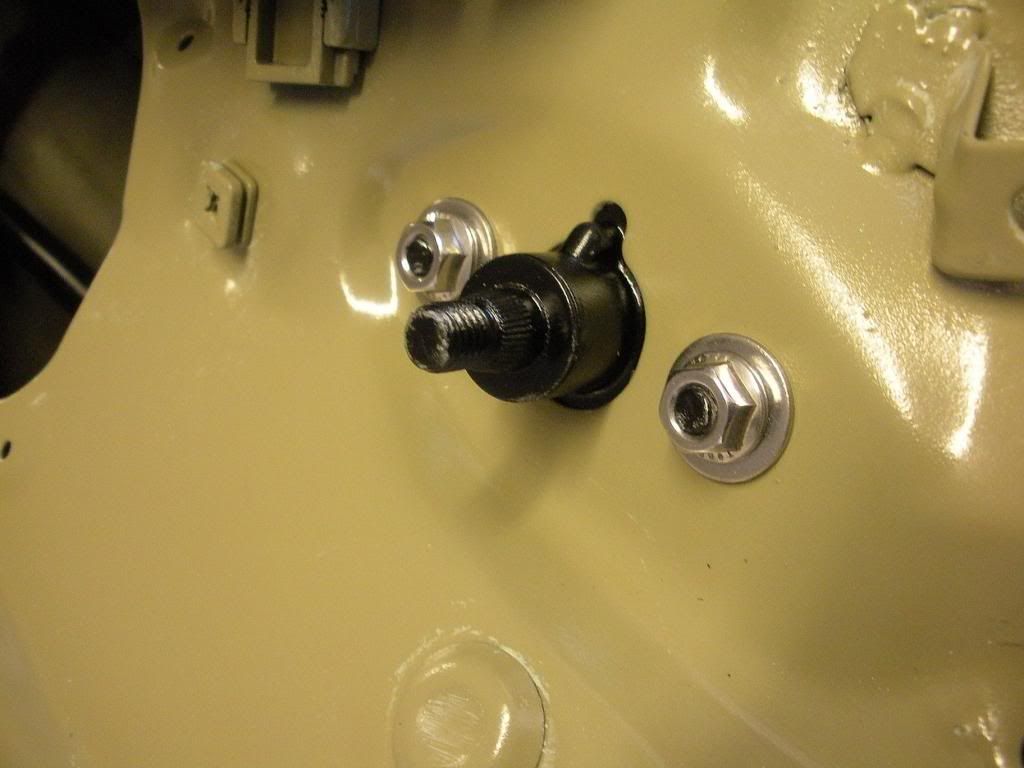 Hung the coilovers with new hardware..............I think you're beginning to notice the trend here. 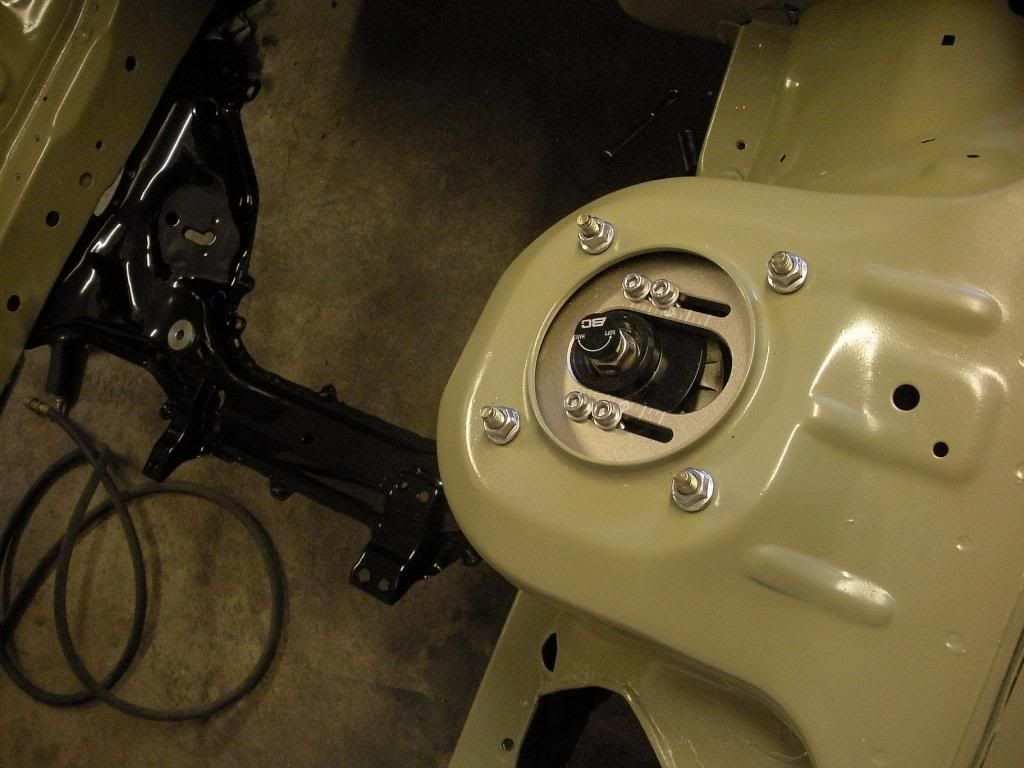 Unbolted my single piston front brakes and tossed them in the trash, time to finally put the 4 piston factory brakes on again. For a low powered car as before though the single piston brakes worked perfectly fine. They would lock up at speeds above 60 mph if you really gave them hell. 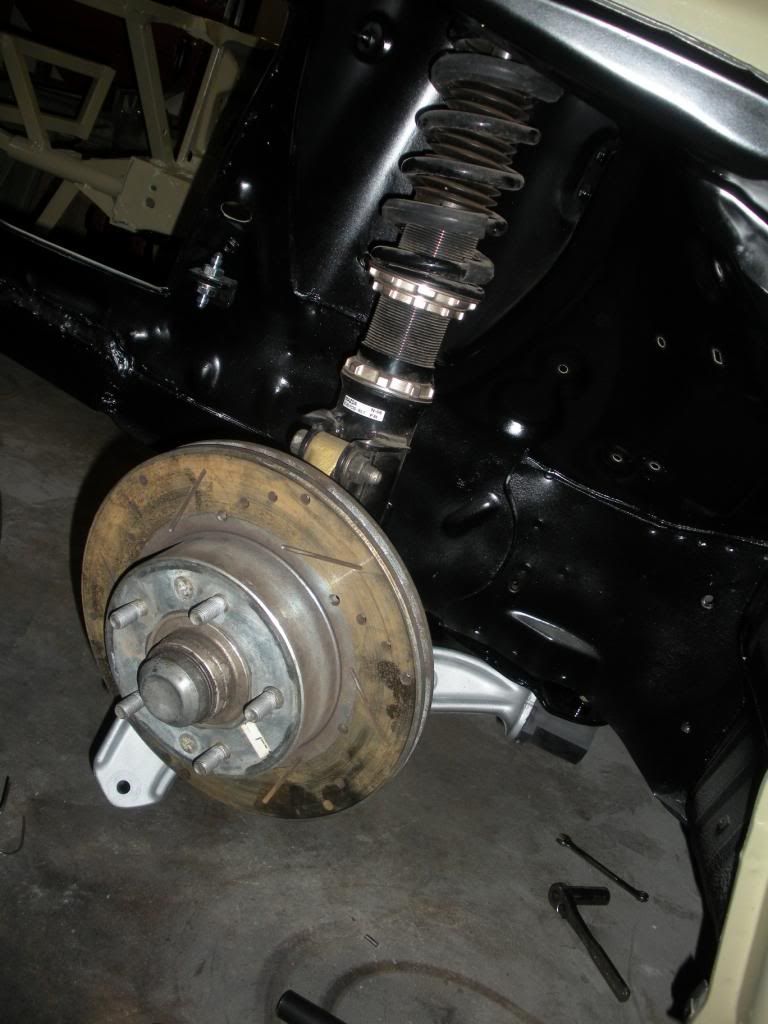 Basically I tore down the wiper motor, cleaned it, sand blasted the body of it. Cleaned everything else and reassembled it. In the picture the top was still drying from repainting so here you can see the little electric motor parts. 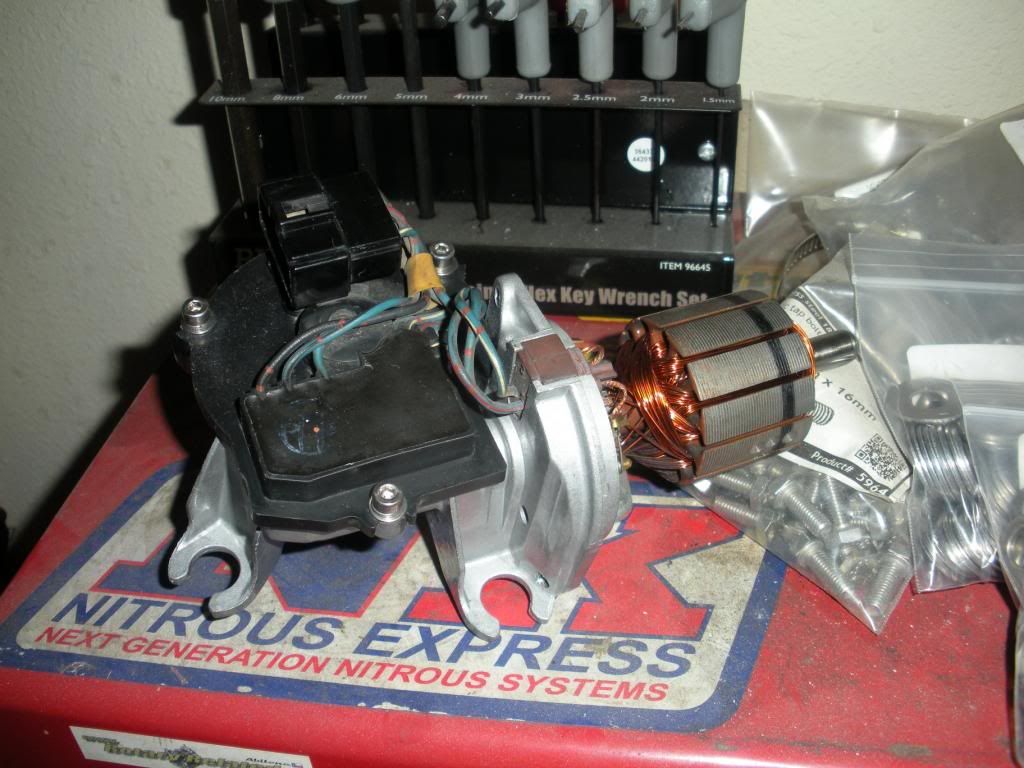 I was going to rebuild a set and sand blast them since I have a few but I think I'm going to go with rebuilt units from a parts supplier to save me some time. They will probably be painted black but I don't care too much what color the calipers are honestly. 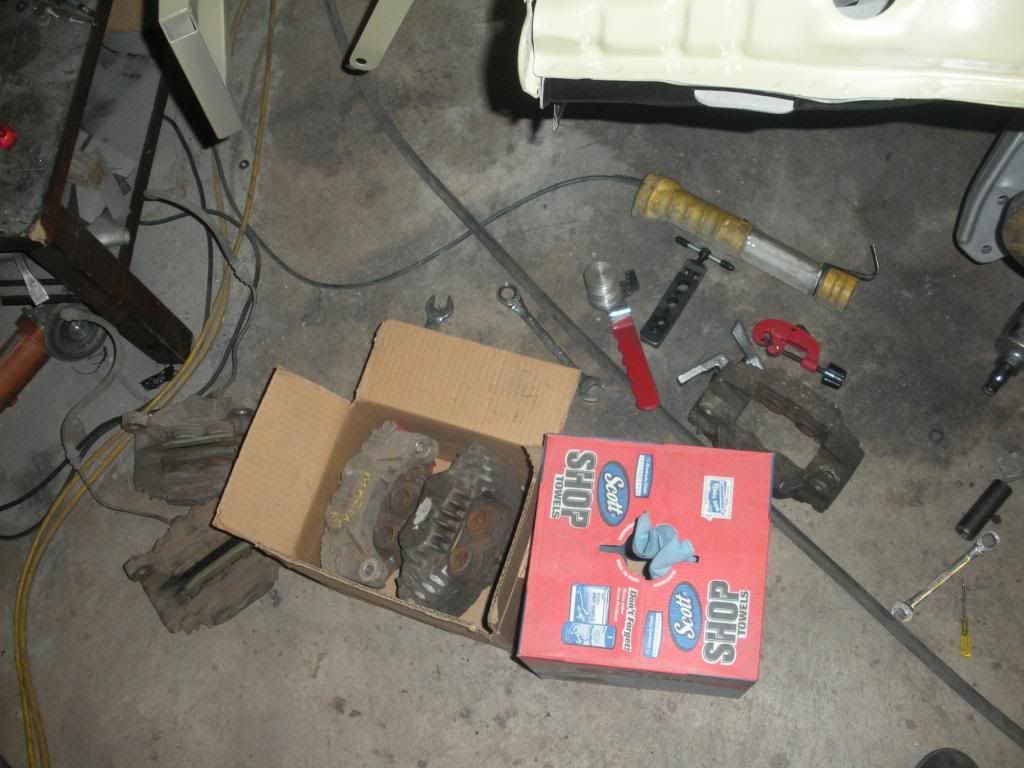 I may still rebuild them myself, I'll see how I feel about it later I guess when i get ready to get that done. |

|

|
|
02-25-2013, 02:12 AM
|
#2 |
|
Rotary Fan in Training
Join Date: Nov 2012
Posts: 58
Rep Power: 13 |
I cleaned up the radiator a bunch since it's been in two cars over the last 5 years. Was starting to look a bit beat up and dirty. Installed the bracket after it got back from powdercoating.
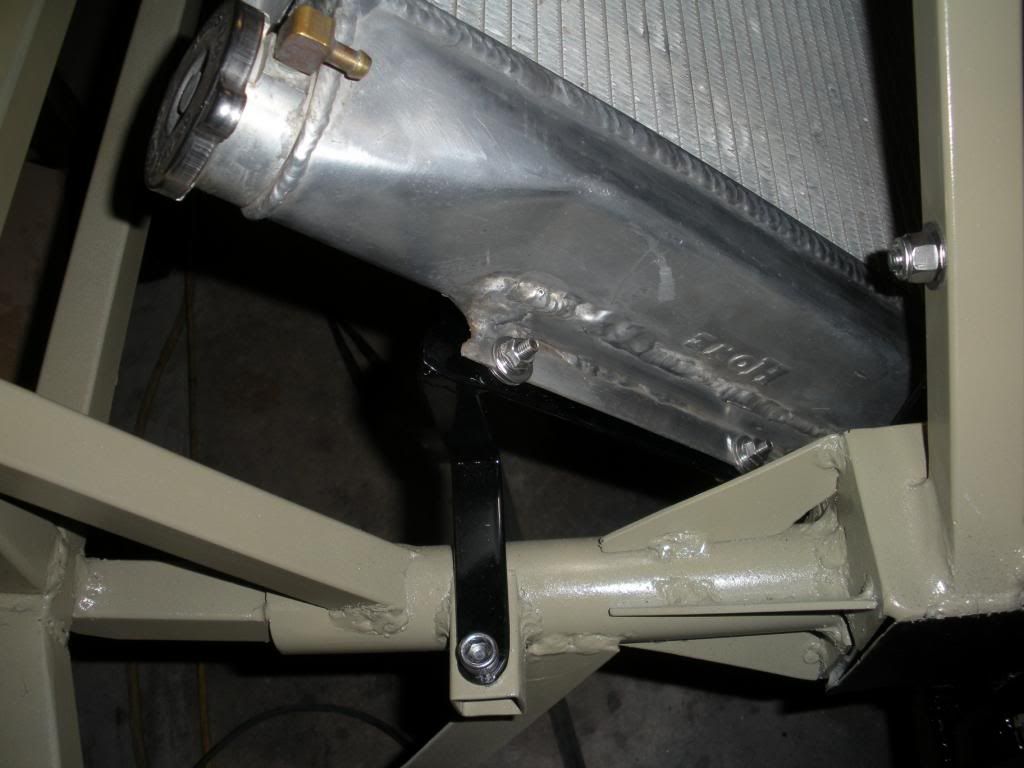  Notice the mounting tabs changed to nuts and bolt for the diagonal square tubes. I used nylocs on the backsides of all these so it could be tight without crushing the tube. 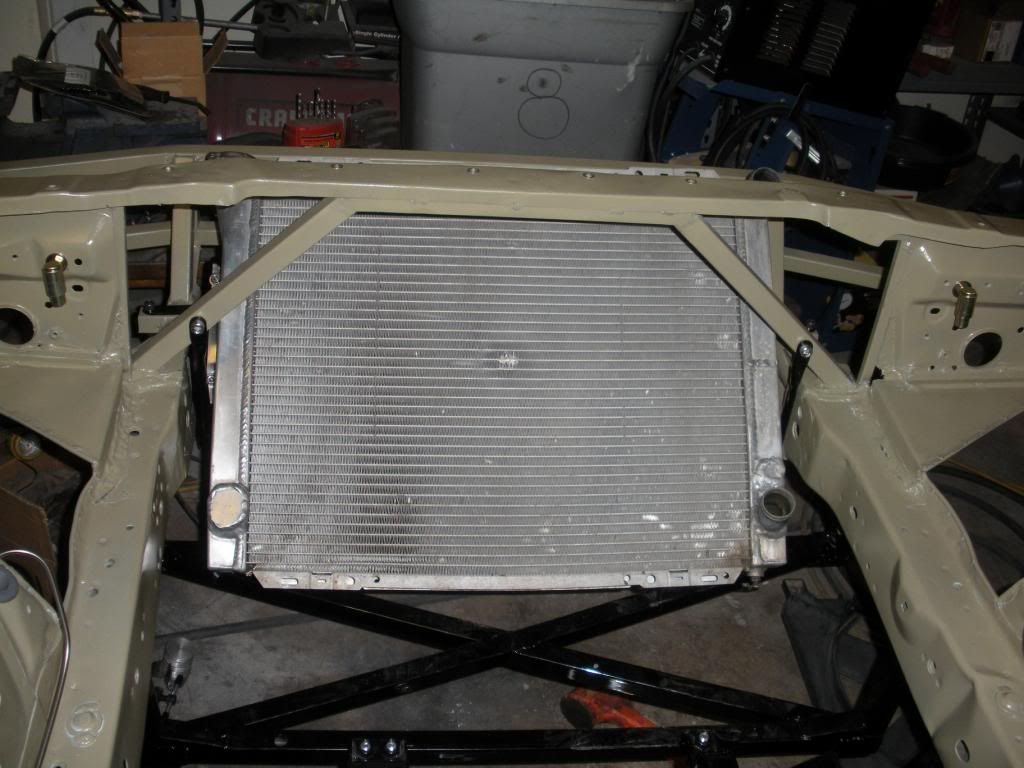 Stuck the clutch master cylinder in there. Basically some of this stuff is being partially assembled for hardware purposes. A lot of it will be final assembled later on as the car comes together. 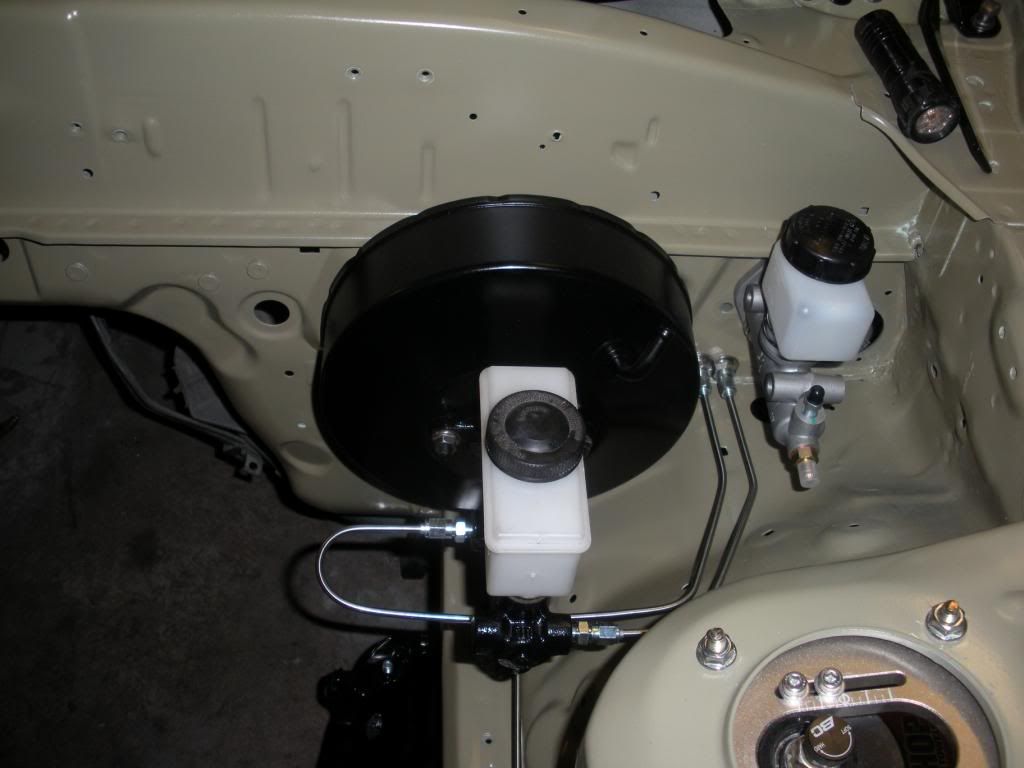 This guy turned out pretty good. 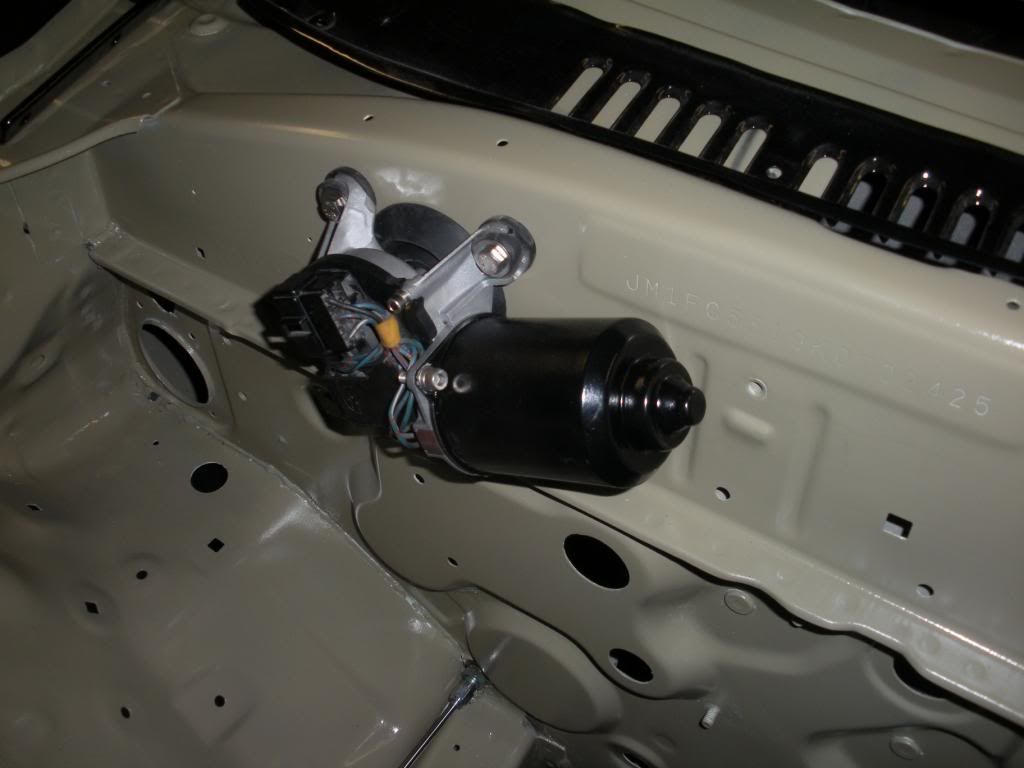 Engine cradle and steering rack brackets and hardware sorted. 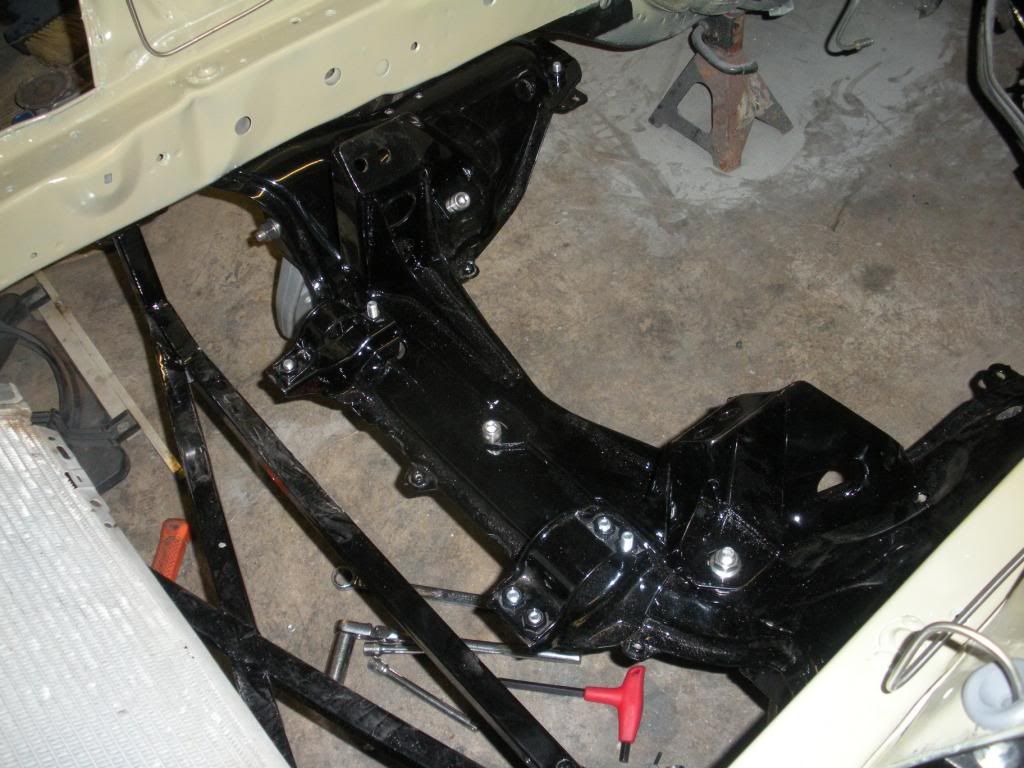 One of my trans bracket factory holes had the threads pulled out of it a while back, which is super awesome so the back one in this pic is a stud and nut now. 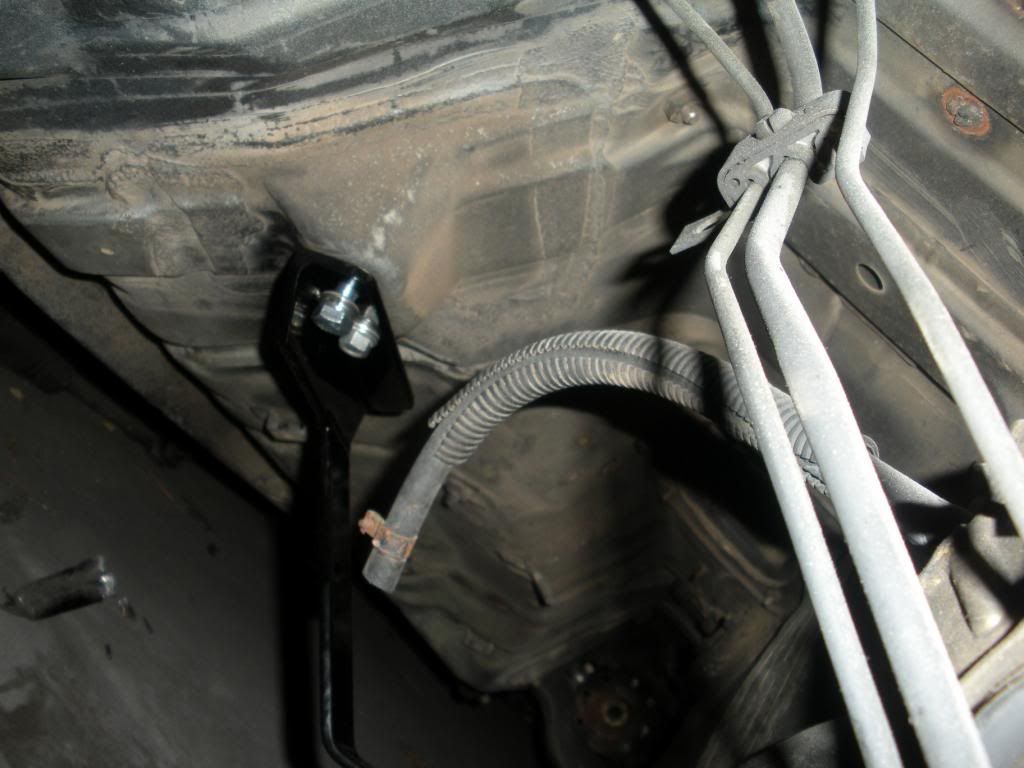 Cut this terrible hole in the passenger floorboard to gain access to the backside so I could weld a bolt in there to fix the pulled thread issue. i'll fix up the hole and make a plate to cover it up later. For now it will look terrible. 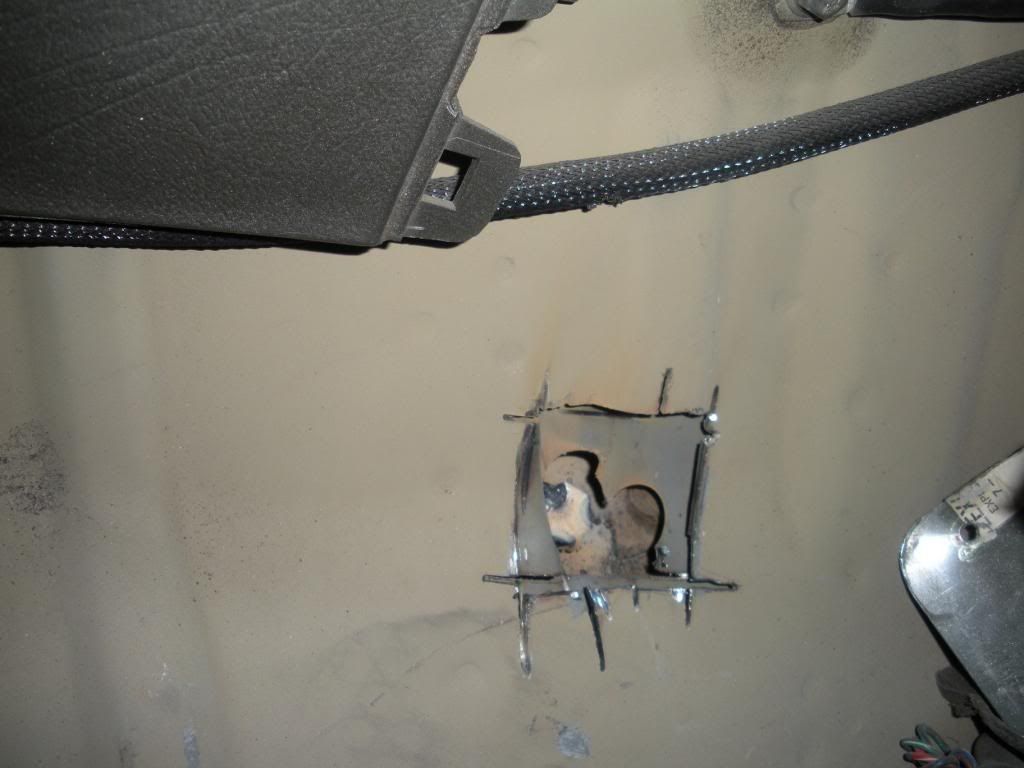 Not sure but yeah there's something to look at lol. 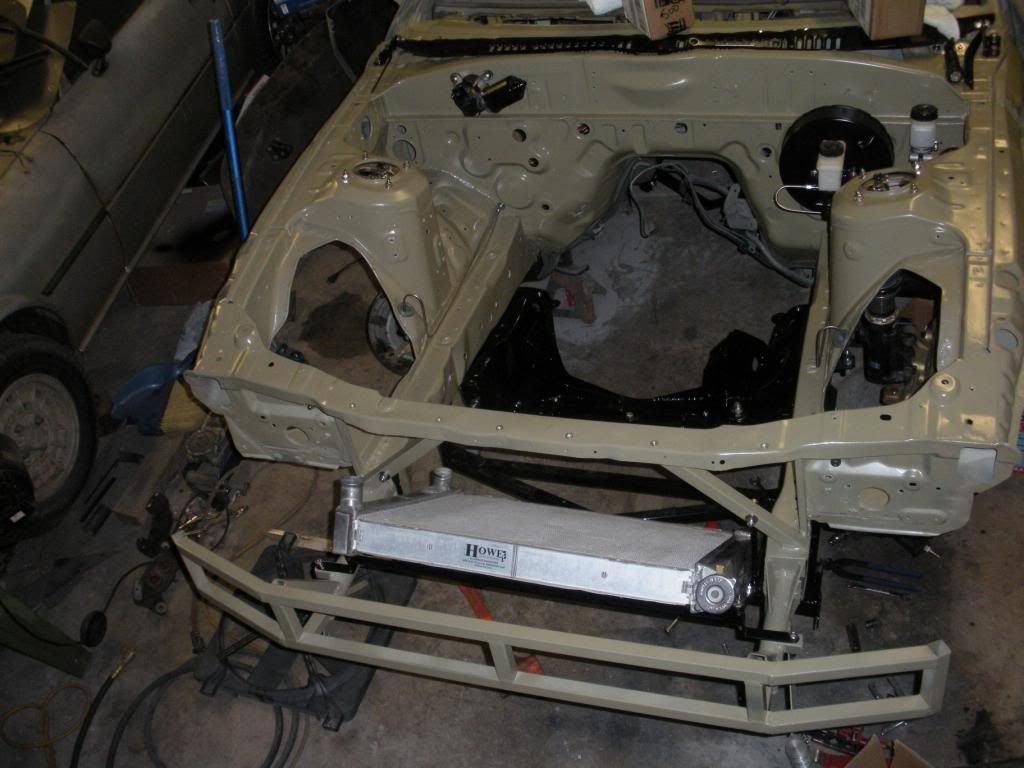
Last edited by StephenSheppard; 02-25-2013 at 02:20 AM. |
|
|
|
|
02-25-2013, 02:30 AM
|
#3 |
|
Rotary Fan in Training
Join Date: Nov 2012
Posts: 58
Rep Power: 13 |
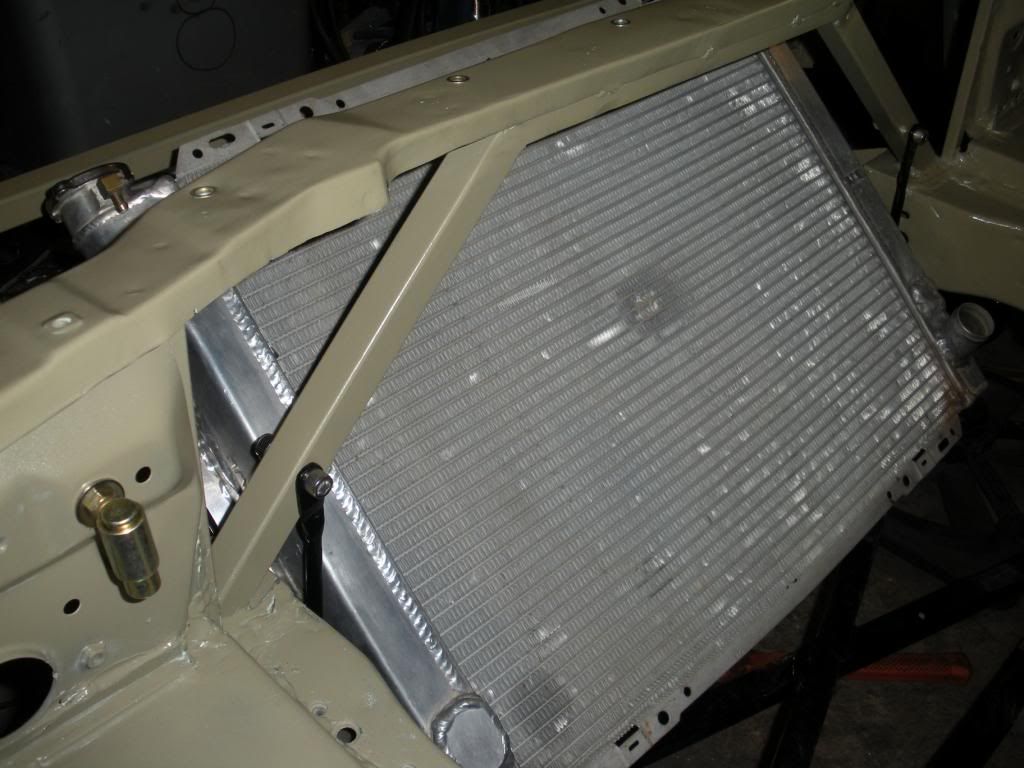
Dat new new
 Radiator clearance 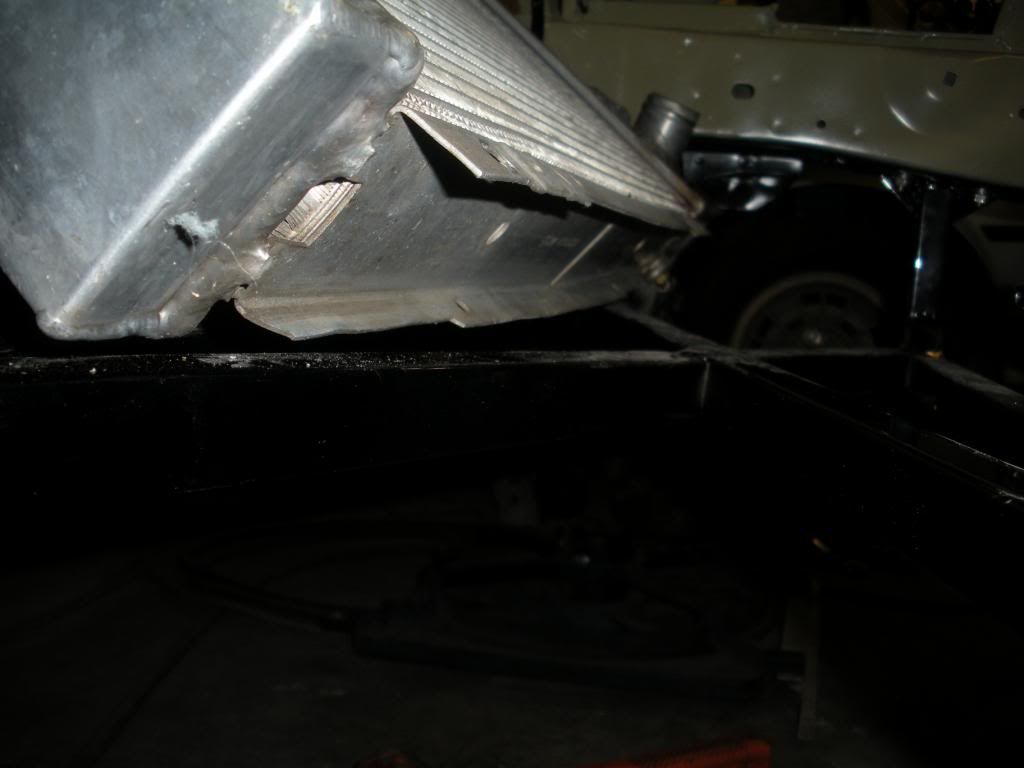 Brakequip plug for the brake mastercylinder I was talkign about earlier. M10x1.0 inverted flare plug. (BQ18 part number I think it was) 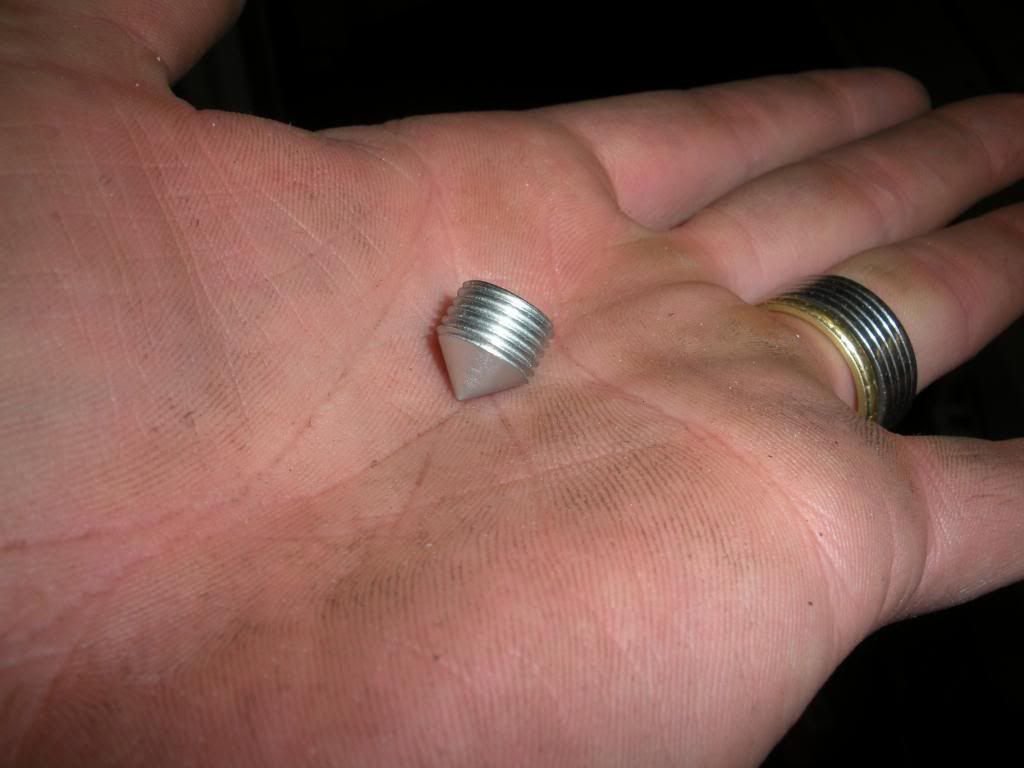 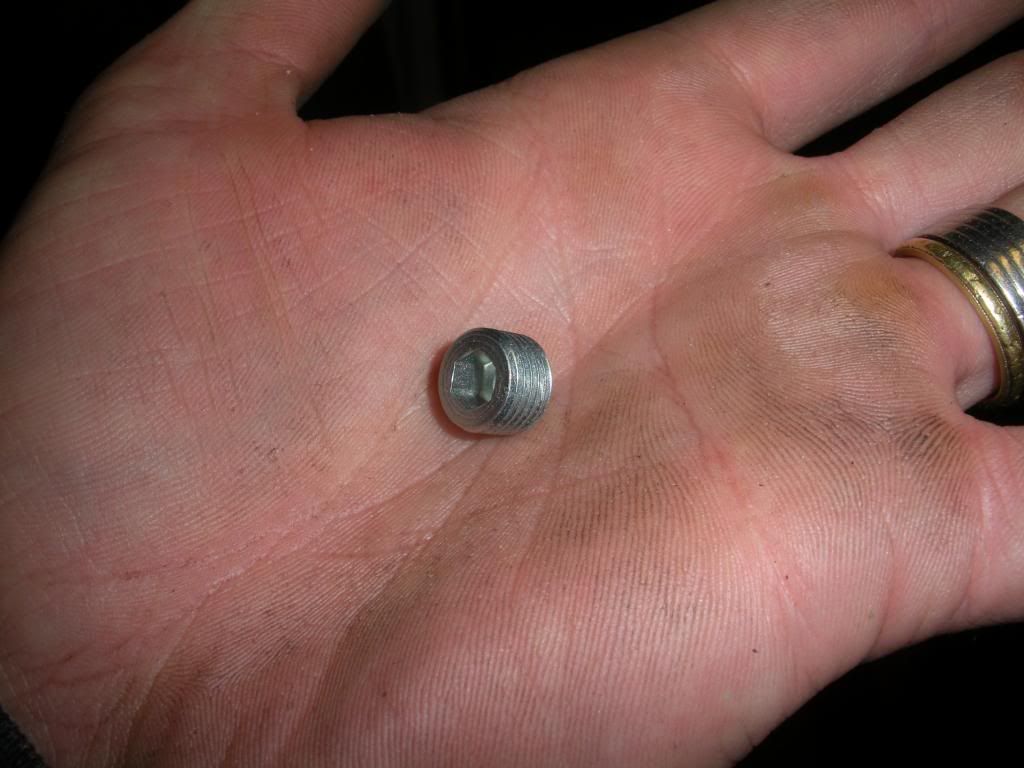 There she is installed 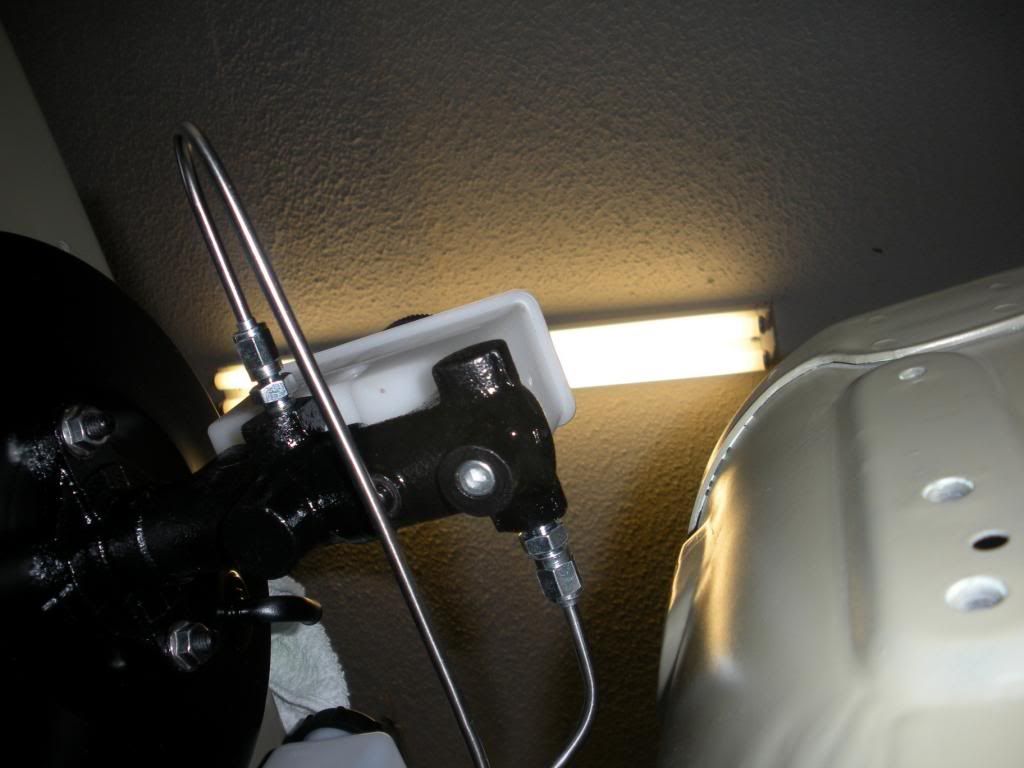 I felt the need to have cool looking clamps for the brake lines. Also I'm pretty sure I hate money. 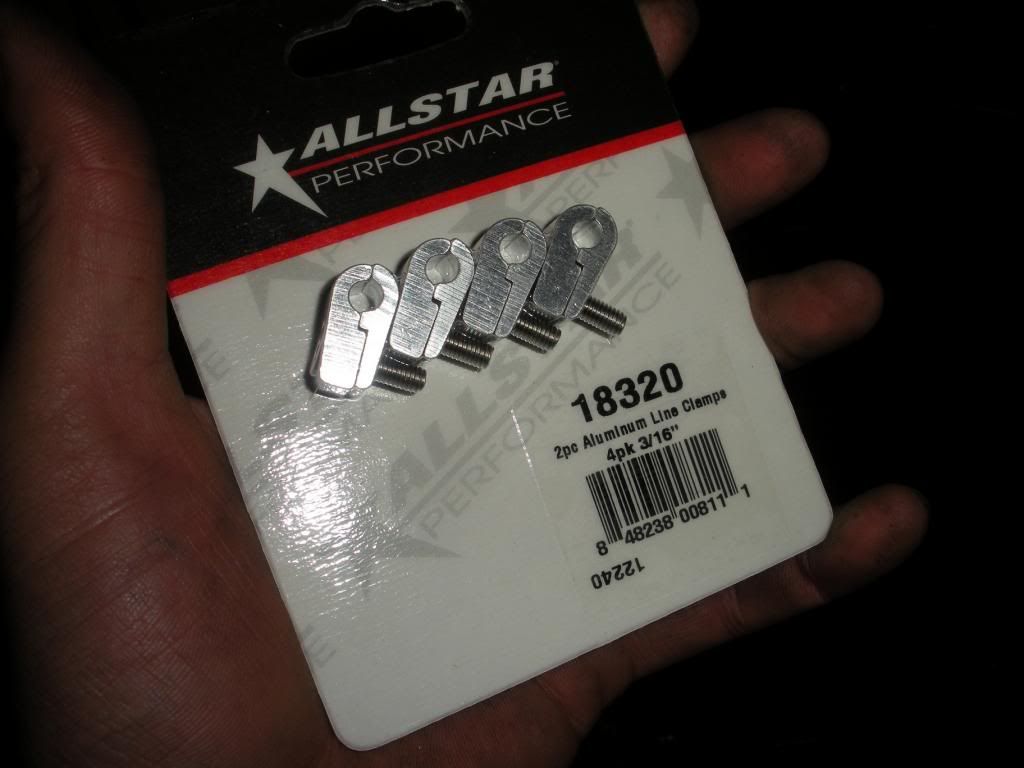 BOOM instant dopeness 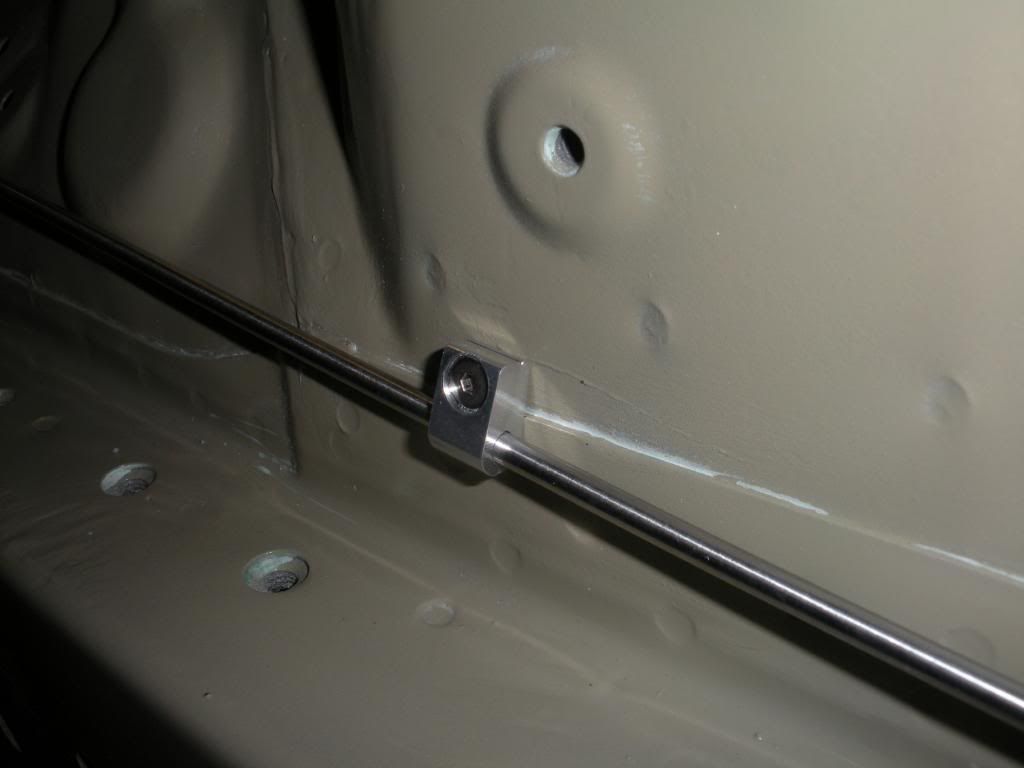 Mounted the proportioning valve here at the lowest point under all the dash stuff so none of these lines will ever have to be removed unless they themselves need to be removed for some reason. Also I can easily reach the biasing valve knob to control the rear brake pressure for various different tire types and sizes. It's a Wilwood component, just flipped over on it's front, then I nerded it up by labeling the inputs and outputs on the backside to make my life easy. Bolted through the tunnel with ..........you guessed it brand new stainless hardware lol. Bent up some hardlines. 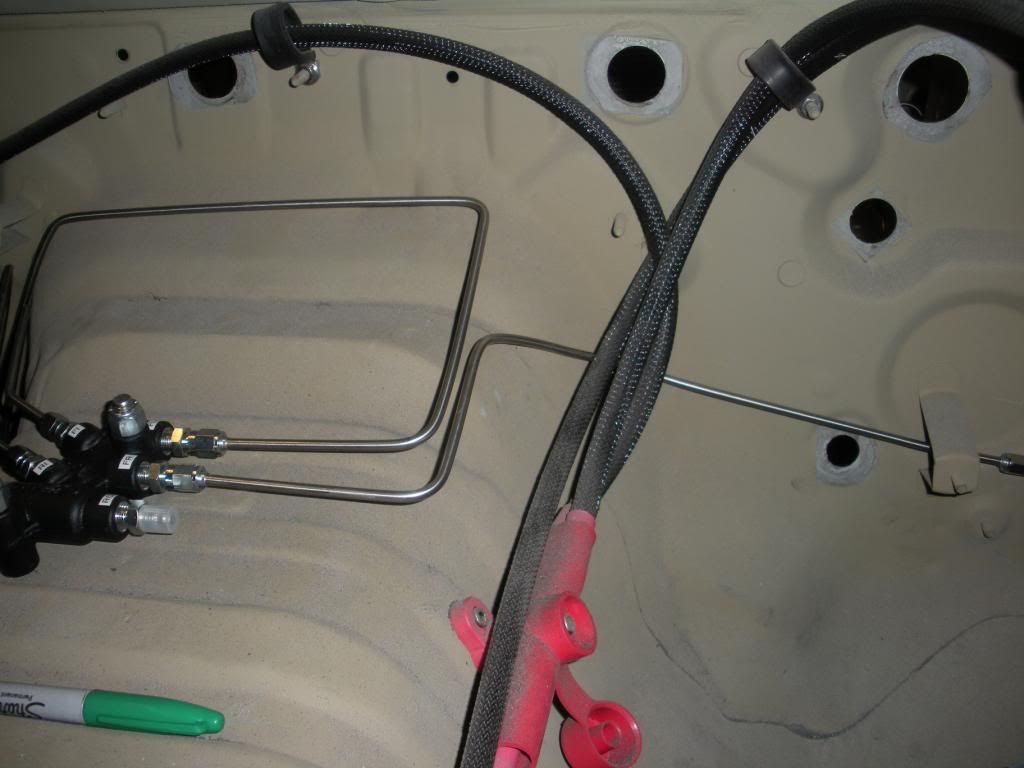 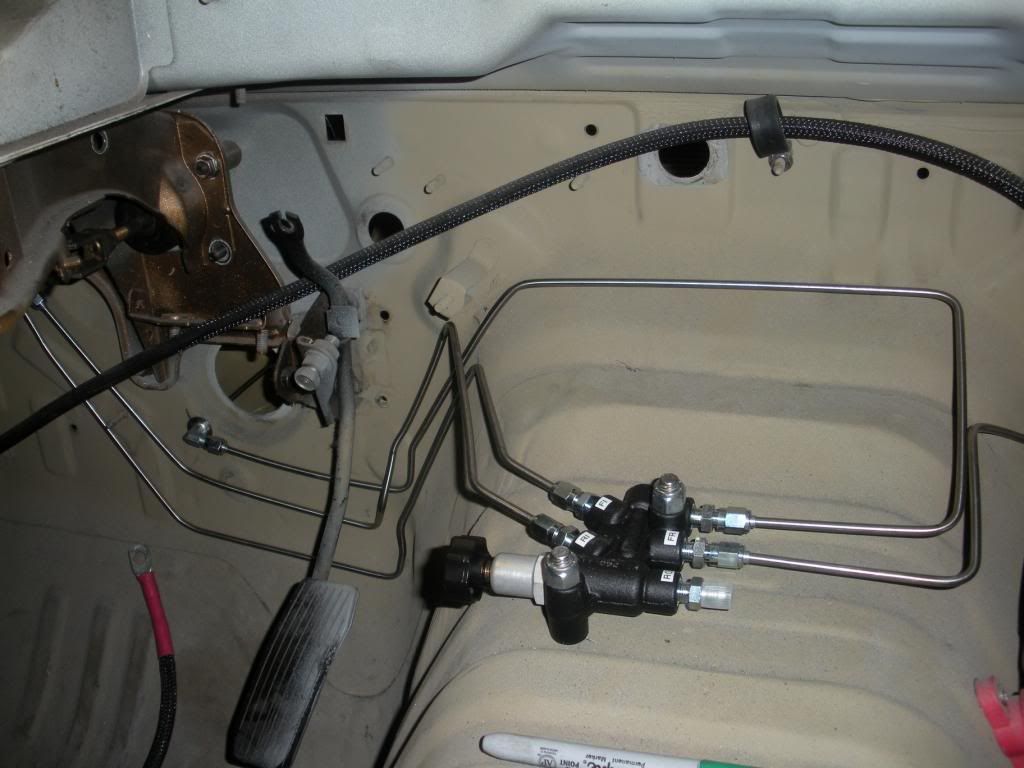 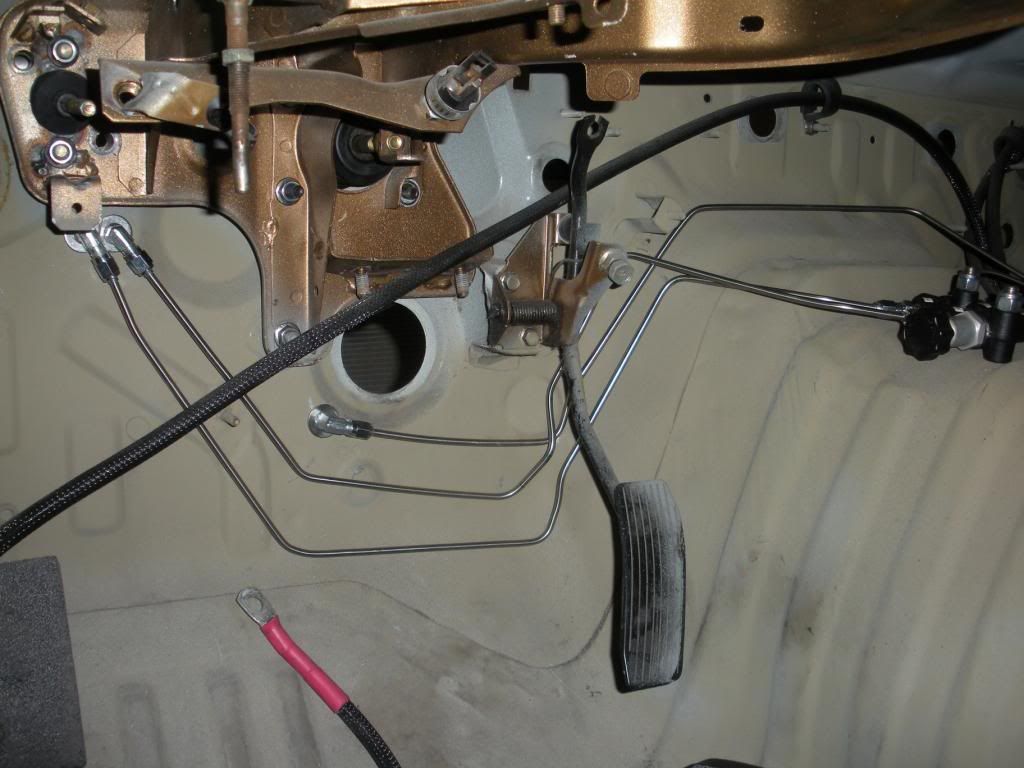 Closer! lol 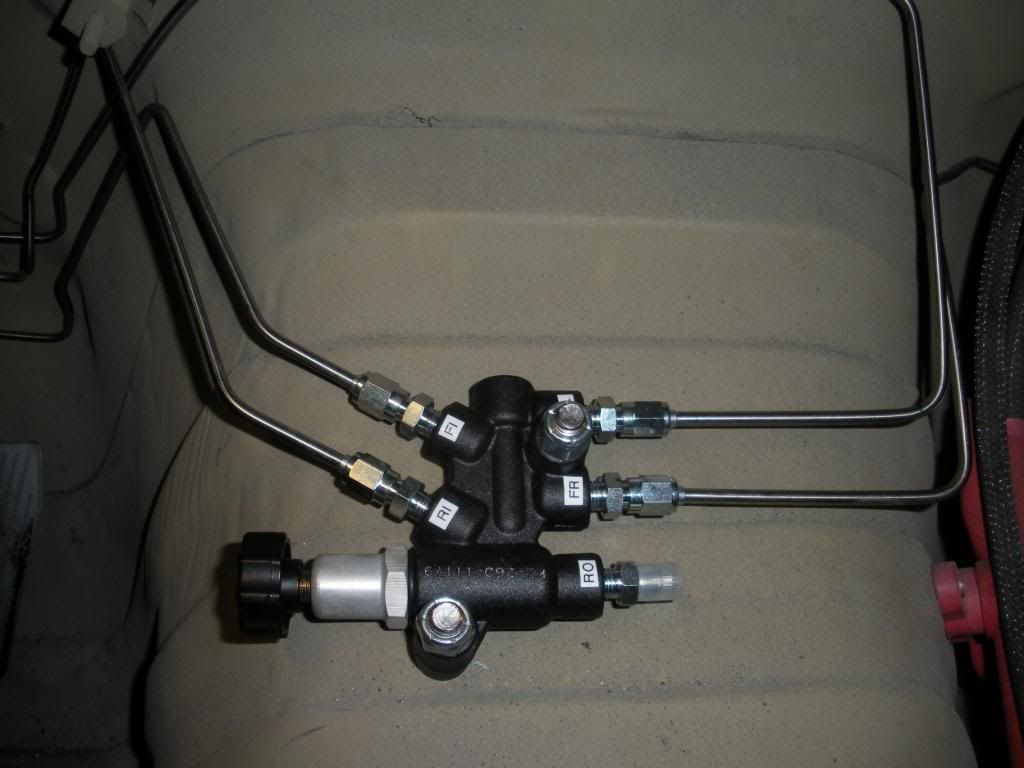 Installed more clamps. 
|
|
|
|
|
02-25-2013, 02:38 AM
|
#4 |
|
Rotary Fan in Training
Join Date: Nov 2012
Posts: 58
Rep Power: 13 |
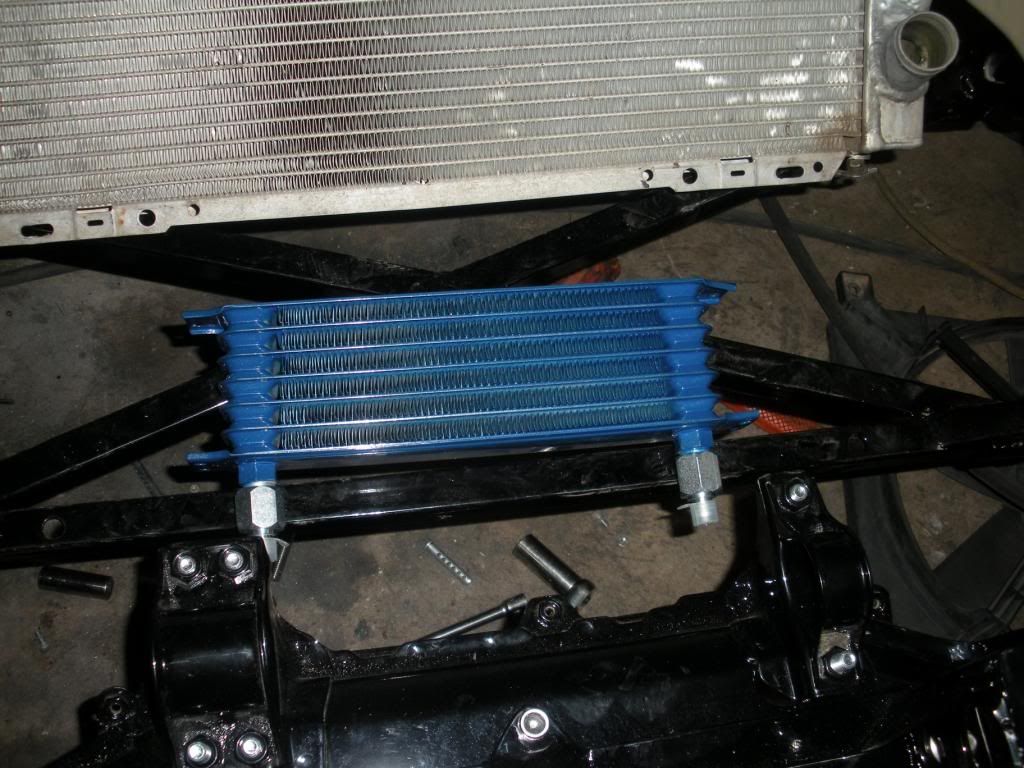
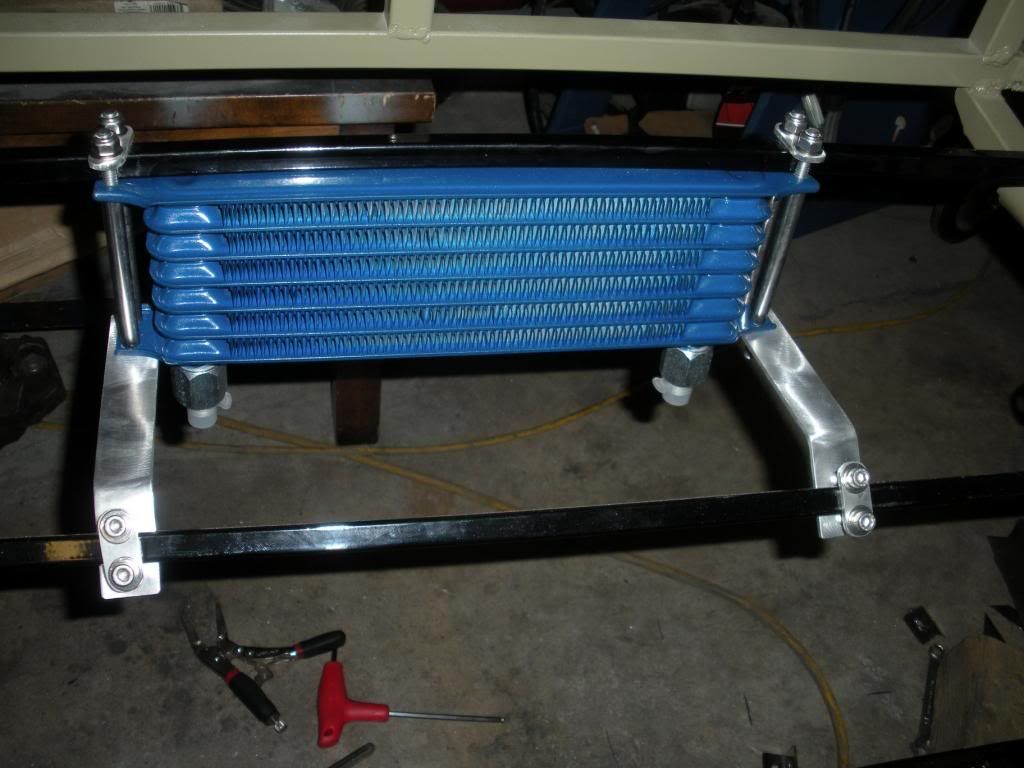
Power steering cooler showed up from china. Still need to make some mounting stuff for this thing. It doesn't go there , but that gives you an idea of it's size at least.
 Went back to my Honda roots for a minute and hit up Blox for this stainless coolant overflow tank. I love the 1/4 turn lid and the fact the hose fittings are on the bottom. 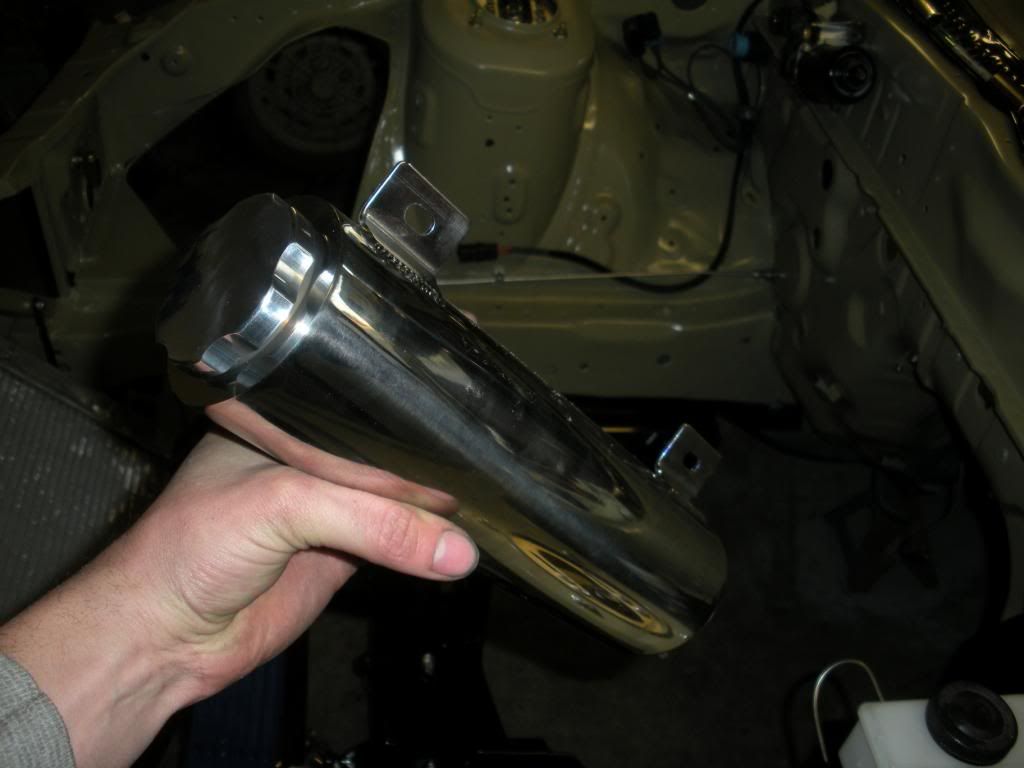 Made an aluminium bracket for the tank 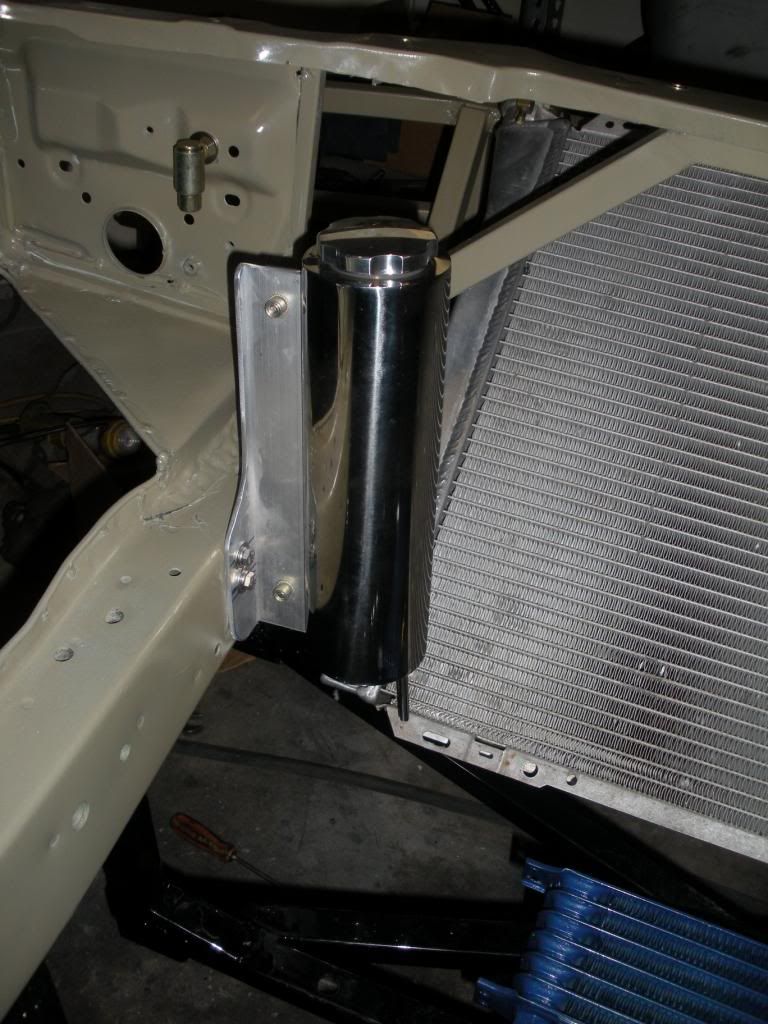 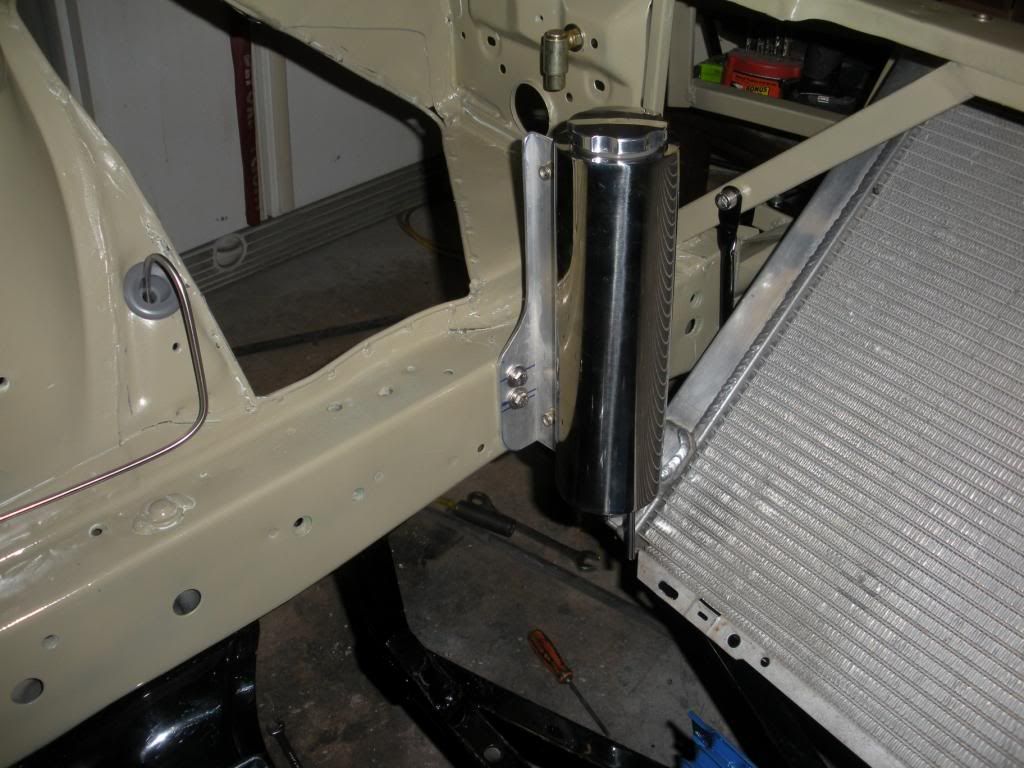 I was talking to my uncle in Canada about the project and he mentioned he had a 87 Corvette TPI intake he didn't need anymore. Sent it to me for my birthday. Pretty cool deal. Lots of changes will be made to this so it will fit the project needs better. More on this guy later. 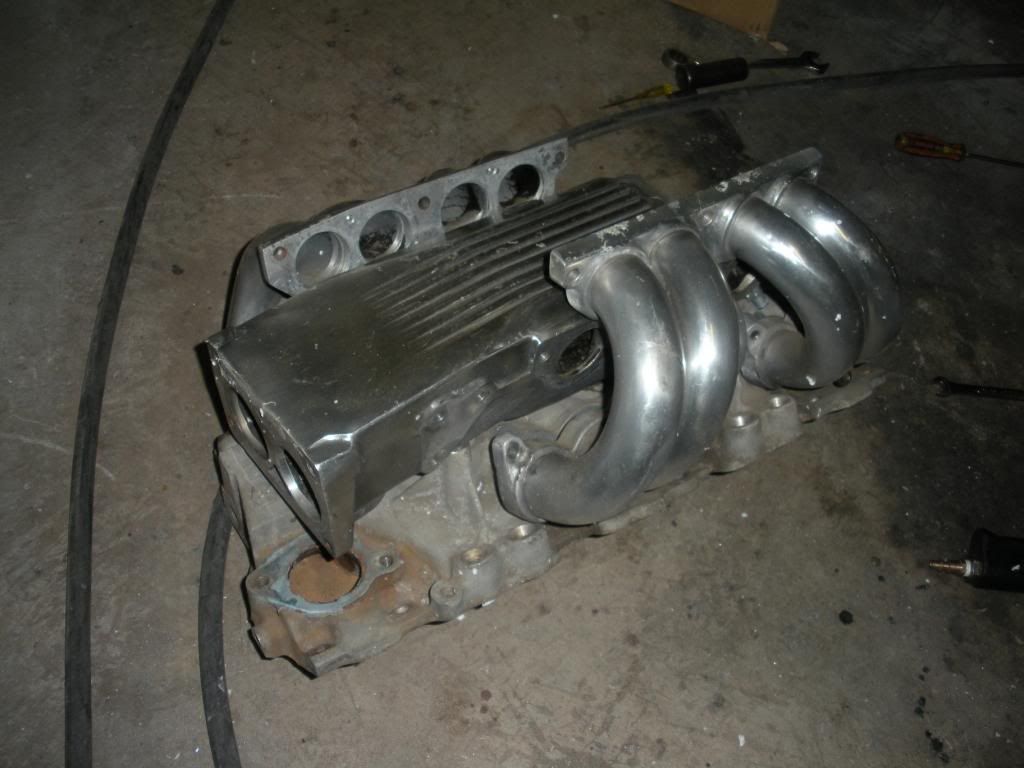 Rebuild kit for the steering rack. Need to tackle that still. 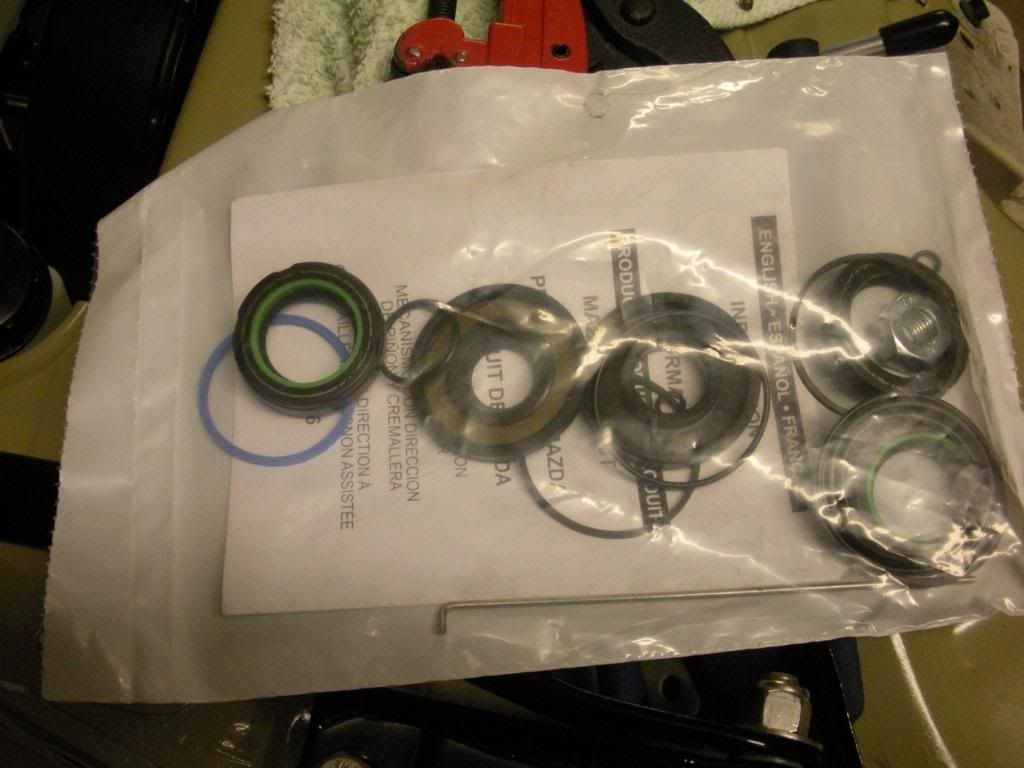 New hardware for the front calipers. 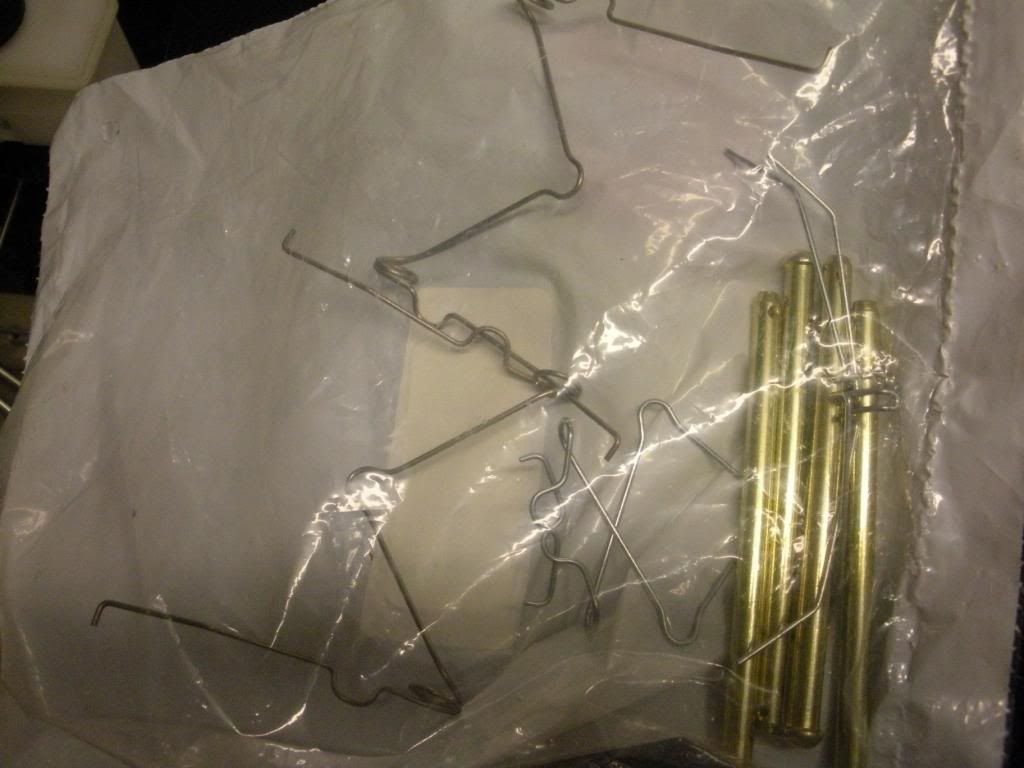 New steering rack bushings, my old ones were pretty trashed, heads up on these they cost about 45 bucks which is a terrible price in my opinion. 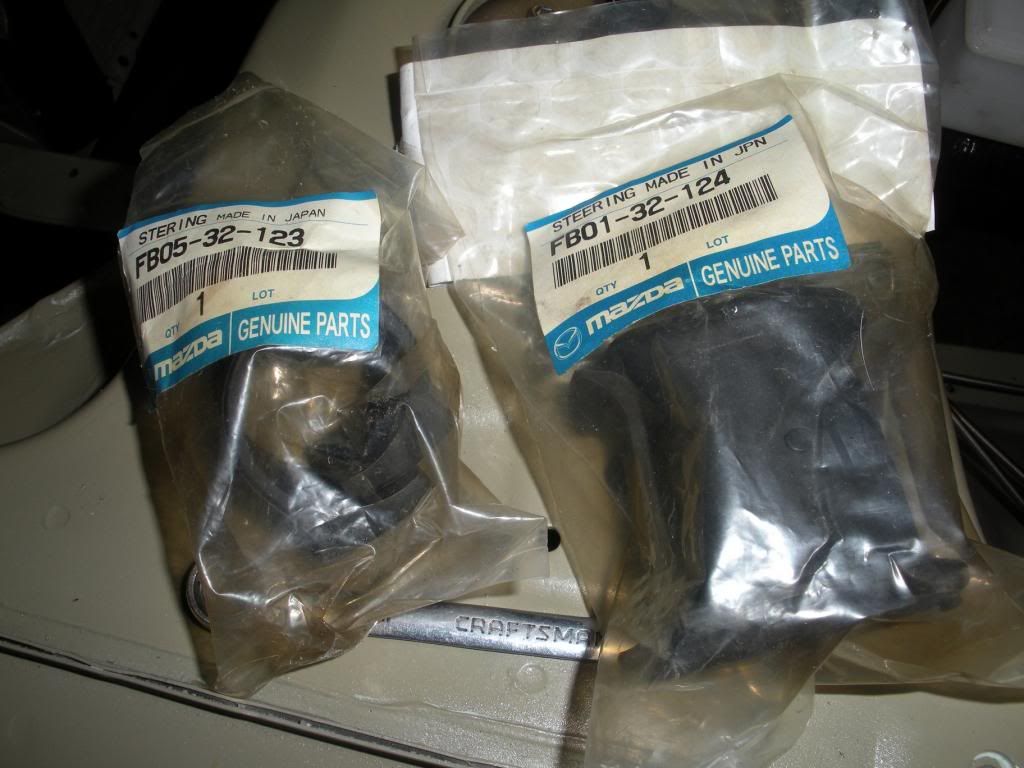
Last edited by StephenSheppard; 02-25-2013 at 02:41 AM. |
|
|
|
|
02-28-2013, 01:08 AM
|
#5 |
|
Rotary Fan in Training
Join Date: Nov 2012
Posts: 58
Rep Power: 13 |
So I rebuilt my steering rack, then made a seperate post about it in the FC forum. Here's the internal link:
http://www.rotarycarclub.com/rotary_...d=1#post234794 That took a lot of time due to the picture taking  Didn't get much else done today. |
|
|
|
|
03-01-2013, 09:12 PM
|
#6 |
|
Rotary Fan in Training
Join Date: Nov 2012
Posts: 58
Rep Power: 13 |
So moving forward after the steering rack rebuild.
Bought these dudes for spacing the hood hinges up away from the body. Normally they go on the bottom of the hood above the top hinge piece but since the FC hood is angled there it's far easier to just space it on the bottom then build a complicated piece that's offset for the hood. Then I just notch the fender for the clearance of the now taller assembly. 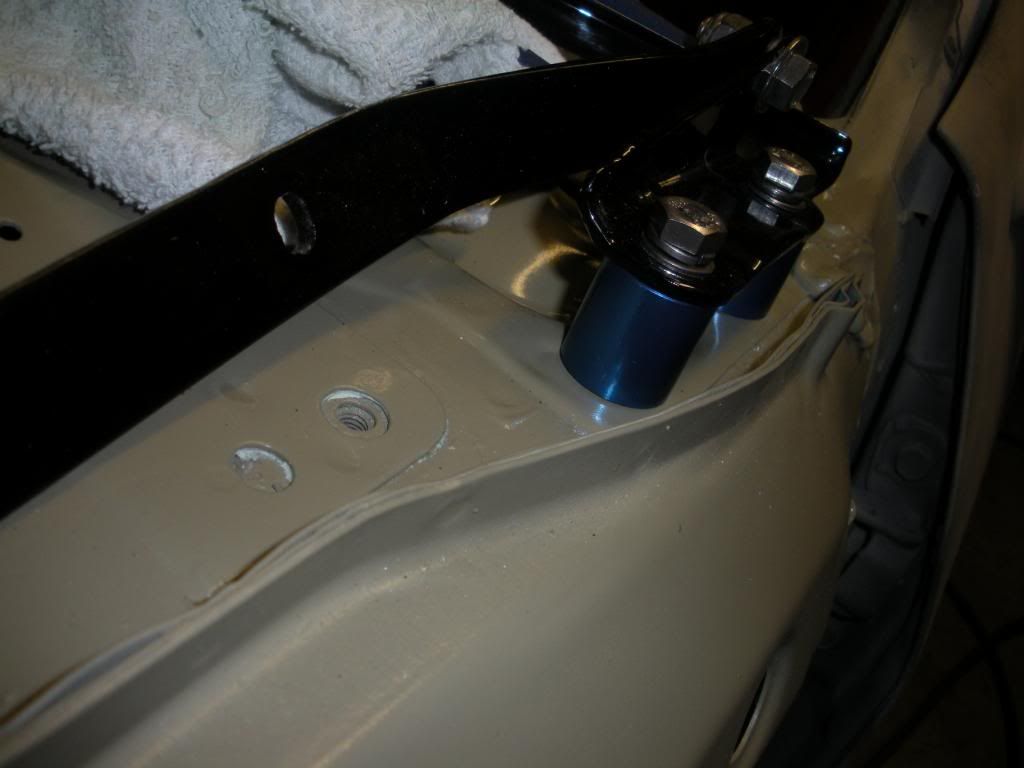 Changed my mind on the right side engine bay harness. Although I won't have 14 wires on that side I decided to use this Molex XRC bulkhead connector anyways. I had it left over from another project so instead of wasting money I decided to use it on my own car. You can find that at the following link: http://www.waytekwire.com/products/2...RC-Connectors/ 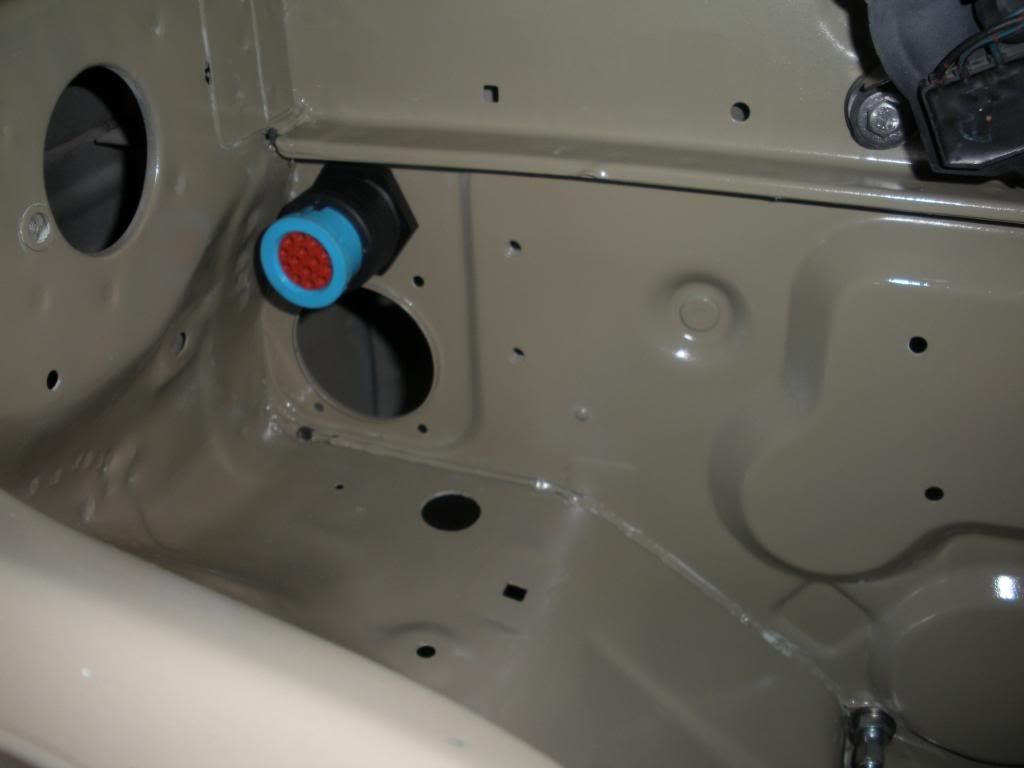 There's still a couple more things to add to this harness but nothing much. The ignition coil wiring may end up on this side of the car, not sure yet on it's placement.  A little closer view. The pass through deals are for the alternator cable and the starter cable. Seperate for a reason we will get to at some point in the build. 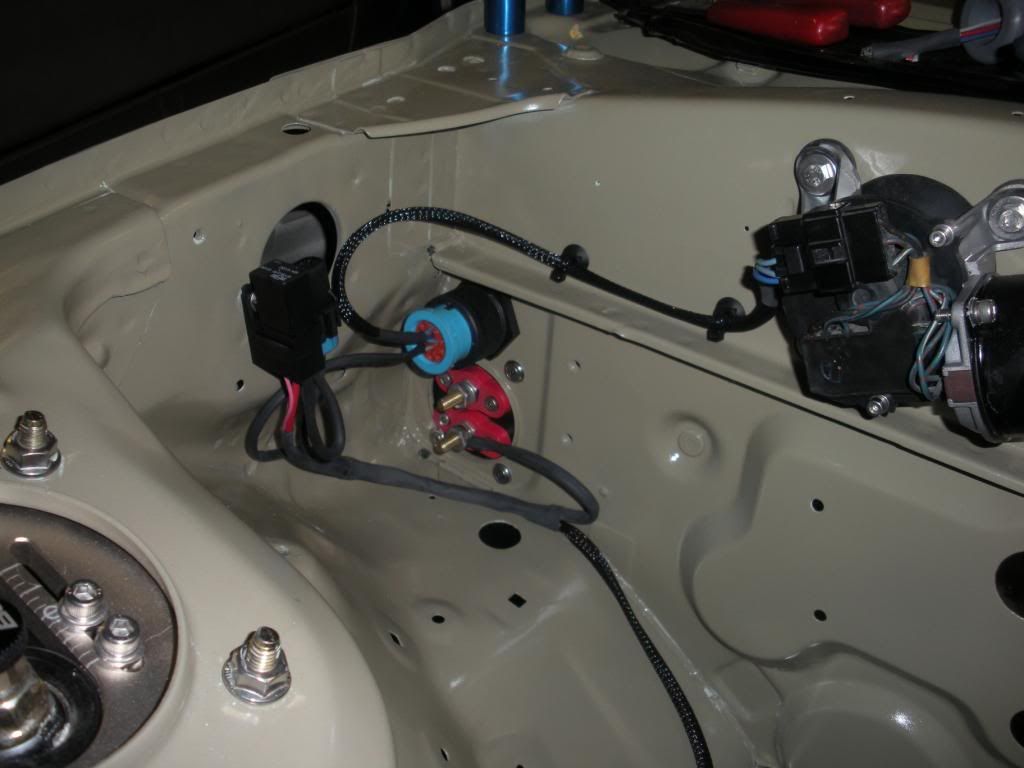 I like details like the clip on this connector. Not technically the correct one but it works well anyways lol. 
|
|
|
|
|
03-03-2013, 10:42 PM
|
#7 |
|
Rotary Fan in Training
Join Date: Nov 2012
Posts: 58
Rep Power: 13 |
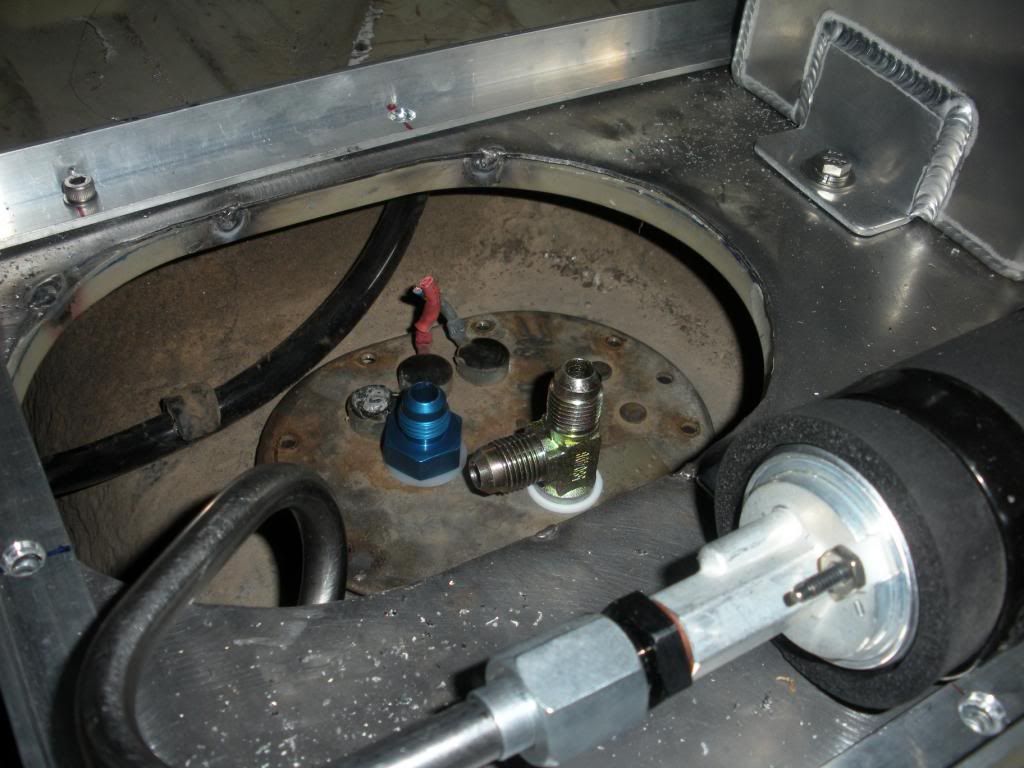
After taking what felt like one million years to drain the tank I removed it and started on the surge tank and second fuel pump. I think there was 16 gallons in the car, seriously it took forever. Put all the fuel in my otehr two cars lol.
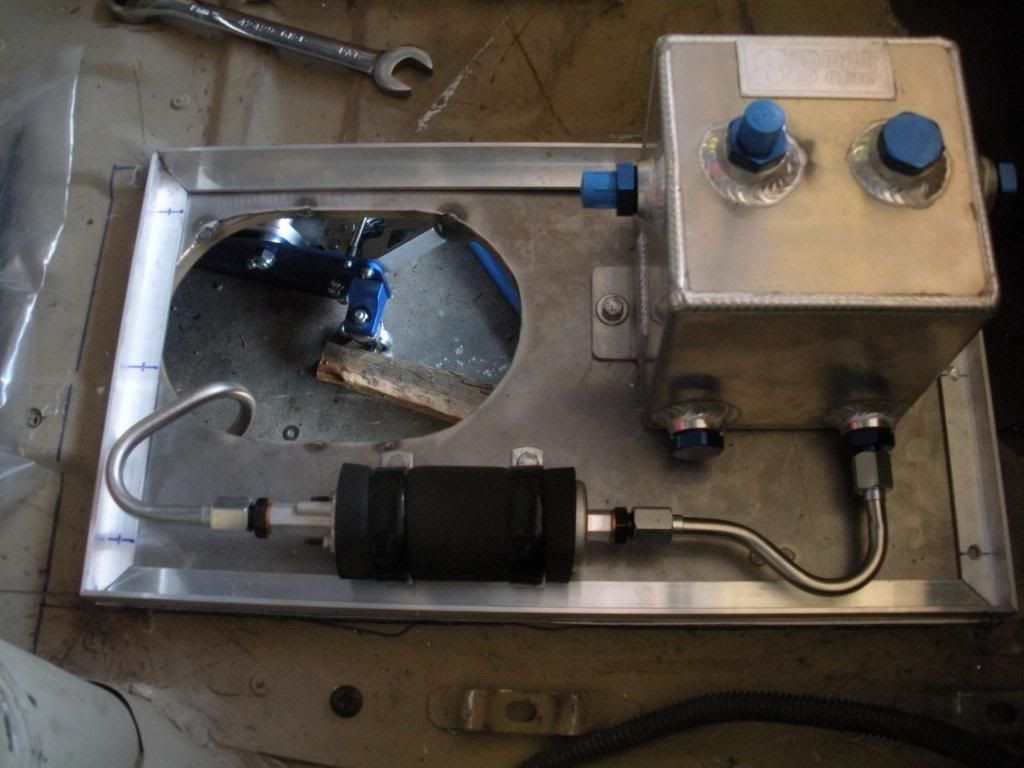
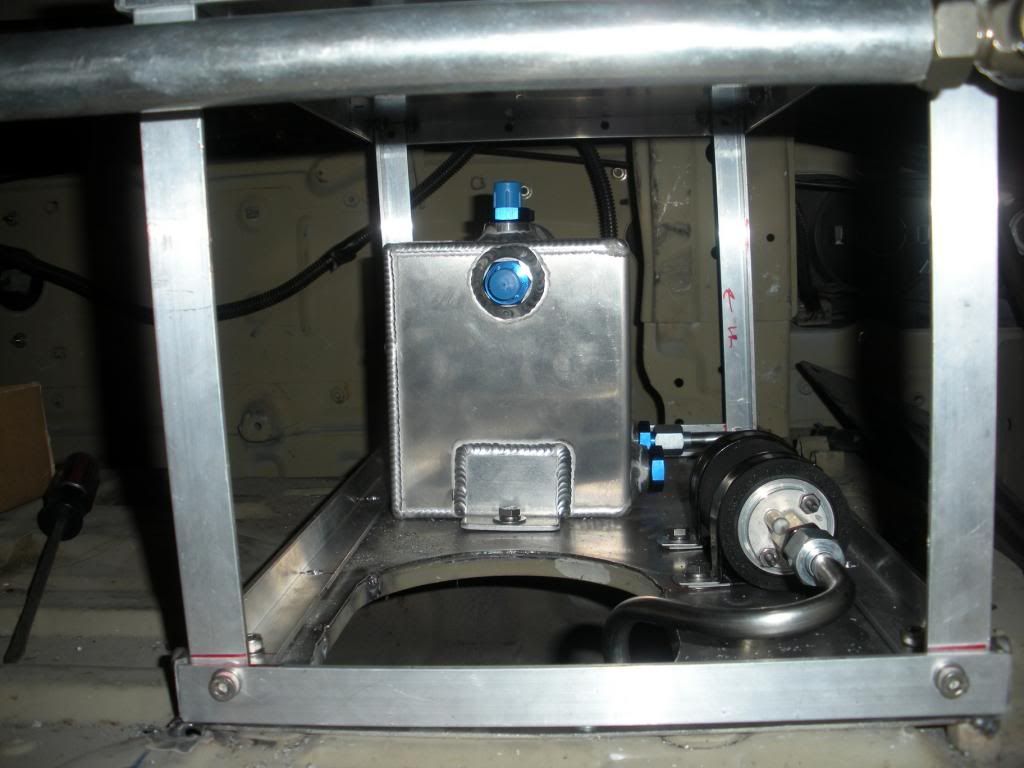
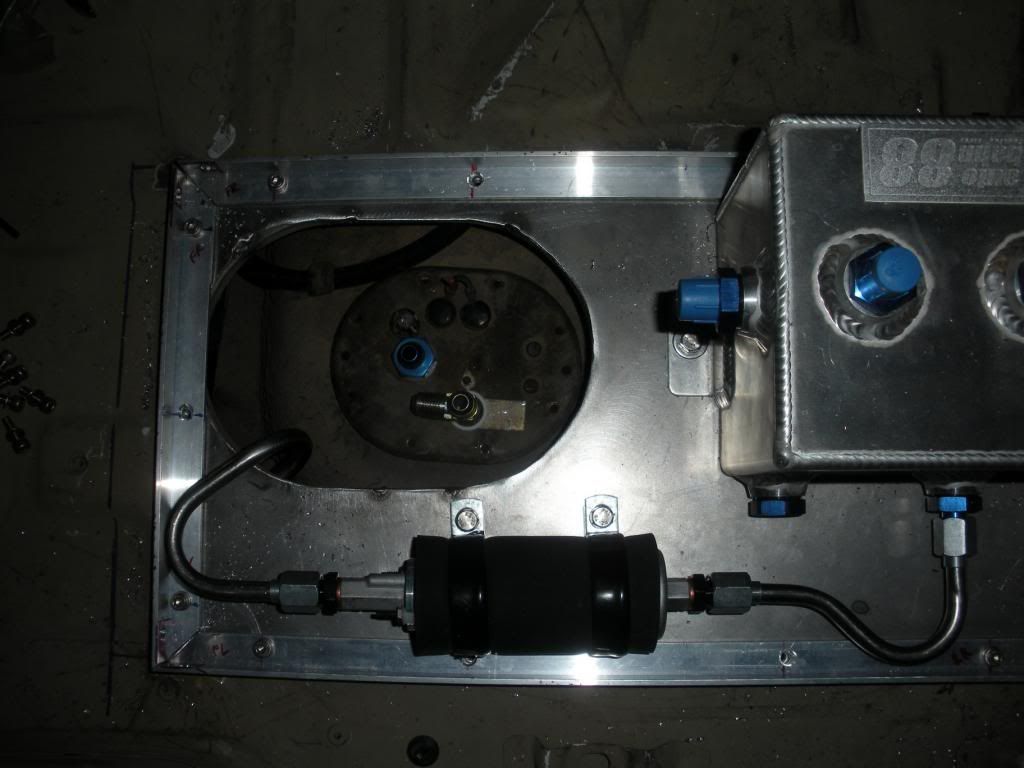
First I gatherered everything up and got an idea of what was needed as far as space goes. I wanted to preserve as much of the trunk space as possible. Cheap chinese surge tank, check. External Walbro loud ass pump, check. And some AN fittings. 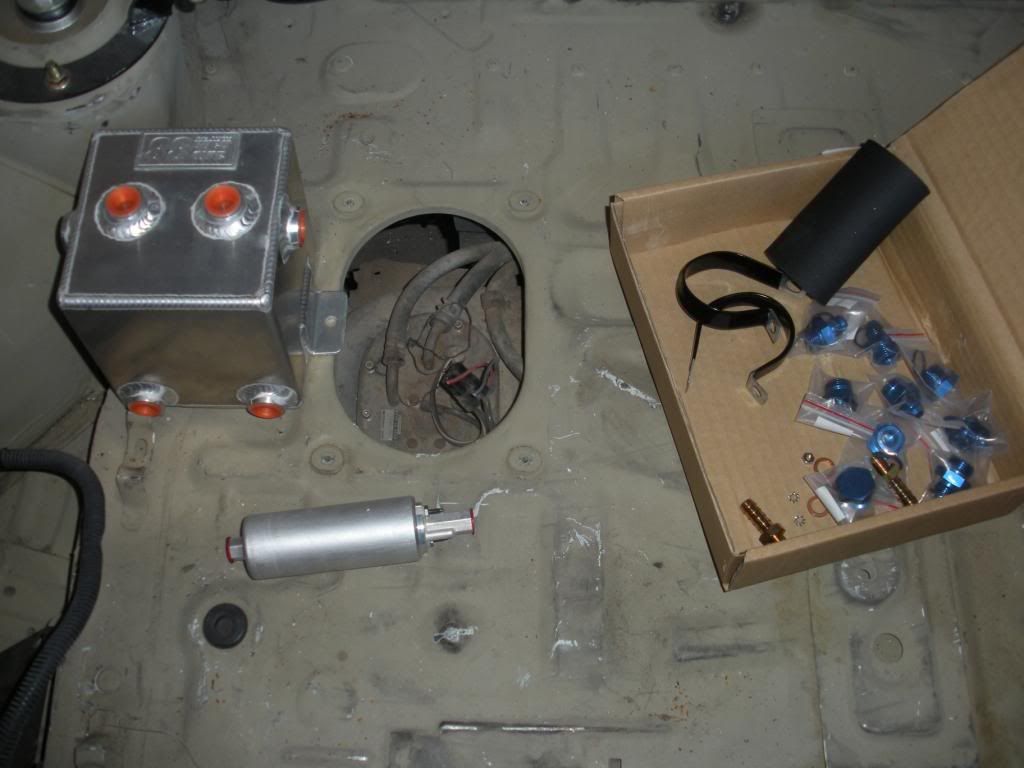 My original layout idea. 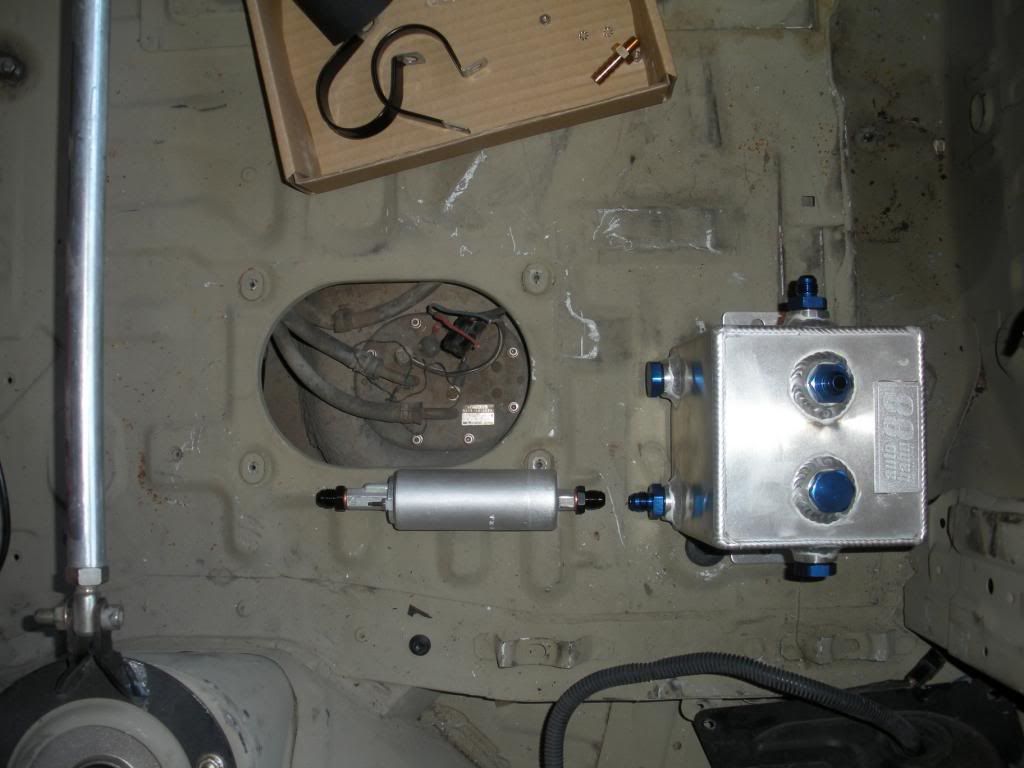 It's so dirty under there. I still need to drop the rear end so I can remove the factory hardlines and build new 3/8" stainless stuff. 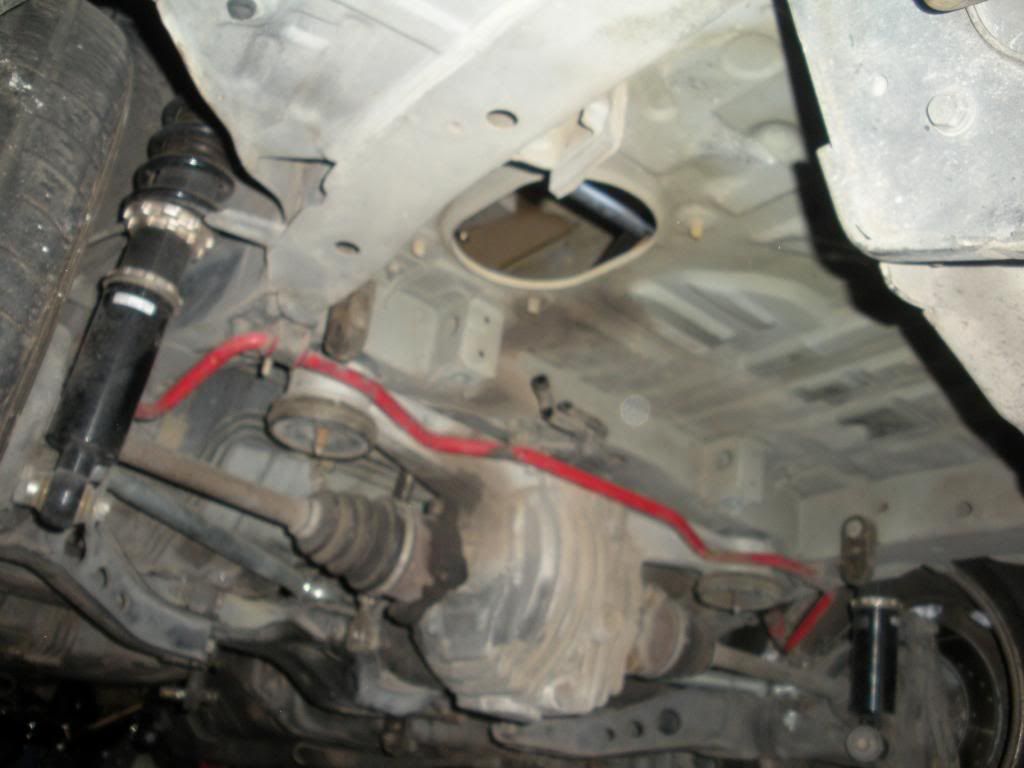 I cut a piece of steel to be tacked to the floor of the trunk to give myself a flat surface to build on, It is my hope when this is fully enclosed that should there be a minor fuel leak it will go out the bottom of the car along with any fire lol. Not sure how that's going to work out. Hopefully I'll never find out. The rason the plate doesn't extend to the blue line is that I felt it was too big for no reason. 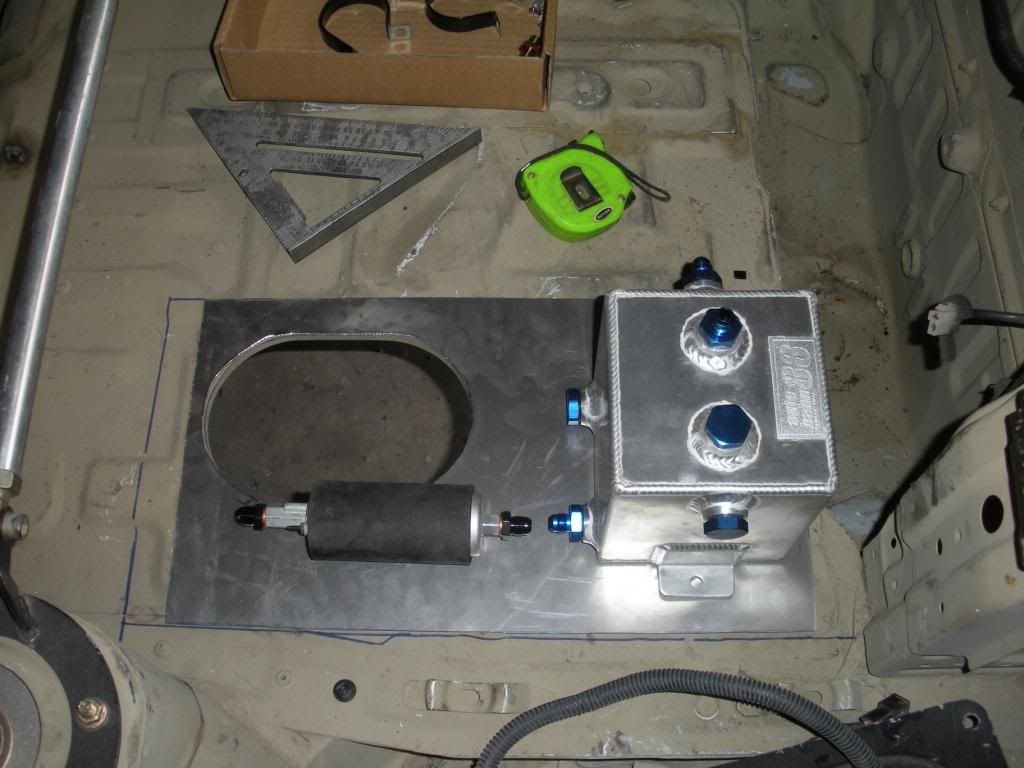 This was option 1 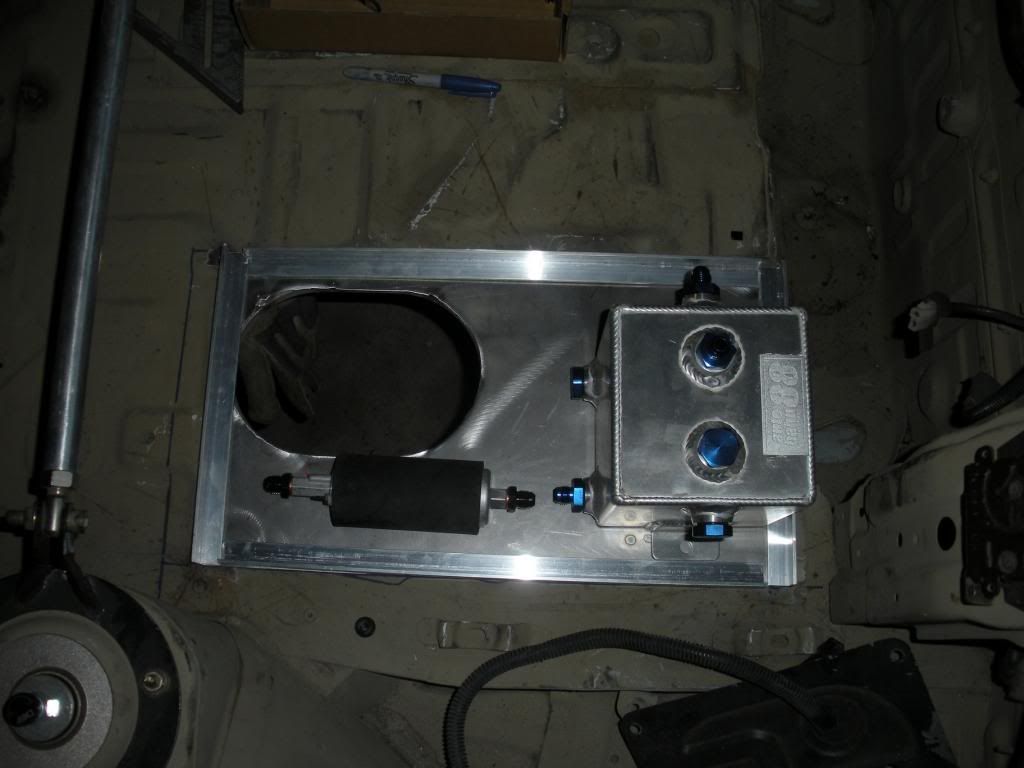 Option 2 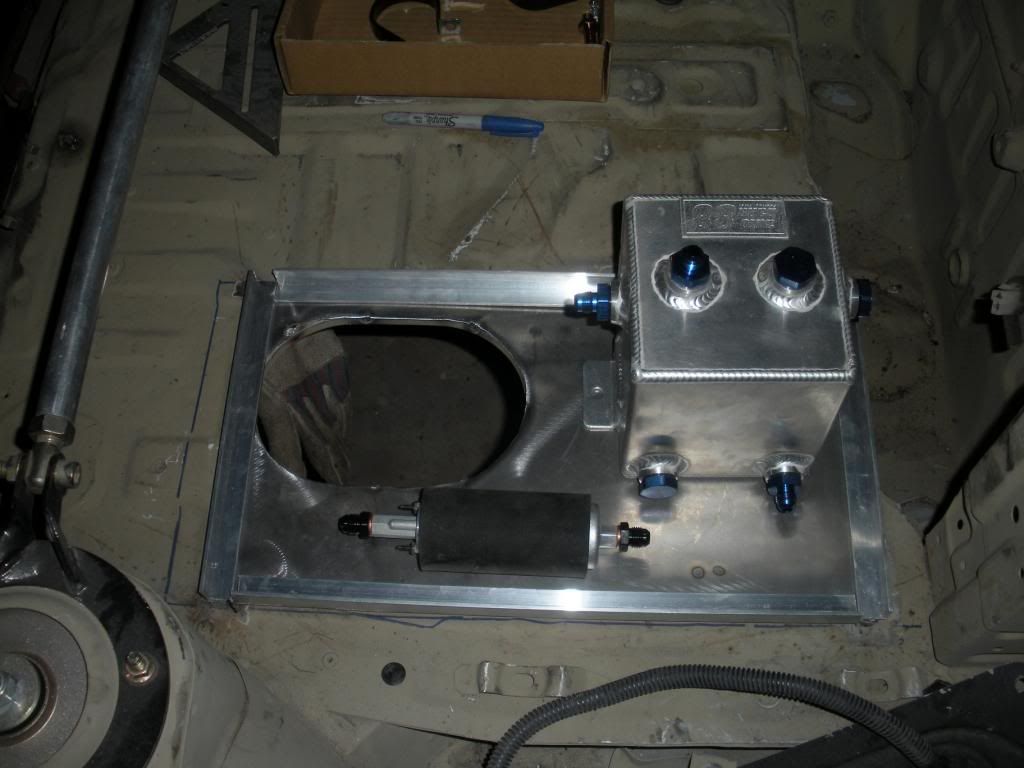 I'll more than likely go with option two. I'll also more than likely cut the angle stuff on a 45 at the corners. I'm hoping to find a piece of scrap aluminium somewhere to build the top out of so the enclosure doesn't weigh anymore than it needs to. Called it quits for the night after this cause I was tired of it to be honest. Also i need to order some fittings to get final clearances for the enclosure. For those not familiar with surge tanks, it goes like this. In tank pump keeps the the surge tank full. External pump takes fuel from the surge tank and sends it to the engine. Pretty simple way to get rid of the fuel pick up problem on FC chassis while turning left. There's pretty much no condition under which the main pump won't keep the surge tank full enough to keep the second pump feeding the engine. |
|
|
|
|
03-05-2013, 09:05 PM
|
#8 |
|
Rotary Fan in Training
Join Date: Nov 2012
Posts: 58
Rep Power: 13 |
After getting off work today I took a couple minutes and dropped the rear end/suspension out of the car so I could remove the factory hardline deal that runs under the entire car. It's trapped above teh subframe and differential if anyone doesn't already know that lol.
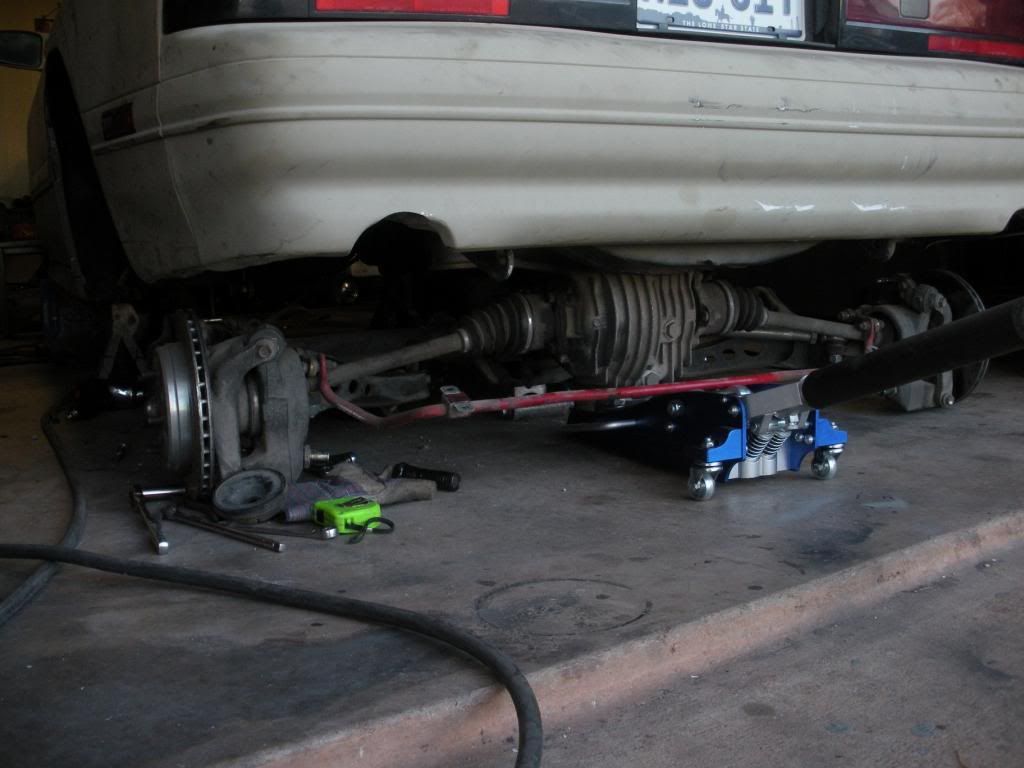 Never let your caliper hang off your soft brake line. Always ziptie them up. When I remove the rear end as an entire assembly I leave the coilovers in and the brakes hooked up. Also I'm going to be sellign the brake lines shown here and the front One's as well. Only the rears have ever been on the car, the front ones are brand new. I'll include the crush washers and banjo bolt as well. Say $50 shipped in the contenital USA? Just holler at me if your interested. I'm building new ones that are AN fitting types so that's the only reason I'm even selling them. 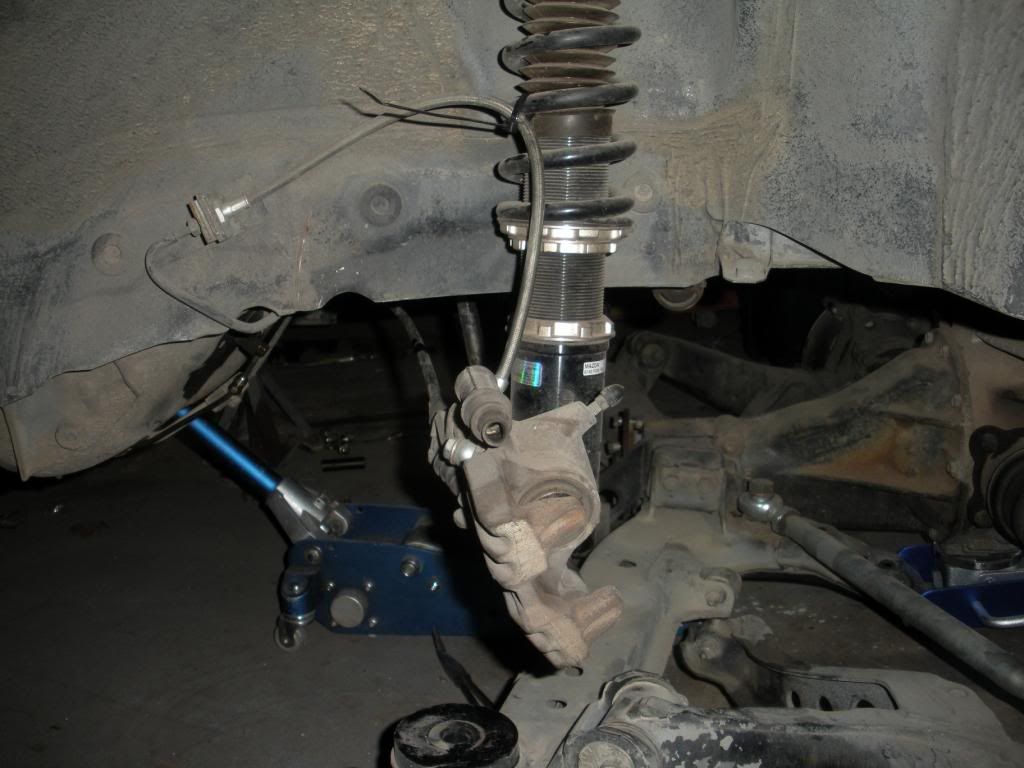 That needs to go 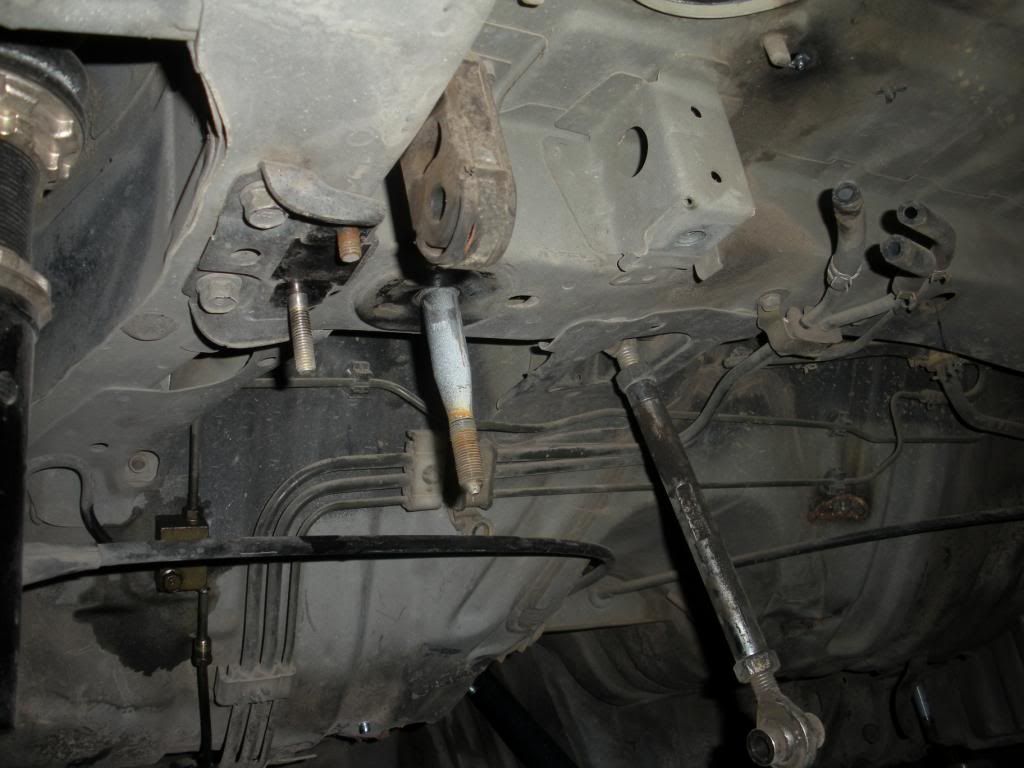 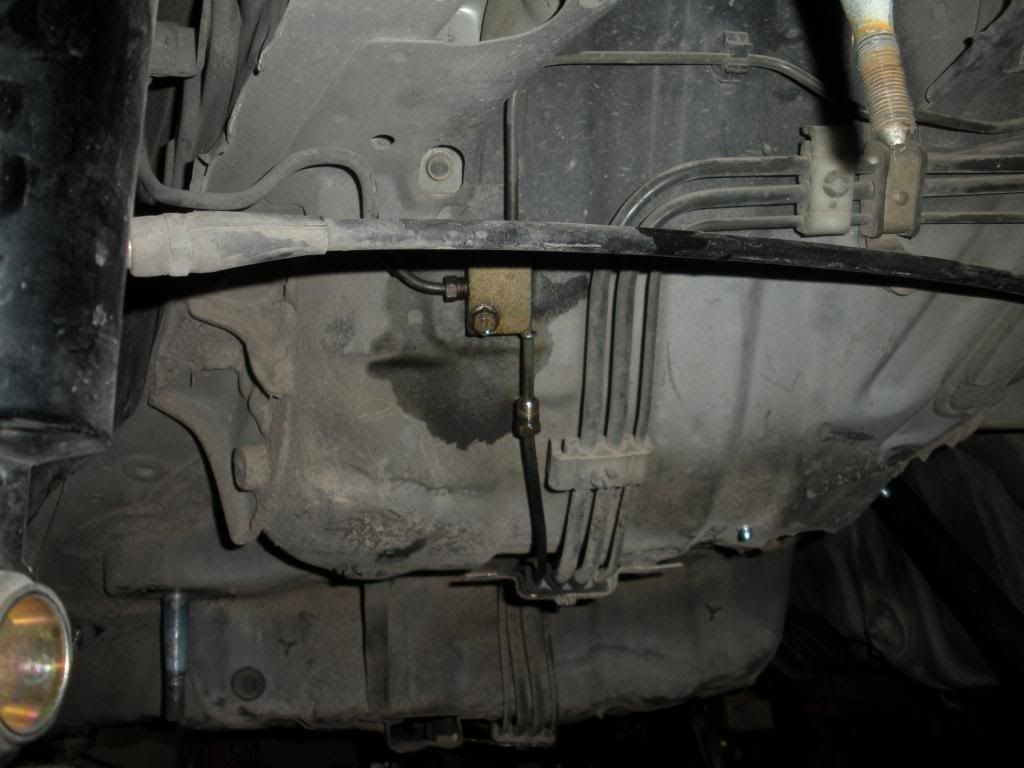 And here it is pulled out ready to go in the garbage. 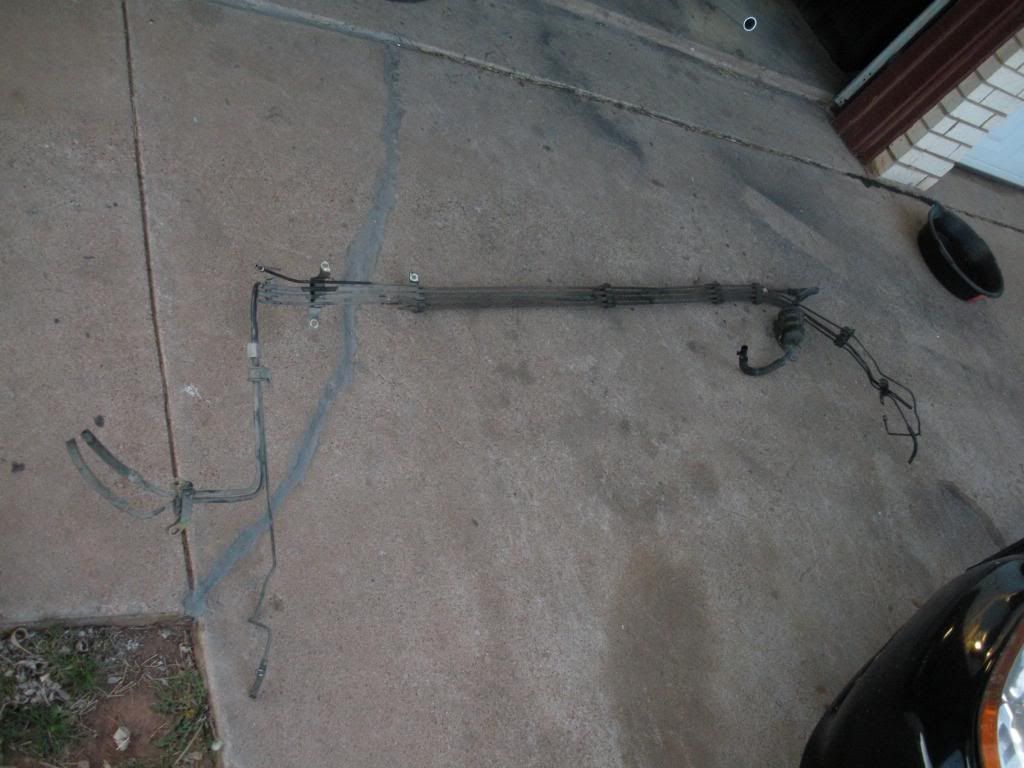 I highly recommend MMR's Subframe and diff bushings. They are Delrin and super solid. I have yet to have any issues with these. Been in the car for a year or two. 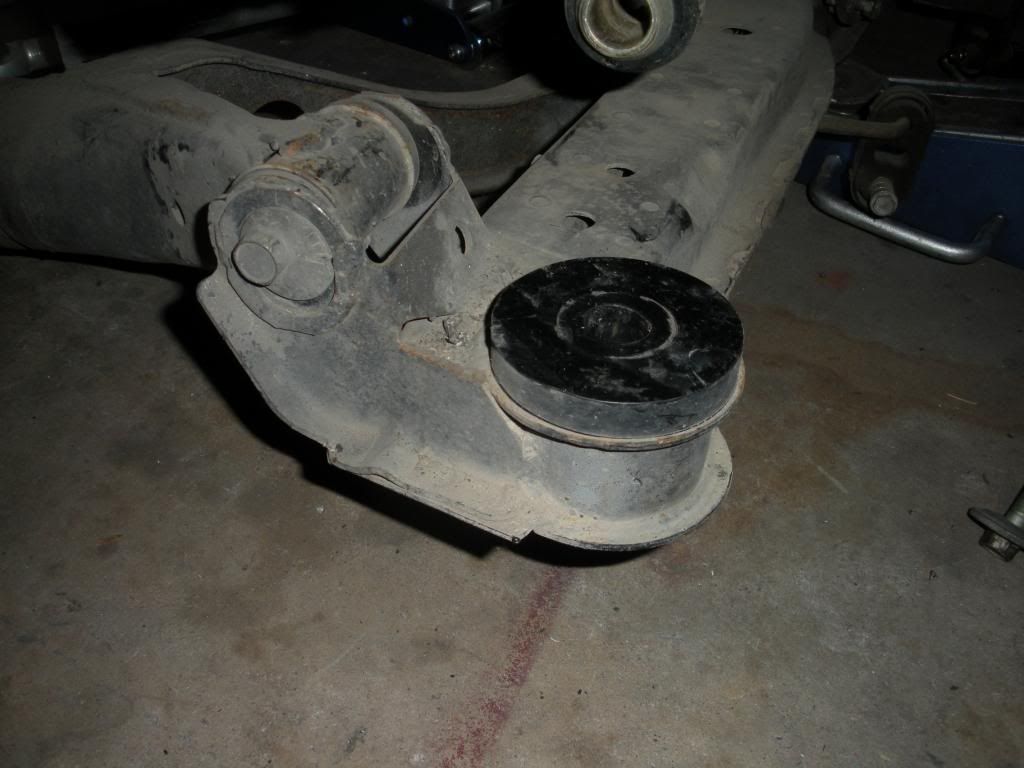 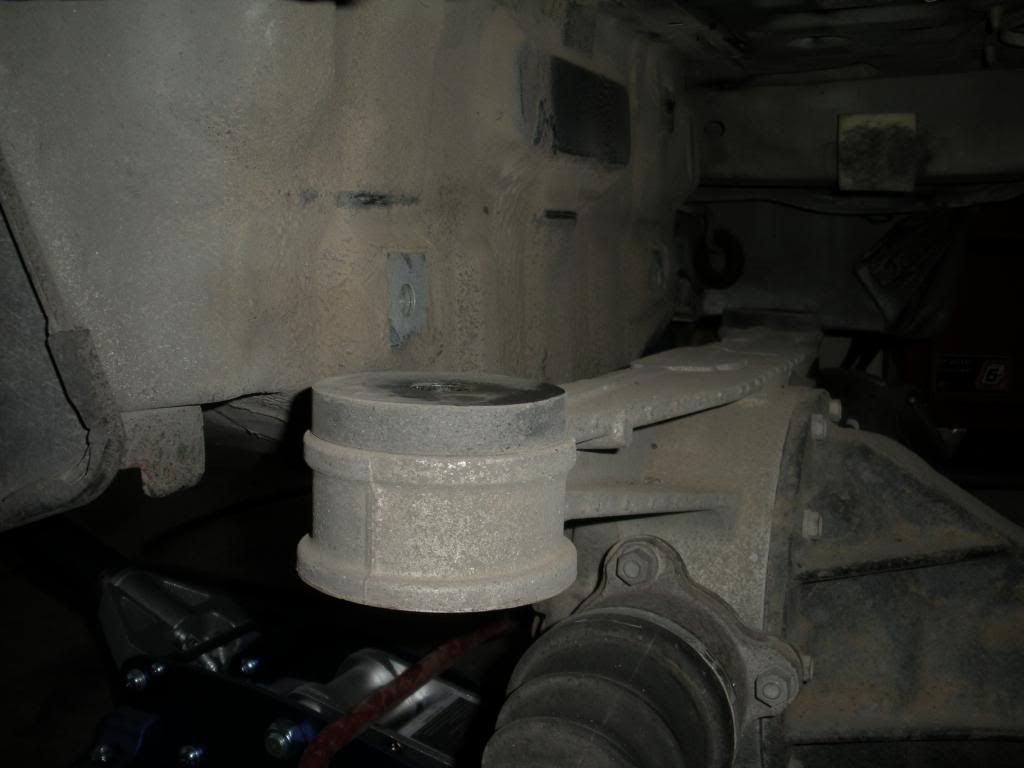 Something that happens a lot on my car. I always seem to get tire shreds stuck in the brake assembly and wrapped around the hubs. 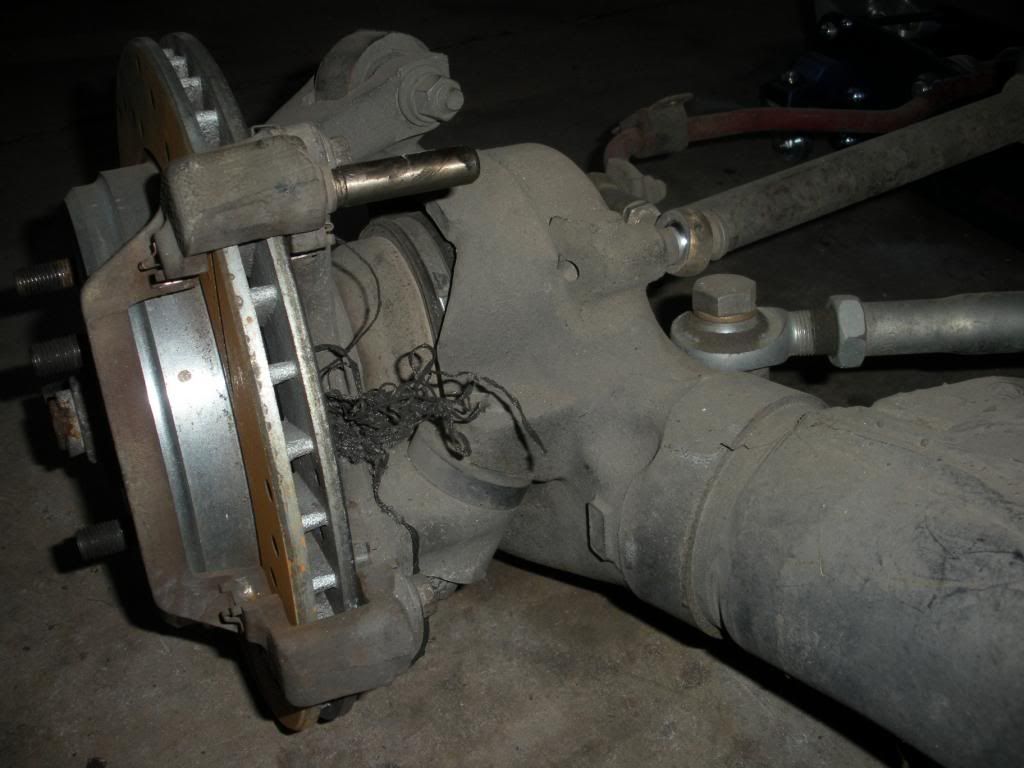 Another reason I recommend the MMR diff bushings. Since I installed them I have yet to break a front diff mount. It looks like there's a tiny crack but it's just the casting or whatever you call it for rubber stuff. I was only making probably 160lbft of torque but this mount has like 1000 clutch kicks on it at least. We will see how it does with the V8.  Waiting on a bunch of stuff to arrive from Summit Racing still, fittings, tube, hardware, bla bla bla |
|
|
|
|
03-06-2013, 04:48 PM
|
#9 |
|
Rotary Fan in Training
Join Date: Nov 2012
Posts: 58
Rep Power: 13 |
So today's my day off and I decided to get some of the rear brake lines done while I'm just sitting around waiting on FedEx and UPS to bring me stuff.
I used -3AN straight bulkheads on each side through the factory brake line holders. Just flat washers, a lockwasher and nut. Bam done. Easiest thing on the whole damn car. 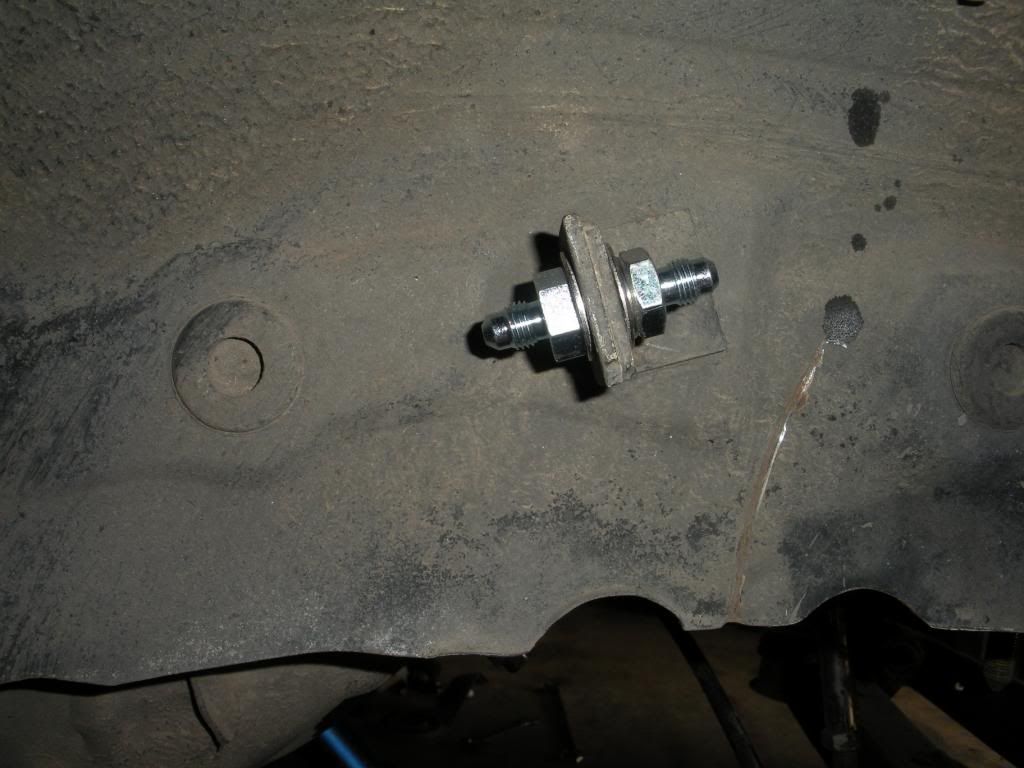 Bent up some more stainless tube for the right rear from the factory junction block to the holder. I'll put the nuts and sleeves on this after i have the fittings for the junction block, which is supposed to come today. 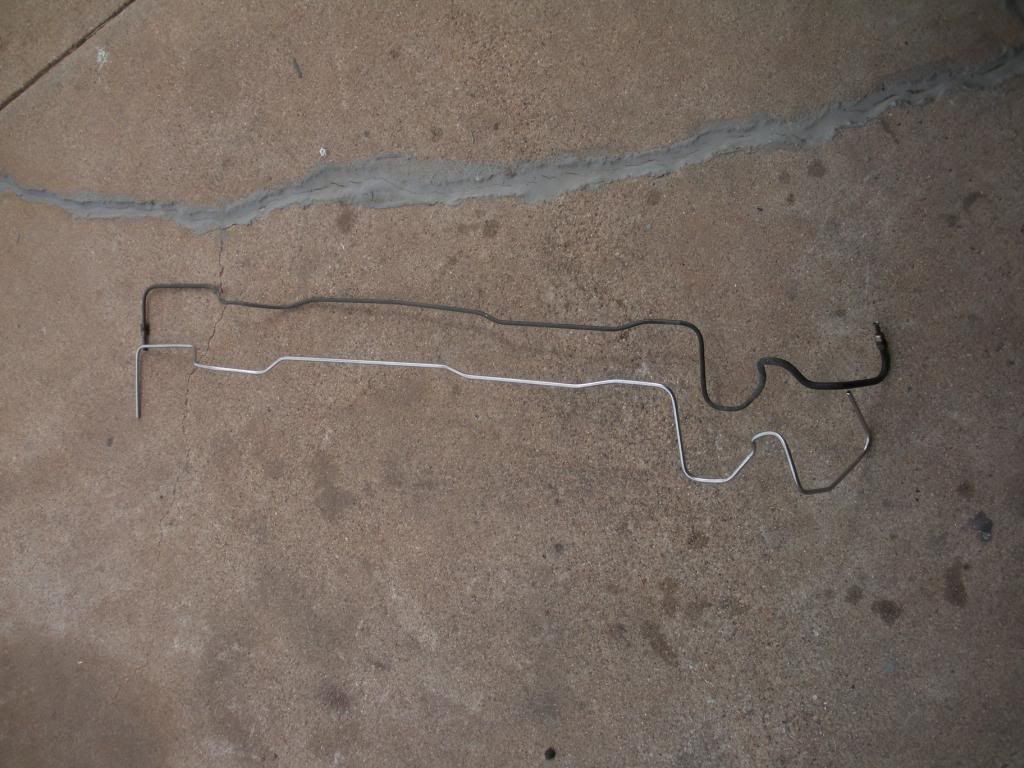 Same deal here. 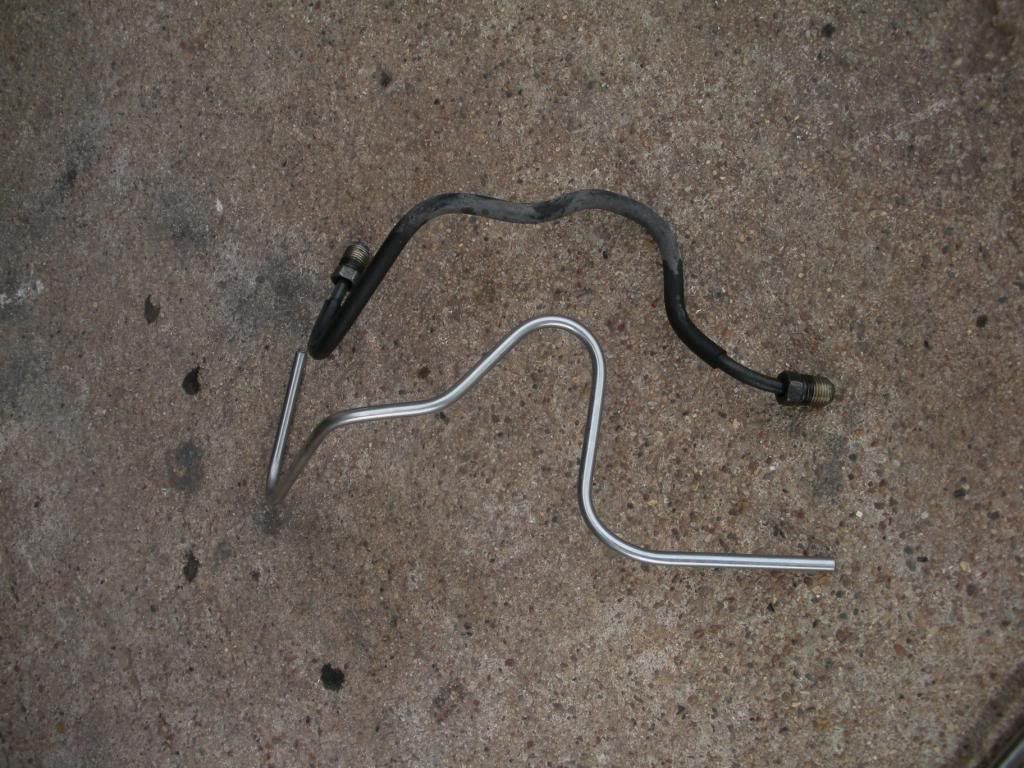 Stuck the new line in the car to get an idea of where I want the new clamps. The factory plastic clamps do fit the 3/16" line just fine if anyone wanted to know. Mine are a bit beat so I'll use new aluminium clamps like the stuff in the front of the car, cause I hate money basically. 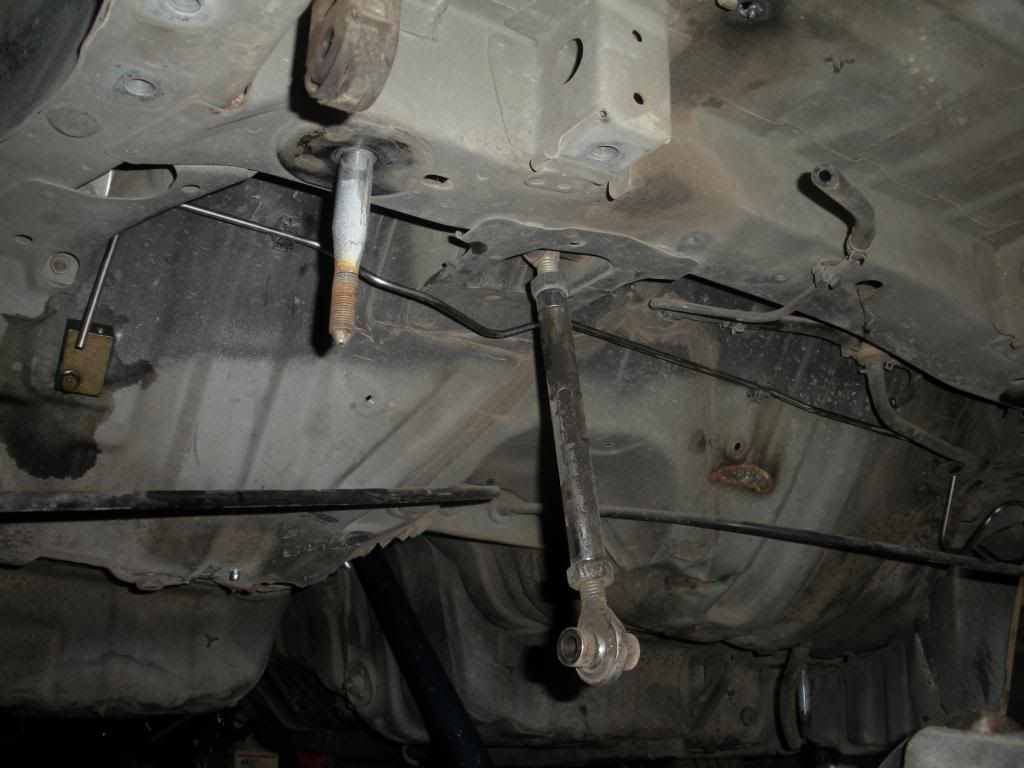 Dat fitment! 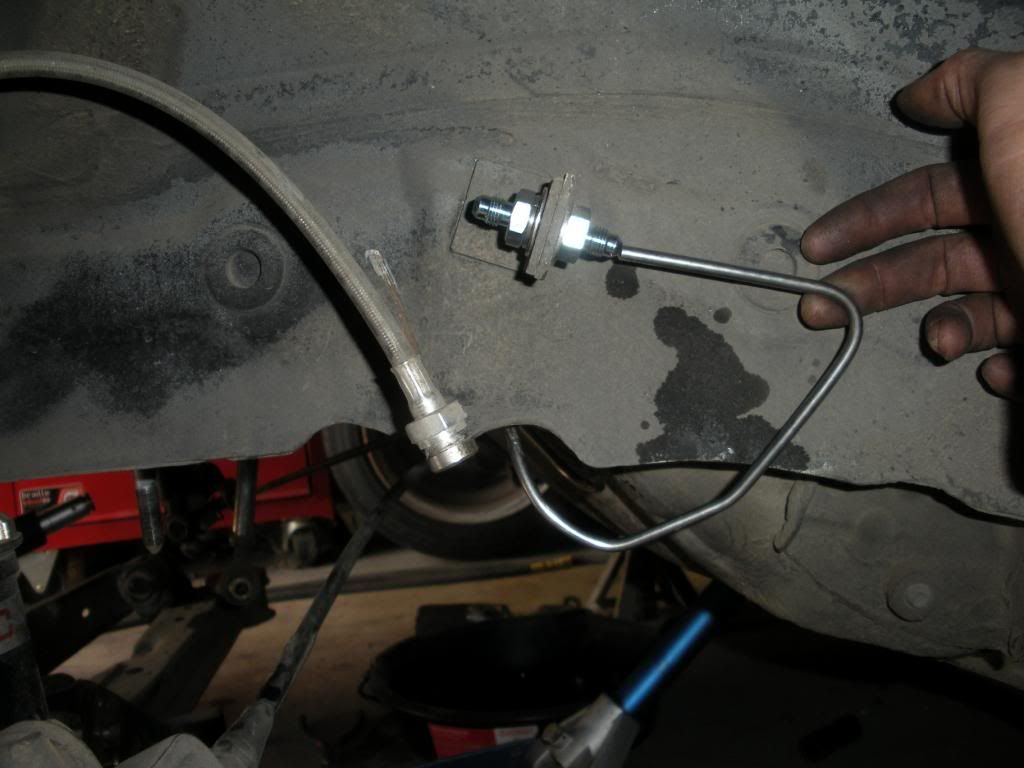 So damn many bends at the end of this thing. PITA to make. 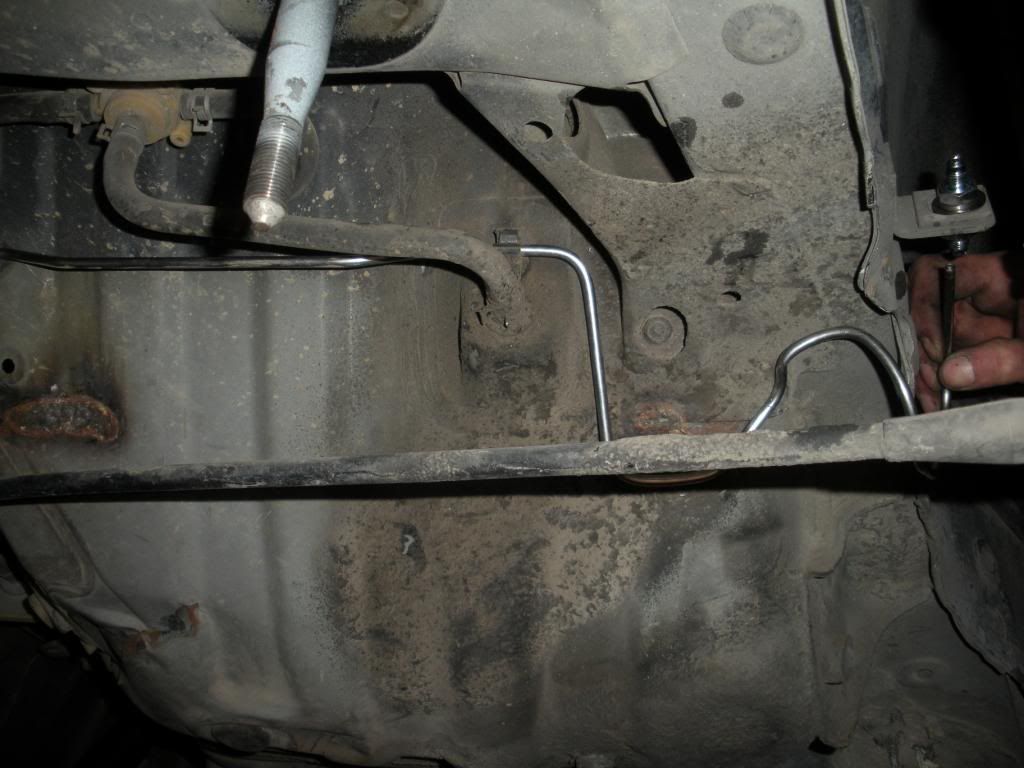 Now if the delivery dudes will get here I can finish this up and build the fuel lines and stuff. Also have some misc stuff coming like a new oil pan and whatever else I bought I can't even remember lol. |
|
|
|
|
03-12-2013, 07:56 PM
|
#10 |
|
Rotary Fan in Training
Join Date: Nov 2012
Posts: 58
Rep Power: 13 |
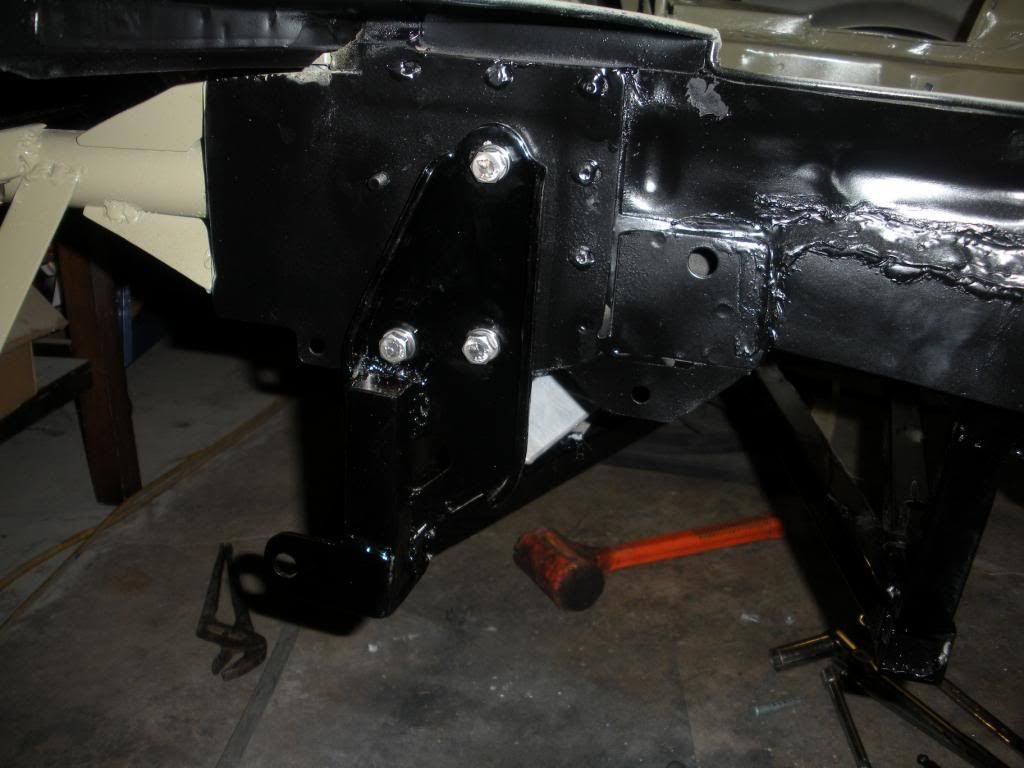
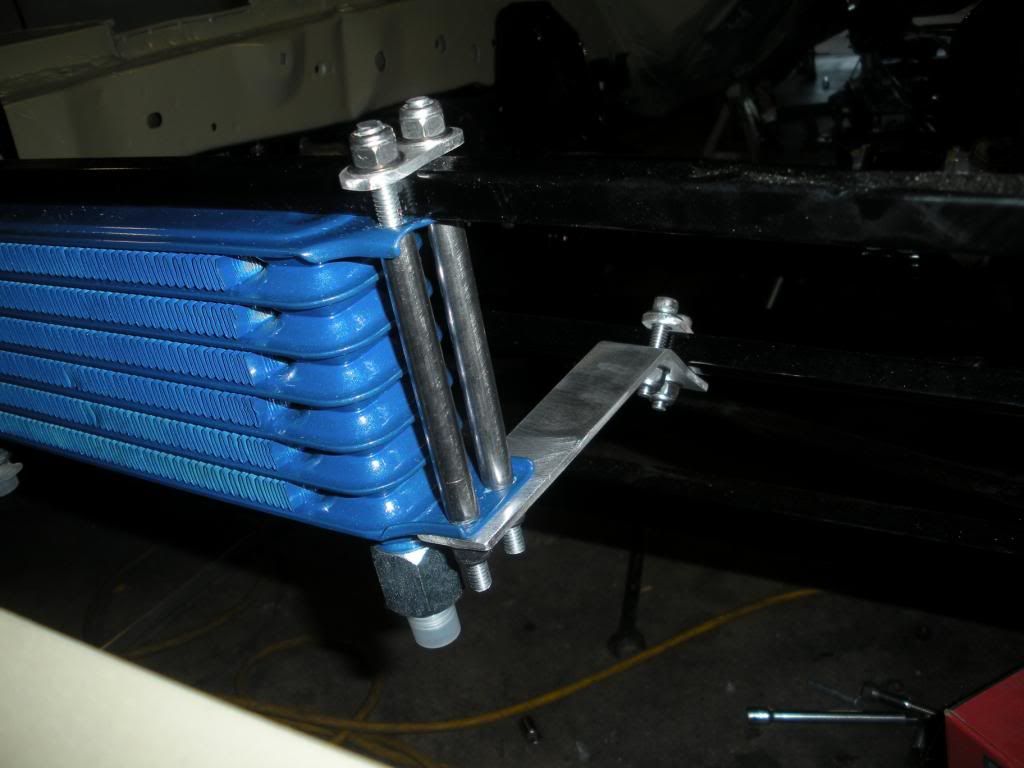
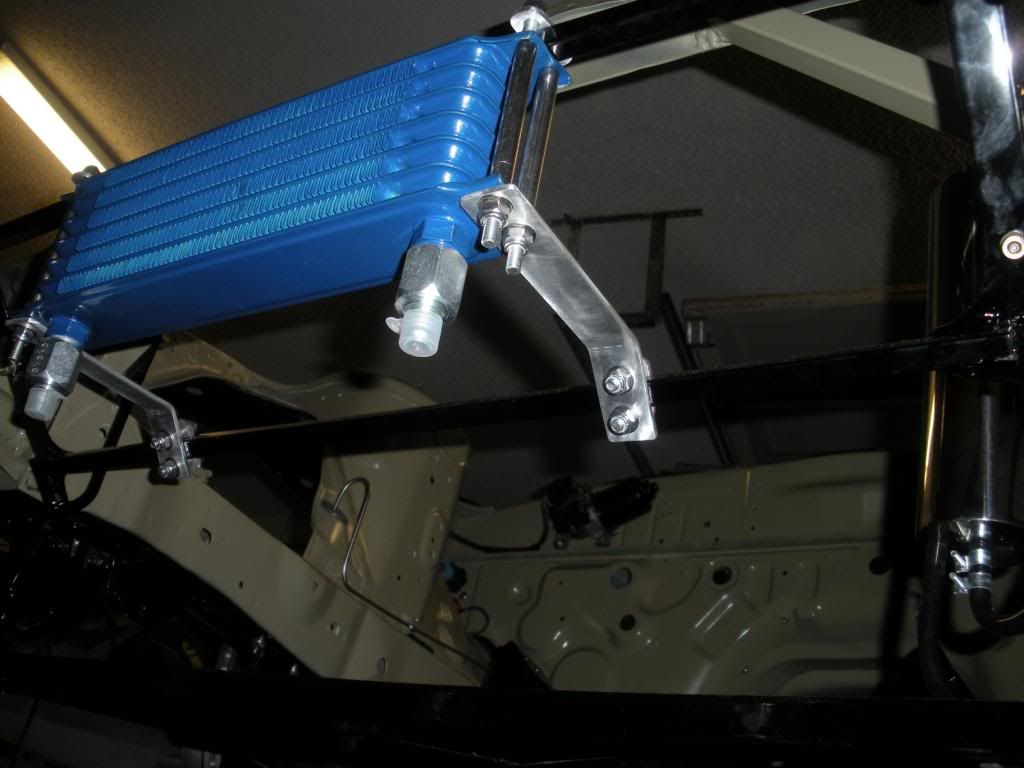
Finished up my power steering brackets finally, due to my Uncle in Canada bugging me about it and how the cooler would shake itself apart. Shit isn't going anywhere now. i can double as a bash bar at this point.
|
|
|
|
|
03-23-2013, 10:36 PM
|
#11 |
|
Rotary Fan in Training
Join Date: Nov 2012
Posts: 58
Rep Power: 13 |
So this happened next? I'm lost lol
 Still had these bad boys new in the packaging lol. The date on them is hilarious. 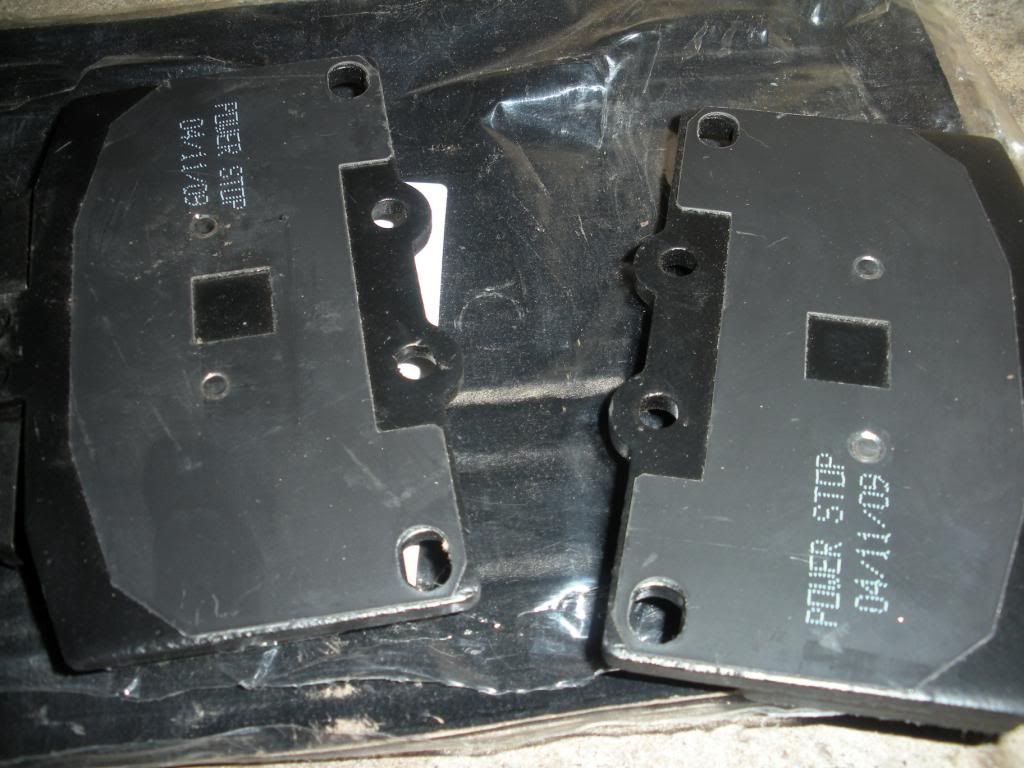 Hung the calipers and put the AN fiittngs in them. Does anyone know if the big spring goes on the bottom or top???? I can't even remember lol. Probably doesn't matter, but damn these are sexy with all new hardware and stuff. 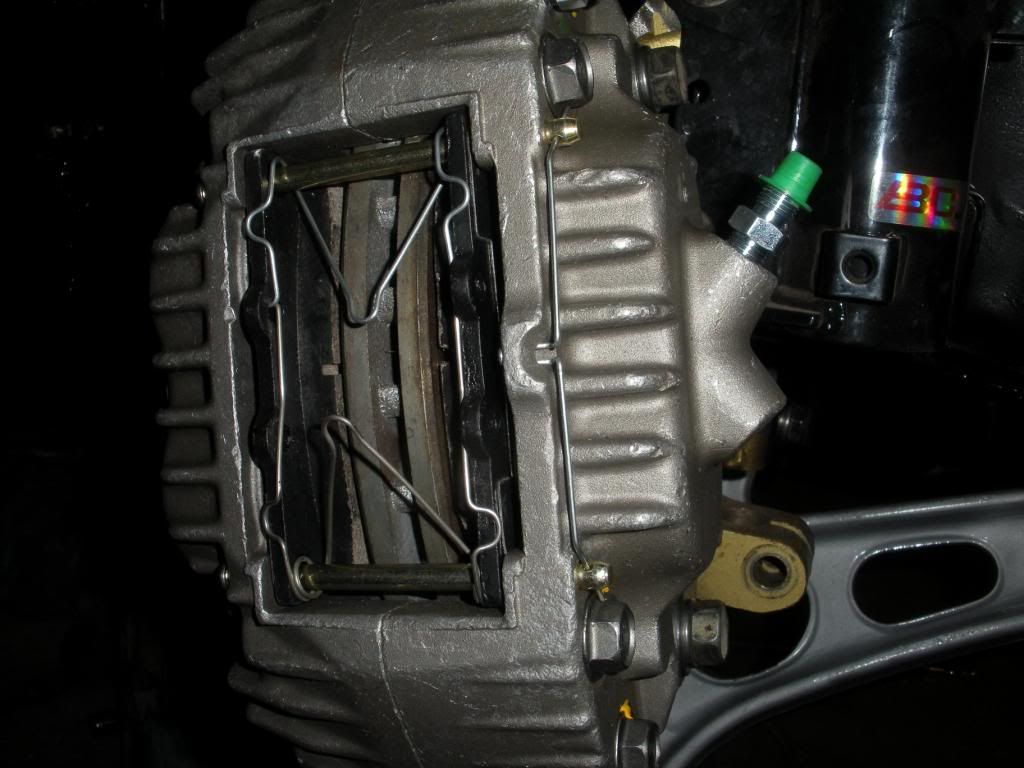 Dat new new 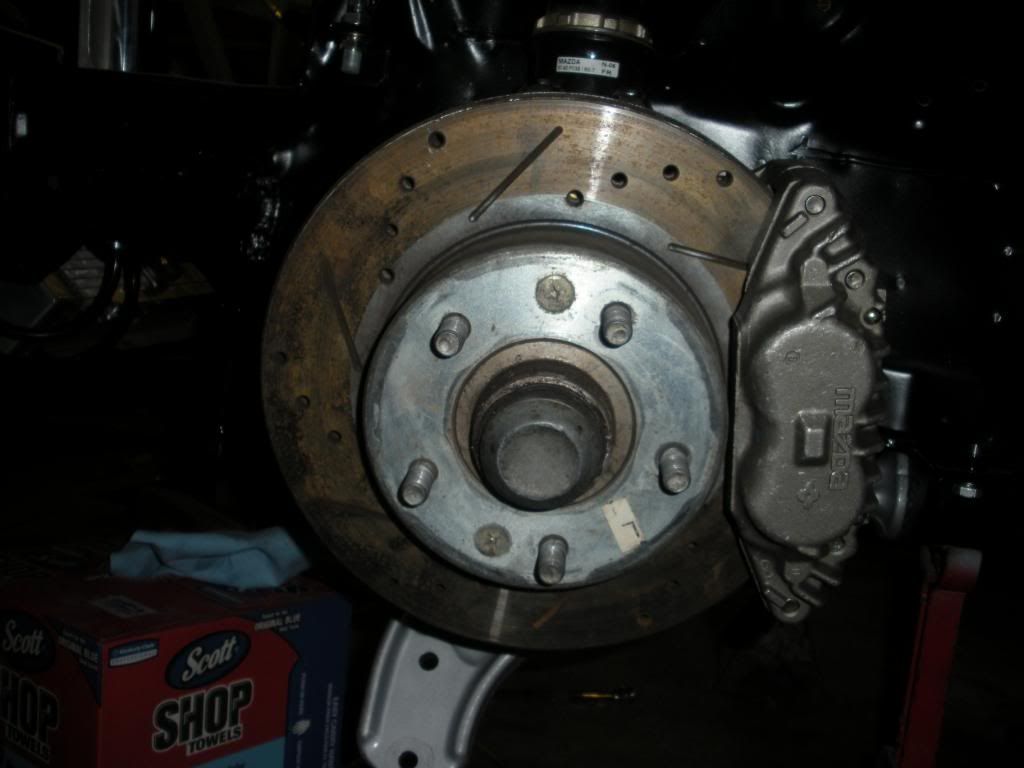 Tore this thing all apart, got rid of the ignition cylinder. 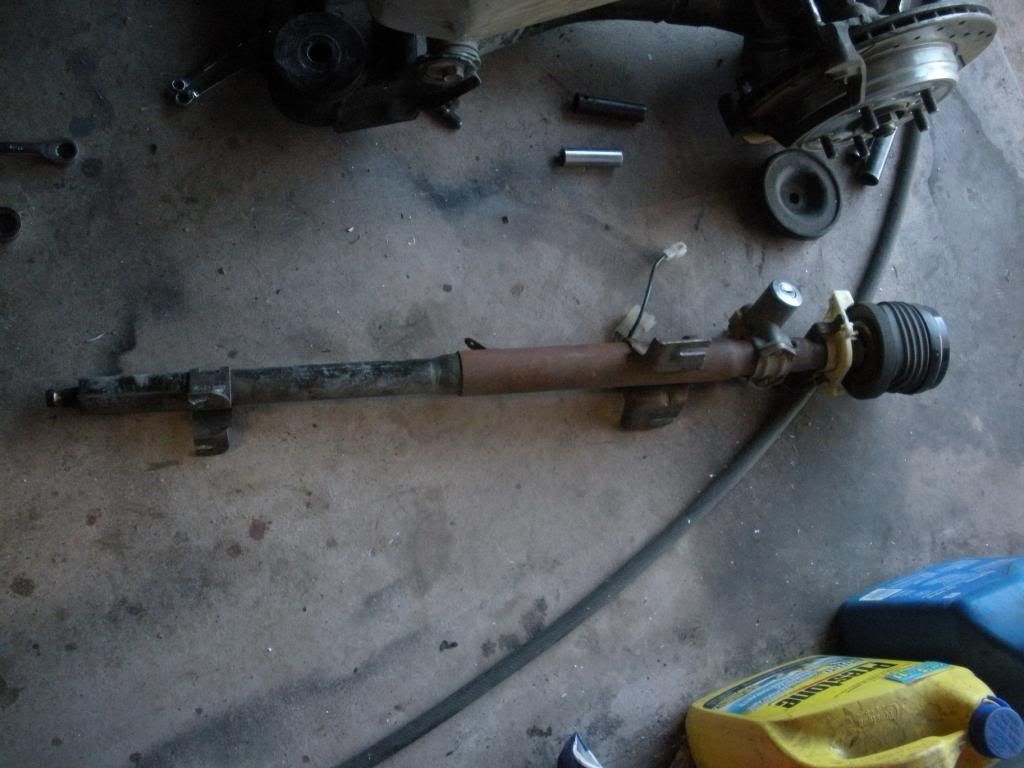 Painted and installed my headlight stuffs. Came out pretty cool, ain't mad at it.  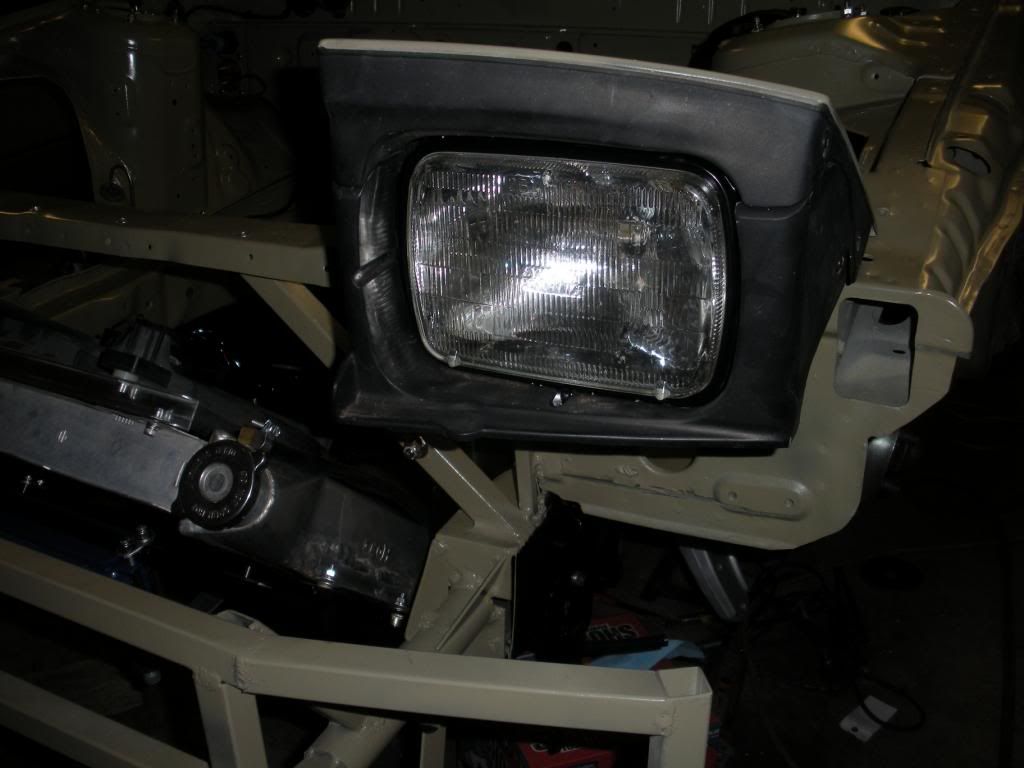 This is terrible and went in the trash can. I can't roll like that. A new one or substitute will be ordered. It's the grommet for the steering column. 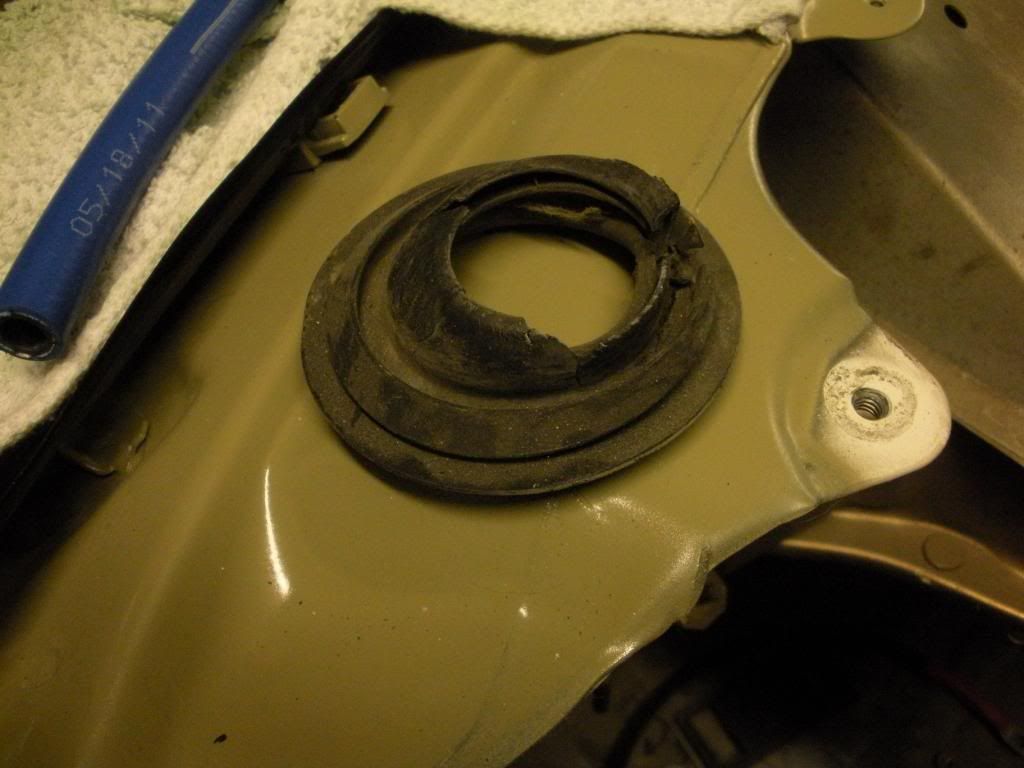 Steering column stripped down and repainted. Color looks super wierd in this picture. Might go black anyways after all. 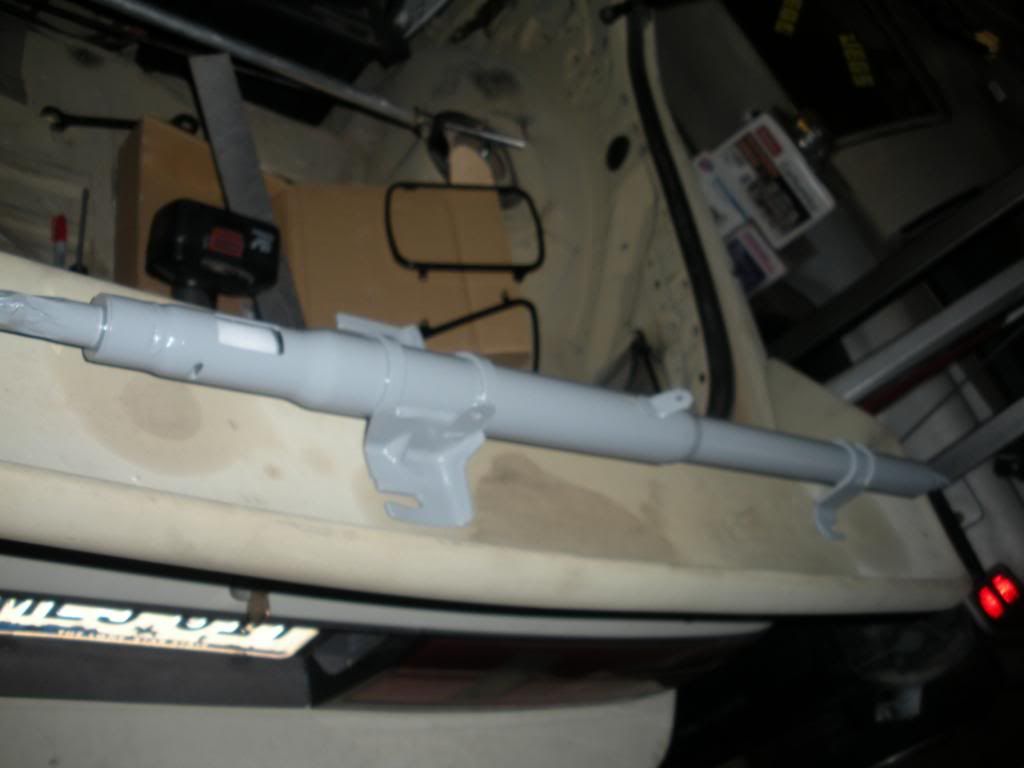 Messing with these almost perfect fenders I got from a buddy. Just thinking and getting ideas. 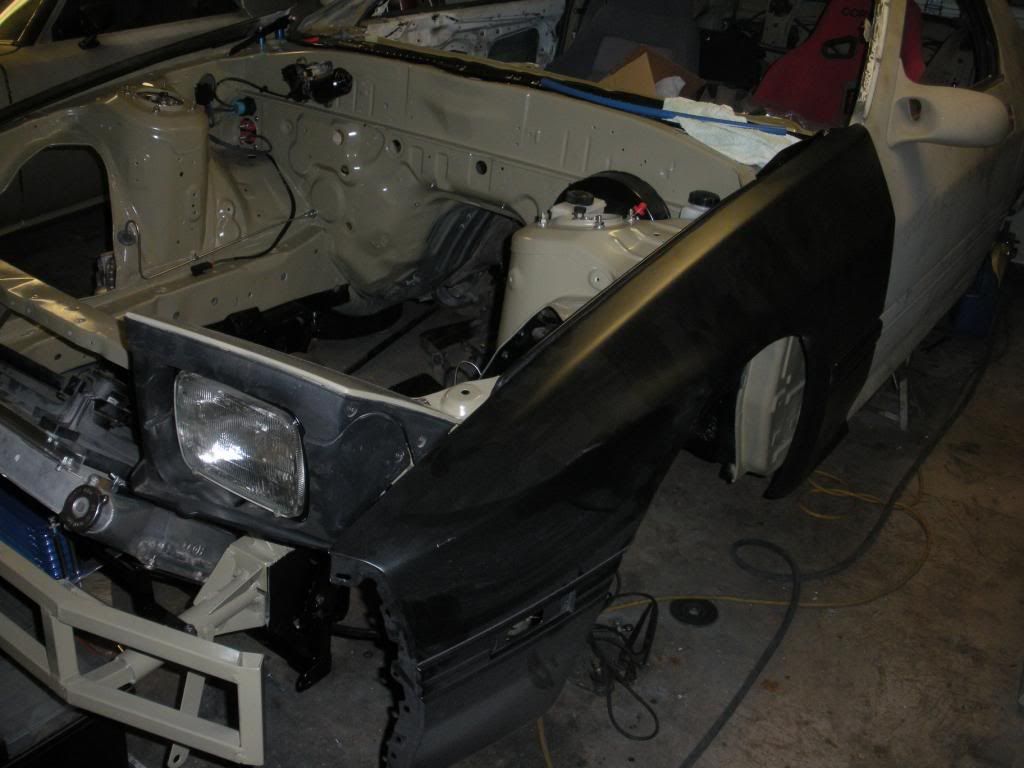
|
|
|
|
|
03-23-2013, 10:44 PM
|
#12 |
|
Rotary Fan in Training
Join Date: Nov 2012
Posts: 58
Rep Power: 13 |
Started building this cover for the fuel stuffs. It's all one piece that is removed by undoing 8 little M5 bolts at the base and lifting up. It is fully enclosed even though some of the pics don't show it. All aluminium, even the rivets lol. weighs like 2 lbs.
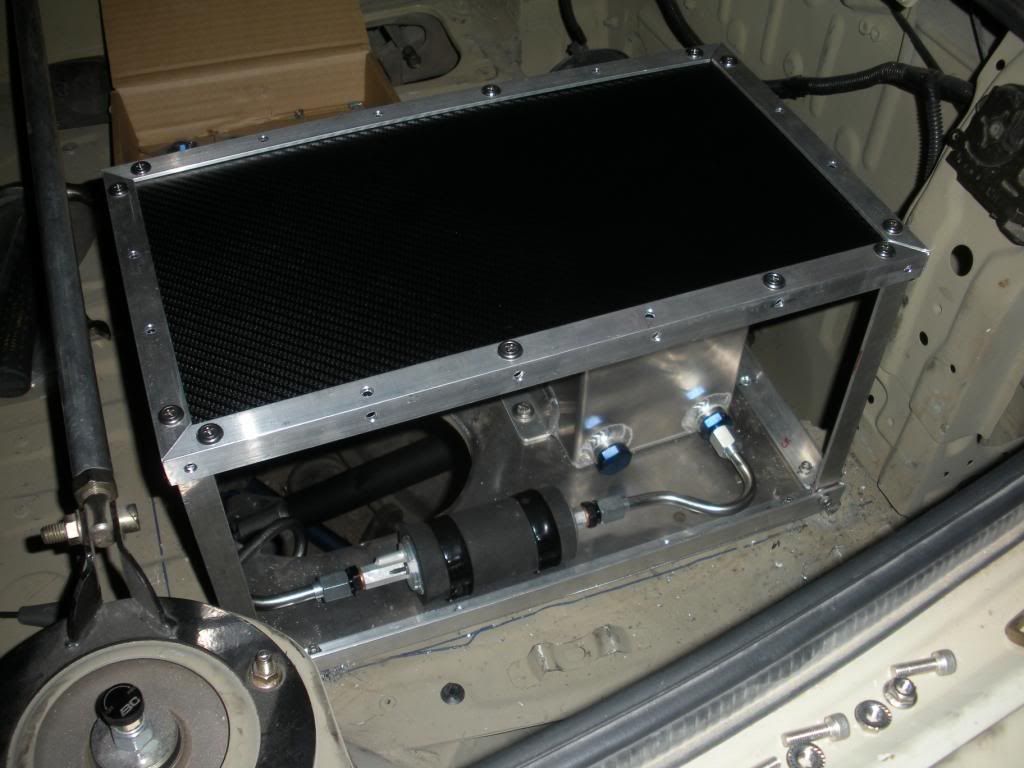  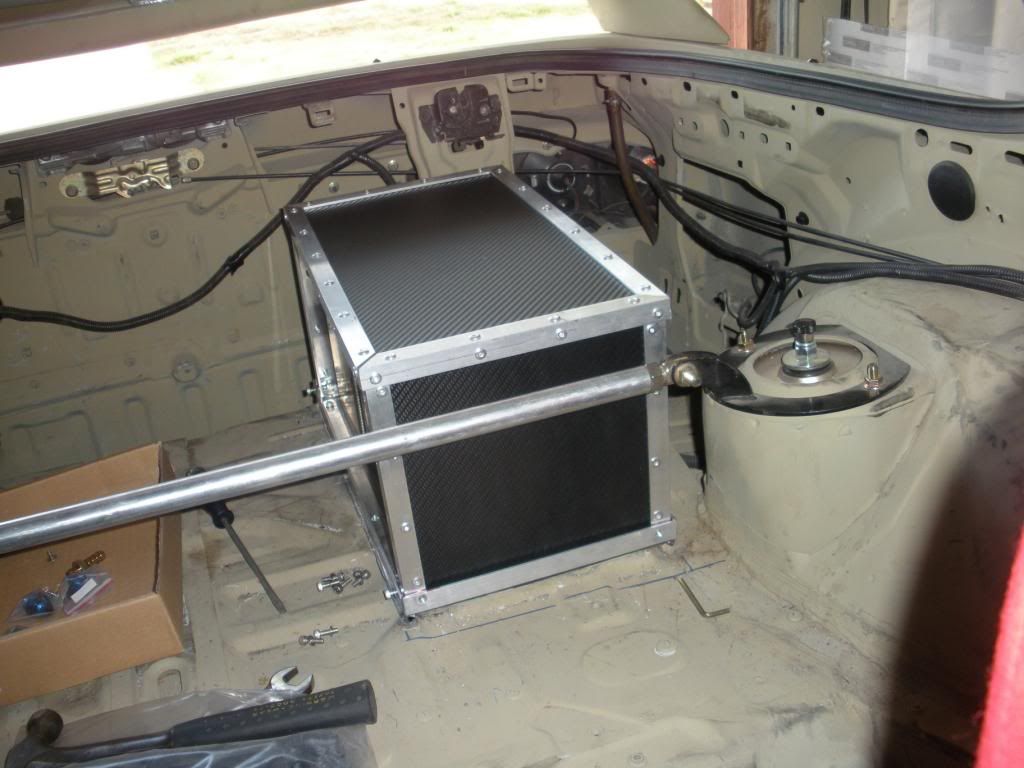 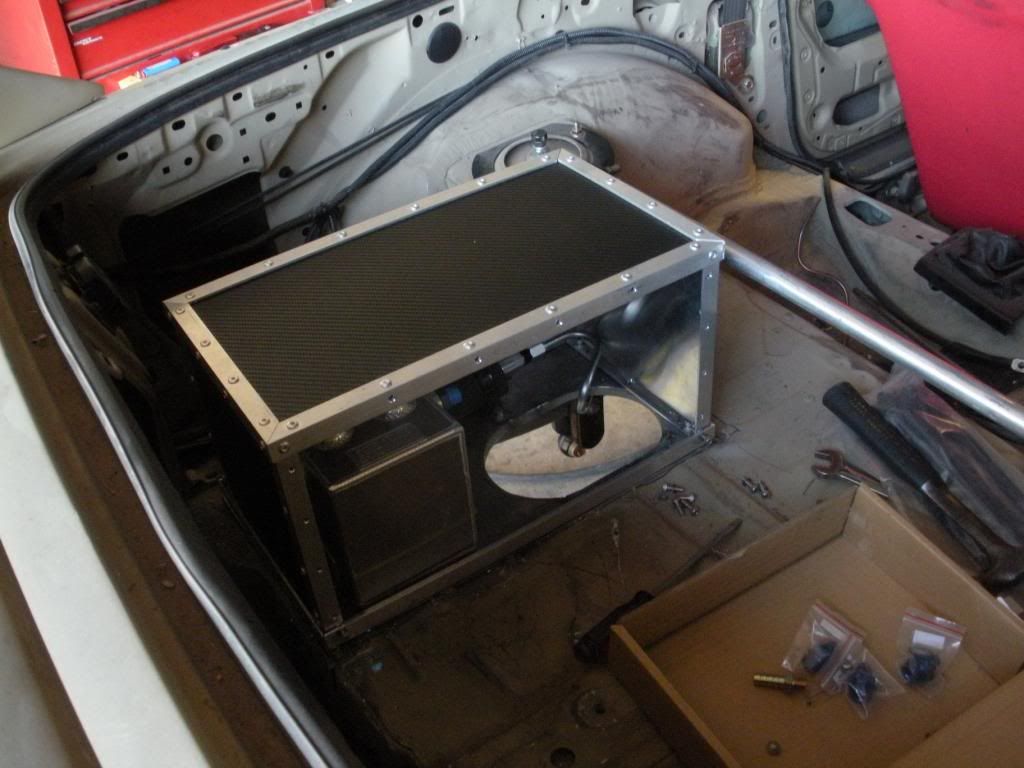 inside 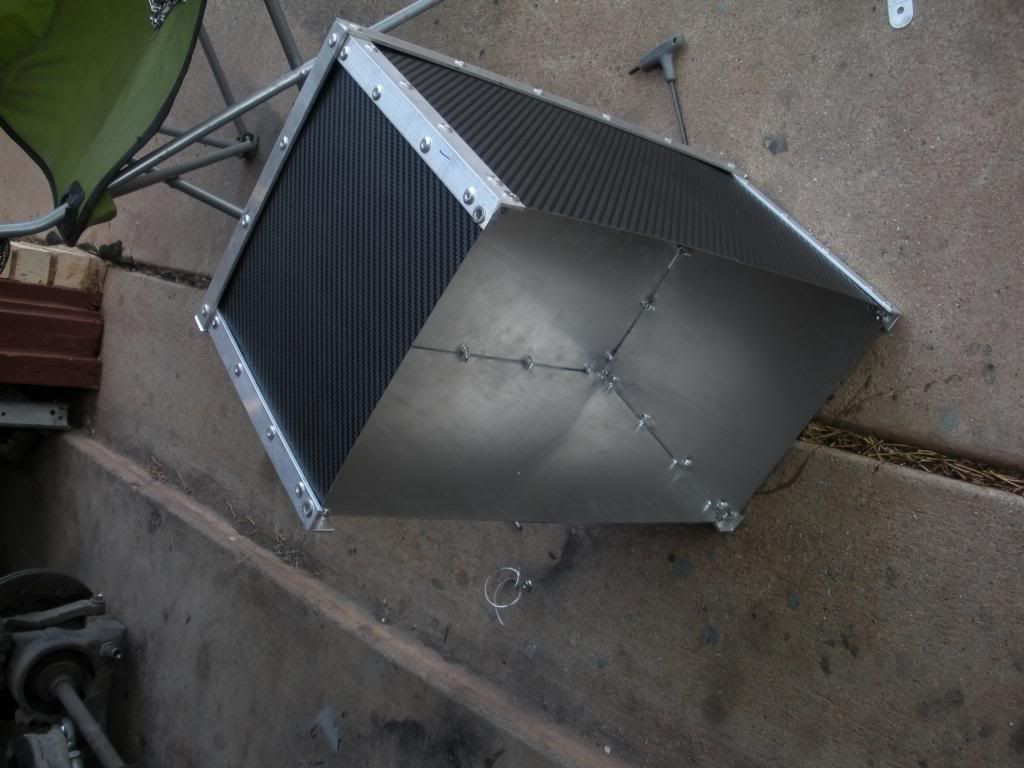 New vent hose before the tank goes back in. 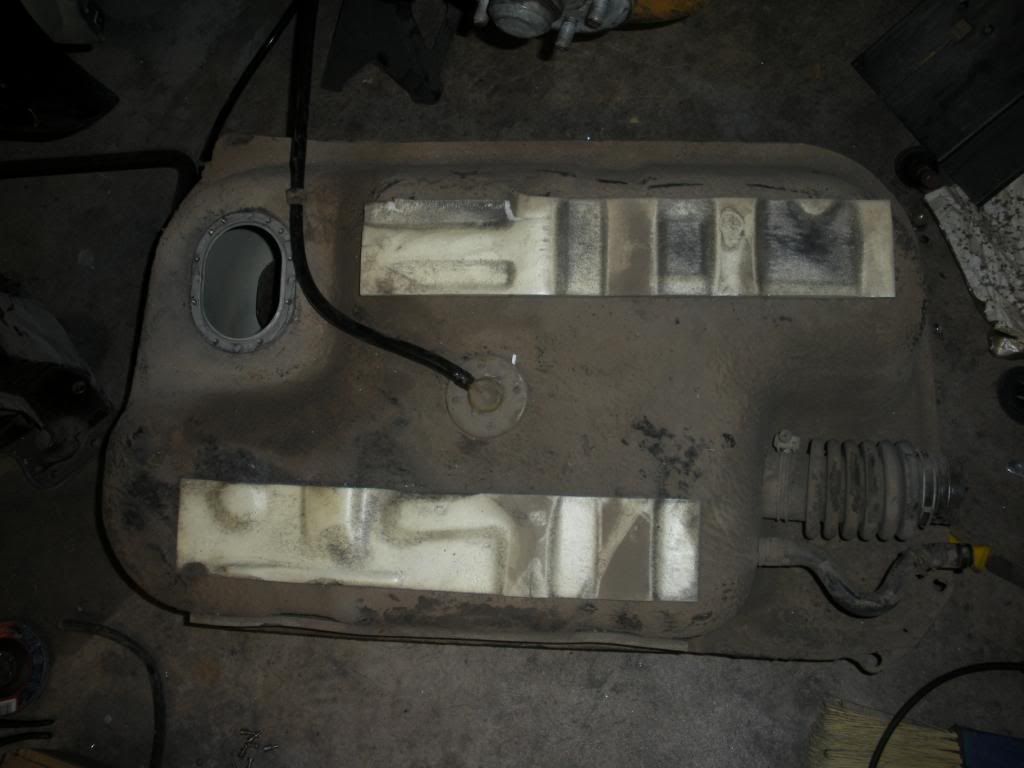 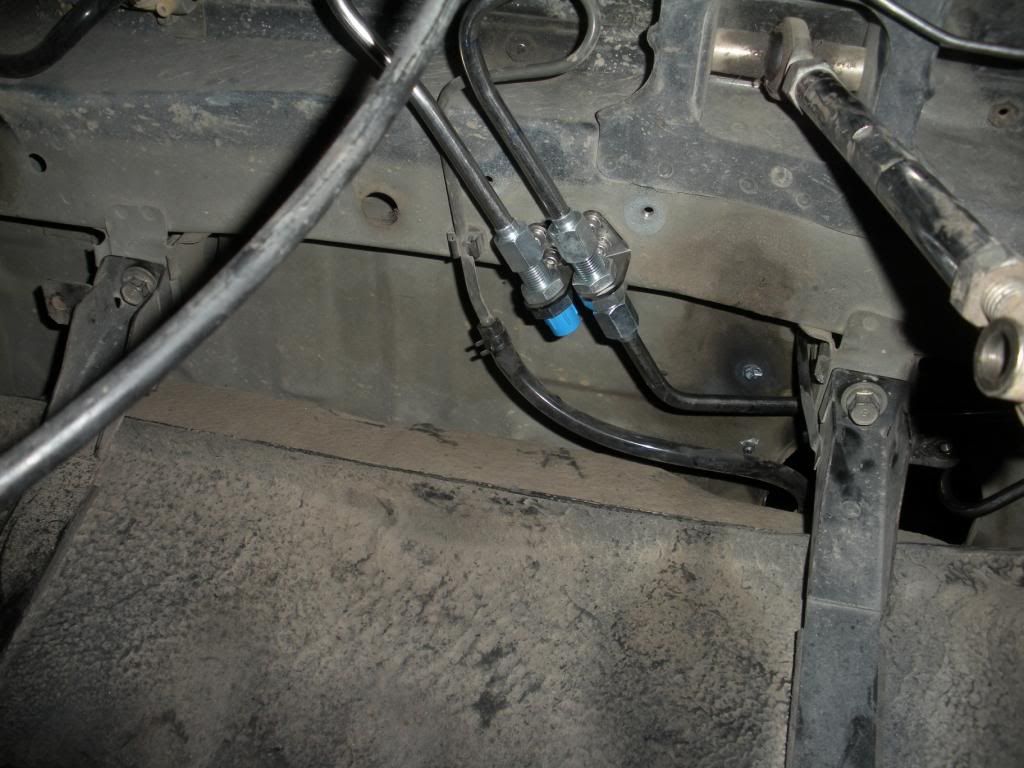 I was really worried about the clearance to this feed hardline, but as you can tell there's no issue at all. 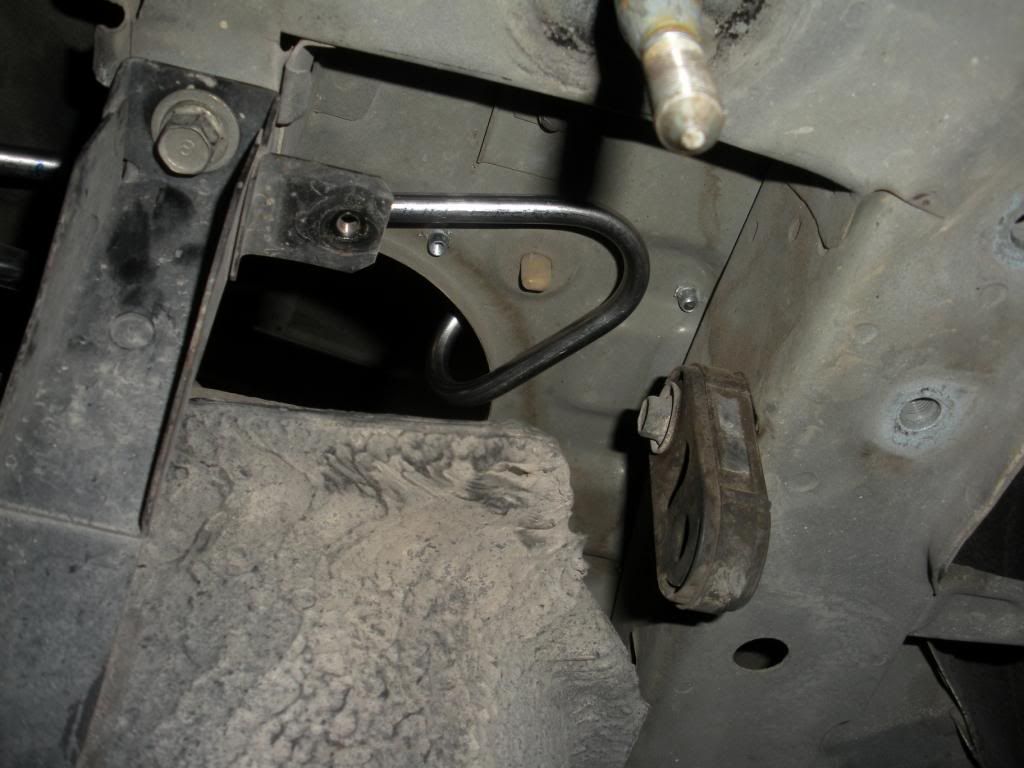 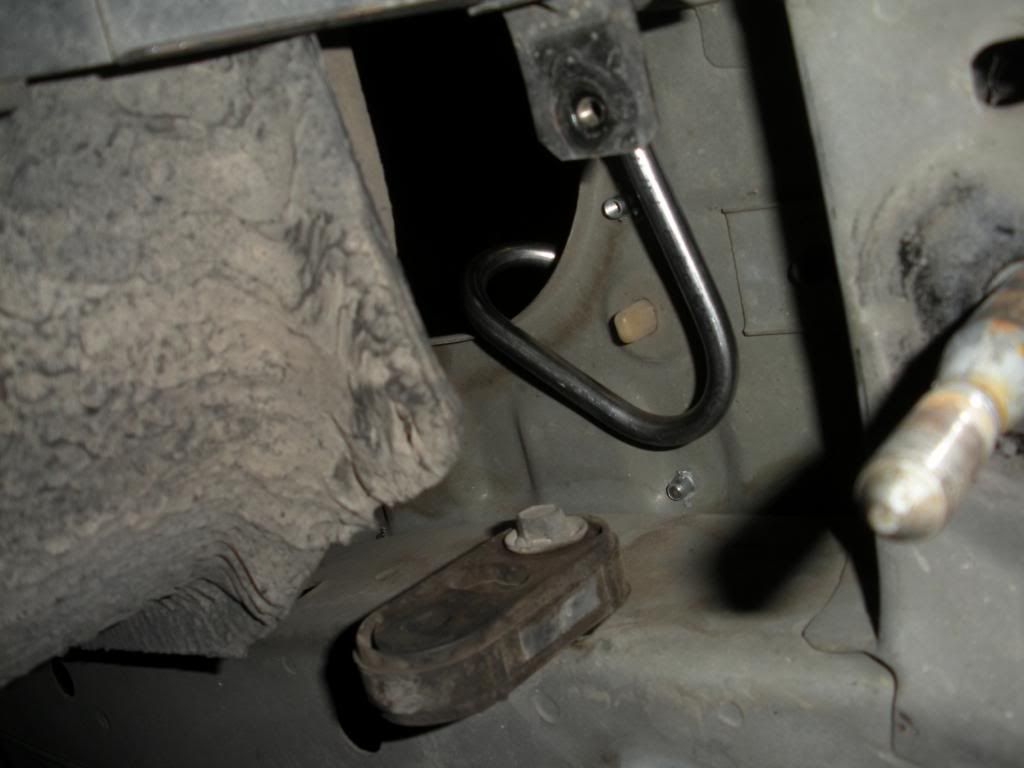 New hoses and stuff for the vent/rollover valve thingy. Cause why not? 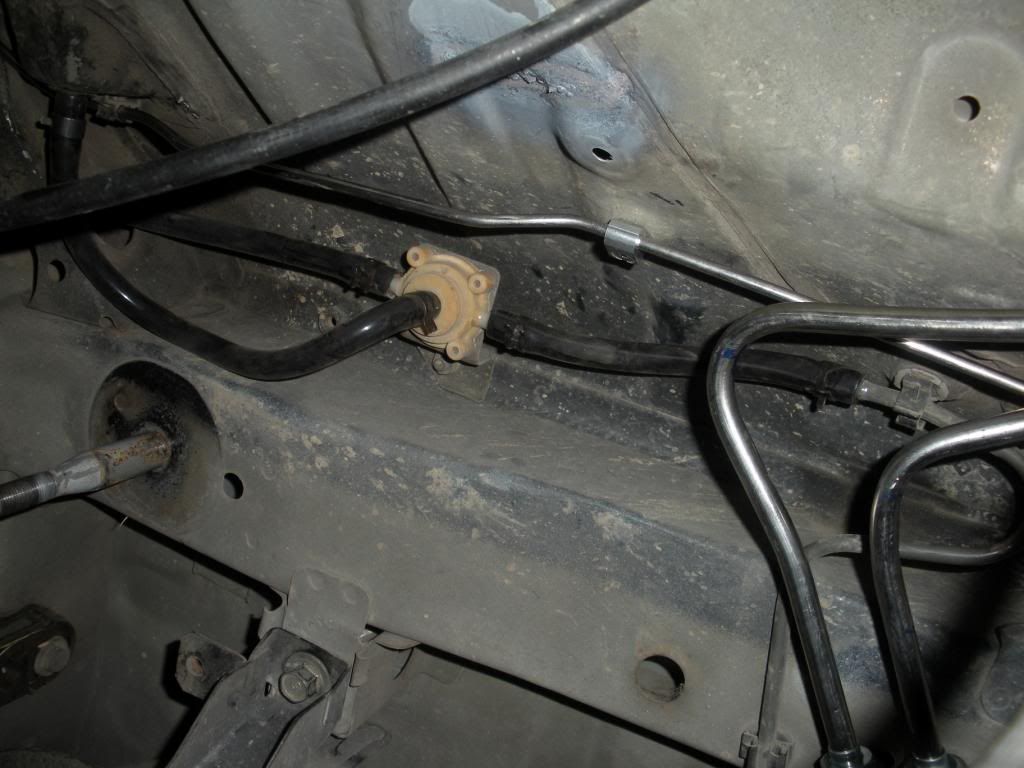 Fits so good. I love it. 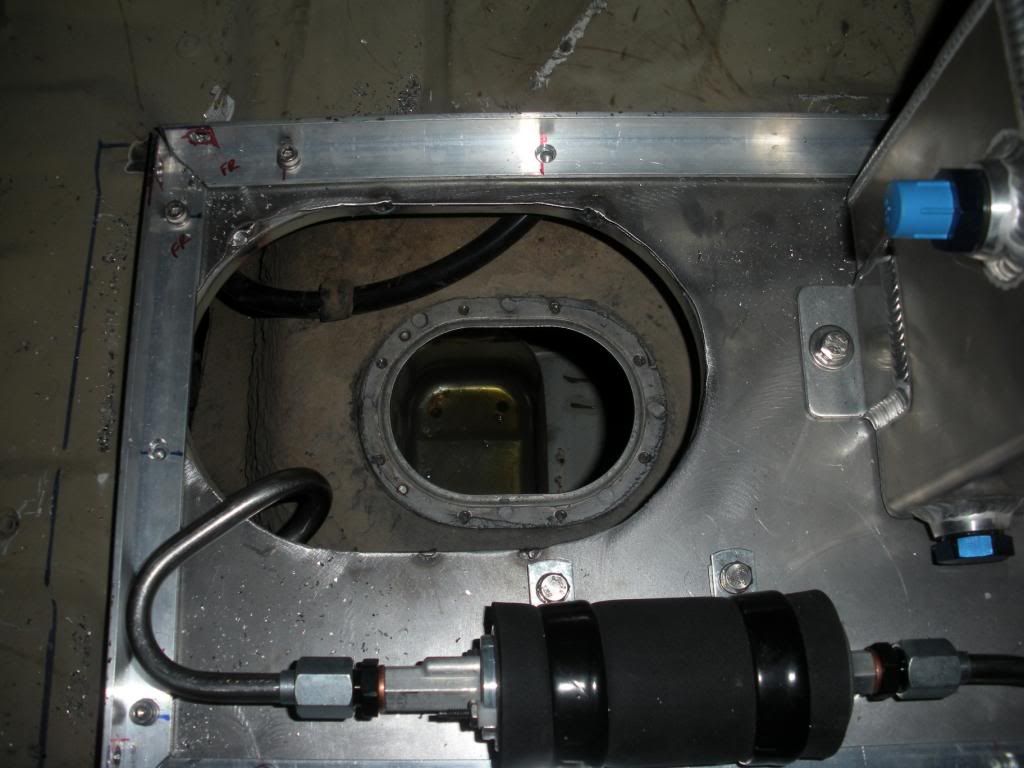 This moth picked the worst place ever for a vacation.....just saying. 
|
|
|
|
|
03-23-2013, 10:47 PM
|
#13 |
|
Rotary Fan in Training
Join Date: Nov 2012
Posts: 58
Rep Power: 13 |
Kinda just tossed the unfinished fuel pump housing in the tank to see what I would need as far as fittings and hose for the last three hoses.
|
|
|
|
|
| Bookmarks |
|
|

 Hybrid Mode
