|
|
#1 |
|
Respecognize!
Join Date: Jul 2008
Location: Δx = ħ/2Δp
Posts: 3,190
Rep Power: 21  |
Well i have seen very few detailed threads on the Kia Sportage Gear change. Many folks haven't even really seen the inner workings of their differential. For someone who is tackling the project for the first time, it can be a little overwhelming. But this thread should give you a good in indication of what you need to go. For those not in the know, the Kia Sportage 4x4 models contain a 4.78 gear ratio for their final drive. Just so happens that the front differential is the same size as the FB, miata, s2000 and some other models. Best part is, use first gen RX-7 folks can directly bolt the 3rd member in place of our existing on on the 84-85 big bearing axles. It is an open type differential though so generally swapping an LSD unit is a good idea.
Here are two good parts fiches to give you an idea of what parts are in here and what they are called. 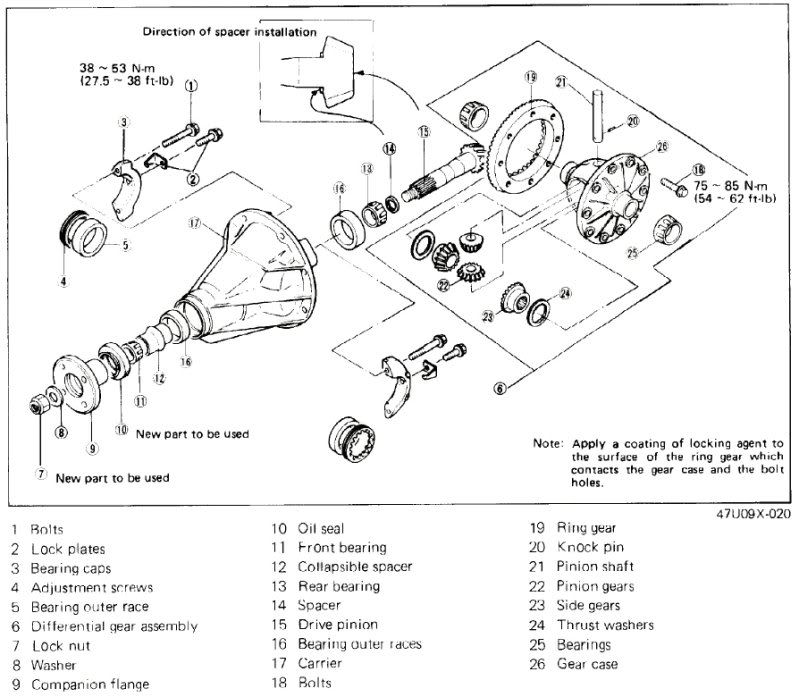 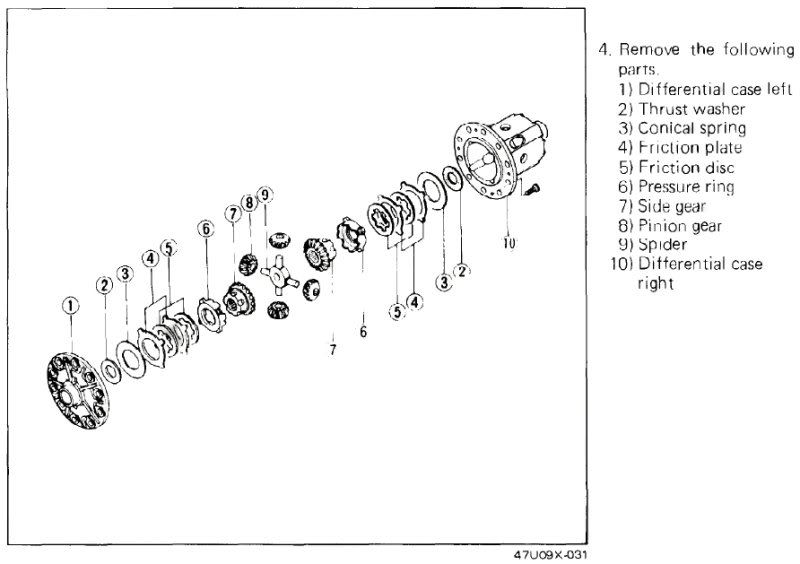 Required Tools: 12mm Socket 14mm Socket Hammer Dial Indicator (Harbor Freight or similar ones will work fine) Magnetic Base for the Dial Indicator (again, Harbor Freight works) Torque Wrench Helps to have air or electric impact Tool to rotate be bearing adjustment screws Right Stuff (for sealing diff into housing) Required Parts: GSL or GSLSE 3rd member, 1984 - 1985 models for its LSD or have another LSD available. Kia Sportage 3rd member 94, 96-01 model years Step 1: Obtaining and disassembling your Kia Sportage Axle The absolute first thing you need to find is a Kia Sportage third member from the front differential. They are a common vehicle, so if your lucky a local yard should have one. Typically, they will just pull the entire front axle. Its not a large piece, but still nothing you want to stuff on your motorcycle to get home. Just make sure you dump the diff fluid out. Its should consist of an aluminum axle housing and a cast iron third member. See Picture below: 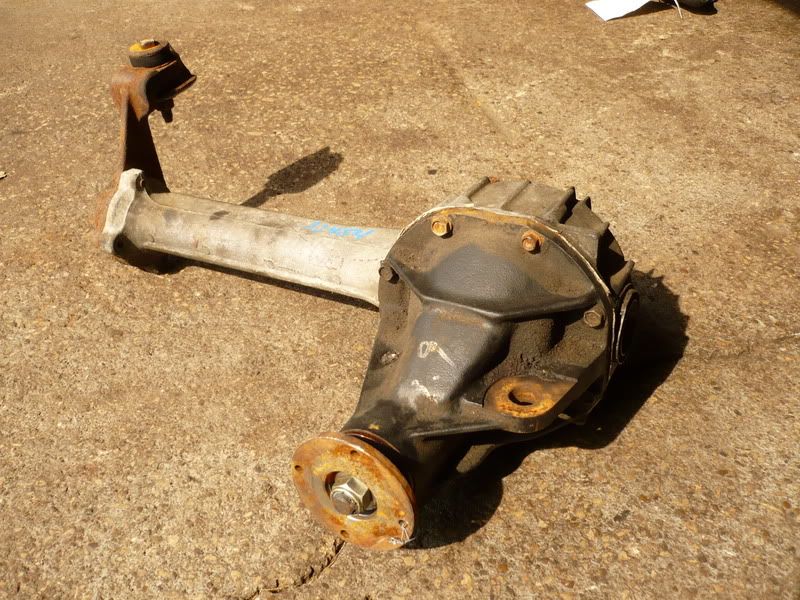 Once you get your Kia axle home you can start to remove the 3rd member. I recommend laying out some cardboard or plastic to catch any diff fluid that will come out. First, remove the 4 bolts holding the long side axle in. Use your hammer and give the axle some taps until it breaks free. Then slide the axle out. Add it to the scrap pile or sell it or place it on your coffee table as a conversation piece. They choice is yours, but from here on out, you don't need it. From here you can start removing the 3rd member from the aluminum housing. Two of the bolts holding the 3rd member in are 12mm. Rest are 14mm. Save all of these bolts as you will reuse them later. Will the bolts removed, again use the hammer to break the 3rd member free. Once free, lift the piece out of the housing. You should now have an empty axle housings and a 3rd member. See pictures below. 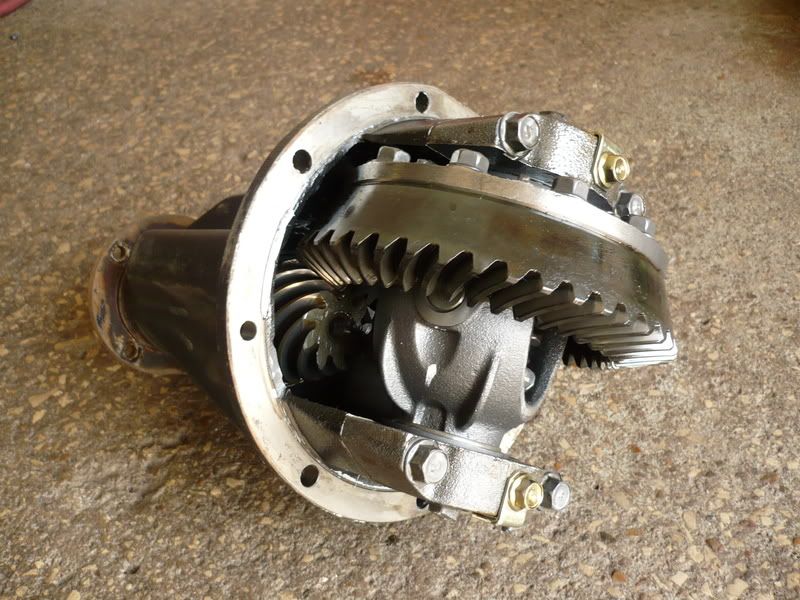 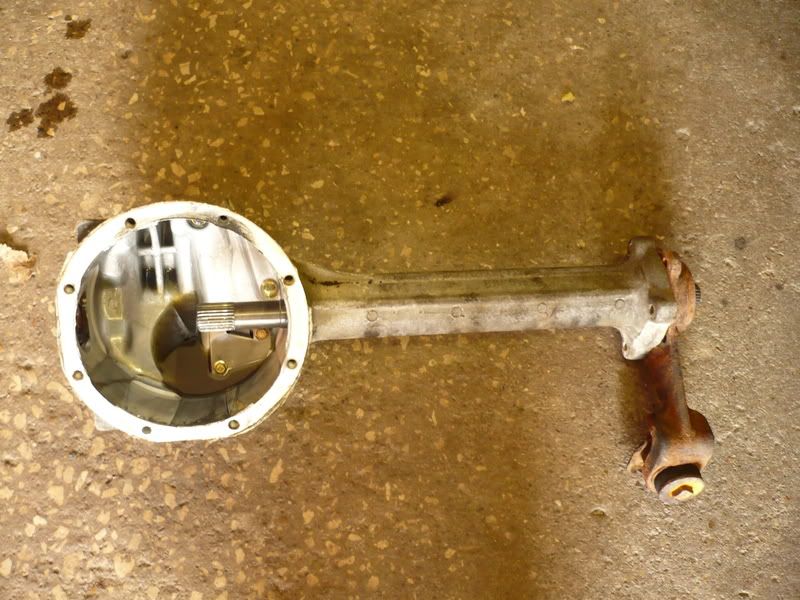 Step 2: Disassembly Once you have your 3rd member out, you should clean off the white gasket sealer material. You will be remaking the gasket later so you don't want any old material causing problems. 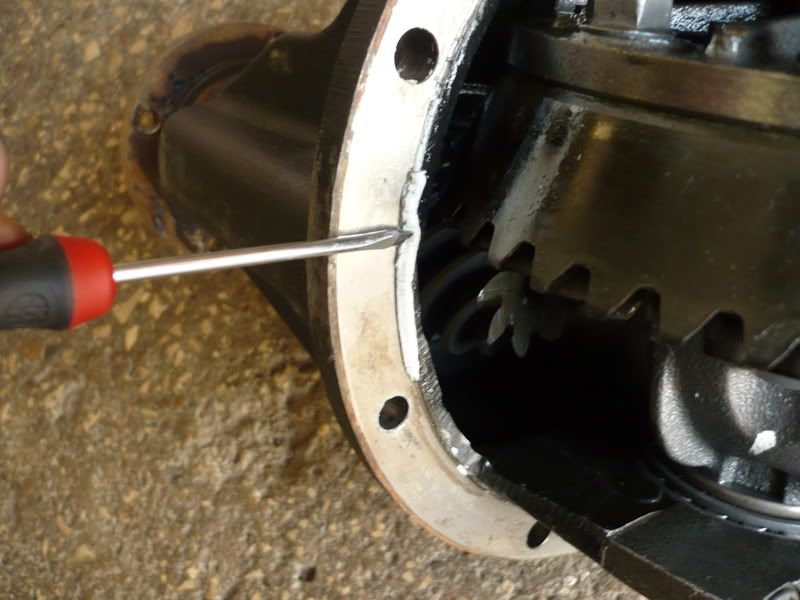 Now for the fun part. Get the Kia rear onto your work bench. You will see that there are four 14mm bolts holding down the bearing caps and two 12mm bolts holding down retainers for the adjusting screws. Do not loosen the 14mm cap bolts yet! Start by removing the 12mm bolts holding the retainers. Once the retainers are removed, set the aside. Keep track of everything you remove and which side it came from. You will be reinstalling everything in the same place (more or less). With the retainers gone, you can now remove the pre load from the bearings. This can be done by rotating the right side (if facing internals) adjusting screw counter-clockwise. Mazda does not give good insight on their bearing loads. Peejay has determined it to be equivalent to 2-1/2 holes. This will make sense you see the adjusting screws. Once unloaded, you can remove the 14mm bearing cap bolts. Then remove the bearing caps and set them aside. Now, you can remove your Kia sportage ring gear / differential unit. For those that are removing their LSD from an Rx-7 3rd member, repeat the above process. Those with an aftermarket or a pre-pulled unit continue on. Begin removing the ring gear bolts. An impact will make this easier if you have it. Else, you might have to resort to bracing it in a vise and doing by hand. But if you have the impact, air or electric, use it. Back these out carefully. leave one or two still a little threaded. You will have to tap them to get the ring gear to slide down. Once the ring gear has dropped, remove the last two bolts, and then the ring gear itself. Again, for those removing the LSD from an Rx-7 3rd member, repeat this process. 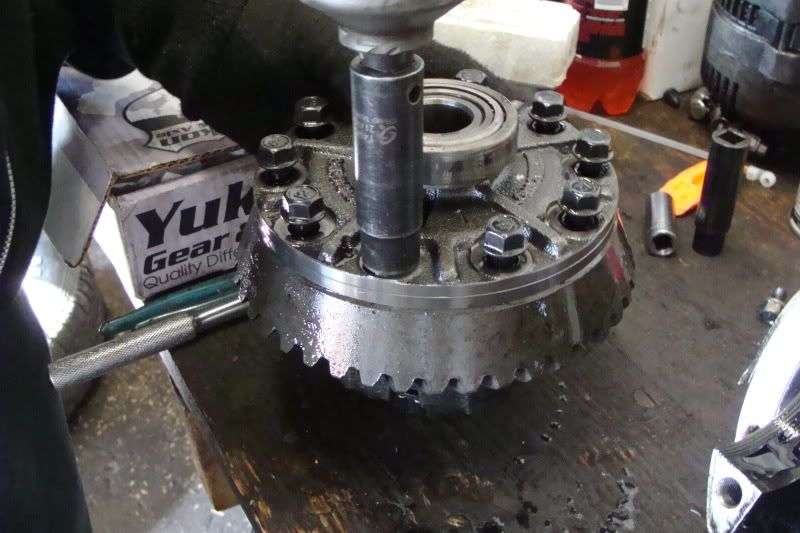 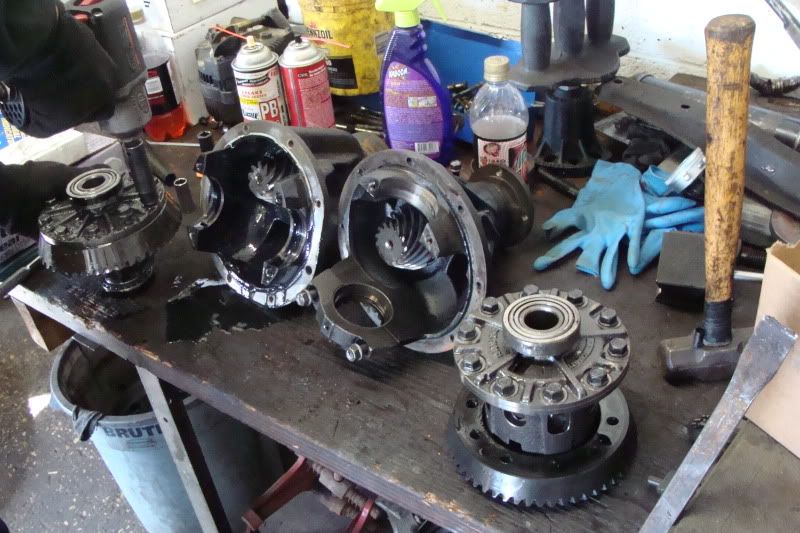 Something that is interesting to see with the differential and ring gear removed, is the pinion. Both rings are 7" but the pinion diameter is what gives you your gear ratio. As you can see the Kia Sportage has a considerably smaller pinion. This does directly relate to the power the rear axle can handle. The small pinion is going to have a lower yield point than the 3.90 pinions. But odds are if your making tons of power, your not going to be looking to overly high gear ratios anyway. 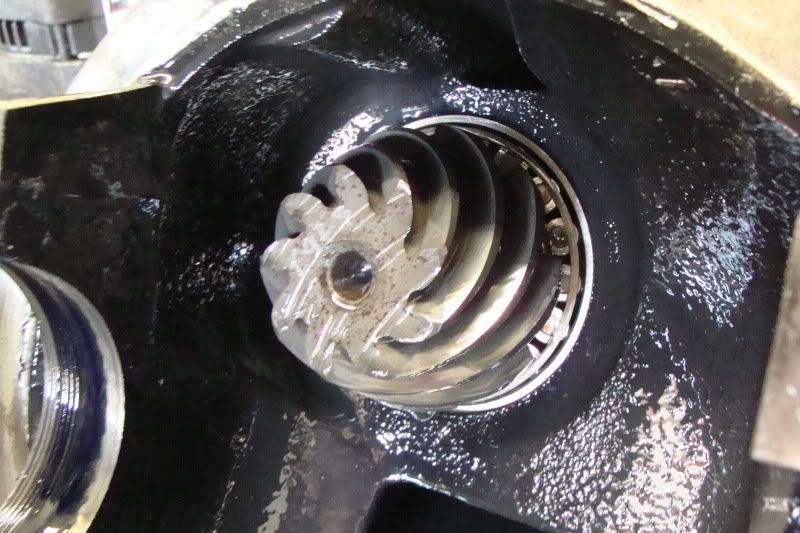 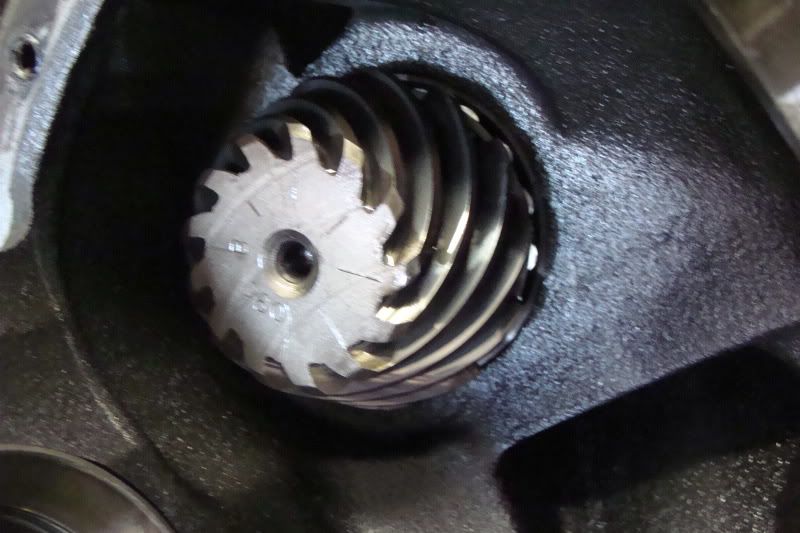
__________________
For current updates and event coverage check out Follow on Twitter! @WhizbangRally Whizbang Rally's Webpage | Facebook Last edited by Whizbang; 03-16-2009 at 12:05 PM. |
|
|
|
|
#2 |
|
Respecognize!
Join Date: Jul 2008
Location: Δx = ħ/2Δp
Posts: 3,190
Rep Power: 21  |
Step 3: Reassembly
Now for the fun part. Getting all back together. Take the LSD unit from the Rx-7 and attach the ring gear from the Kia Sportage to it. Reuse the Kia's ring gear bolts. Ring gear bolts will need to be torqued down to 51~61 ft-lbs (75~85 N/m). 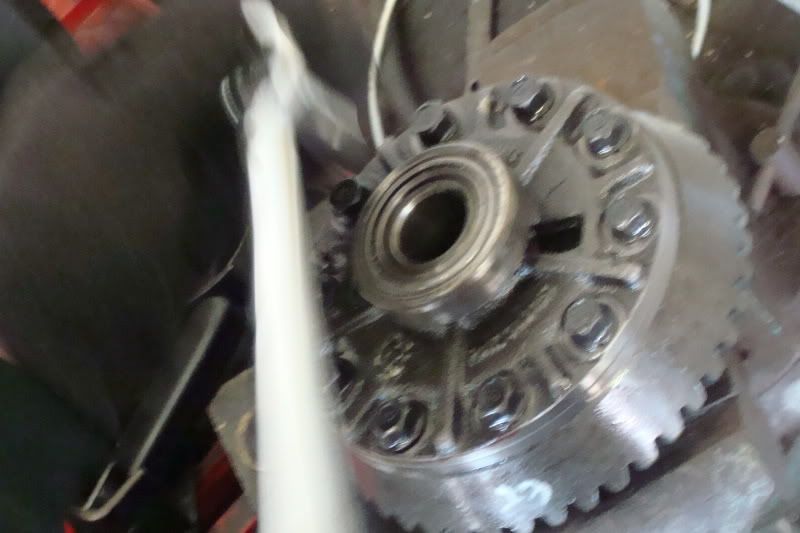 From here ensure the bearings and races are attached to the LSD and insert it into the Kia Sportage 3rd member casing. Then place the adjust screws back into their respective sides. Hold everything down will you put the bearing caps back on in the same places they came from. You probably will find yourself having to play around with everything to get it to line up and actually have the bolt start threading. Just have patience and take your time. Once you do get all four bolts threaded, you can bring the heads down but do not tighten beyond figure tight. You need to allow for the differential to move side to side while setting the backlash. As for the bearings, from neutral (where you should be at now with the adjusting screws against the bearings but not tightening inwards) add the 2-1/2 holes of preload by turning the right side adjusting screw clockwise. Your bearing preload is now set. From here on out, while chaning the back lash, you will move both sides adjusting screws the exact same to maintain the preload. 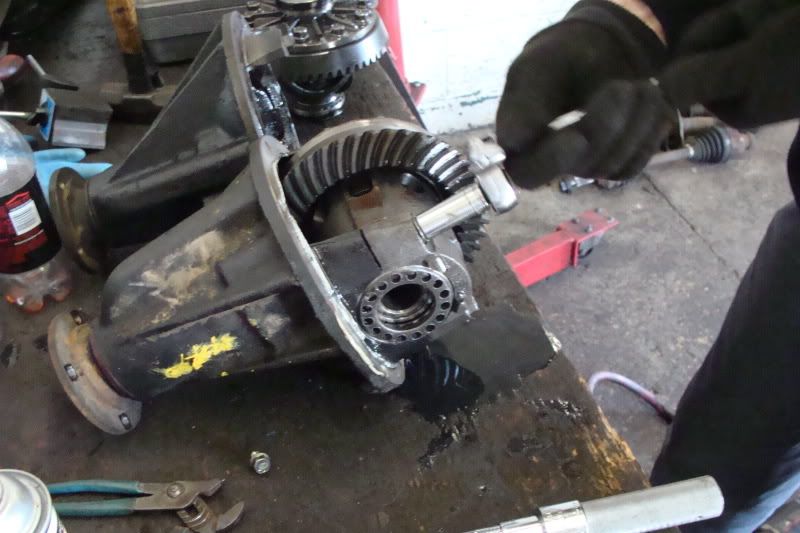 Next place your dial indicator on its magnetic base onto the casing as shown below. 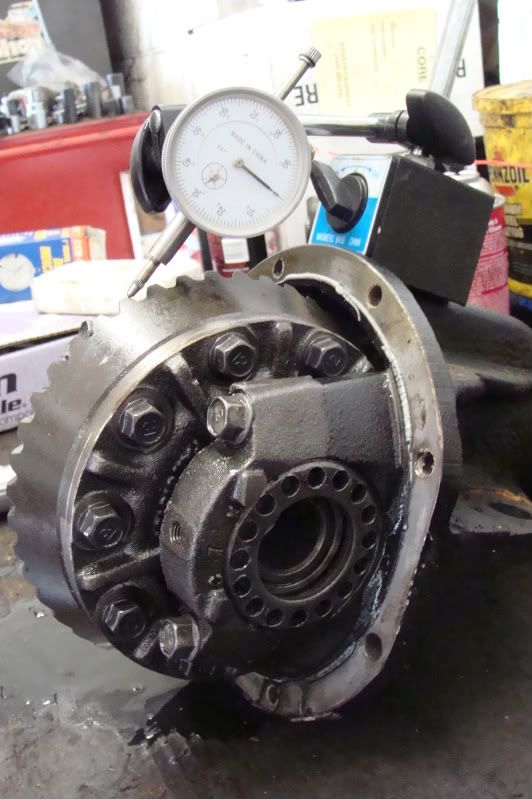 Mazda states that the backlash should be around 0.009 to 0.011mm. This can make or a rather loud rear end. We opted for a tighter setup of 0.005mm. This will require the use of synthetic fluid but keep the noise down and help prolong its life span. To set the backlash, you essentially will be moving the adjusting screws equally on either side which will move the differential side to side with the bearing cap bolts loose. When you measure your backlash, ensure the bolts are tight. Take your initial measurement on the backlash. Doing this requires you too use your hand and slight rotate the ring gear back and forth. you will feel the play as it hits either side of the pinions teeth. Adjust the backlashing with equal movement of the adjusting screws until to achieve your desired measure. This does take a few attempts to get it. Also when i say equal movements, i mean tightening one side and loosening the the other but equal turns. Once you get your backlash, just torque the bearing cap bolts down. Bearing cap bolts should be torqued to 27~38 ft-lbs (38~53 N/m) 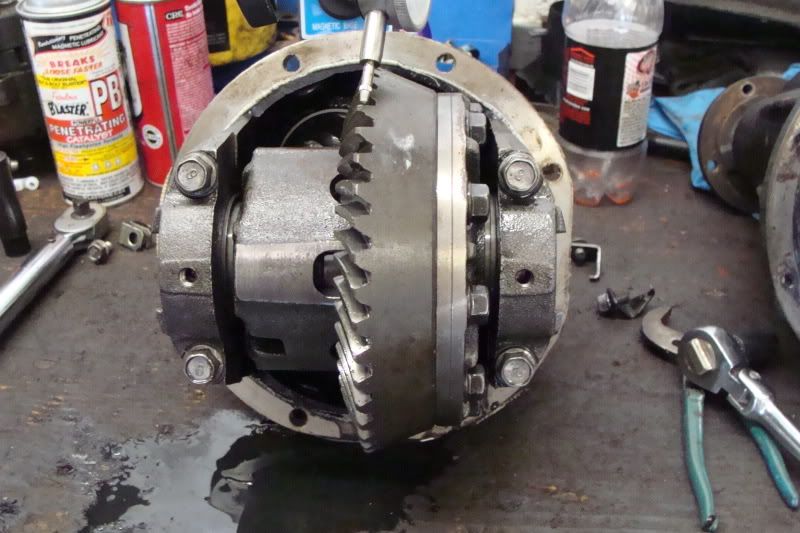 Now you can just follow the standard instructions on replacing the 3rd member. Ensure that you use gasket making material (i recommend Right Stuff) to make a good leak free seal and if you have a tighter tolerance rear, a good synthetic fluid and proper LSD additives.
__________________
For current updates and event coverage check out Follow on Twitter! @WhizbangRally Whizbang Rally's Webpage | Facebook Last edited by Whizbang; 03-16-2009 at 12:25 PM. |
|
|
|
|
#3 |
|
Wankel Works
Join Date: May 2011
Location: Boston, MA
Posts: 35
Rep Power: 0  |
wouldnt the rear diff be the same off the sportage?
|
|
|
|
|
#4 |
|
Respecognize!
Join Date: Jul 2008
Location: Δx = ħ/2Δp
Posts: 3,190
Rep Power: 21  |
the rear is a 7.5" ring and pinion, the front is a 7"
__________________
For current updates and event coverage check out Follow on Twitter! @WhizbangRally Whizbang Rally's Webpage | Facebook |
|
|
|
|
#5 |
|
The Newbie
Join Date: Mar 2012
Posts: 4
Rep Power: 0  |
wow, thanks for this info!
|
|
|
|
|
#6 |
|
Rotary Fan in Training
Join Date: Mar 2008
Posts: 93
Rep Power: 18  |
nice writeup

|
|
|
|
|
#7 |
|
Respecognize!
Join Date: Jul 2008
Location: Δx = ħ/2Δp
Posts: 3,190
Rep Power: 21  |
interesting situation... Doesnt seem to be possible to get a new pinion seal if the kia 3rd member's one is leaking... and its different enough from the Mazda one so that wont work.
__________________
For current updates and event coverage check out Follow on Twitter! @WhizbangRally Whizbang Rally's Webpage | Facebook |
|
|
|
|
#8 |
|
Respecognize!
Join Date: Jul 2008
Location: Δx = ħ/2Δp
Posts: 3,190
Rep Power: 21  |
yes they are some alternatives out there. do you have more information on the model you pulled it from?
__________________
For current updates and event coverage check out Follow on Twitter! @WhizbangRally Whizbang Rally's Webpage | Facebook |
|
|
|
|
#9 |
|
Respecognize!
Join Date: Jul 2008
Location: Δx = ħ/2Δp
Posts: 3,190
Rep Power: 21  |
ah interesting.
__________________
For current updates and event coverage check out Follow on Twitter! @WhizbangRally Whizbang Rally's Webpage | Facebook |
|
|
|
|
#10 |
|
Respecognize!
Join Date: Jul 2008
Location: Δx = ħ/2Δp
Posts: 3,190
Rep Power: 21  |
5.4 would be wonderful. Wonder whats on korean ebay
__________________
For current updates and event coverage check out Follow on Twitter! @WhizbangRally Whizbang Rally's Webpage | Facebook |
|
|
|
|
#11 |
|
Rotary Fan in Training
Join Date: Jun 2016
Posts: 56
Rep Power: 10  |
Nice write up Whizbang! Question : Will doing this...create the LSD I need? Or do I need a Torsen to swap the guts out from?
|
|
|
|
|
#12 |
|
Respecognize!
Join Date: Jul 2008
Location: Δx = ħ/2Δp
Posts: 3,190
Rep Power: 21  |
Use whichever 7" lsd you have. Torsen or clutch is availible depending on your source. They interchange well for the 84/85 yearvstuff. What you do not want is a clutch lsd from an 83 or earlier rx7 or a small diff miata.
Unless you have an 83 or earlier axle then your kinda stuck with the 83 or earlier lsd
__________________
For current updates and event coverage check out Follow on Twitter! @WhizbangRally Whizbang Rally's Webpage | Facebook |
|
|
|
|
#13 | |
|
Rotary Fan in Training
Join Date: Jun 2016
Posts: 56
Rep Power: 10  |
Quote:
|
|
|
|
|
|
#14 |
|
The Newbie
Join Date: Aug 2016
Posts: 3
Rep Power: 0  |
Whizbang, If I understand, I can use LSD from rear diff from Honda S2000 to front diff Kia sportage '95?
|
|
|
|
|
#15 |
|
Respecognize!
Join Date: Jul 2008
Location: Δx = ħ/2Δp
Posts: 3,190
Rep Power: 21  |
The actual limkted slip i have no idea. I have never verified fitment or axle spline. That said the ring and pinion supposedly work
__________________
For current updates and event coverage check out Follow on Twitter! @WhizbangRally Whizbang Rally's Webpage | Facebook |
|
|
 |
| Bookmarks |
|
|