|
|
 08-10-2015, 05:52 PM
|
#1 | |
|
⊙⊙

Join Date: Dec 2009
Location: Great Falls
Posts: 1,258
Rep Power: 17  |
So when ya starting it up then?

__________________
Quote:
|
|

|
|
08-10-2015, 06:33 PM
|
#2 | |
|
Professional Stick Poker

Join Date: Feb 2011
Location: Stafford, Ks.
Posts: 1,018
Rep Power: 16 |
Quote:

__________________
1988 N/A SE 2+2, dead stock and staying that way. 1979 SA22C stock? Not so much. http://rotarycarclub.com/rotary_foru...ad.php?t=15585 |
|
|
|
|
08-14-2015, 09:44 PM
|
#3 |
|
Professional Stick Poker
Join Date: Feb 2011
Location: Stafford, Ks.
Posts: 1,018
Rep Power: 16 |
After a protracted struggle I finished modifying my muffler.
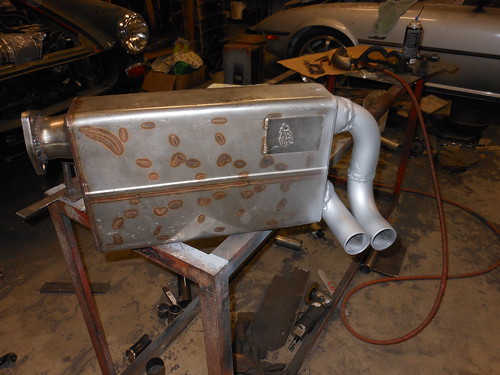 muffler - after modifications by Kevin Frank, on Flickr muffler - after modifications by Kevin Frank, on FlickrI replaced the two 2.5 inch outlet pipes with 1.75 ID pipes (same as the header pipes). I'm hoping that by decreasing the size of the outlet pipes it will help to muffle the noise a little better. Getting the bottom pipe to make multiple curves in a lot of directions, so that it would exit in the correct place, was a real nightmare. I had to cut it off and re-section it 4 times to get it right. At this point I think it has as many welds on it as it does pipe.  Getting the top pipe to exit inline with, and on the same angle, as the bottom wasn't easy. It was a lot easier than the bottom pipe though. Getting the top pipe to exit inline with, and on the same angle, as the bottom wasn't easy. It was a lot easier than the bottom pipe though.and a picture with the muffler in (before hanging it permanently) showing the exhaust tips exiting where I wanted them to. 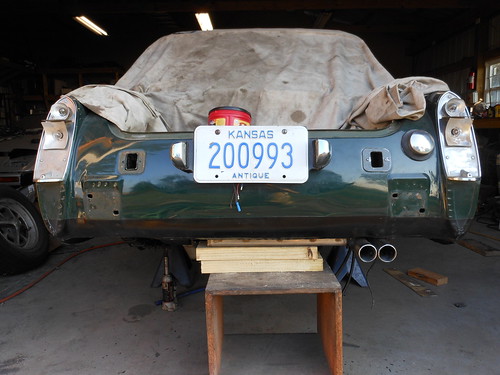 tail pipes - before hanging muffler by Kevin Frank, on Flickr tail pipes - before hanging muffler by Kevin Frank, on FlickrI have to get the muffler hung and then on to the rest of the exhaust system.
__________________
1988 N/A SE 2+2, dead stock and staying that way. 1979 SA22C stock? Not so much. http://rotarycarclub.com/rotary_foru...ad.php?t=15585 Last edited by GySgtFrank; 08-14-2015 at 09:47 PM. |
|
|
|
08-14-2015, 11:22 PM
|
#4 | |
|
⊙⊙
Join Date: Dec 2009
Location: Great Falls
Posts: 1,258
Rep Power: 17 |
Saweeeeeeet!
__________________
Quote:
|
|
|
|
|
08-16-2015, 09:23 PM
|
#5 |
|
Professional Stick Poker
Join Date: Feb 2011
Location: Stafford, Ks.
Posts: 1,018
Rep Power: 16 |
I am going to document how I got the muffler mounted in the tight space I have to work with. This may seem like piddley details to some, but if you've ever had to mount an exhaust and muffler into a tight space (where you could not have a lot of movement) you will know that it is important. Get it wrong and it will cause you no end of headaches.
The mounts that I am using are a common mount you can get from most muffler shops. It is a fully captured rubber mount. This makes it possible to isolate movement in all directions (with the use of jams nuts on the center mounting rod), but still maintain rubber isolation between the exhaust system and the body of the car. There is still some movement so that I "hopefully" don't break anything, but not enough for it to contact any of the surrounding metal when I hit bumps. 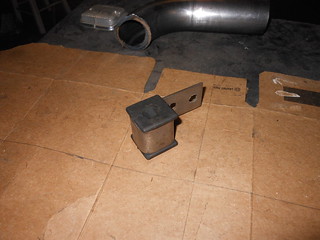 exhaust mounts by Kevin Frank, on Flickr exhaust mounts by Kevin Frank, on FlickrI used 1/2" threaded dowel to make the hangers so that I could adjust the position of the mounting point and secure it down with jam nuts on either side of the rubber block. I used three mounting points so that it stayed secured in all directions and could be moved into the optimum position. The inlet side has two mounts, top and bottom, the outlet side has only one mount up top. Mount on inlet side: 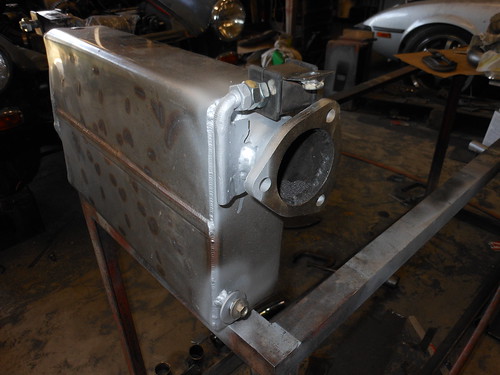 muffler mounts - inlet side by Kevin Frank, on Flickr muffler mounts - inlet side by Kevin Frank, on FlickrMount on outlet side: 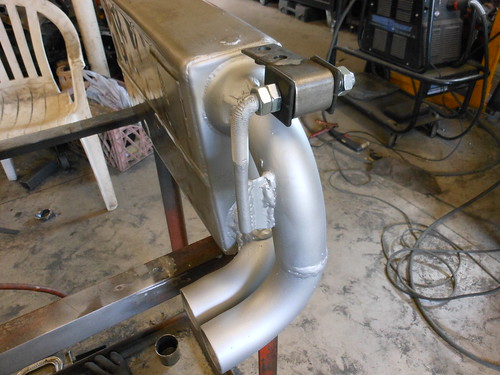 muffler mount - exit side by Kevin Frank, on Flickr muffler mount - exit side by Kevin Frank, on FlickrThese are the pictures of how I mounted it in the box. It doesn't look like it in the pictures, but there is at least one inch of air space all around the muffler. The box sides act as a heat shield to minimize heat transfer to the fuel tank and the body. 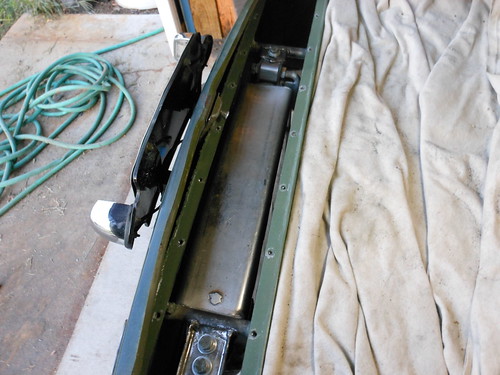 muffler - mounted 1 by Kevin Frank, on Flickr muffler - mounted 1 by Kevin Frank, on Flickr muffler - mounted 2 by Kevin Frank, on Flickr muffler - mounted 2 by Kevin Frank, on Flickr... and another picture of how the muffler and tailpipes actually ended up looking from the rear once mounted. I was pretty happy with it, as it came out just the way I wanted it to. 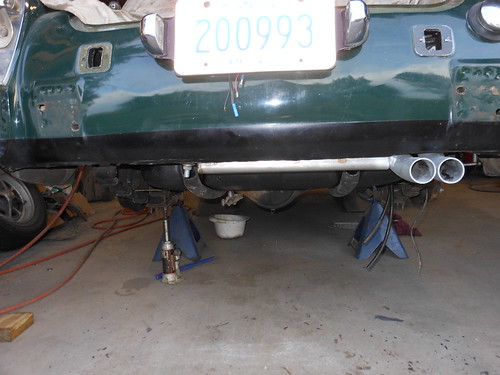 muffler - mounted bottom by Kevin Frank, on Flickr muffler - mounted bottom by Kevin Frank, on Flickr
__________________
1988 N/A SE 2+2, dead stock and staying that way. 1979 SA22C stock? Not so much. http://rotarycarclub.com/rotary_foru...ad.php?t=15585 |
|
|
|
08-17-2015, 07:36 PM
|
#6 |
|
Rotary Fanatic
Join Date: Mar 2008
Location: Freedom Land
Posts: 316
Rep Power: 18 |
Good job
__________________
This is going to tear |
|
|
|
08-17-2015, 09:00 PM
|
#7 | |
|
Professional Stick Poker
Join Date: Feb 2011
Location: Stafford, Ks.
Posts: 1,018
Rep Power: 16 |
Quote:
__________________
1988 N/A SE 2+2, dead stock and staying that way. 1979 SA22C stock? Not so much. http://rotarycarclub.com/rotary_foru...ad.php?t=15585 |
|
|
|
|
08-17-2015, 09:54 PM
|
#8 |
|
Test Whore - Admin

Join Date: Mar 2008
Location: Right Behind you son
Posts: 4,581
Rep Power: 10 |
Looks really fucking good man! I'm digging it and looking forward to seeing it finished!
Got a line on an engineer harness for you, should know more soon, like weekendish time. Pretty sure I just tossed the ECU so I may have to source one of those too
__________________
-The Angry Stig- DGRR 2009, 2011, 2012 & 2013 - Best FC DEALS GAP!! WOOHOOOO!!!!! 2015 Audi S4 - Samantha - Zero Brap S4 2004 RX8 - Jocelyn - 196rwhp, 19mpg fuel to noise converter 2000 Jeep Cherokee Sport - Wifey mobile - Now with 2.5" OME lift and 30" BFG AT KO's! So it begins 1998 Jeep Cherokee - 5 spd, 4" lift, 33" BFG's - Rotary Tow Vehicle 1988 'Vert - In progress 1988 FC Coupe - Gretchen -The attention whore BEAST! I'm a sick individual, what's wrong with you? I'm pure Evil I'm still insane, in the best possible way. I think Brian's idea of romance is using lube. Your rage caused the meteor strike in Russia. The Antichrist would be proud of his minion. You win with your thread. Most everything It's a truck with a steel gate on the back. Just a statement of fact Motec M820, AIM dash, ported 13B-RE Cosmo, 6-spd trans, 4.3 Torsen, custom twin wg fully divided mani, Custom 4" split into 2x 3" exhaust, Custom HMIC, Custom custom custom custom I like to welder stuff.... No Bolt-ons allowed. Dyno'ed @ Speed1 Tuned by me - 405rwhp on WG.... WM50 cuming soon. -Angry Motherf*cker Mode ENGAGED- |
|
|
|
08-17-2015, 09:58 PM
|
#9 | |
|
Professional Stick Poker
Join Date: Feb 2011
Location: Stafford, Ks.
Posts: 1,018
Rep Power: 16 |
Quote:
__________________
1988 N/A SE 2+2, dead stock and staying that way. 1979 SA22C stock? Not so much. http://rotarycarclub.com/rotary_foru...ad.php?t=15585 |
|
|
|
|
08-18-2015, 03:07 PM
|
#10 |
|
Test Whore - Admin
Join Date: Mar 2008
Location: Right Behind you son
Posts: 4,581
Rep Power: 10 |
I hear ya cuz... No need for that shit... Get a meecrowreck before that happens
__________________
-The Angry Stig- DGRR 2009, 2011, 2012 & 2013 - Best FC DEALS GAP!! WOOHOOOO!!!!! 2015 Audi S4 - Samantha - Zero Brap S4 2004 RX8 - Jocelyn - 196rwhp, 19mpg fuel to noise converter 2000 Jeep Cherokee Sport - Wifey mobile - Now with 2.5" OME lift and 30" BFG AT KO's! So it begins 1998 Jeep Cherokee - 5 spd, 4" lift, 33" BFG's - Rotary Tow Vehicle 1988 'Vert - In progress 1988 FC Coupe - Gretchen -The attention whore BEAST! I'm a sick individual, what's wrong with you? I'm pure Evil I'm still insane, in the best possible way. I think Brian's idea of romance is using lube. Your rage caused the meteor strike in Russia. The Antichrist would be proud of his minion. You win with your thread. Most everything It's a truck with a steel gate on the back. Just a statement of fact Motec M820, AIM dash, ported 13B-RE Cosmo, 6-spd trans, 4.3 Torsen, custom twin wg fully divided mani, Custom 4" split into 2x 3" exhaust, Custom HMIC, Custom custom custom custom I like to welder stuff.... No Bolt-ons allowed. Dyno'ed @ Speed1 Tuned by me - 405rwhp on WG.... WM50 cuming soon. -Angry Motherf*cker Mode ENGAGED- |
|
|
|
08-21-2015, 04:18 PM
|
#11 |
|
Professional Stick Poker
Join Date: Feb 2011
Location: Stafford, Ks.
Posts: 1,018
Rep Power: 16 |
I had to build a merge collector to feed the two 1.75 inch ID pipes into the single 2.5 inch ID inlet for my muffler. It was a far bigger chore than it had any right to be. I had planned to use a header collector flange that would allow me to swivel the pipe around to make it fit if I moved the muffler. Unfortunately I couldn't find that style of 2.5 inch collector that would fit my existing flange on the muffler. If I had to do it over again, I would cut the flange off the muffler and use the other style flange, but I didn't, so this will have to work.
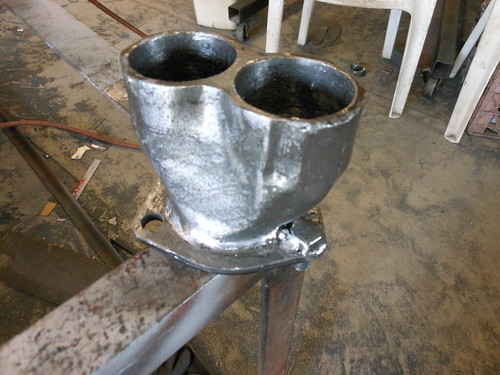 muffler merge collector 1 by Kevin Frank, on Flickr muffler merge collector 1 by Kevin Frank, on Flickr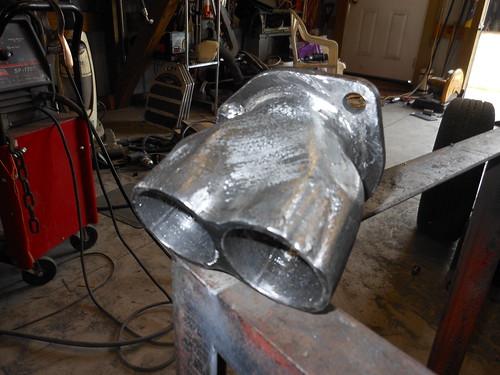 muffler merge collector 2 by Kevin Frank, on Flickr muffler merge collector 2 by Kevin Frank, on Flickr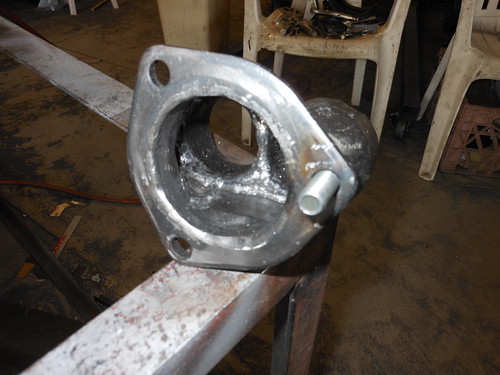 muffler merge collector 3 by Kevin Frank, on Flickr muffler merge collector 3 by Kevin Frank, on FlickrI used a 2.5 inch ID flange that would fit my muffler flange, a short section of 2.5 inch ID exhaust pipe, and two short pieces of 1.75 inch ID (2" OD) to make the piece. I had to split and form the 2.5" pipe in four directions after it was welded to the flange. I then formed it onto the two short pieces of 2" OD pipe, that I had already welded together, and tacked it down. I cut out and formed some fill pieces for the gaps where the split pipe no longer covered and put a lot of welds inside and out to ensure that I have no leaks. Clean up on all those welds was not fun. As I said, far more work than was reasonable. I would suggest using an off the shelf part if at all possible, the high cost of parts like this are for a reason, time and effort. I couldn't as no one makes a part like this to join the pieces that I am planning to use. This piece will allow me to connect the two pipes side by side to be run over and dropped down with 90s. They will run forward between the fuel tank and frame rail, one stacked on top of the other with a small gap between them. It is going to be enough of a battle trying to get the pipes in the right position without having to worry about the fit at the muffler end as well.
__________________
1988 N/A SE 2+2, dead stock and staying that way. 1979 SA22C stock? Not so much. http://rotarycarclub.com/rotary_foru...ad.php?t=15585 Last edited by GySgtFrank; 08-21-2015 at 04:49 PM. |
|
|
|
08-21-2015, 07:36 PM
|
#12 | |
|
⊙⊙
Join Date: Dec 2009
Location: Great Falls
Posts: 1,258
Rep Power: 17 |
Where ya bored?
 Looks good and like its gonna work...
__________________
Quote:
|
|
|
|
|
08-21-2015, 07:52 PM
|
#13 |
|
Professional Stick Poker
Join Date: Feb 2011
Location: Stafford, Ks.
Posts: 1,018
Rep Power: 16 |
Thanks Ransom. It took way too long for one stupid little part.
__________________
1988 N/A SE 2+2, dead stock and staying that way. 1979 SA22C stock? Not so much. http://rotarycarclub.com/rotary_foru...ad.php?t=15585 |
|
|
|
08-22-2015, 02:28 AM
|
#14 |
|
RCC Loves Me Not You

Join Date: Mar 2008
Location: Colorado Springs, CO
Posts: 2,089
Rep Power: 20 |
^I hate when that happens. One little thing takes forever and you feel like you got nothing done. Not quite infuriating, more annoying I think.
|
|
|
|
08-22-2015, 01:29 PM
|
#15 | |
|
Professional Stick Poker
Join Date: Feb 2011
Location: Stafford, Ks.
Posts: 1,018
Rep Power: 16 |
Quote:

__________________
1988 N/A SE 2+2, dead stock and staying that way. 1979 SA22C stock? Not so much. http://rotarycarclub.com/rotary_foru...ad.php?t=15585 |
|
|
|
 |
| Bookmarks |
|
|


 Hybrid Mode
