Go Back   Rotary Car Club > Tech Discussion > Show your rotary car build up.

Show your rotary car build up. Show off your Rotary Car build!


Welcome to Rotary Car Club.

You are currently viewing our boards as a guest which gives you limited access to view most discussions and access our other features. By joining our free community you will have access to post topics, communicate privately with other members (PM), respond to polls, upload content and access many other special features. Registration is fast, simple and absolutely free so please, join our community today!

If you have any problems with the registration process or your account login, please contact contact us.

Reply
 
Thread Tools Display Modes
Old 12-15-2013, 11:19 AM   #31
Silver86
now what?
 
Silver86's Avatar
 
Join Date: Jul 2009
Location: SE Wisconsin
iTrader: (0)
Posts: 178
Rep Power: 16
Silver86 is on a distinguished road
Default

yikes!

i do like the cluster ideas though!


__________________
1986 Rx7 coupe - arctic silver - sold
aka - 20bforme
Silver86 is offline   Reply With Quote
Old 01-16-2014, 01:01 PM   #32
infernosg
IT'S ALIVE!
 
infernosg's Avatar
 
Join Date: Dec 2009
Location: Richmond, VA
iTrader: (5)
Posts: 811
Rep Power: 15
infernosg is on a distinguished road
Default

Quote:
Originally Posted by Silver86 View Post
yikes!

i do like the cluster ideas though!
So far it's the worst part on the car. The driver's side is pristine except for that black crap, which I've also discovered is even inside the doors! I'll just treat that section like any other accident damage; drill out the spot welds and replace.

Back before the holidays I finished swapping the front subframe. Empty red car:


Removed with steering rack:


In its new home:


Though it's heavier I decided to keep the tilting steering column from the red car in case the lower seating position warrants the use of the tilt feature.


I don't feel like removing the ignition switches so I've been working on swapping all the locks on the cars. It works out in the end since the locks from the '89 are in better shape.

Been focusing on stripping down the red car. Someone wants the chassis so I need to get everything off I intent to keep so I can get rid of it. This is how the interior looked Monday night:


It's a bigger mess now.
infernosg is offline   Reply With Quote
Old 01-17-2014, 07:33 PM   #33
scarsofcarma
Rotary Fanatic
 
scarsofcarma's Avatar
 
Join Date: Aug 2013
Location: Antioch, Ca
iTrader: (0)
Posts: 101
Rep Power: 12
scarsofcarma is on a distinguished road
Default

Quote:
Originally Posted by infernosg View Post
Last night I realized I have the line reversed. The feed line should be on the inside and the return on the outside. Shouldn't be too hard to swap already on the car.
Did the same thing with a friends car once after a motor swap... couldn't figure out why it wouldn't start for a while lmao
scarsofcarma is offline   Reply With Quote
Old 02-11-2014, 12:49 PM   #34
infernosg
IT'S ALIVE!
 
infernosg's Avatar
 
Join Date: Dec 2009
Location: Richmond, VA
iTrader: (5)
Posts: 811
Rep Power: 15
infernosg is on a distinguished road
Default

Okay it's been while since I've been in here.

The red car will be gone this weekend. I finished stripping and removing the wire harnesses last weekend and I've just got to wrap up a few items.

Empty engine bay:


Wire-less interior:


Harnesses sorted (front, rear, and ECU):


The front subframe from the silver car is installed because the buyer originally wanted it. He didn't want to pay my asking price so it's no longer included and will be coming out. Fortunately I may have a couple other people interested.

I've gotten some work done on the silver car but no pictures. I decided I wanted the non-tilt steering column after all because it's 4.4 lbs lighter than the tilt column (see title). Swapping the lock cylinders and ignition switches was easy enough. I also got the fuel tank cover off, but I had to grind off all the screw heads. Now to figure out how to remove them. Turns out the S4 and S5 fuel sending units are different so I can't reuse my modified S5 one. It shouldn't be too hard to redo everything on the S4 unit.

Other than that I think I've found my new instrument cluster setup:


Speedhut gauges. 3-3/8" dual oil temp/pressure, 4-1/2" tach (mine will be 10K RPM) with inset 120 mph GPS speedometer and indicator and hi-beam LED's, and 3-3/8" dual water temp/fuel level. The voltmeter will just have to be separate in the console with the wideband. If anyone's interested I will be selling my Marshall Instruments gauges.
infernosg is offline   Reply With Quote
Old 03-05-2014, 06:28 PM   #35
Tanj!
Rotary Fan in Training
 
Tanj!'s Avatar
 
Join Date: Feb 2008
Location: Dallas, TX
iTrader: (0)
Posts: 44
Rep Power: 0
Tanj! is on a distinguished road
Default

Were on Speedhut's site are you finding that tach/speedo combo? All I can find is the speedo being the primary with the tach the secondary. I'm really liking the looks of this so far btw.

*EDIT* Never mind. I found them shortly after posting this. *SMH*

Last edited by Tanj!; 03-05-2014 at 06:32 PM..
Tanj! is offline   Reply With Quote
Old 05-20-2014, 11:37 AM   #36
infernosg
IT'S ALIVE!
 
infernosg's Avatar
 
Join Date: Dec 2009
Location: Richmond, VA
iTrader: (5)
Posts: 811
Rep Power: 15
infernosg is on a distinguished road
Default

Holy hell it's been a long time since I've updated this!

Sold the red car back in February, moved the silver car into the garage at home, and promptly started pulling it apart:


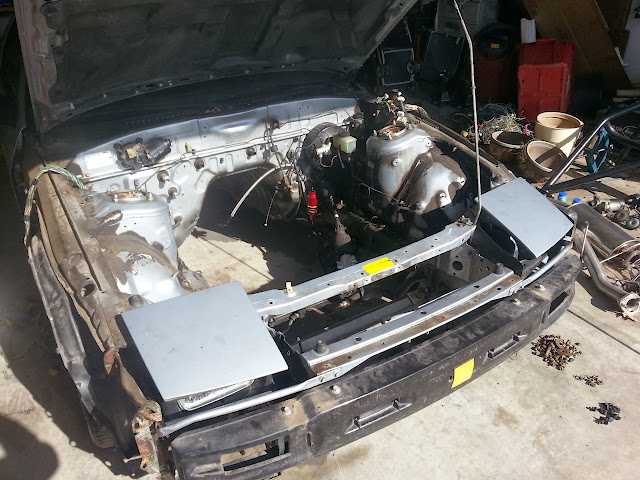
Removing the engine wiring harness is pretty easy the third time around.


Removed the purple tint from the windows.


Interiors from two FC's (I still have the S4 dash if anyone needs one):


Down to the bare interior:


Goofing around/trying to clear up some space in the garage by installing parts:


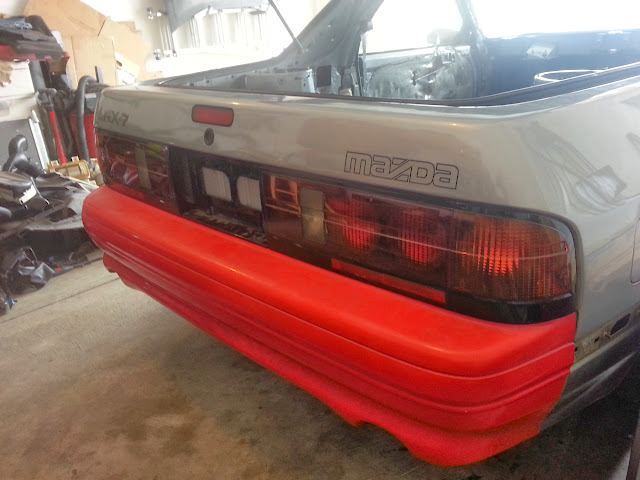
The fitment is a little funny, which makes me wonder if there was a rear-end collision at some point.

No radio means no speakers so the rear towers aren't needed anymore:


Got a little over-aggressive on the driver's sides so some welding will be needed (what little did I know...)

Bought a bunch of dry ice and went after the sound-deadening material. The floors and hatch area were pretty easy but I couldn't hold the dry ice to vertical surfaces so that was removed the hard way.


In process I noticed this redudant piece of metal. I'm not exactly sure what its purpose was but it's gone now.


Turns out Goo-Gone and Scotch-Brite pads work really well at getting the leftover adhesive removed. I didn't worry too much about the stuff stuck to the seam sealer.


Sounds like a hollow tin can now...


Almost filled a 5 gal bucket with the sound-deadening material...


...and the total weight was a whopping 10 lbs. IMO, not worth it, for future reference.

Switched gears and pulled the gas tank (with no broken bolts/studs) to try to get it cleaned and attempt to remove the broken studs.


Started cleaning off the outside with a wire wheel when I noticed a bunch of small pin holes that quickly turned into .125"+ holes. Time for a new tank. Found one on eBay in CA and picked it up. Bottom was dented underneath the fuel sending unit but a few whacks with a hammer and everything is sorted.

Weather's started to warm up, which means the lawn tractor needs to be pulled out. Threw all the interior pieces in the car (where they still are today) until I can get a shed built to house the lawn/garden equipment and get back to work.

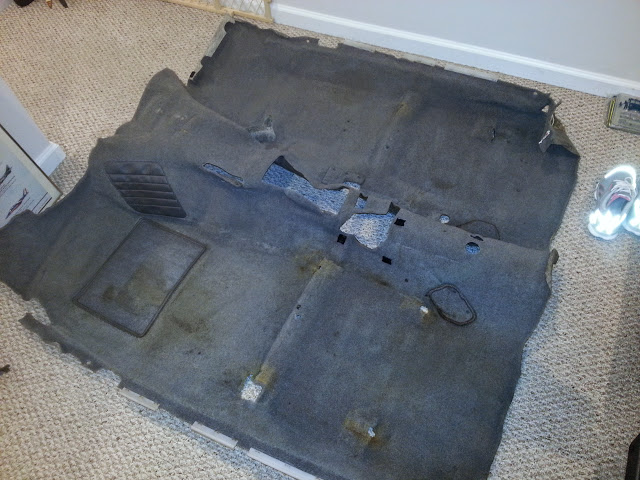
I haven't touched the car in ~4 weeks due to work and doing other stuff around the house. The last thing I did was strip the padding material from the back of the carpet.


Hard to believe this all weighs 10 lbs.

Cleaned up the carpet with a vacuum and cut away the driver's heel pad that was already torn up. I'll eventually die this black and attach a metal plate for a new heel pad.


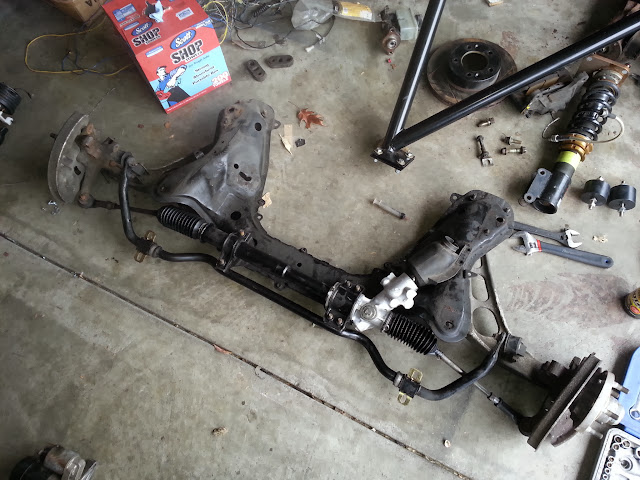
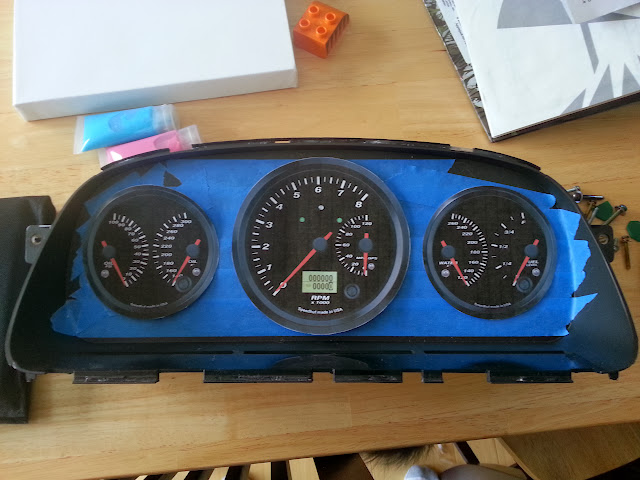
...and nothing else has been accomplished since Easter. Started building the shed in the back yard so that's taken all my free time, which wasn't much to start. Looking to get back into it in a couple weeks starting with welding up all the exposed holes in the floor and firewall. Also, decided to change direction with the ECU and upgrade to a PS1000 and ditch the stock CAS for FFE's trigger wheel w/ Hall effect sensor. Probably going to go with the IQ3 digital display dash as well. So if anyone wants an unused Sprint RE (need to find your own harness though) and some extra gauges, I'm your man.

Last edited by infernosg; 05-21-2014 at 06:13 AM..
infernosg is offline   Reply With Quote
Old 05-20-2014, 01:05 PM   #37
Silver86
now what?
 
Silver86's Avatar
 
Join Date: Jul 2009
Location: SE Wisconsin
iTrader: (0)
Posts: 178
Rep Power: 16
Silver86 is on a distinguished road
Default

Holy smokes!
__________________
1986 Rx7 coupe - arctic silver - sold
aka - 20bforme
Silver86 is offline   Reply With Quote
Old 07-25-2014, 11:10 AM   #38
infernosg
IT'S ALIVE!
 
infernosg's Avatar
 
Join Date: Dec 2009
Location: Richmond, VA
iTrader: (5)
Posts: 811
Rep Power: 15
infernosg is on a distinguished road
Default

I really need to start working on this again. A busy Summer means no time to work on the car. Since it doesn't look like the workload is going to let up I've outsourced some of the work. It's currently at a local shop getting the exhaust remade because I was never really happy with it. Same Racing Beat stuff but with better tube and layout. They're also going to make the radiator ducting for me since I don't have a sheet metal brake or bead roller. I've reached out to Chris at LMS to get an engine harness made although I'll still have a lot of chassis wiring to do myself. Finally, I still need to locate a body shop to fix the front end and some rust spots. The latter keeps getting worse with each inspection and now I have 5 or so holes in the body

The only recent picture I have is this of the fan shroud ready for primer.

infernosg is offline   Reply With Quote
Old 09-10-2014, 08:23 AM   #39
infernosg
IT'S ALIVE!
 
infernosg's Avatar
 
Join Date: Dec 2009
Location: Richmond, VA
iTrader: (5)
Posts: 811
Rep Power: 15
infernosg is on a distinguished road
Default

Got the car back last Wednesday.


The duct-work is clean, but not complete:


I need to make plates to seal up the sides around the oil cooler and I may try to change the inlet to take full advantage of the opening in the bumper cover (conservation of mass and all that). It's still better than what I could do without having a metal brake.

Mocked up the engine to start figuring out where all the wiring's gonna go. Chris Ludwig of LMS Motorsports will be handling the engine harness while I'll be doing the chassis side.


Looks like I got a little carried away with the fan shroud. Depending how I orient the shroud it can be as little as 1/2" away from the front swaybar and about a 1" from the main pulley.
infernosg is offline   Reply With Quote
Old 09-22-2014, 12:14 PM   #40
infernosg
IT'S ALIVE!
 
infernosg's Avatar
 
Join Date: Dec 2009
Location: Richmond, VA
iTrader: (5)
Posts: 811
Rep Power: 15
infernosg is on a distinguished road
Default

Bought some stuff: Iron Canyon Motorsports fuel sending unit (converts resistance-based senders to a 0-5 V signal), Speedometer Solutions digital speedometer converter (Hall Effect sensor that screws onto the stock transmission take-off), and a pair of Sakebomb Garage IGN-1A mounts.

I've been trying to get back into working on the car. So far I've only manage to take apart more stuff (side mirrors, window trim, wipers, etc.) and work on the fuel tank cover. I decided to keep the current cover so to combat the rust I soaked it in Evapo-Rust and gave it the POR-15 treatment. As with before I cut out the stock fuel lines and drilled holes for the AN fittings. I don't remember everything being this cramped on the S5 cover. This is basically as it sits now:


The through-cover electrical connections are different on the S4 so I had to come up with a new plan. After drilling through some sealant-type stuff I discovered the exterior connections are essentially ring terminals. Instead of being secured with a nut they're crimped onto a top post. The post is very close in diameter to a #10 bolt so I took a #10 ring terminal, soldered it to the post, and filled the rest of the "boss" with epoxy.


It's not pretty. Hopefully the epoxy will keep the contact from corroding and/or failing. A quick continuity check showed no voltage drop to the nearest .01 V across the post and ~24 in. of wire.
infernosg is offline   Reply With Quote
Old 10-08-2014, 06:32 AM   #41
infernosg
IT'S ALIVE!
 
infernosg's Avatar
 
Join Date: Dec 2009
Location: Richmond, VA
iTrader: (5)
Posts: 811
Rep Power: 15
infernosg is on a distinguished road
Default

Some updates...

Finished the fuel tank cover a while back.


Been racking my brain on mounting locations for the ignition coils and vacuum manifold. Got the latter sorted But the coils are an issue. Most people put them on the driver's frame rail but with my side-mounted alternator this is difficult. It's possible, but tight. I toyed with the idea of mounting them like FDs do:


...but obviously I forgot about the clutch master cylinder so that doesn't work. The only way this setup work is if the coils are split in groups of two with two on the fender side and two on the strut tower.

...and I bought I bunch of stuff. Iron Canyon Motorsports fuel level sending unit (coverts resistance-based signal to 0-5V):


Speedometer Solutions digital speedometer conversion:


SakeBomb Garage IGN-1A coil brackets:


Haltech PS1000 (old Sprint RE is for sale):


RacePak/Haltech IQ3 display dash:


Too much money spent; not enough progress...
infernosg is offline   Reply With Quote
Old 10-09-2014, 05:42 PM   #42
diabolical1
I have radioactive semen
 
Join Date: Jul 2008
Location: in a bottle of Glenfiddich
iTrader: (0)
Posts: 249
Rep Power: 17
diabolical1 is on a distinguished road
Default

this is good stuff. working on and off really sucks.

between the red car and the work you've done to this one, how much time have you spent building this thing. i'm just curious ....
__________________
Quote:
Originally Posted by RICE RACING View Post
This thread is more about debunking GAYclub and its spammers who hold more penis than any relevant qualifications ....
diabolical1 is offline   Reply With Quote
Old 10-10-2014, 07:01 AM   #43
infernosg
IT'S ALIVE!
 
infernosg's Avatar
 
Join Date: Dec 2009
Location: Richmond, VA
iTrader: (5)
Posts: 811
Rep Power: 15
infernosg is on a distinguished road
Default

Quote:
Originally Posted by diabolical1 View Post
this is good stuff. working on and off really sucks.

between the red car and the work you've done to this one, how much time have you spent building this thing. i'm just curious ....
I have no idea - way too much time. Most of it's my fault due for changing plans or increasing the scope. I made a lot of progress initially in 2011 but things kind of fell apart mid-2012 and I haven't been able to keep the same rhythm.
infernosg is offline   Reply With Quote
Old 10-15-2014, 12:46 PM   #44
infernosg
IT'S ALIVE!
 
infernosg's Avatar
 
Join Date: Dec 2009
Location: Richmond, VA
iTrader: (5)
Posts: 811
Rep Power: 15
infernosg is on a distinguished road
Default

FFE trigger kit:


Turn signal and high beam indicators for the new display.


They're incandescent but at least they have the typical arrow and high beam shapes. I think they're aftermarket OEM parts for a Harley Davidson.

Two 2' x 4' sheets of 1/16" ABS for the door panels and a small 12" x 24" sheet of .040" aluminum to finish off the ducting.

infernosg is offline   Reply With Quote
Old 11-17-2014, 08:04 AM   #45
infernosg
IT'S ALIVE!
 
infernosg's Avatar
 
Join Date: Dec 2009
Location: Richmond, VA
iTrader: (5)
Posts: 811
Rep Power: 15
infernosg is on a distinguished road
Default

Got the door panels completed. I bought some knock-off Recaro fabric on eBay and covered the ABS and picked up some red nylon straps to use as pulls.


I had enough leftover fabric to cover the headliner, which turned out better than painted ever would have.


Got my custom-made harness from Chris at LMS-EFI.


I've got a few more things to take care of and the body will be ready for paint. Trying to work out a plan with a local body shop to get that done in early 2015.
infernosg is offline   Reply With Quote
Reply

Bookmarks


Posting Rules
You may not post new threads
You may not post replies
You may not post attachments
You may not edit your posts

BB code is On
Smilies are On
[IMG] code is On
HTML code is Off

Forum Jump


All times are GMT -5. The time now is 11:19 AM.


Powered by vBulletin® Version 3.8.4
Copyright ©2000 - 2024, Jelsoft Enterprises Ltd.
Hosted by www.GotPlacement.com
Ad Management by RedTyger