|
|
|
|
#1 |
|
Home-brew Rotary
Join Date: Feb 2008
Location: GooseCreek SC
Posts: 552
Rep Power: 18  |
Stock ecu is just temporary.
S4 intake manifold is just simple. I don't want to mess with the vdi. Sure, I've heard that you get an additional 5-10-15 HP with the S5 vdi, but is that with it still functional? Or can you get away with it wired open? The S4 manifold eliminates that uncertainty. lol. |
|
|

|
|
|
#2 |
|
Home-brew Rotary
Join Date: Feb 2008
Location: GooseCreek SC
Posts: 552
Rep Power: 18  |
Maybe they were talking about a turbo?
Maybe I heard wrong. Anyway I'm going to see if it can be done. 
|
|
|

|
|
|
#3 |
|
Home-brew Rotary
Join Date: Feb 2008
Location: GooseCreek SC
Posts: 552
Rep Power: 18  |
Classic. Rebuild has come to a fork in the road.
I just tore down the bridge ported S4 engine. The front iron of the bridge ported motor has a coolant-seal-tract to coolant-passageway break / rust through. What should I do about this? As far as staying with the bridge port way, I'm thinking either, A: block up that coolant passageway and just run with it that way, or, B: take the other stock front plate I have and bridge port it the same as the other plate. But I'm thinking of totally reconsidering the entire build. Maybe go a different way. I have my reasons. |
|
|

|
|
|
#4 |
|
The quest for more torque
Join Date: Sep 2008
Location: Sheboygan, Wisconsin
Posts: 855
Rep Power: 18  |
What other way are you referring to? P-port or a simple street port?
__________________
1986 GXL ('87 4-port NA - Haltech E8, LS2 Coils. Defined Autoworks Headers, Dual 2.5" Exhaust (Dual Superflow, dBX mufflers) 1991 Coupe (KYB AGX Shocks, Eibach lowering springs, RB exhaust, Stock and Automatic) |
|
|

|
|
|
#5 |
|
Home-brew Rotary
Join Date: Feb 2008
Location: GooseCreek SC
Posts: 552
Rep Power: 18  |
Well I've decided what I'm going to do, and its not going to be bridge ported.
So that kinda defeats the title of this thread. But I will post up a little more of what I found with the original S5 motor, as a kinda proof of a build to judge upon. |
|
|

|
|
|
#6 |
|
Home-brew Rotary
Join Date: Feb 2008
Location: GooseCreek SC
Posts: 552
Rep Power: 18  |
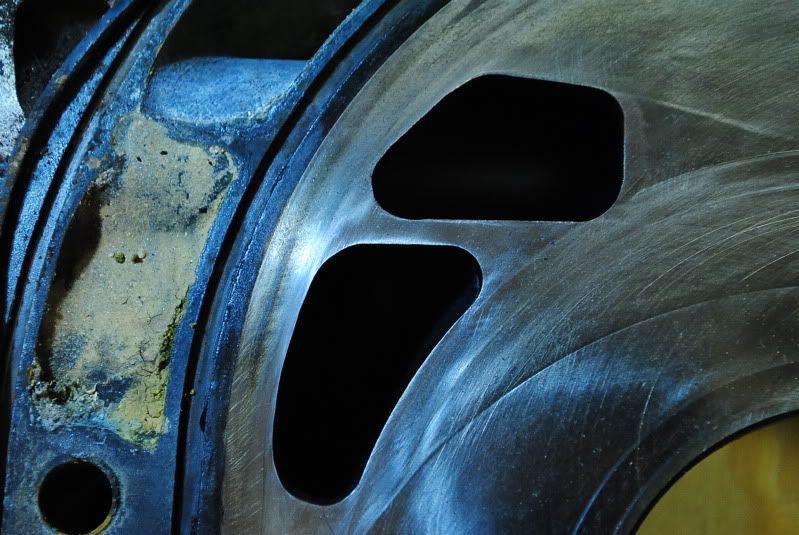
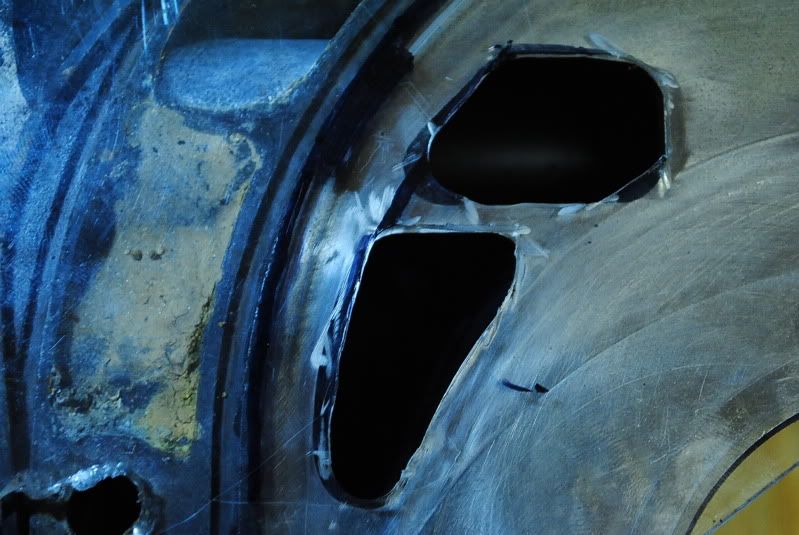
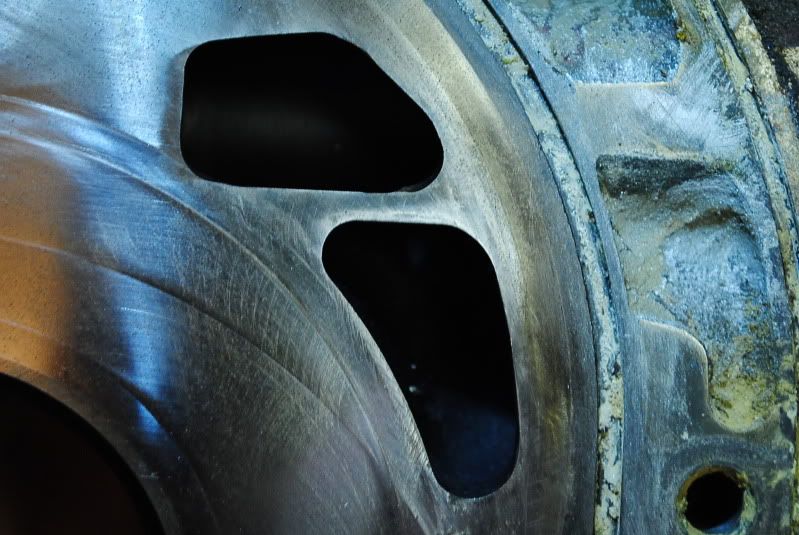
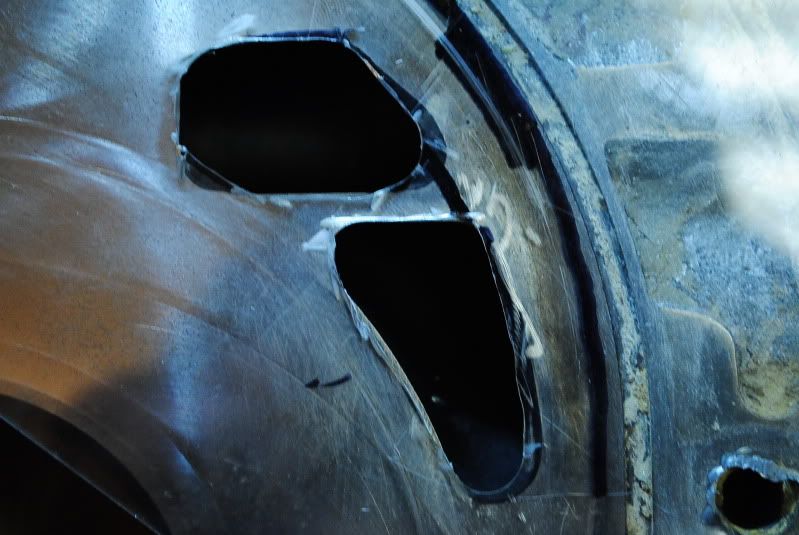
The end irons.
It looks like they were ported mostly outward. The aux ports look a little different from each other.  The plastic is a crappy template I made a few years ago to resemble stock ports. You can see the difference.    I found a very slight wear on the ends of the side seals. And found very slight wear on the top edges of the ports. Maybe that porting caused this? Anyway, I'm going to slightly bevel those ports. I also found spots on the rotor that were really clean, instead of having the oil and carbon residue. These spots are on the sides and on the faces of each rotor. Kinda find that weird. BTW: This motor only has 55k miles on it since its first rebuild. |
|
|

|
|
|
#7 |
|
The quest for more torque
Join Date: Sep 2008
Location: Sheboygan, Wisconsin
Posts: 855
Rep Power: 18  |
Nice conservative porting, I like. I am guessing that you have figured out how far you can go out without losing a side seal.
What do you intend to do with the intake manifold? I think you will find your biggest power gains from modifying the manifold. I don't know if you intend to keep the stock ECU or not. Do you have a dyno curve from the HBP? EDIT; By the way, my bone stock 6-port in complete stock trim (146 Hp) would squack the tires going into second. The tire squacking is mostly due to engine inertia, not power. The 4-port will light the tires up from standing on the gas (between 2,500 and 4,500 RPM in first gear) while traveling in a straight line on dry pavement. It is making about 200 WHp. I have 245/40/R17s on it. A 6-port will probably never do that because it can't make the torque (Ports close way too late). You will probably have more high end than I have though (less torque X higher RPM = same horsepower).
__________________
1986 GXL ('87 4-port NA - Haltech E8, LS2 Coils. Defined Autoworks Headers, Dual 2.5" Exhaust (Dual Superflow, dBX mufflers) 1991 Coupe (KYB AGX Shocks, Eibach lowering springs, RB exhaust, Stock and Automatic) Last edited by NoDOHC; 12-13-2010 at 09:43 PM. |
|
|

|
|
|
#8 |
|
Home-brew Rotary
Join Date: Feb 2008
Location: GooseCreek SC
Posts: 552
Rep Power: 18  |
I didn't port those ports.
Not yet anyway. Imo, the lower ports look fine, but the aux ports are uneven, a little shloppy. I looks like the corner seals might be about 1/3rd supported. The bridge port motor. I'm thinking I'm not just going to forget that motor. I have a plan to sometime, put it back together, reusing the o-rings and other seals, and block off that one coolant passageway, then do an engine swap, maybe for just a few weeks, run it, take it for a mtn run, and get it dynoed, then swap the good motor back in. Cause I still like that motor. But for now, Im going with this street port motor. |
|
|

|
|
|
#9 |
|
The Newbie
Join Date: Dec 2010
Posts: 8
Rep Power: 0  |
 waiting for the finish ,great start!!! waiting for the finish ,great start!!!
|
|
|

|
|
|
#10 |
|
Home-brew Rotary
Join Date: Feb 2008
Location: GooseCreek SC
Posts: 552
Rep Power: 18  |
Ok this is a classic question but, when I was cleaning the rotors, I lost track of which was the front and which was the rear rotor.
They are S4 n/a rotors. So does it matter? Is there anyway to tell which is the front and rear? What should I do? Usually I'm pretty careful to keep track of them, but not this time, oops. |
|
|

|
|
|
#11 |
|
KTEC
Join Date: Jan 2009
Posts: 642
Rep Power: 0  |
It dosnt really matter. Just look at the letters on the rotor, as long as they are within one letter of eachother, up or down, then your good. And if these are the original rotors you were already using. Your good to go.
__________________
what I have: 1985 Gs:12a All motor Drag car - 1973 Rx2: Play car What I had: 93 Touring: TRADED - 91 Coupe: TRADED - 90 GTU: RHD - 88 10AE: SOLD - 87 Base: SOLD - 86 Base: SOLD - 1985 GSLSE - 85 Gsl: SOLD - 80 Gs: TRADED - 1972 Rx2 |
|
|

|
|
|
#12 |
|
I have radioactive semen
Join Date: Jul 2008
Location: in a bottle of Glenfiddich
Posts: 250
Rep Power: 18  |
like he said, front and rear and interchangable. carry on.
|
|
|

|
|
|
#13 |
|
Home-brew Rotary
Join Date: Feb 2008
Location: GooseCreek SC
Posts: 552
Rep Power: 18  |
Cool, thats what I thought too, thanks.
Here's one for ya... When I was going through the rotors, I decided to use some of the comp. seals from the S5 rotors, cause they had less mileage on them. I used the side seals and corner seals. The question is, does it matter if I lost track of the exact place that each seal went on the rotor? Imo, this used to be a big no-no. And I did used to keep track of them in previous builds. This time I purposely lost track of where they go, I found it easier to just take em off and put em on. Imo, it might matter in the case of the side seals and corner seals, since the side seals have been trimmed to fit. So in my case, when I put it back together, I guess will it be a "best clearance" issue with each side to corner seal. What do you think about this? |
|
|

|
|
|
#14 |
|
I have radioactive semen
Join Date: Jul 2008
Location: in a bottle of Glenfiddich
Posts: 250
Rep Power: 18  |
i usually draw diagrams of each rotor when i disassemble an engine. it helps me keep track of things: front, rear and the positions of all the seal. then i put the seals in place on the drawing, clean them one at a time and replace them to the drawing.
that said, at the end of the day, clearances are what matter, so if they're all mixed up, there's nothing you can do about it now but to sit and measure everything, then keep track of it all until assembly. at least that's what i'd do. Last edited by diabolical1; 12-17-2010 at 02:18 PM. |
|
|

|
|
|
#15 |
|
The quest for more torque
Join Date: Sep 2008
Location: Sheboygan, Wisconsin
Posts: 855
Rep Power: 18  |
Actually, on high mileage engines, the triangle-shaped part of the apex seal will wear into the rotor. I had good success with switching rotors, as that allowed the triangle an un-worn part of the groove to seal in.
I don't know if that was better or worse, but it worked. Make sure that you get the three piece seals in correctly. The triangle piece should always touch the rear plate for the rotor (towards the back of the engine). The reason that I am telling you this is that I wore a housing out prematurely (significant wear in 350 miles) using a backwards-installed 3-piece seal. It doesn't matter with the 2-piece seals. As said before, as long as the seal fit in the groove within the tolerance, you should be Ok.
__________________
1986 GXL ('87 4-port NA - Haltech E8, LS2 Coils. Defined Autoworks Headers, Dual 2.5" Exhaust (Dual Superflow, dBX mufflers) 1991 Coupe (KYB AGX Shocks, Eibach lowering springs, RB exhaust, Stock and Automatic) |
|
|

|
 |
| Bookmarks |
|
|