|
|||||||
| Show your rotary car build up. Show off your Rotary Car build! |
 |
|
|
Thread Tools | Display Modes |
|
|||||||
| Show your rotary car build up. Show off your Rotary Car build! |
 |
|
|
Thread Tools | Display Modes |
|
|
#31 |
|
Rotary Fanatic
Join Date: Feb 2010
Posts: 183
Rep Power: 16  |
My belts came in today, I bought 40", 40.5" and 41" gatorback belts to see what would fit best. 41" fits on great and has tension. I'll be using some extra nuts to raise the supercharger up about 1/4" to put the final bit of tension on. Unfortunately I ordered 5 rib belts by mistake, I need to order a 6 rib instead. At least I've got the tension right though.
I'm also ordering a 5 rib 35.5" belt for the water pump, alternator, and TeakIt idler/airpump delete belt. I'm glad I finally installed that. Here is the first round of pics from last weekend (please keep in mind these are prior to grinding down/touching up welds. I'll spend the time making them pretty once I know it actually works): First up, inlet for supercharger. I actually purchased the stock mercedes cast piece and planned to weld my own pipe to it, but due to clearance issues under the UIM, we just made the entire piece from stock. Flange, will have pipe welded to this side 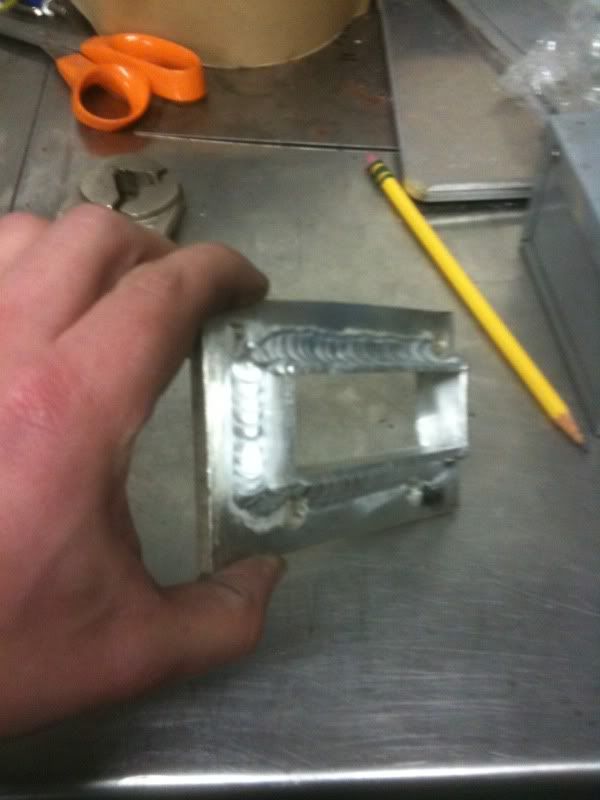 mates against supercharger, need to grind these down to get a perfectly flat flange. 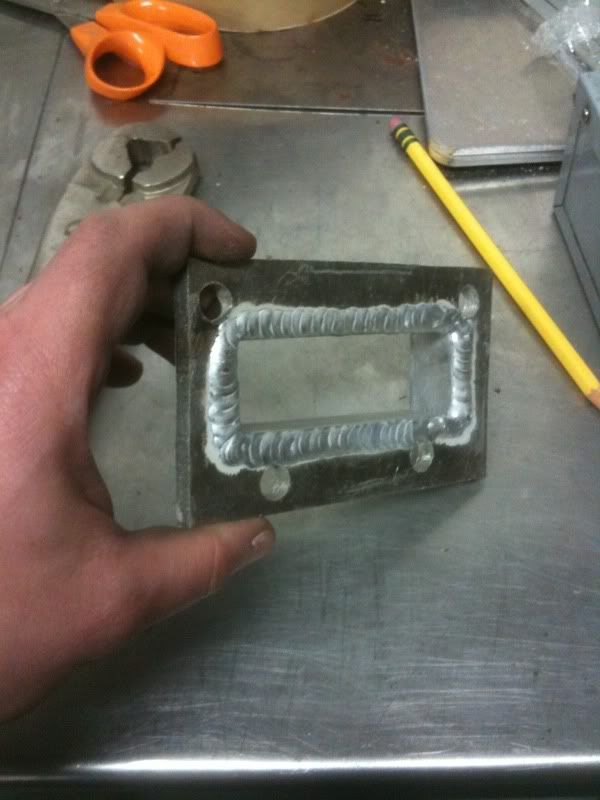 With pipe attached: This pipe will run under the UIM, and curve up next to the secondary fuel rail where many have their aftermarket fuel pressure regulator located, and then into the outlet of the supercharger. 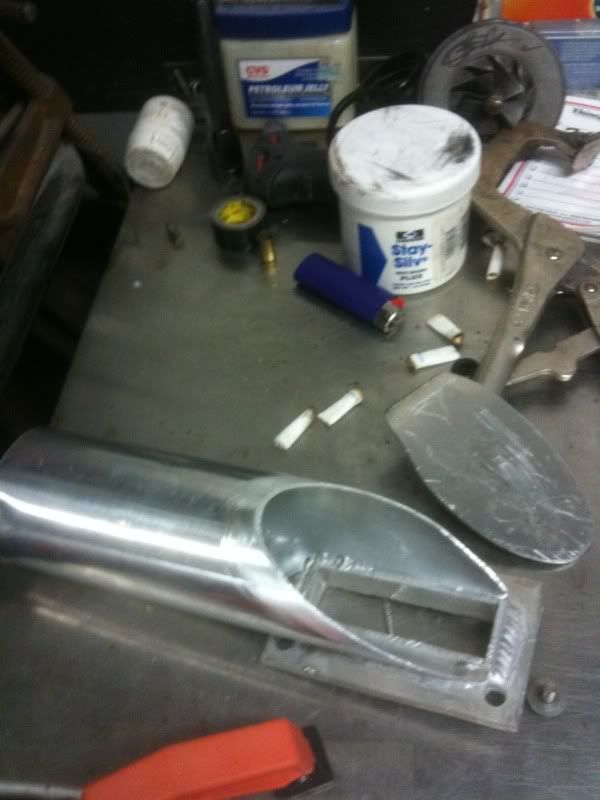 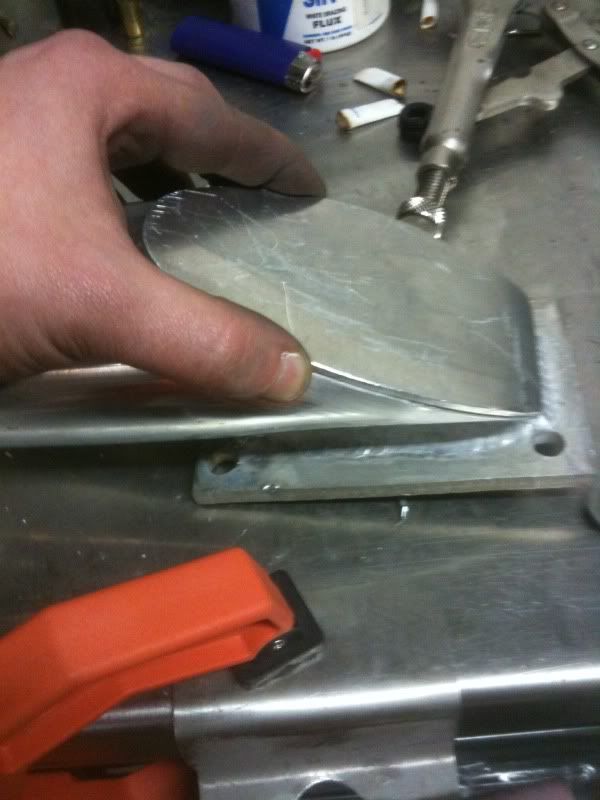 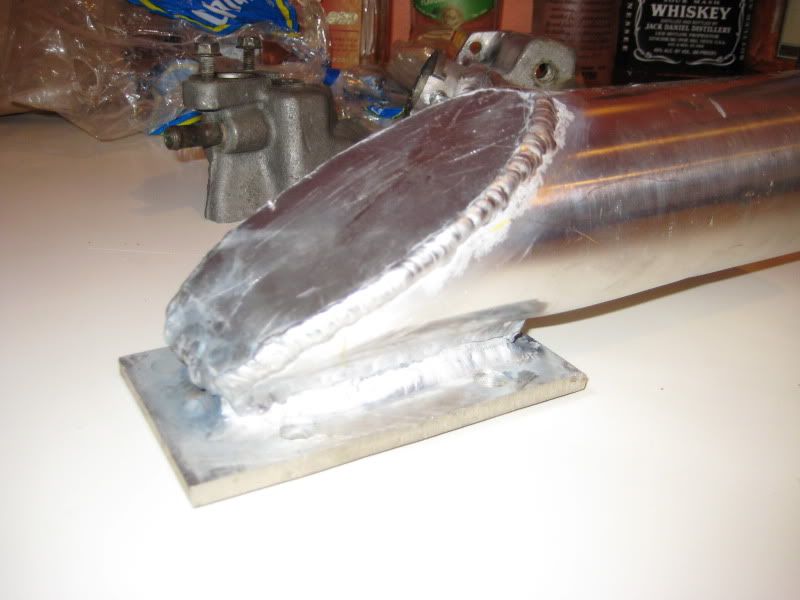 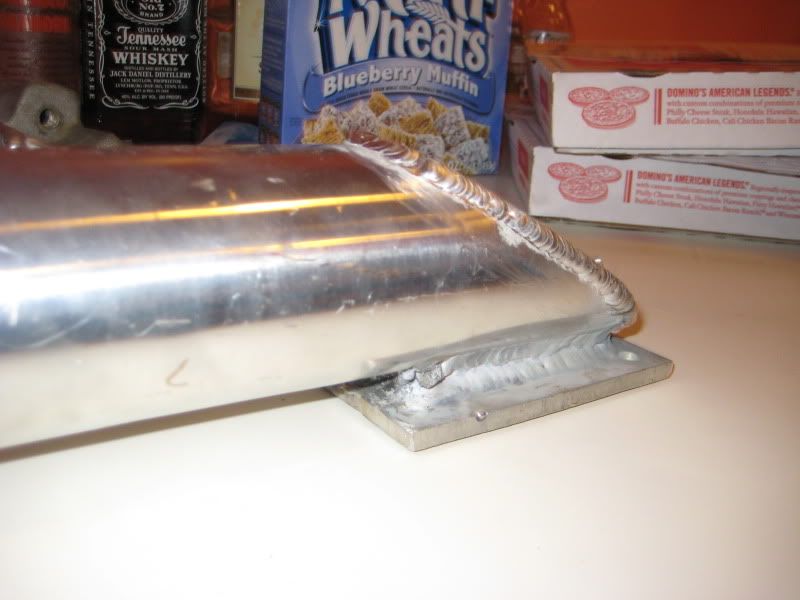 need to plane this flat: 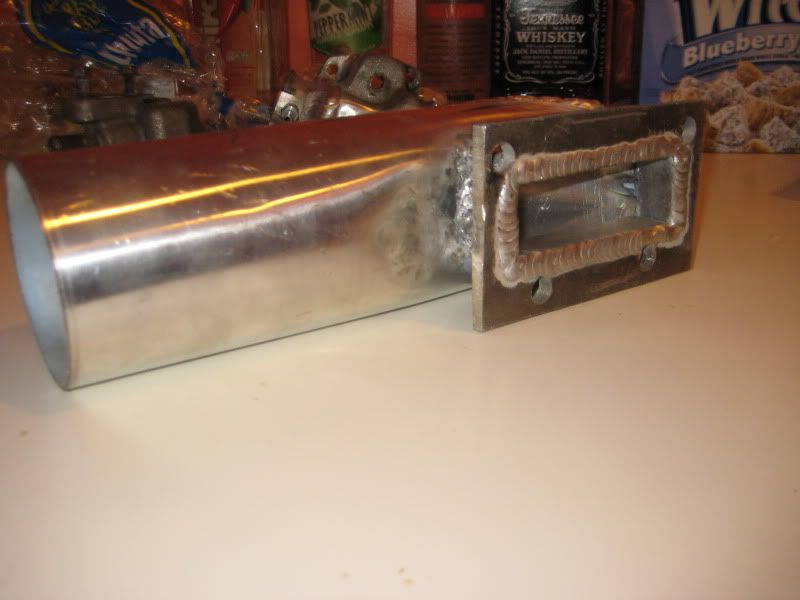
|
|
|

|
|
|
#32 |
|
Rotary Fanatic
Join Date: Feb 2010
Posts: 183
Rep Power: 16  |
Supercharger outlet pipe:
Will be routed from supercharger across the front of the alternator, over the thermostat housing, and into the intercooler: What i started with: 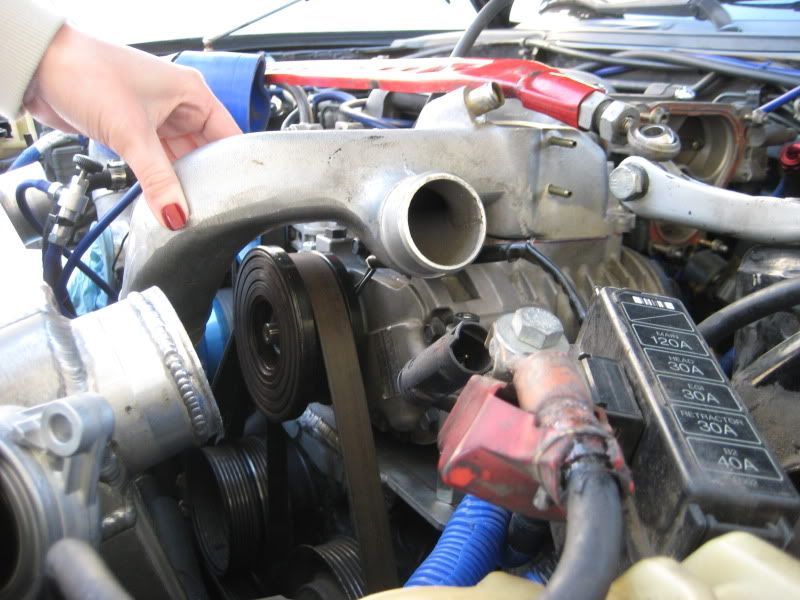 What I've got now (same angle) 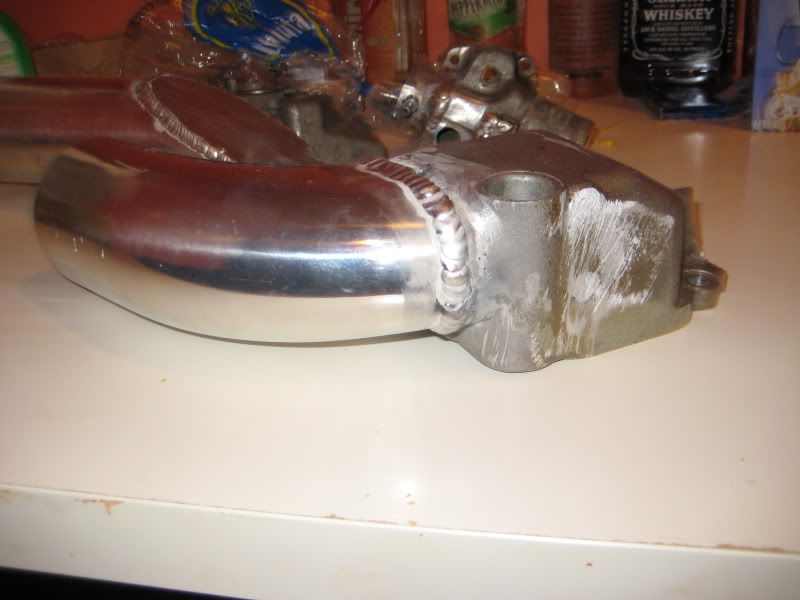 (opposite angle) 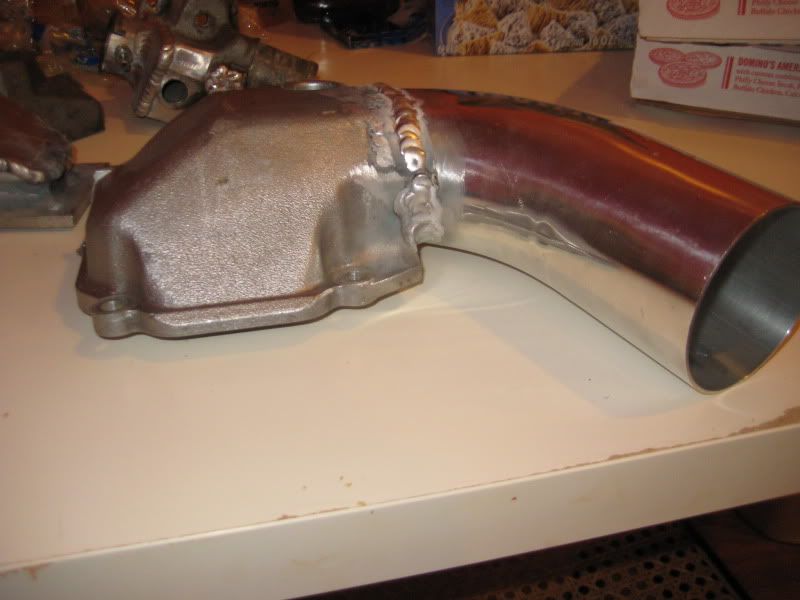 This would interfere with the thermostat housing, so I had to modify the Tstat housing in order to provide for a smooth transition into the intercooler. Please keep in mind that my AST has been deleted for a long time. two pieces that used to be one: Tstat housing: 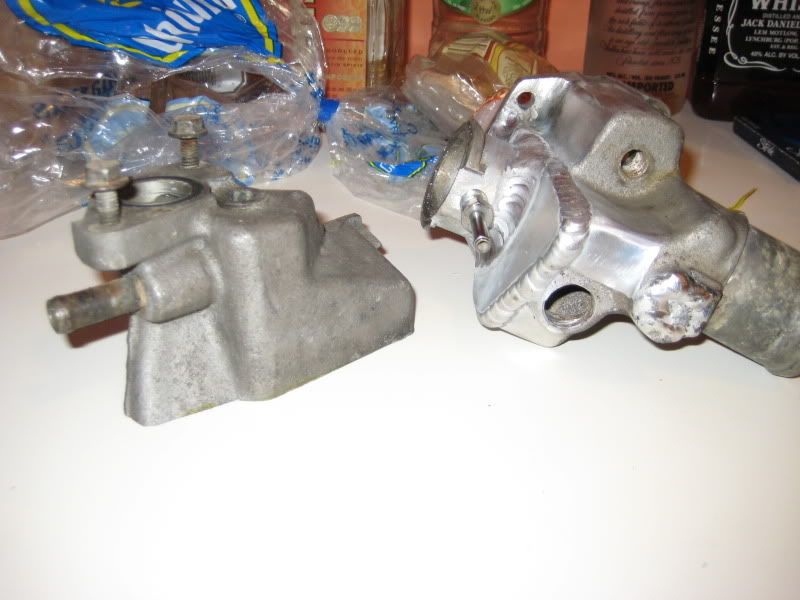 In process: 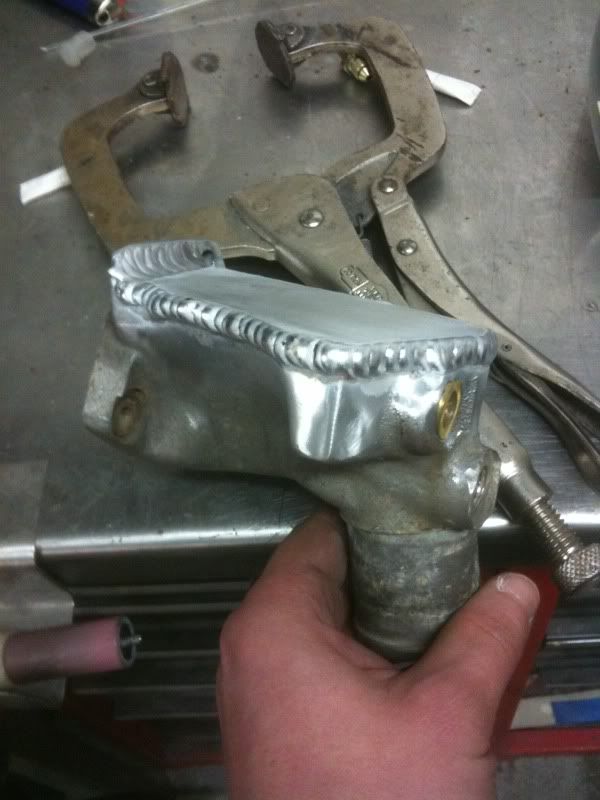 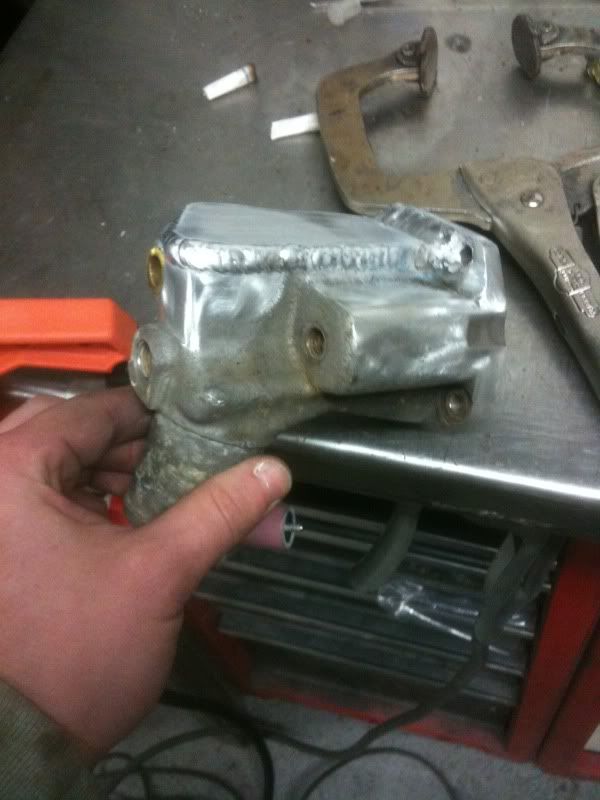 Done and tons of clearance for my new supercharger to intercooler piping: 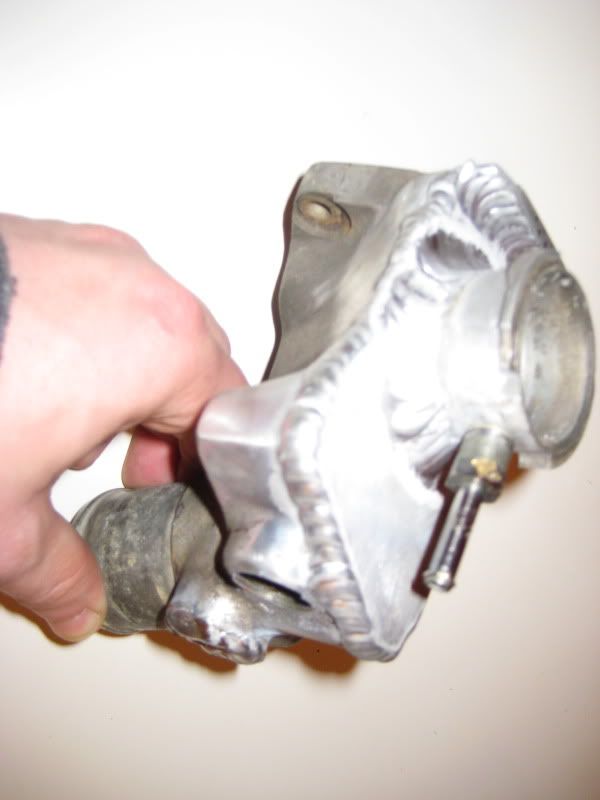 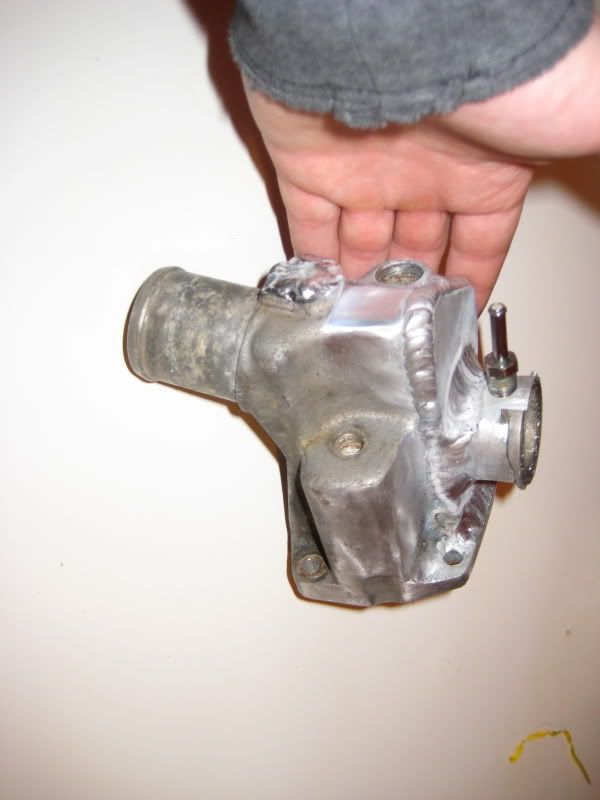 I use the 2nd gen metal fill neck (cut the flange off and welded to the new piece), the 3rd gen fill neck is plastic |
|
|

|
|
|
#33 |
|
Rotary Fanatic
Join Date: Feb 2010
Posts: 183
Rep Power: 16  |
Greddy Elbow:
The extreme angle on the normal greddy elbow wouldn't allow the inlet pipe to clear the supercharger, so I had to change the angle. Now the pipe will run closer to the strut tower where the fuse box was. Original: 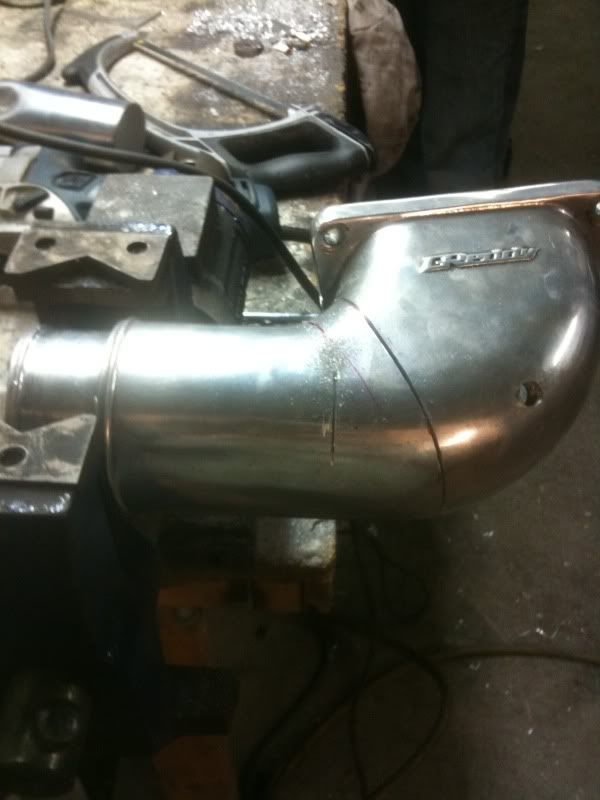 Cutting: 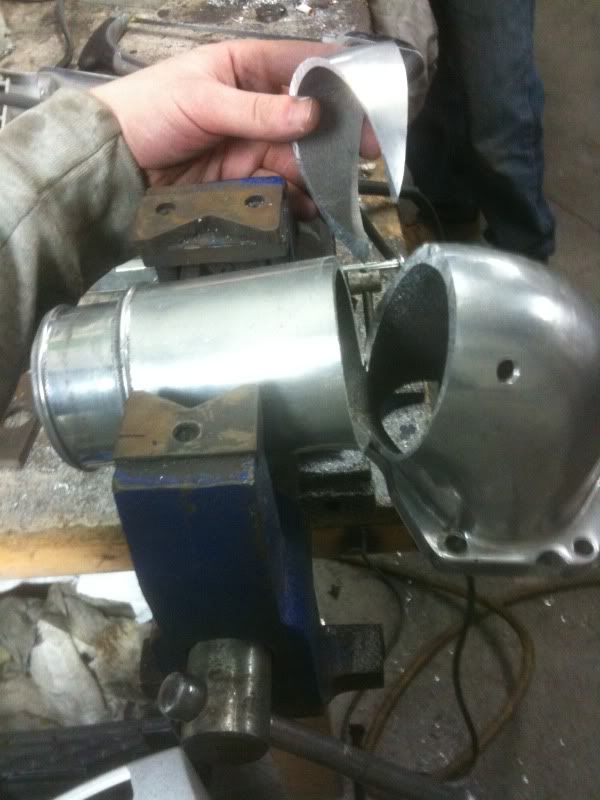 Tacked together for mock up: 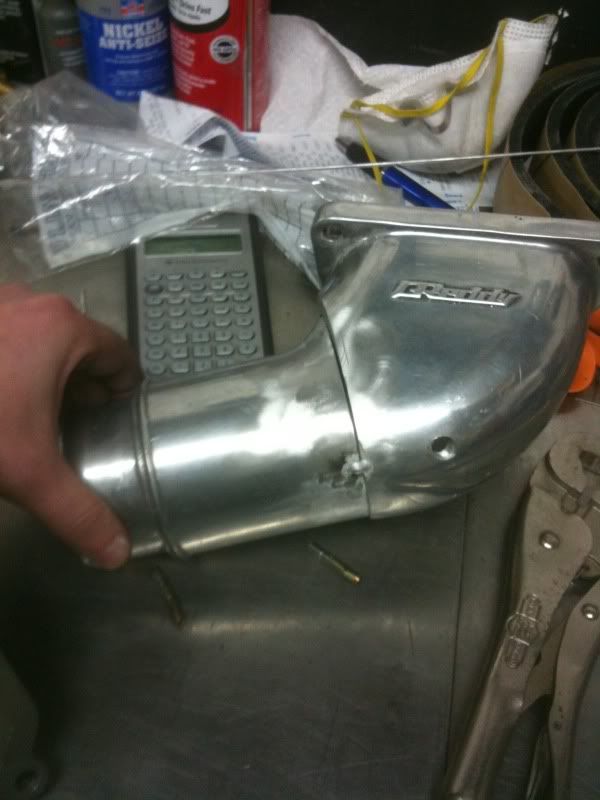 Final (angle wasn't quite enough to provide clearance in the above pic, so this is the final piece which was cut one more time) 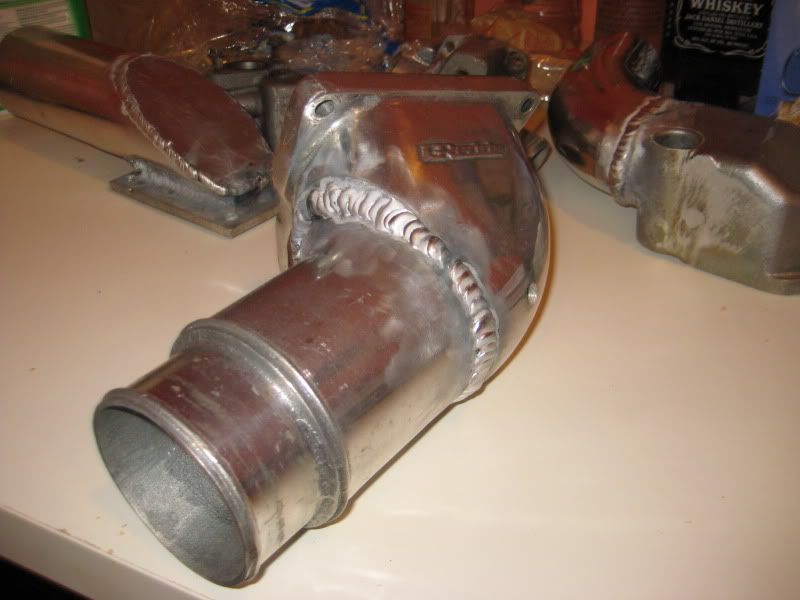 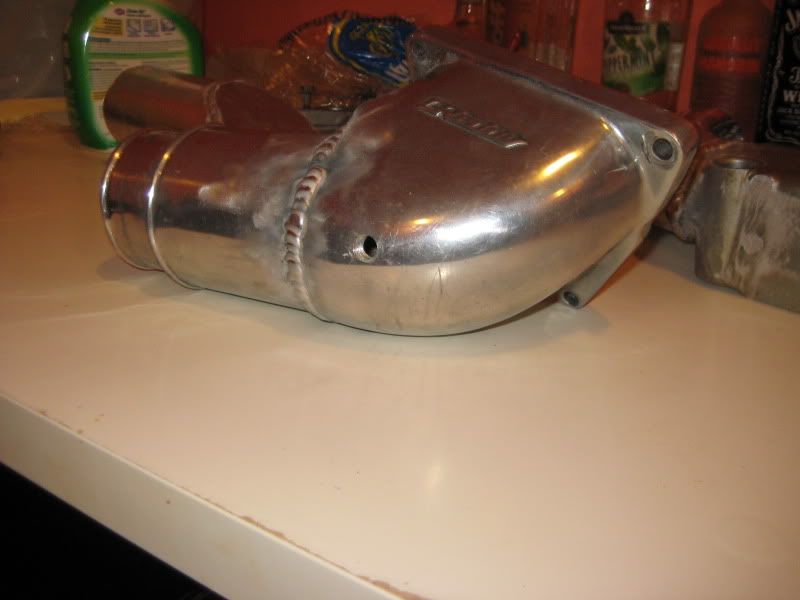 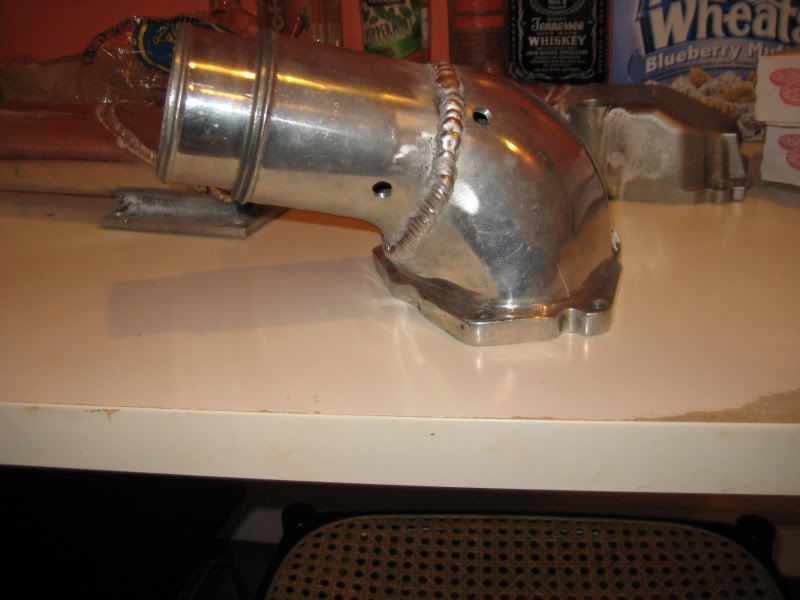 Inside: 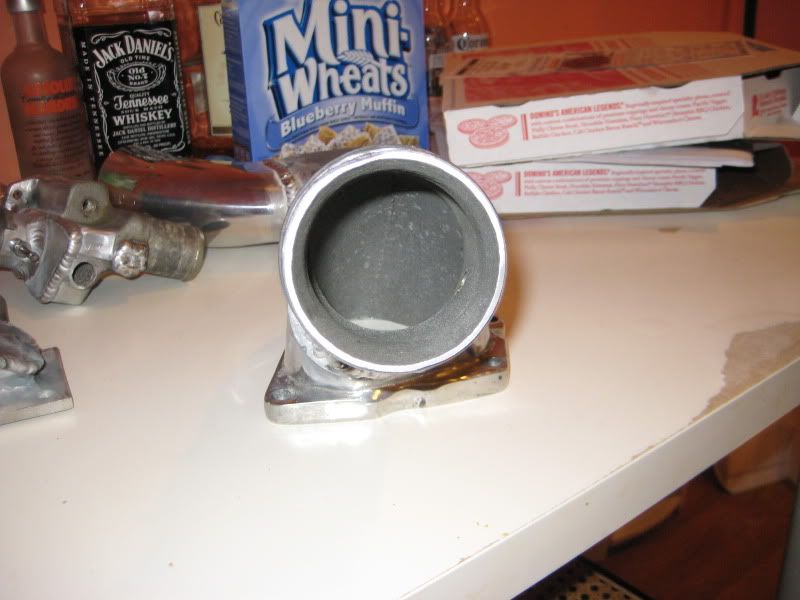 Still have smooth flow: 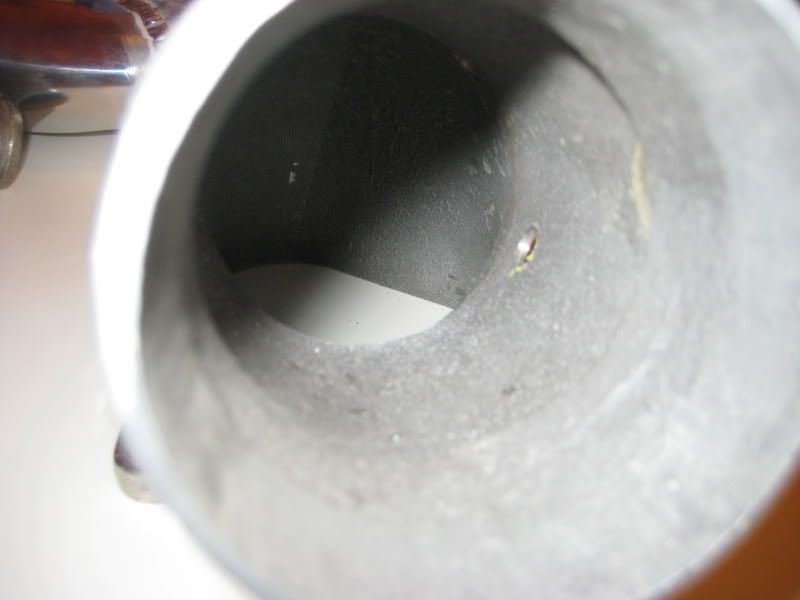 There are three tapped holes, 2 for meth nozzles, 1 for intake temp sensor. I really think all of these pieces came out great. Please remember, these still all need to be cleaned up some, but the welding is great. Thanks again Brian!!! Now we just have to make a few easy pieces. Straight pipe with BOV from intercooler outlet to greddy elbow. and a pipe with a 45 degree bend from the supercharger inlet pipe to the turbo outlet. |
|
|

|
|
|
#34 |
|
Mazda Lover
Join Date: Aug 2010
Location: Akron, Ohio
Posts: 319
Rep Power: 16  |
Very interesting build. Interested to see the next steps too.
__________________
 2004 Mazda6 V6 5-spd - still waiting on money for a motor 1991 Mazda RX7 NA 5-spd - my new DD with 145,000 miles |
|
|

|
|
|
#35 | ||
|
Test Whore - Admin
Join Date: Mar 2008
Location: Right Behind you son
Posts: 4,581
Rep Power: 10  |
Quote:
 Someones a bad influence Someones a bad influence  Quote:
So DJ, looks like she'll be @ DGRRXI afterall!
__________________
-The Angry Stig- DGRR 2009, 2011, 2012 & 2013 - Best FC DEALS GAP!! WOOHOOOO!!!!! 2015 Audi S4 - Samantha - Zero Brap S4 2004 RX8 - Jocelyn - 196rwhp, 19mpg fuel to noise converter 2000 Jeep Cherokee Sport - Wifey mobile - Now with 2.5" OME lift and 30" BFG AT KO's! So it begins 1998 Jeep Cherokee - 5 spd, 4" lift, 33" BFG's - Rotary Tow Vehicle 1988 'Vert - In progress 1988 FC Coupe - Gretchen -The attention whore BEAST! I'm a sick individual, what's wrong with you? I'm pure Evil I'm still insane, in the best possible way. I think Brian's idea of romance is using lube. Your rage caused the meteor strike in Russia. The Antichrist would be proud of his minion. You win with your thread. Most everything It's a truck with a steel gate on the back. Just a statement of fact Motec M820, AIM dash, ported 13B-RE Cosmo, 6-spd trans, 4.3 Torsen, custom twin wg fully divided mani, Custom 4" split into 2x 3" exhaust, Custom HMIC, Custom custom custom custom I like to welder stuff.... No Bolt-ons allowed. Dyno'ed @ Speed1 Tuned by me - 405rwhp on WG.... WM50 cuming soon. -Angry Motherf*cker Mode ENGAGED- |
||
|
|

|
|
|
#36 |
|
Test Whore - Admin
Join Date: Mar 2008
Location: Right Behind you son
Posts: 4,581
Rep Power: 10  |
Just read it again.... Tension!!! SWEET!!! So tension bolted down, then even more with the 4 nuts underneath moving it up ever so slightly?
When are we doing the obligatory AIDS ereerrrrrr comp test and firing her up?
__________________
-The Angry Stig- DGRR 2009, 2011, 2012 & 2013 - Best FC DEALS GAP!! WOOHOOOO!!!!! 2015 Audi S4 - Samantha - Zero Brap S4 2004 RX8 - Jocelyn - 196rwhp, 19mpg fuel to noise converter 2000 Jeep Cherokee Sport - Wifey mobile - Now with 2.5" OME lift and 30" BFG AT KO's! So it begins 1998 Jeep Cherokee - 5 spd, 4" lift, 33" BFG's - Rotary Tow Vehicle 1988 'Vert - In progress 1988 FC Coupe - Gretchen -The attention whore BEAST! I'm a sick individual, what's wrong with you? I'm pure Evil I'm still insane, in the best possible way. I think Brian's idea of romance is using lube. Your rage caused the meteor strike in Russia. The Antichrist would be proud of his minion. You win with your thread. Most everything It's a truck with a steel gate on the back. Just a statement of fact Motec M820, AIM dash, ported 13B-RE Cosmo, 6-spd trans, 4.3 Torsen, custom twin wg fully divided mani, Custom 4" split into 2x 3" exhaust, Custom HMIC, Custom custom custom custom I like to welder stuff.... No Bolt-ons allowed. Dyno'ed @ Speed1 Tuned by me - 405rwhp on WG.... WM50 cuming soon. -Angry Motherf*cker Mode ENGAGED- |
|
|

|
|
|
#37 |
|
Rotary Fanatic
Join Date: Feb 2010
Posts: 183
Rep Power: 16  |
hopefully sunday. I have to do my taxes in the morning haha, then work, then car time.
We've still got to adjust the downpipe too, but it looks like it should be easy. Fingers crossed for the aids test haha, but im a little owrried |
|
|

|
|
|
#38 |
|
Test Whore - Admin
Join Date: Mar 2008
Location: Right Behind you son
Posts: 4,581
Rep Power: 10  |
Cooooooooool.... w/e is supposed to be lousy for weather though.... good thing you've got that lean-to
 Yeah man, whenever you've got that DP ready, shoot me a txt and we'll get it all welded up, and whenever you've got the time, I've got the tester. Yeah man, whenever you've got that DP ready, shoot me a txt and we'll get it all welded up, and whenever you've got the time, I've got the tester.
__________________
-The Angry Stig- DGRR 2009, 2011, 2012 & 2013 - Best FC DEALS GAP!! WOOHOOOO!!!!! 2015 Audi S4 - Samantha - Zero Brap S4 2004 RX8 - Jocelyn - 196rwhp, 19mpg fuel to noise converter 2000 Jeep Cherokee Sport - Wifey mobile - Now with 2.5" OME lift and 30" BFG AT KO's! So it begins 1998 Jeep Cherokee - 5 spd, 4" lift, 33" BFG's - Rotary Tow Vehicle 1988 'Vert - In progress 1988 FC Coupe - Gretchen -The attention whore BEAST! I'm a sick individual, what's wrong with you? I'm pure Evil I'm still insane, in the best possible way. I think Brian's idea of romance is using lube. Your rage caused the meteor strike in Russia. The Antichrist would be proud of his minion. You win with your thread. Most everything It's a truck with a steel gate on the back. Just a statement of fact Motec M820, AIM dash, ported 13B-RE Cosmo, 6-spd trans, 4.3 Torsen, custom twin wg fully divided mani, Custom 4" split into 2x 3" exhaust, Custom HMIC, Custom custom custom custom I like to welder stuff.... No Bolt-ons allowed. Dyno'ed @ Speed1 Tuned by me - 405rwhp on WG.... WM50 cuming soon. -Angry Motherf*cker Mode ENGAGED- |
|
|

|
|
|
#39 |
|
Rotary Fanatic
Join Date: Feb 2010
Posts: 183
Rep Power: 16  |
Update: cut the 4 bolt downpipe flange off the downpipe, welded a small piece of pipe, and then welded on the vband flange. For anyone with the T78 kit wanting to do this, you have to cut back the downpipe to just before where it finishes its final bend, otherwise the downpipe is about 1/4" to high to go straight into the turbo outlet.
Check out the fitment now  Cut and tacked together, vband and hose clamps holding everything in place:  Half way there:  Complete (there will be no leaks on this vband:  Now I just have to rewrap the downpipe and coat it and the turbo with DEI high temp coating. I had no idea that the normal heat wrap just disintegrates after its been run for a while. It was literally turning to dust during removal. |
|
|

|
|
|
#40 |
|
Test Whore - Admin
Join Date: Mar 2008
Location: Right Behind you son
Posts: 4,581
Rep Power: 10  |
I said DAMYUM that shop is filthy... clean that shit up!!!!! oh wait
 Seeing as how my car won't be attending.... we're gonna bust ass and make sure DJ is satisfied and this bad ride is @ DGRRXI
__________________
-The Angry Stig- DGRR 2009, 2011, 2012 & 2013 - Best FC DEALS GAP!! WOOHOOOO!!!!! 2015 Audi S4 - Samantha - Zero Brap S4 2004 RX8 - Jocelyn - 196rwhp, 19mpg fuel to noise converter 2000 Jeep Cherokee Sport - Wifey mobile - Now with 2.5" OME lift and 30" BFG AT KO's! So it begins 1998 Jeep Cherokee - 5 spd, 4" lift, 33" BFG's - Rotary Tow Vehicle 1988 'Vert - In progress 1988 FC Coupe - Gretchen -The attention whore BEAST! I'm a sick individual, what's wrong with you? I'm pure Evil I'm still insane, in the best possible way. I think Brian's idea of romance is using lube. Your rage caused the meteor strike in Russia. The Antichrist would be proud of his minion. You win with your thread. Most everything It's a truck with a steel gate on the back. Just a statement of fact Motec M820, AIM dash, ported 13B-RE Cosmo, 6-spd trans, 4.3 Torsen, custom twin wg fully divided mani, Custom 4" split into 2x 3" exhaust, Custom HMIC, Custom custom custom custom I like to welder stuff.... No Bolt-ons allowed. Dyno'ed @ Speed1 Tuned by me - 405rwhp on WG.... WM50 cuming soon. -Angry Motherf*cker Mode ENGAGED- |
|
|

|
|
|
#41 |
|
Rotary Fanatic
Join Date: Feb 2010
Posts: 183
Rep Power: 16  |
Worked all weekend again, Deals Gap is coming way to quickly. Still don't know if it'll even work.
I'll let the pics do the talking: In with the new, out with the old  Resprayed manifold (also re-wrapped and sprayed the downpipe):   New turbo oil feed, this sits under the supercharger bracket, and the old hardline was touching the bottom of the mounting plate. So now it's braided -4 AN (black nylon) and won't rub on anything:   Since the back of the supercharger partly under the TB, I had to make a new oil fill neck. This will have a -10 AN bung welded to it and a short black nylon braided line will be routed to the rear of the UIM and will be the oil fill point:    Unfortunately, the supercharger air inlet pipe still hits that new oil fill neck, so i had to modify the pipe. I've since modified this 2 more times, and it's going to need a little more persuasion before it will actually bolt down nicely. The oil fill neck and rear of the supercharger are just so close    Hopefully I can get this piece fitting correctly. I finished relocating the fuse boxes and tieding up the wiring this weekend. I also finished replacing the old oil hardline (from oil filter pedastal to driver side oil cooler) to -10 AN braided line. The hard pipe would have rubbed on the supercharger bracket. Then I can finish off the final pipes and see if it starts. Tonight I should be able to put the bumper and lights back on (not fixed though). And I'll also have my new 90mm bi-xenon D2S projectors up and running, finally I'll be able to see at night. |
|
|

|
|
|
#42 |
|
Rotary Fanatic
Join Date: Feb 2010
Posts: 183
Rep Power: 16  |
Just got in from pulling the rear subframe. I had originally started to just replace all of the bushings/pillowballs. I started with the front, then I got bit by the bug and said, "I'm not going to have this apart for a long time, so now's the time to clean & paint". So instead of just new bushings, I cleaned the disgusting wheel wells, resprayed with rubberized coating, cleaned and painted all the suspension arms, installed new rubbers on the ball joints.
And of course, after all that, I couldn't just leave the rear alone. So tonight I removed the subframe, which will now be sent away for powdercoating along with the PPF and driveshaft. I'll paint all the suspension arms, diff, and axles. I've been painting the suspension arms because aluminum can become brittle unless done exactly right (slow heat, cure powdercoat, and slow cool down). I don't really trust anyone enough to take the risk on brittle suspension arms, so paint will have to do. Here's a few pics (the theme is black and blue on the entire car): The subframe is a bear to get out by yourself haha.    A glimpse of the amount of dirt caked onto the front wheel wells:  The amount that came off just one side:  A clean wheel well (before new rubberized coating)  (I also sprayed the liners) (I also sprayed the liners)Dirty Arms:  Clean arms:  These all have the old rubber boots, which i left on to keep paint out of the joints, I then installed nice new boots from Malloy Mazda (Ray's the man) Primered Arms:  Painted Arms:  Quick update on the twin charged part of the project, haven't really made any progress on the boost system lately, working on finishing the suspension & undercarriage, then driving it over to my awesome welder's to do some work. While its there, I'll be changing the oilpan and installing the oil pan brace. I'll be taking the engine out when I do this so I can have the subframe powdercoated, engine bay painted, and every piece in the engine bay powdercoated. I'm doing this at my Brian's place so that we can clean up some of the piping that you can't really inspect when the engine is in the car, so we'll have the engine out, with all the piping installed, and make sure nothing is rubbing and do some other cleanup. Last edited by RX SE7EN; 06-30-2011 at 10:05 PM. |
|
|

|
|
|
#43 |
|
cxxxx|::::::::::::>
Join Date: Nov 2009
Posts: 315
Rep Power: 16  |
Very nice. I thought about painting mine but in the end opted just for a nice shinny aluminum finish and called it good. I'll have to go back and do the rubber spray.
|
|
|

|
|
|
#44 |
|
Rotary Fanatic
Join Date: Feb 2010
Posts: 183
Rep Power: 16  |
Update:
Rear subframe removed: (out for powder coating tomorrow, along with the PPF, undercarriage braces, and muffler shield)    Diff painted:   Axles/Knuckles painted:  Rear bushings & pillow balls pressed out: 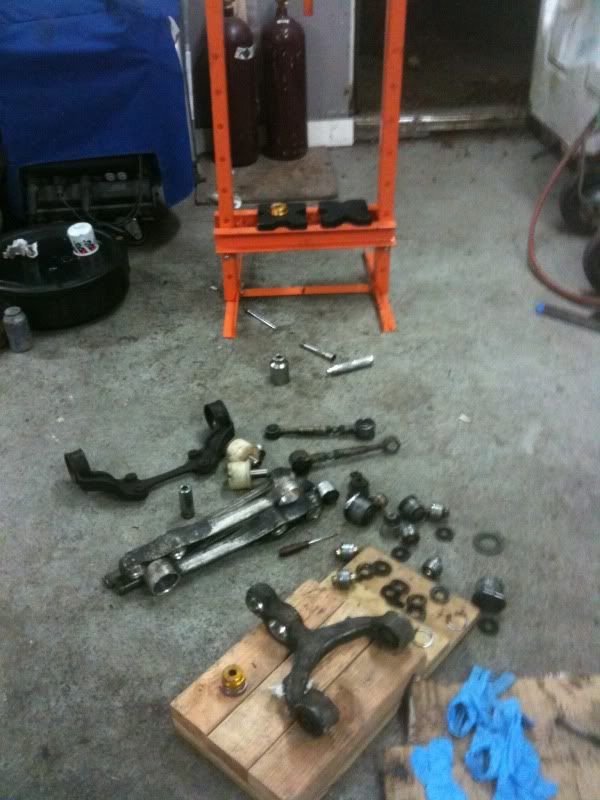 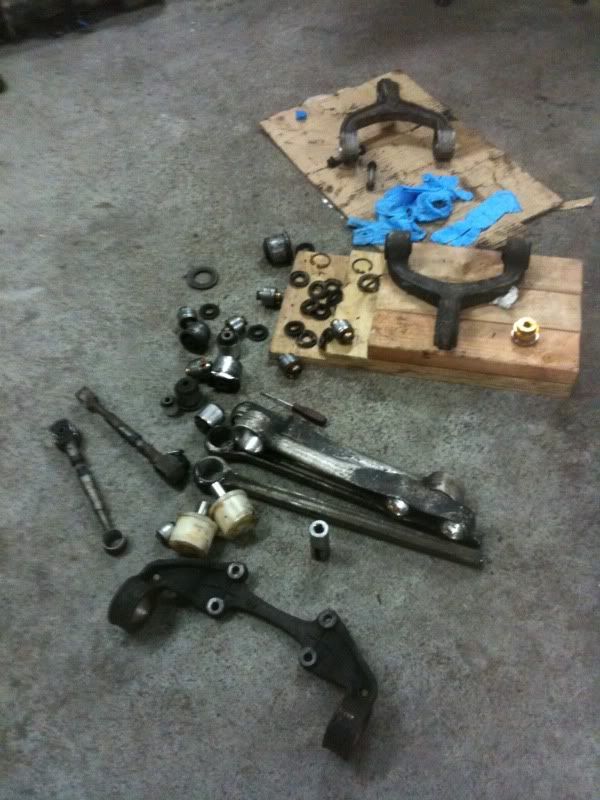 Will be cleaned, painted, with Powerflex bushings and AtomicRex pillow balls pressed in this weekend. |
|
|

|
|
|
#45 | |
|
cxxxx|::::::::::::>
Join Date: Nov 2009
Posts: 315
Rep Power: 16  |
Quote:

|
|
|
|

|
 |
| Bookmarks |
| Thread Tools | |
| Display Modes | |
|
|