 01-28-2013, 02:43 PM
|
#106 | ||||
|
Get off my lawn!!!
Join Date: Jun 2011
Location: At a USO near you!
Posts: 715
Rep Power: 15  |
Quote:
We had a pretty successful weekend all things considered. We put some LONG hours into the car on Saturday, getting it started at 6:30am on Sunday and finally calling it quits at 7:30 for some much needed rest. Stuff left to do is patch a tiny hole in the radiator core, put the clutch fork where pity belongs (it fell out of alignment), and add a return port into the cooling system for the AST to drain to. I'll get pics up when I get home from work and have a moment.
__________________
'94 Touring - Cursed '96 NA Miata '14 Mazda3 Hatch '14 Aprilia RSV4 R Quote:
Quote:
Quote:
|
||||

|

|
|
01-29-2013, 09:44 AM
|
#107 |
|
Test Whore - Admin

Join Date: Mar 2008
Location: Right Behind you son
Posts: 4,581
Rep Power: 10 |
FRA-497104 *3 for the AST
SUM-220071 *1 for the rad SUM-2200075B *1 for the return line in the tank (used from my personal stash) and then the -4 fittings needed for the line from the rad to the AST, I'm thinking a straight on the rad, and a 90* on the AST given where it's being welded grumble grumble Crutchfield grumble grumble Norm 
__________________
-The Angry Stig- DGRR 2009, 2011, 2012 & 2013 - Best FC DEALS GAP!! WOOHOOOO!!!!! 2015 Audi S4 - Samantha - Zero Brap S4 2004 RX8 - Jocelyn - 196rwhp, 19mpg fuel to noise converter 2000 Jeep Cherokee Sport - Wifey mobile - Now with 2.5" OME lift and 30" BFG AT KO's! So it begins 1998 Jeep Cherokee - 5 spd, 4" lift, 33" BFG's - Rotary Tow Vehicle 1988 'Vert - In progress 1988 FC Coupe - Gretchen -The attention whore BEAST! I'm a sick individual, what's wrong with you? I'm pure Evil I'm still insane, in the best possible way. I think Brian's idea of romance is using lube. Your rage caused the meteor strike in Russia. The Antichrist would be proud of his minion. You win with your thread. Most everything It's a truck with a steel gate on the back. Just a statement of fact Motec M820, AIM dash, ported 13B-RE Cosmo, 6-spd trans, 4.3 Torsen, custom twin wg fully divided mani, Custom 4" split into 2x 3" exhaust, Custom HMIC, Custom custom custom custom I like to welder stuff.... No Bolt-ons allowed. Dyno'ed @ Speed1 Tuned by me - 405rwhp on WG.... WM50 cuming soon. -Angry Motherf*cker Mode ENGAGED- |
|
|
|
|
01-29-2013, 09:59 AM
|
#108 | |||
|
Get off my lawn!!!
Join Date: Jun 2011
Location: At a USO near you!
Posts: 715
Rep Power: 15 |
Gotcha. How much of that do you need delivered to the shop in order to finish the AST?
Yeah, yeah... I gotta call him again... I was fucking DEAD last night after work.. Did you get stuff worked out smoothly after I left on Sunday?
__________________
'94 Touring - Cursed '96 NA Miata '14 Mazda3 Hatch '14 Aprilia RSV4 R Quote:
Quote:
Quote:
|
|||
|
|
|
|
01-29-2013, 11:22 AM
|
#109 |
|
Test Whore - Admin
Join Date: Mar 2008
Location: Right Behind you son
Posts: 4,581
Rep Power: 10 |
Just have everything delivered to the shop and I'll toss it in the box when I ship the AST out..... no sense paying shipping twice for 2 different addy's
Can't imagine why one would be sooooo tired  Yeah, please lemme know... I'm heading to RI Friday night and need to figure out this ongoing vehicle saga that makes me want to punch babies in the face and rape 7 yo's like red headed step children.... J0o has txt about that...
__________________
-The Angry Stig- DGRR 2009, 2011, 2012 & 2013 - Best FC DEALS GAP!! WOOHOOOO!!!!! 2015 Audi S4 - Samantha - Zero Brap S4 2004 RX8 - Jocelyn - 196rwhp, 19mpg fuel to noise converter 2000 Jeep Cherokee Sport - Wifey mobile - Now with 2.5" OME lift and 30" BFG AT KO's! So it begins 1998 Jeep Cherokee - 5 spd, 4" lift, 33" BFG's - Rotary Tow Vehicle 1988 'Vert - In progress 1988 FC Coupe - Gretchen -The attention whore BEAST! I'm a sick individual, what's wrong with you? I'm pure Evil I'm still insane, in the best possible way. I think Brian's idea of romance is using lube. Your rage caused the meteor strike in Russia. The Antichrist would be proud of his minion. You win with your thread. Most everything It's a truck with a steel gate on the back. Just a statement of fact Motec M820, AIM dash, ported 13B-RE Cosmo, 6-spd trans, 4.3 Torsen, custom twin wg fully divided mani, Custom 4" split into 2x 3" exhaust, Custom HMIC, Custom custom custom custom I like to welder stuff.... No Bolt-ons allowed. Dyno'ed @ Speed1 Tuned by me - 405rwhp on WG.... WM50 cuming soon. -Angry Motherf*cker Mode ENGAGED- |
|
|
|
|
01-29-2013, 12:16 PM
|
#110 | ||||
|
Get off my lawn!!!
Join Date: Jun 2011
Location: At a USO near you!
Posts: 715
Rep Power: 15 |
Quote:
Also, I had originally ordered 2x of the FRA-497104's, they came in the same box as the rest of the -4 stuff. I'll double check in the boxes downstairs to be sure we didn't accidentally overlook them. And I'm kinda thinking of just going ahead and -16ing the radiator right now, as the shop will already be welding on it... If I do that than I think I'll make two separate orders, one for coming here, and one going there.
__________________
'94 Touring - Cursed '96 NA Miata '14 Mazda3 Hatch '14 Aprilia RSV4 R Quote:
Quote:
Quote:
|
||||
|
|
|
|
01-29-2013, 12:38 PM
|
#111 | |||
|
Test Whore - Admin
Join Date: Mar 2008
Location: Right Behind you son
Posts: 4,581
Rep Power: 10 |
Quote:
Quote:
Quote:
If you're gonna do that, you're also going to need the -16 AN fittings welded onto waterpump housing as well. And if you're going that far, you might as well get rid of the T-stat housing and build a combo t-stat housing/ AST tank as opposed to the hooky way it's going to be mounted now.Personally, I would do it that way..... oh wait... I am doing it that way on the 'vert I would've done it that way on the FC but didnt' really have the room because VMIC.
__________________
-The Angry Stig- DGRR 2009, 2011, 2012 & 2013 - Best FC DEALS GAP!! WOOHOOOO!!!!! 2015 Audi S4 - Samantha - Zero Brap S4 2004 RX8 - Jocelyn - 196rwhp, 19mpg fuel to noise converter 2000 Jeep Cherokee Sport - Wifey mobile - Now with 2.5" OME lift and 30" BFG AT KO's! So it begins 1998 Jeep Cherokee - 5 spd, 4" lift, 33" BFG's - Rotary Tow Vehicle 1988 'Vert - In progress 1988 FC Coupe - Gretchen -The attention whore BEAST! I'm a sick individual, what's wrong with you? I'm pure Evil I'm still insane, in the best possible way. I think Brian's idea of romance is using lube. Your rage caused the meteor strike in Russia. The Antichrist would be proud of his minion. You win with your thread. Most everything It's a truck with a steel gate on the back. Just a statement of fact Motec M820, AIM dash, ported 13B-RE Cosmo, 6-spd trans, 4.3 Torsen, custom twin wg fully divided mani, Custom 4" split into 2x 3" exhaust, Custom HMIC, Custom custom custom custom I like to welder stuff.... No Bolt-ons allowed. Dyno'ed @ Speed1 Tuned by me - 405rwhp on WG.... WM50 cuming soon. -Angry Motherf*cker Mode ENGAGED- |
|||
|
|
|
|
01-29-2013, 08:52 PM
|
#112 | |
|
RCC Addict
Join Date: Feb 2008
Location: VA
Posts: 1,812
Rep Power: 19 |
Quote:

|
|
|
|
|
|
01-29-2013, 08:53 PM
|
#113 |
|
RCC Addict
Join Date: Feb 2008
Location: VA
Posts: 1,812
Rep Power: 19 |
Oh and sorry to hear about that rad leak... what caused the hole? I assume it's easily repaired....
|
|
|
|
|
01-29-2013, 11:01 PM
|
#114 | ||
|
Test Whore - Admin
Join Date: Mar 2008
Location: Right Behind you son
Posts: 4,581
Rep Power: 10 |
Quote:
Thanks....Ask my woman  Actually.... you should see the muffler I just got in for the FC... I ordered it when I ordered all the shit for the 8 exhaust because it was special order, figure I'll get it now. 4" inlet, dual 3" outlets on a 5"x11" oval and the thing is 28" long. Keep in mind the TII tranny is about 32" long... that will be fun to fit Quote:
__________________
-The Angry Stig- DGRR 2009, 2011, 2012 & 2013 - Best FC DEALS GAP!! WOOHOOOO!!!!! 2015 Audi S4 - Samantha - Zero Brap S4 2004 RX8 - Jocelyn - 196rwhp, 19mpg fuel to noise converter 2000 Jeep Cherokee Sport - Wifey mobile - Now with 2.5" OME lift and 30" BFG AT KO's! So it begins 1998 Jeep Cherokee - 5 spd, 4" lift, 33" BFG's - Rotary Tow Vehicle 1988 'Vert - In progress 1988 FC Coupe - Gretchen -The attention whore BEAST! I'm a sick individual, what's wrong with you? I'm pure Evil I'm still insane, in the best possible way. I think Brian's idea of romance is using lube. Your rage caused the meteor strike in Russia. The Antichrist would be proud of his minion. You win with your thread. Most everything It's a truck with a steel gate on the back. Just a statement of fact Motec M820, AIM dash, ported 13B-RE Cosmo, 6-spd trans, 4.3 Torsen, custom twin wg fully divided mani, Custom 4" split into 2x 3" exhaust, Custom HMIC, Custom custom custom custom I like to welder stuff.... No Bolt-ons allowed. Dyno'ed @ Speed1 Tuned by me - 405rwhp on WG.... WM50 cuming soon. -Angry Motherf*cker Mode ENGAGED- |
||
|
|
|
|
01-30-2013, 01:14 PM
|
#115 | ||||||||
|
Get off my lawn!!!
Join Date: Jun 2011
Location: At a USO near you!
Posts: 715
Rep Power: 15 |
Quote:
Quote:
) at the 'merica speed shop (asshats are LITERALLY across the street from a huge base and they refuse to give a military discount)...So yeah, I'll order 4x of the -4 male weld on fittings: 2x for your cache, 1x for my AST, and 1x for my radiator. Quote:
However.... If you wanna cut up and weld into the AST/t-stat housing while it's up there... That I wouldn't protest too much. Quote:
Quote:
__________________
'94 Touring - Cursed '96 NA Miata '14 Mazda3 Hatch '14 Aprilia RSV4 R Quote:
Quote:
Quote:
|
||||||||
|
|
|
|
01-30-2013, 03:16 PM
|
#116 |
|
Rotary Fanatic
Join Date: Feb 2008
Location: Front Royal, VA
Posts: 487
Rep Power: 18 |
Levi, it sucks that screwdriver hit were it did. Little to left or right no damage at all. Glad you found a place to get it fixed. Let me know if you need a hand with the slave cylinder. I have done more than a few over the years.
In a thread jack Brian what type of coils did you say to get for the 8? Time for something new for DGRR. |
|
|
|
|
01-30-2013, 03:40 PM
|
#117 | ||||
|
Get off my lawn!!!
Join Date: Jun 2011
Location: At a USO near you!
Posts: 715
Rep Power: 15 |
Quote:
I just might take you up on that offer since I don't recall having done it myself before. I'll get the car off the ground again and give it a shot myself first though.
__________________
'94 Touring - Cursed '96 NA Miata '14 Mazda3 Hatch '14 Aprilia RSV4 R Quote:
Quote:
Quote:
|
||||
|
|
|
|
01-30-2013, 04:26 PM
|
#118 | |||
|
Get off my lawn!!!
Join Date: Jun 2011
Location: At a USO near you!
Posts: 715
Rep Power: 15 |
Anyway... Pic dump time!! I think the last pictures posted are from when we were still putting the oil pan on.
So here's a shot with the pan and engine mounts on. I've been holding on to these stock mounts for several years now. I went from damaged stock mounts to a set of Banzai's poly mounts (which were nice) then I switched over to a pair of solid aluminum mounts (which were not so nice) when the turbo side banzai mount began to warp. So here I am, back to good condition stockers: I wanted to see what all the fuss was about  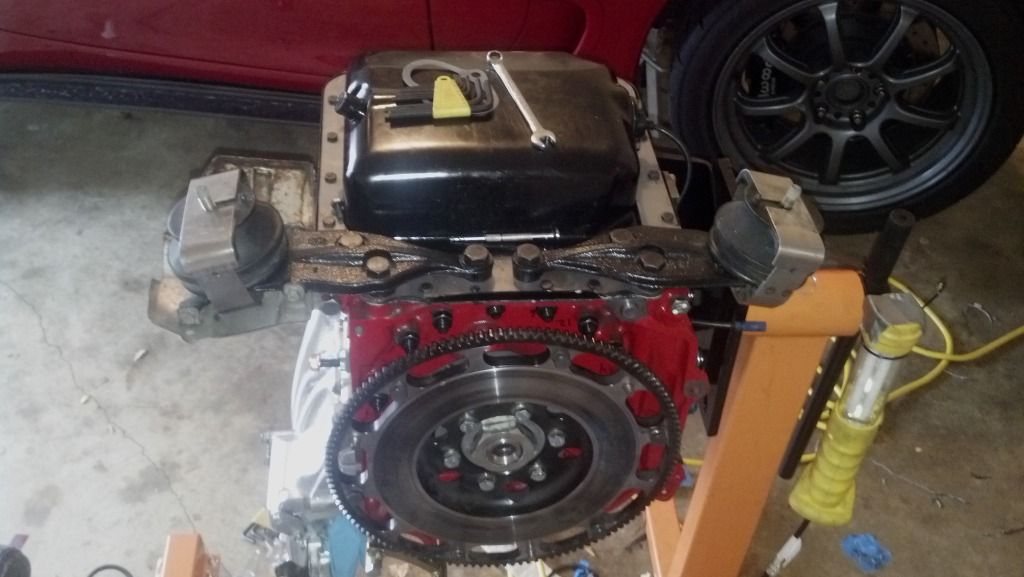 Garfinkle's Oil Pan Brace fit on like a charm! 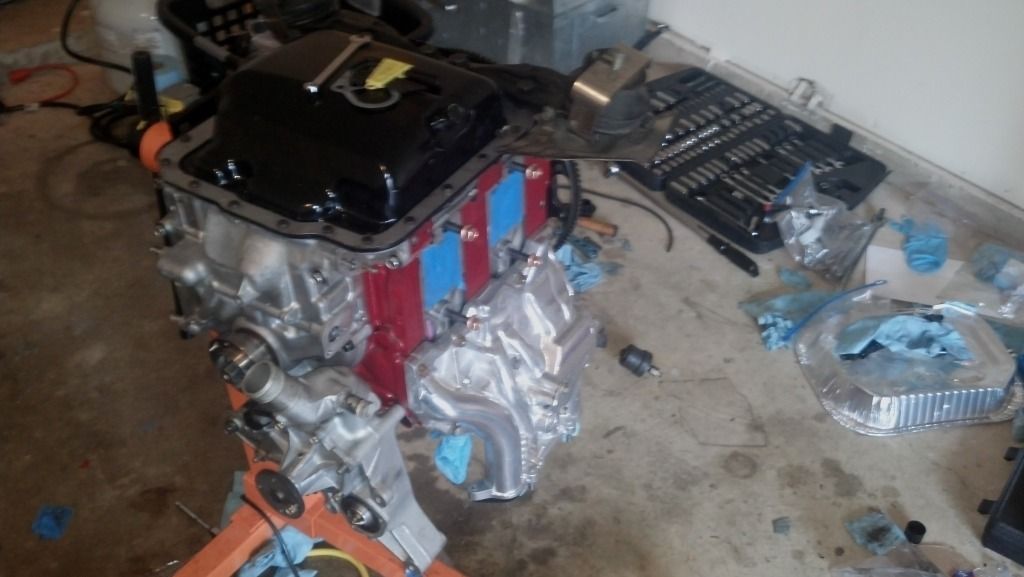 And everything sitting there, patiently waiting to be installed.. 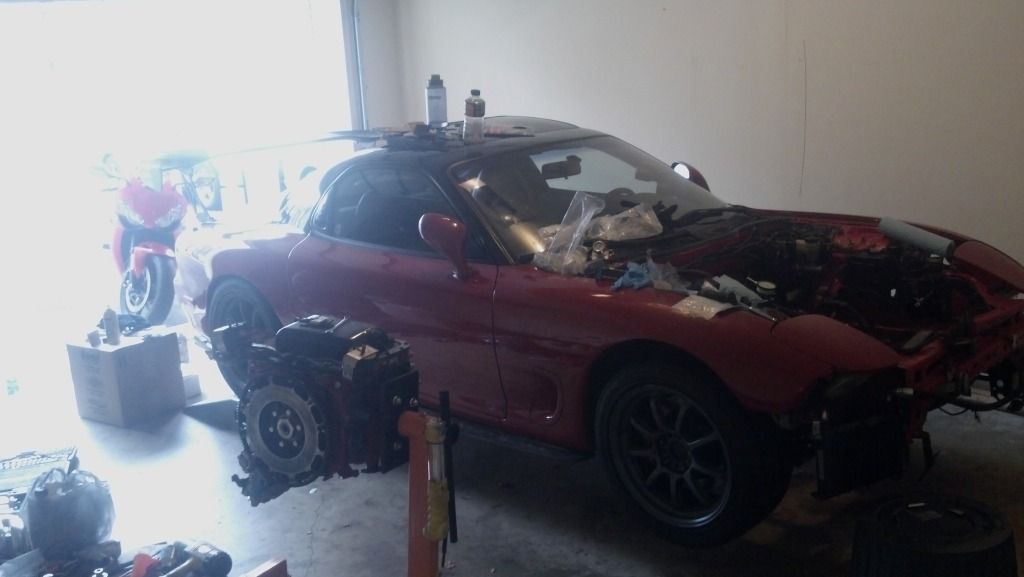 We got the engine in and the turbo fitted: 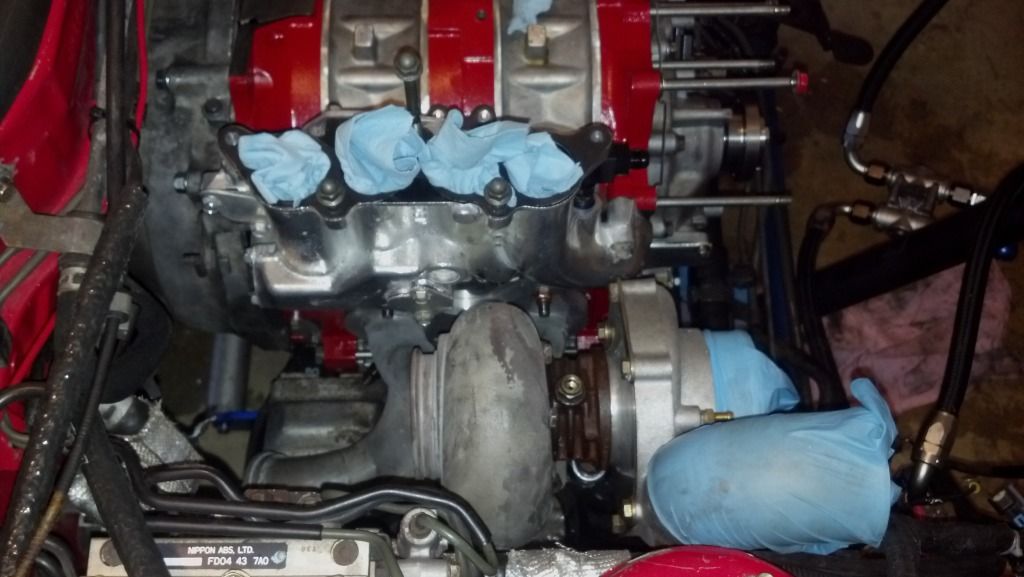 When I bought my copper clad exhaust nuts I accidentally bought the wrong size  So I had to put the manifold on with generic autozone nuts. Once the correct ones got in I swapped them out though. So I had to put the manifold on with generic autozone nuts. Once the correct ones got in I swapped them out though.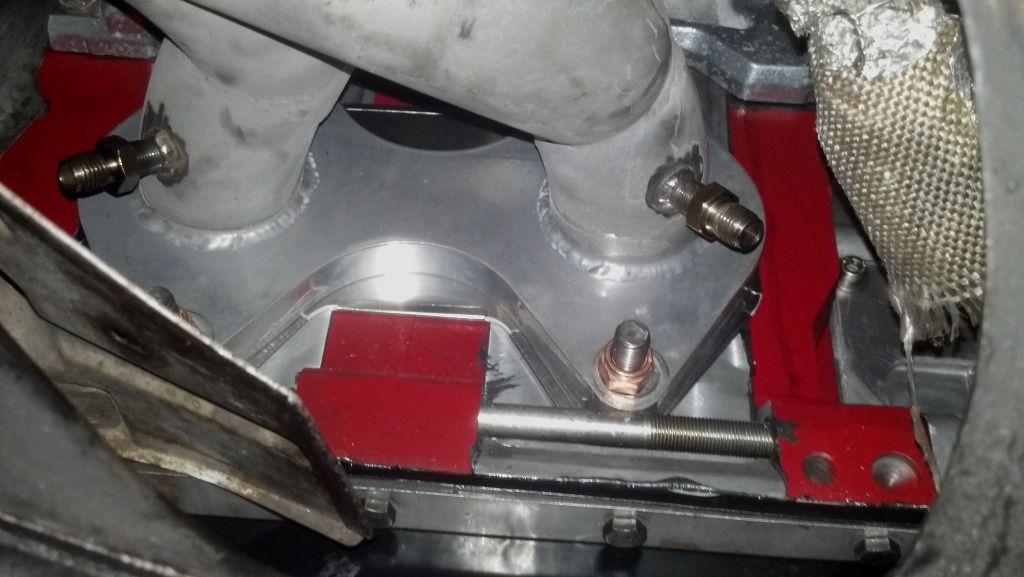 And there she sat... patiently waiting: 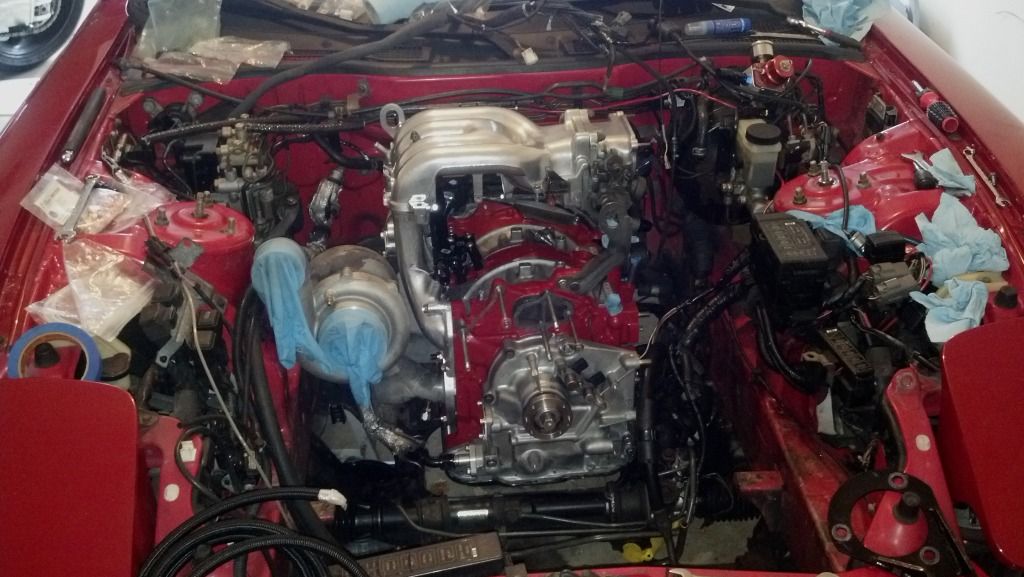 I completely scrapped all the factory hard lines, and made new fuel lines from the tank to the injectors and back again. I used -8 lines to feed the engine, and -6 on the return. I went with the FuelLab filter that, following my buddy Vlad's suggestions, I mounted to the rear subframe between the fuel tank and the subframe, just above the differential. Sorry for the shitty pictures, there wasn't much space to get a decent angle from: 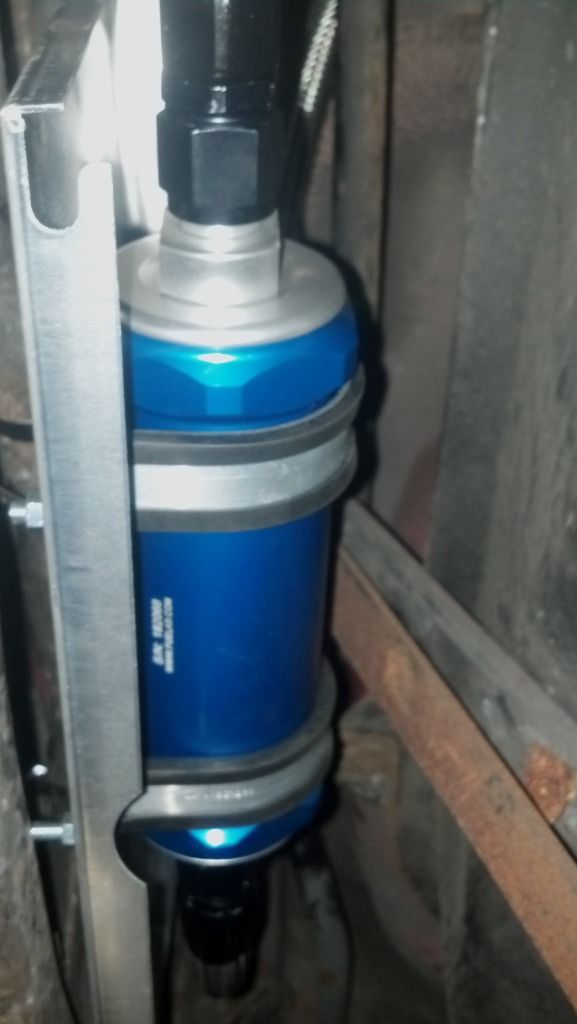 Here's the inlet side of the filter: 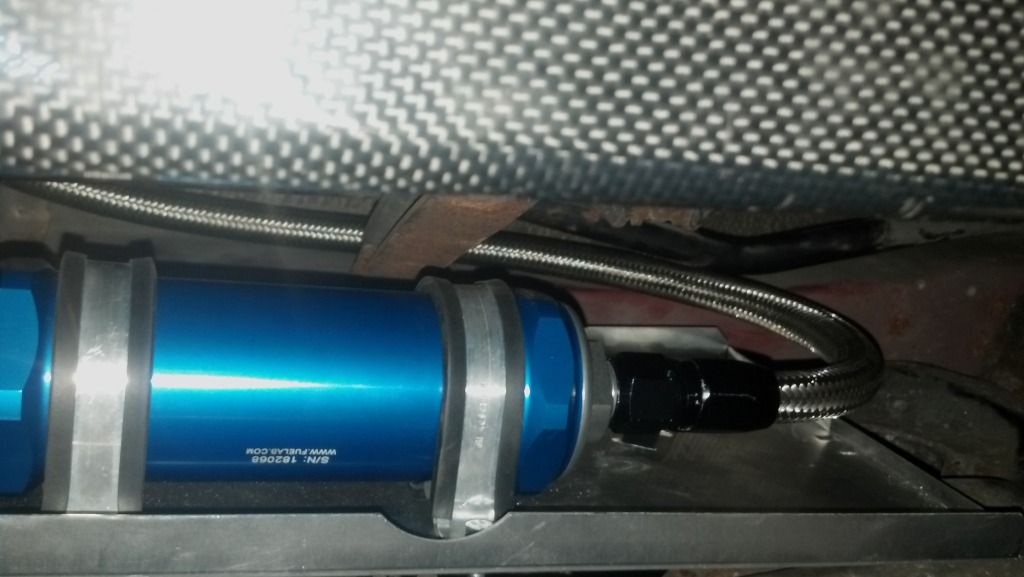 I used a scrap piece of aluminum to mount my filter onto, then I cut a couple slits into the plate and used worm clamps to attach it to my subframe. WAAAYYYY too much rust on that mounting arm for my diffuser I'll really need to pull everything out, brush it down, and coat it all one of these days..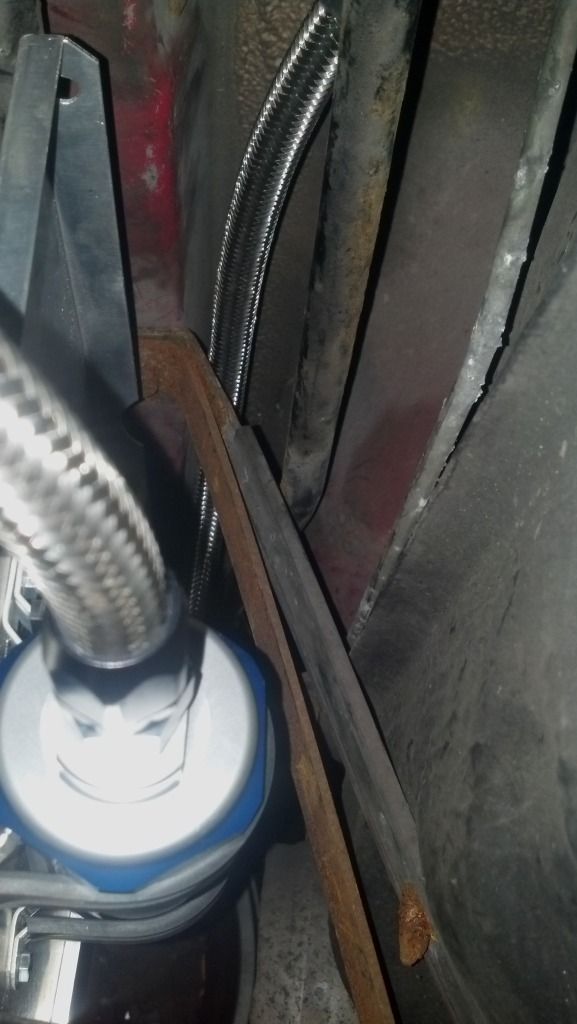 Some pics of the feed and return lines running under the car: 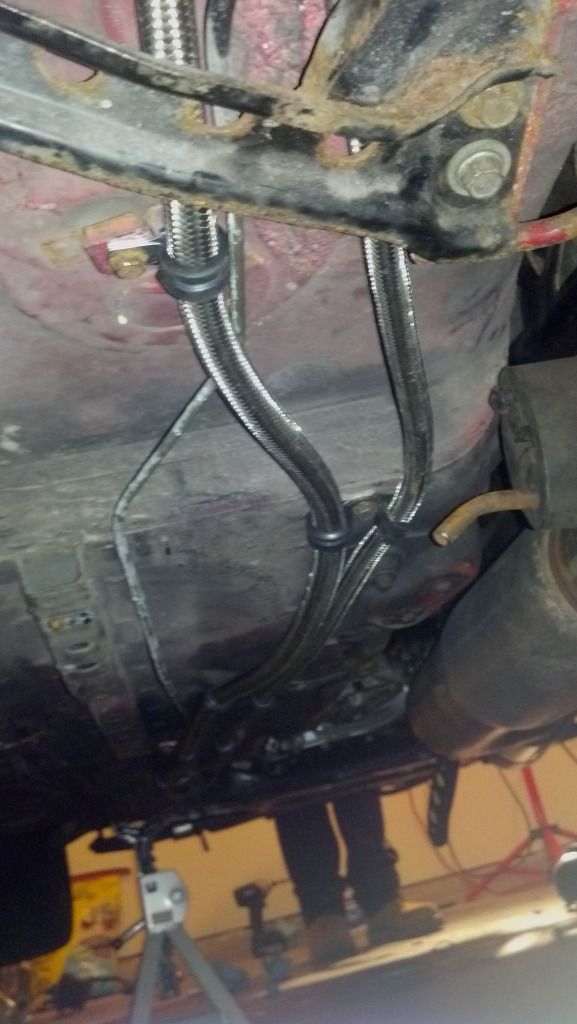 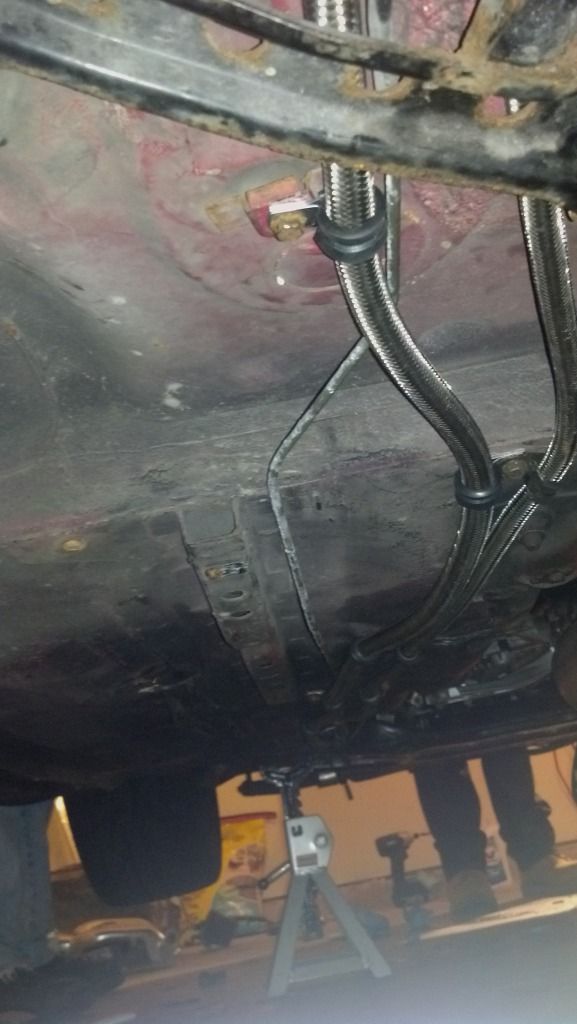 The engine bay finally starting to look like an engine bay again: 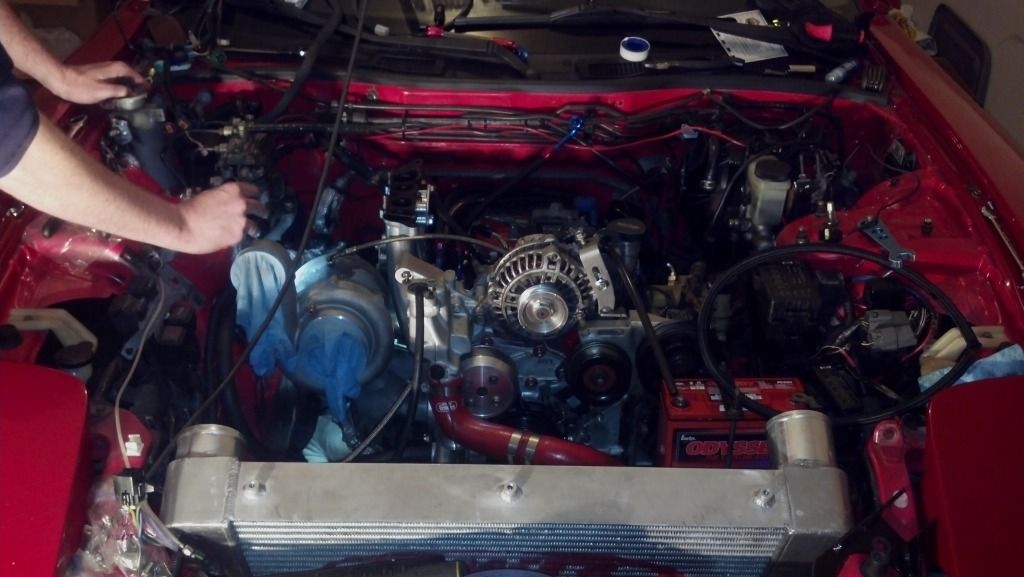 We opted to go with nylon braided fuel lines for the majority of the routing inside the engine bay. I'd hate for any fuel line flex to cut through stuff... 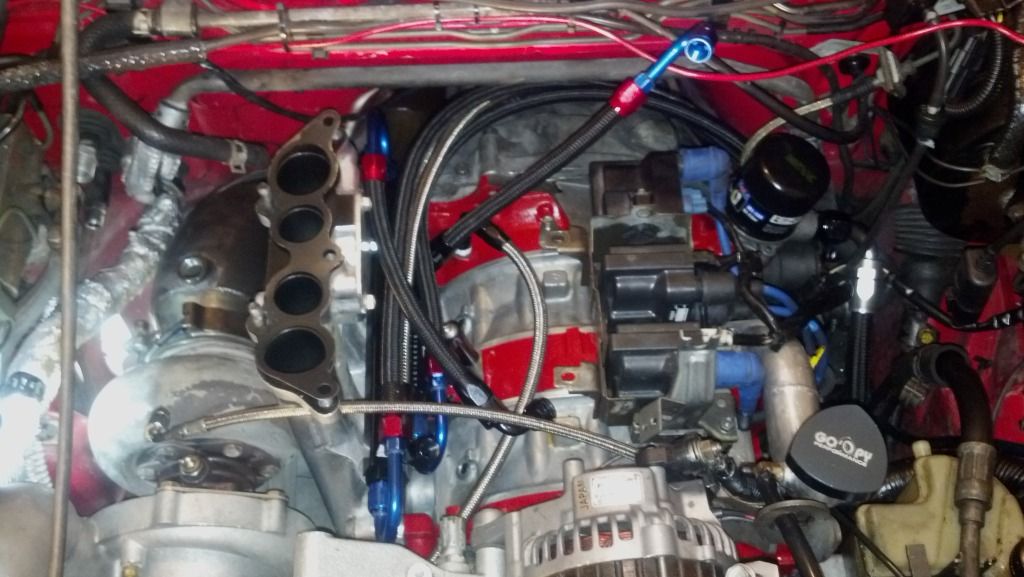 Also, some last minute fitting/routing changes sent me off to the "local" performance shop about 20 miles away... 5x -6 fittings (in the wrong color, lol) cost me well over $160, but nobody ever said that doing a badass build (the RIGHT WAY) was cheap... Here's a look at the parallel fuel lines routed the way we wanted them, just waiting on the UIM and FPR. The steel braided line is the return line going from the FPR back to the tank. 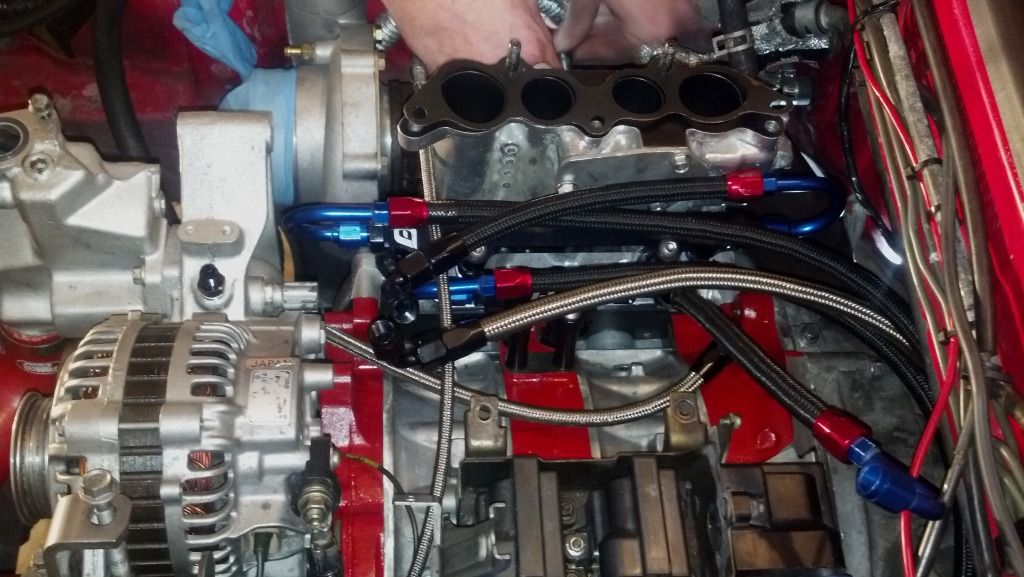 Those are Brian's hands, probably around 3am, making sure my AST lines are fit correctly in the two highest points in the engine (we'll be adding a third AST feed line in the top of the radiator). 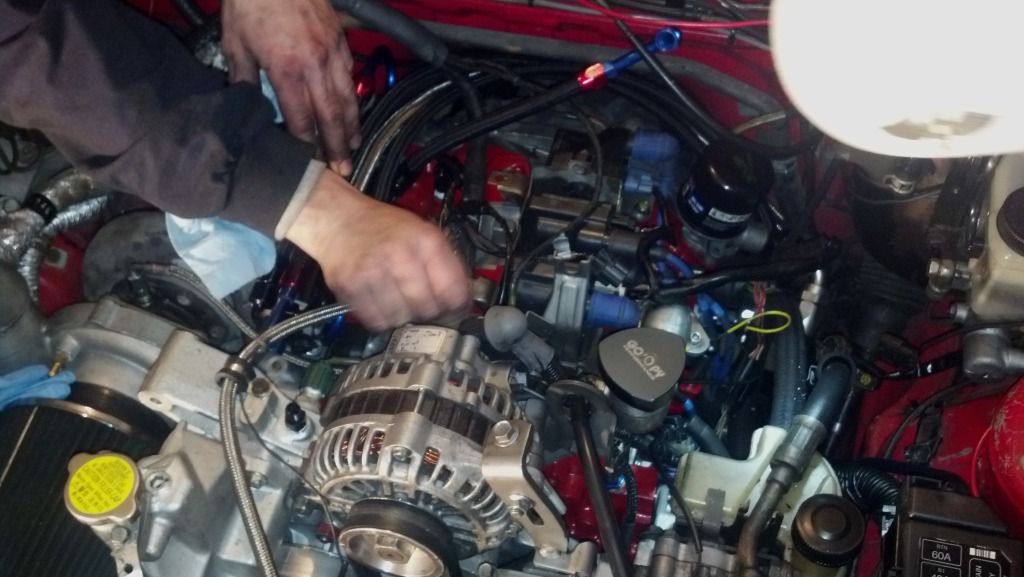 Speaking of the radiator... Here's the little tiny hole that brought the operation to a halt, having us all wait until yet another weekend to take this little project for her first drive. 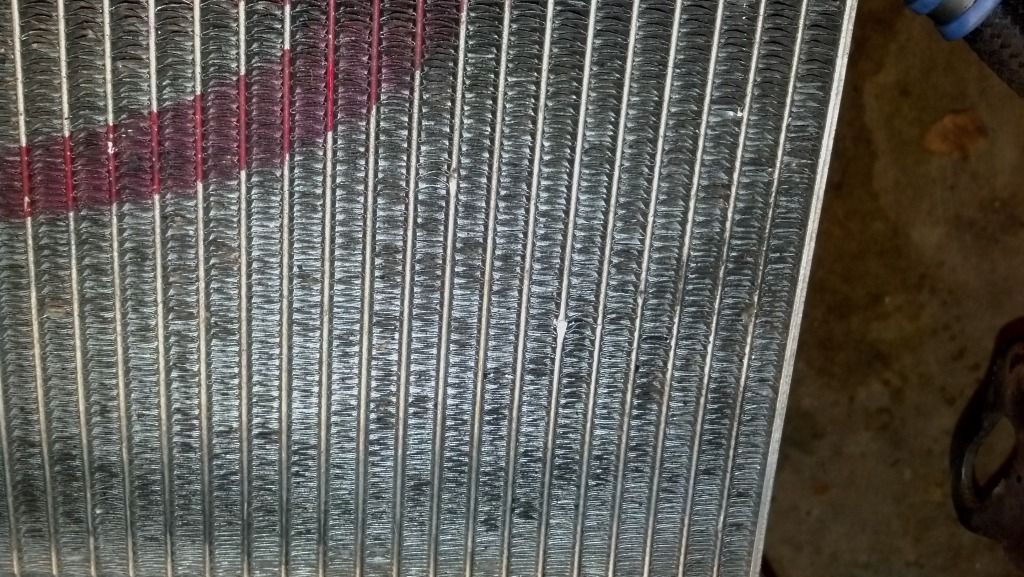 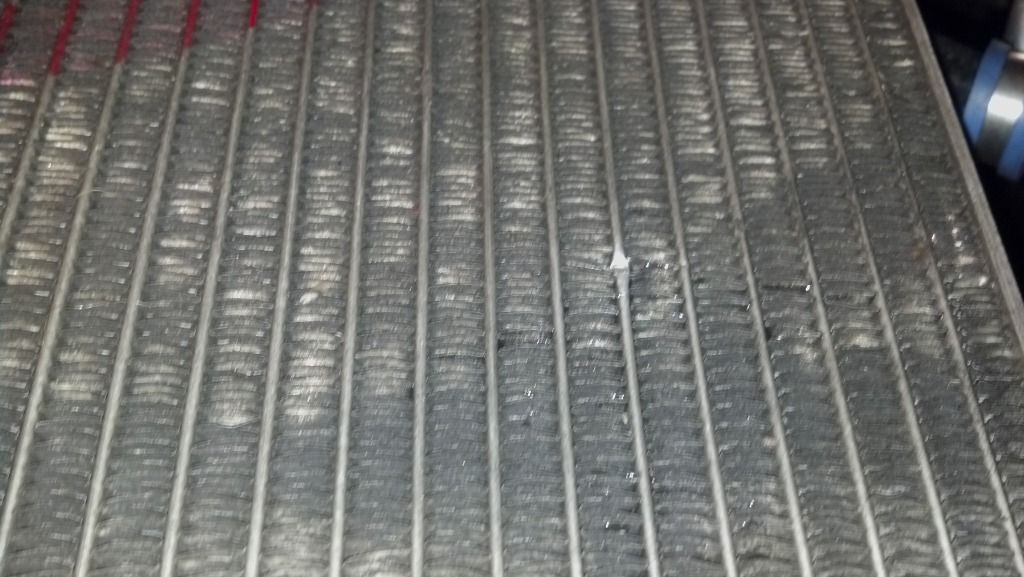 And.... The (mostly) finished project! 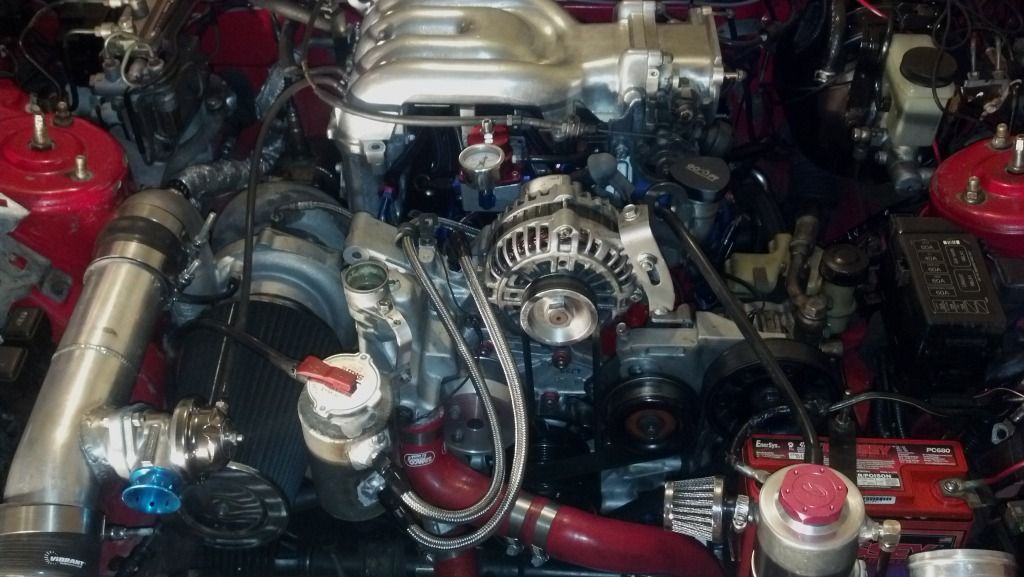  We started the car (she fired right off on the first try :happy_dance:, yay!) at about 6:30am on Sunday after beginning work at about 11am on Saturday. Needless to say it was a LOOONNNNGGGG weekend! But, with the engine firing right up and sounding very nice I'd say it was worth it. Ideally there will be one more session which (unless I do convert the radiator to -16 lines right now) will entail lots of grabassery, some light mechanical work, and initial road tuning (you GTFO of here Mr. Murphy!!!)
__________________
'94 Touring - Cursed '96 NA Miata '14 Mazda3 Hatch '14 Aprilia RSV4 R Quote:
Quote:
Quote:
|
|||
|
|
|
|
01-30-2013, 06:14 PM
|
#119 |
|
Rotary Fanatic
Join Date: Apr 2008
Location: front royal va
Posts: 440
Rep Power: 18 |
Looking good maybe next time I can make it down in my car.(its getting close)
__________________
____________________________________________ 1976 Cosmo needing lots of work 1993 Rx-7 410 RWHP single turbo toy 1985 Rx-7 toy/project car 411HP stoplight terror 2001 Dodge ram 4wd.parts hauler 2016 Ram 2500 cause its a hemi 2006 VW TDI commuter __________________________________________ I guarantee there's a pregnant redneck teenager somewhere in a shitty trailer park that thinks "Ebola would be a lovely name for their child"... 
|
|
|
|
|
01-30-2013, 06:15 PM
|
#120 | ||||||||
|
Test Whore - Admin
Join Date: Mar 2008
Location: Right Behind you son
Posts: 4,581
Rep Power: 10 |
Quote:
Quote:
Quote:
Quote:
Quote:
Quote:
Other option is the Bosch Motorsports coils from FFE... they are not as powerful, but the packaging is MUCH nicer.... Quote:
Quote:
Also adding the AST/T-stat combo will eliminate the hooky ass 5/8" barb to 3/8"NPT to 3/8 NPT tee to 5/8 barb to 3/8"NPT to 5/16"barb to 3/8" NPT fitting that needs to be constructed in the heater core return line near the turbo..... just saying... one more benefit
__________________
-The Angry Stig- DGRR 2009, 2011, 2012 & 2013 - Best FC DEALS GAP!! WOOHOOOO!!!!! 2015 Audi S4 - Samantha - Zero Brap S4 2004 RX8 - Jocelyn - 196rwhp, 19mpg fuel to noise converter 2000 Jeep Cherokee Sport - Wifey mobile - Now with 2.5" OME lift and 30" BFG AT KO's! So it begins 1998 Jeep Cherokee - 5 spd, 4" lift, 33" BFG's - Rotary Tow Vehicle 1988 'Vert - In progress 1988 FC Coupe - Gretchen -The attention whore BEAST! I'm a sick individual, what's wrong with you? I'm pure Evil I'm still insane, in the best possible way. I think Brian's idea of romance is using lube. Your rage caused the meteor strike in Russia. The Antichrist would be proud of his minion. You win with your thread. Most everything It's a truck with a steel gate on the back. Just a statement of fact Motec M820, AIM dash, ported 13B-RE Cosmo, 6-spd trans, 4.3 Torsen, custom twin wg fully divided mani, Custom 4" split into 2x 3" exhaust, Custom HMIC, Custom custom custom custom I like to welder stuff.... No Bolt-ons allowed. Dyno'ed @ Speed1 Tuned by me - 405rwhp on WG.... WM50 cuming soon. -Angry Motherf*cker Mode ENGAGED- |
||||||||
|
|
|
 |
| Bookmarks |
| Thread Tools | |
| Display Modes | |
|
|


 Linear Mode

