|
|||||||


| Piston Engine Conversion Have you replaced your rotary with a V8 or any other type of piston engine? Tell us about it! |
 |
|
|
Thread Tools | Display Modes |
|
|||||||
| Piston Engine Conversion Have you replaced your rotary with a V8 or any other type of piston engine? Tell us about it! |
|
|
|
Thread Tools | Display Modes |
|
|
 11-21-2012, 09:30 AM
|
#1 |
|
Rotary Fan in Training
Join Date: Nov 2012
Posts: 58
Rep Power: 13  |
LOL everyone is always worried about that. I'm not sure who is actually tall enough for their head to touch the outer skin of the roof and still have the ability to fit in the car. Don't worry it's taken care of already man.
Also a bit of this happened the other day. There was a bit a cracking and popping but the radiator support is back to it's original height on that side now. 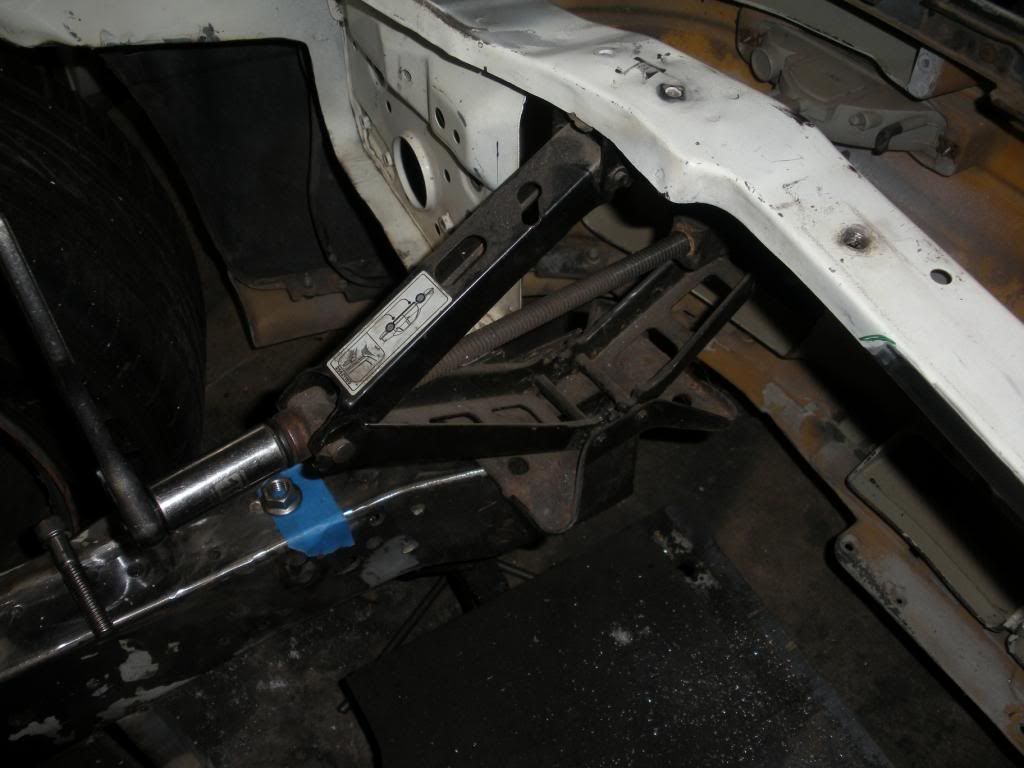
|

|

|
|
12-11-2012, 11:35 AM
|
#2 |
|
Rotary Fan in Training
Join Date: Nov 2012
Posts: 58
Rep Power: 13 |
Haven't updated in awhile due to breaking my hand with a drill. yep a drill. It was super fun........
Basically my hand met a drill body that was spinning really fast and broke some of those little bones behind the knuckles. Hurt like hell was swollen up pretty good as well. Also i started a new job and that's borrowing a lot of my time lately. I'll get back on this pretty quick though, my hand is nearly operational now. |
|
|
|
|
02-25-2013, 12:58 AM
|
#3 |
|
Rotary Fan in Training
Join Date: Nov 2012
Posts: 58
Rep Power: 13 |
Soooooooooooooo........
Ya I forgot to update this thread.......like a lot. Let me try to figure out how this was going. I started mocking up the radiator brackets. These were unfinished parts of course I was just trying to get some sort of direction on what I liked. Turns out I didn't like any of it lol. Here's some pics anyways. 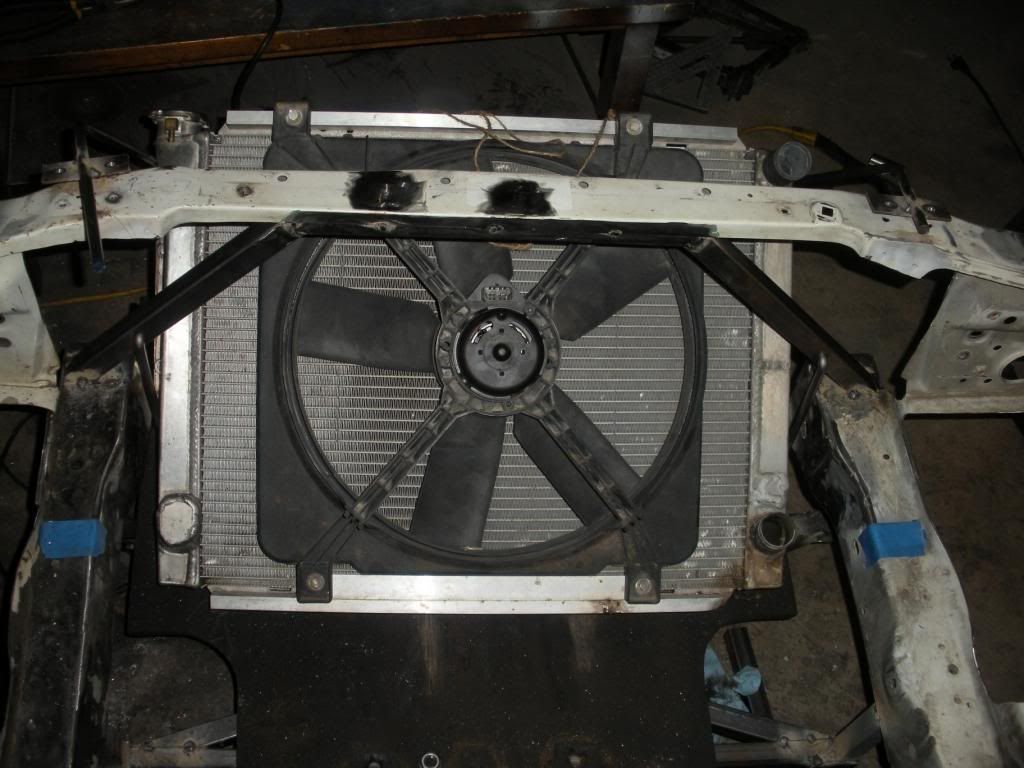 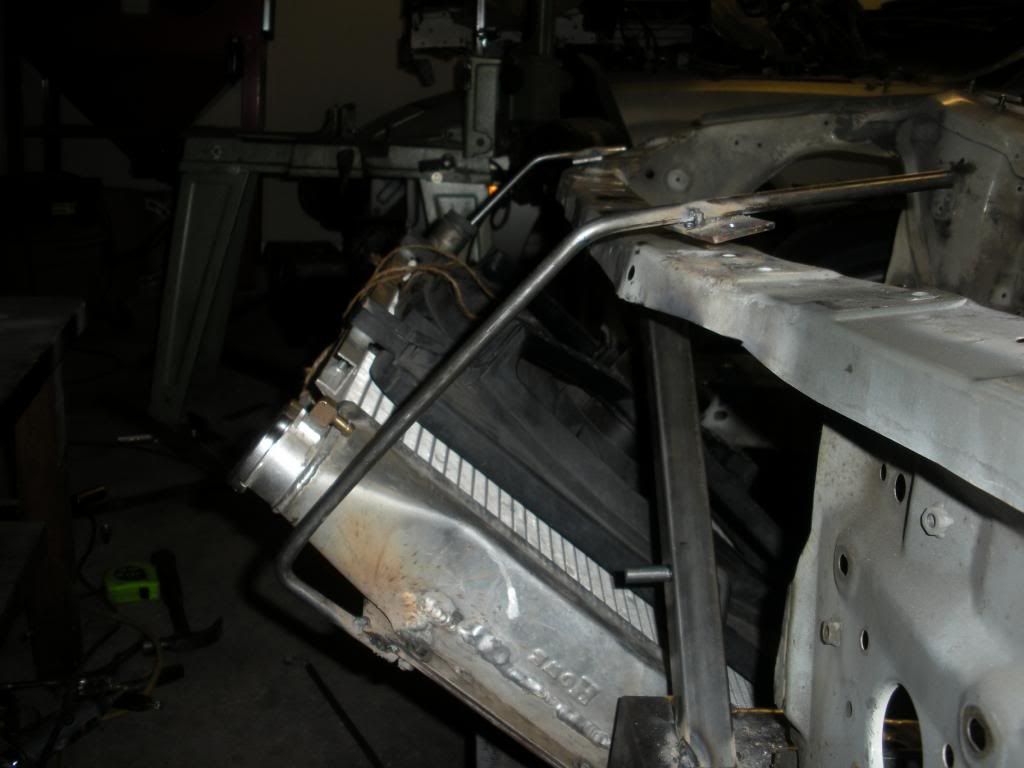 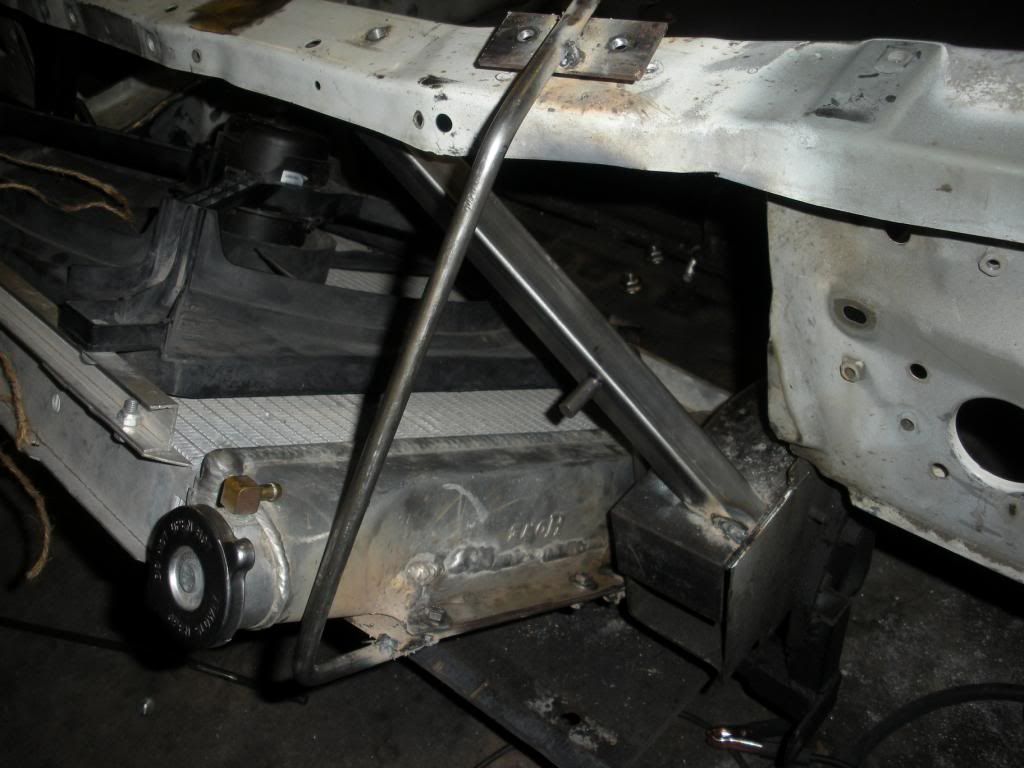 I messed with that for a couple days and couldn't get any kind of setup that was stable enough or would keep vibrations down to something I felt was appropriate for an aluminium jam bouncing around in the front of the car. So I ignored the problem hoping it would go away or whatever lol, and moved on to finishing up the x-brace for the bottom of the front of the car. 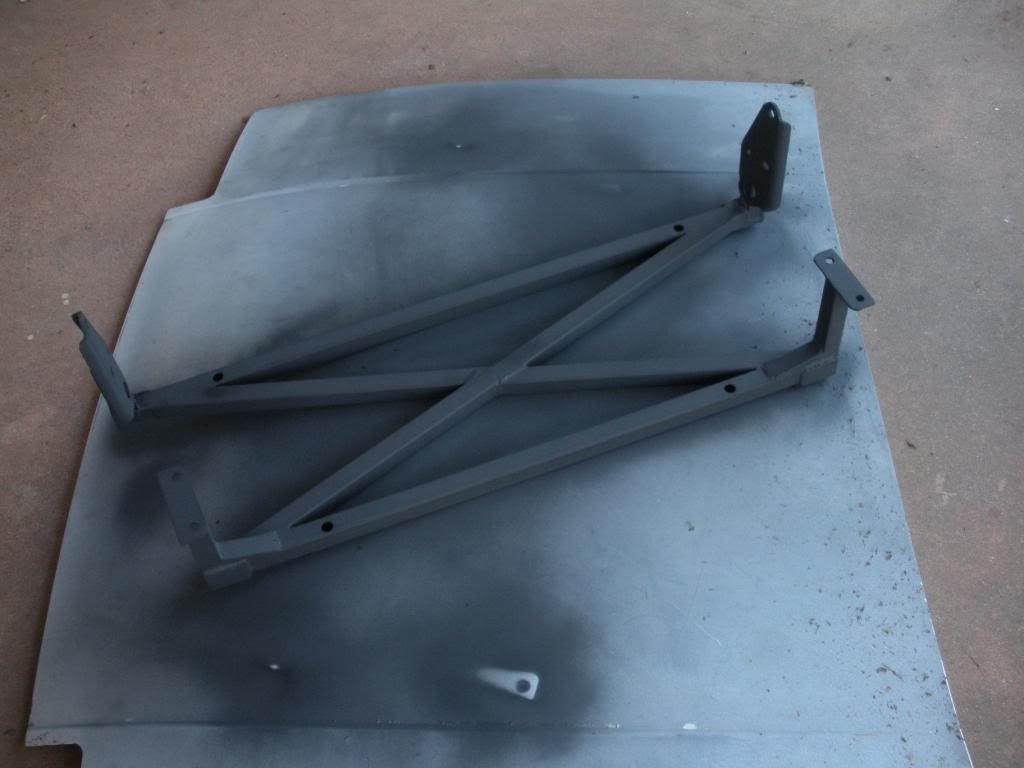 I painted it and all that on my FB hood cause why not right? Later that turned out to be a waste of time and I had it powdercoated black with a bunch of other stuff. Then I moved on to cut and notch the outside of the frame rails where that annoying little tab of metal sticks out that everyone beats in with a hammer to gain tire clearance. 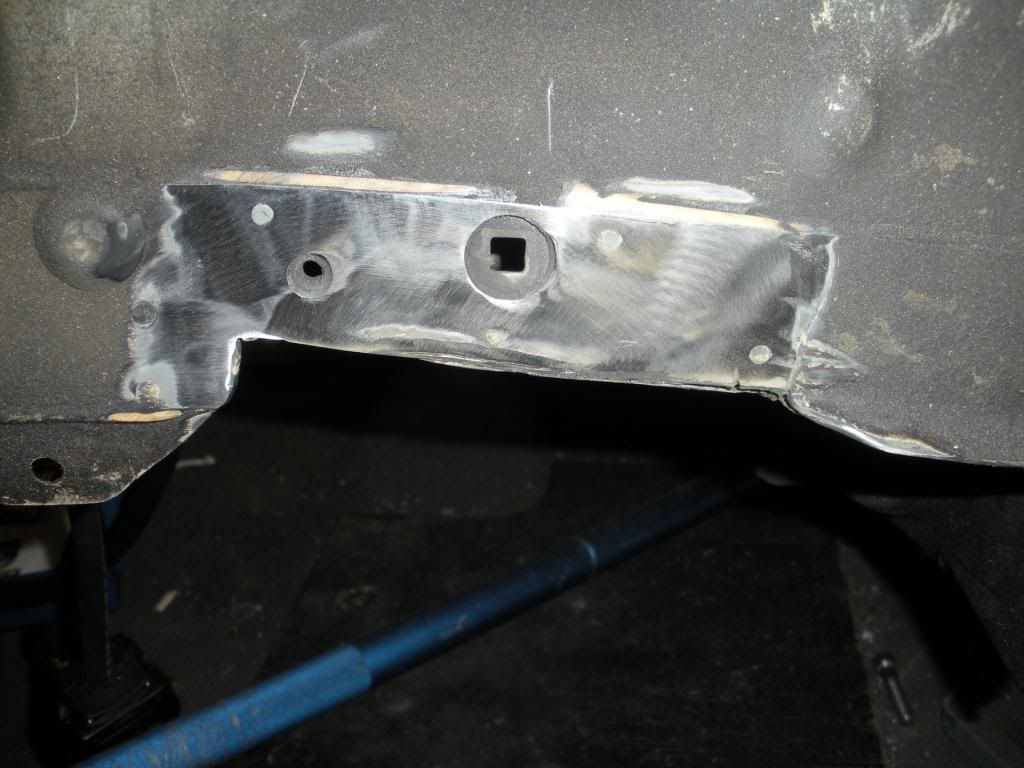 I welded in some steel. Kind of bootleg but whatever. 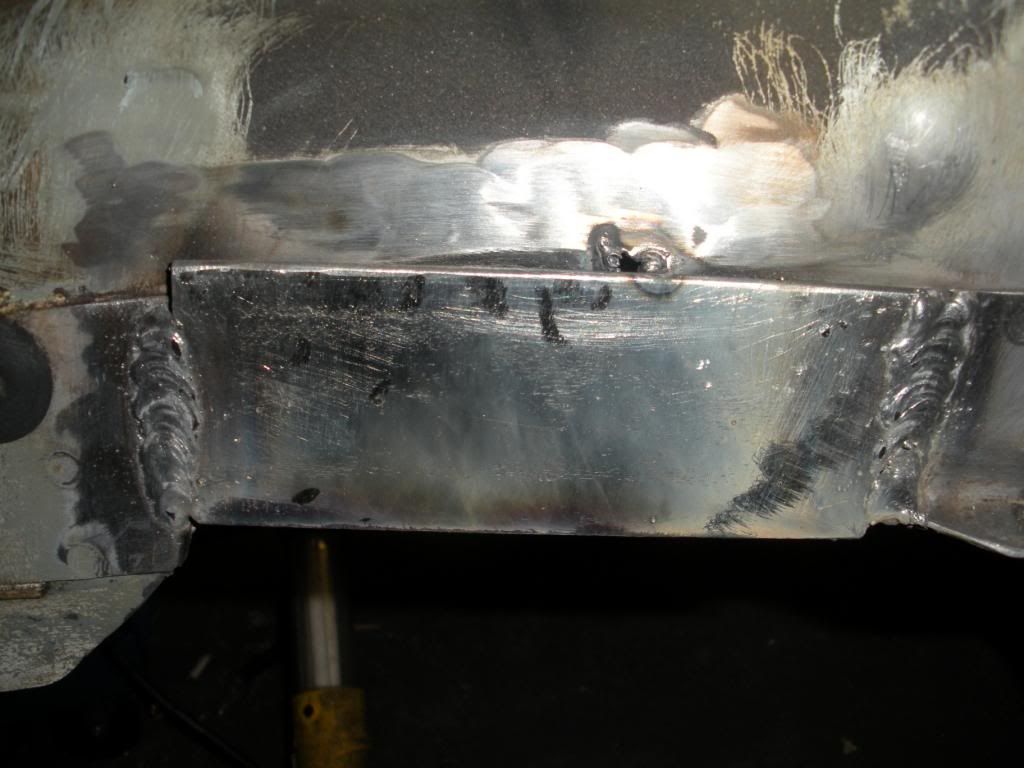 I can't really remember what I did next so I'm guessing, but anyways at some point I modified the pedal assembly for the new Wilwood clutch master cylinder that comes with the Granny's Speed Shop SBC kit. 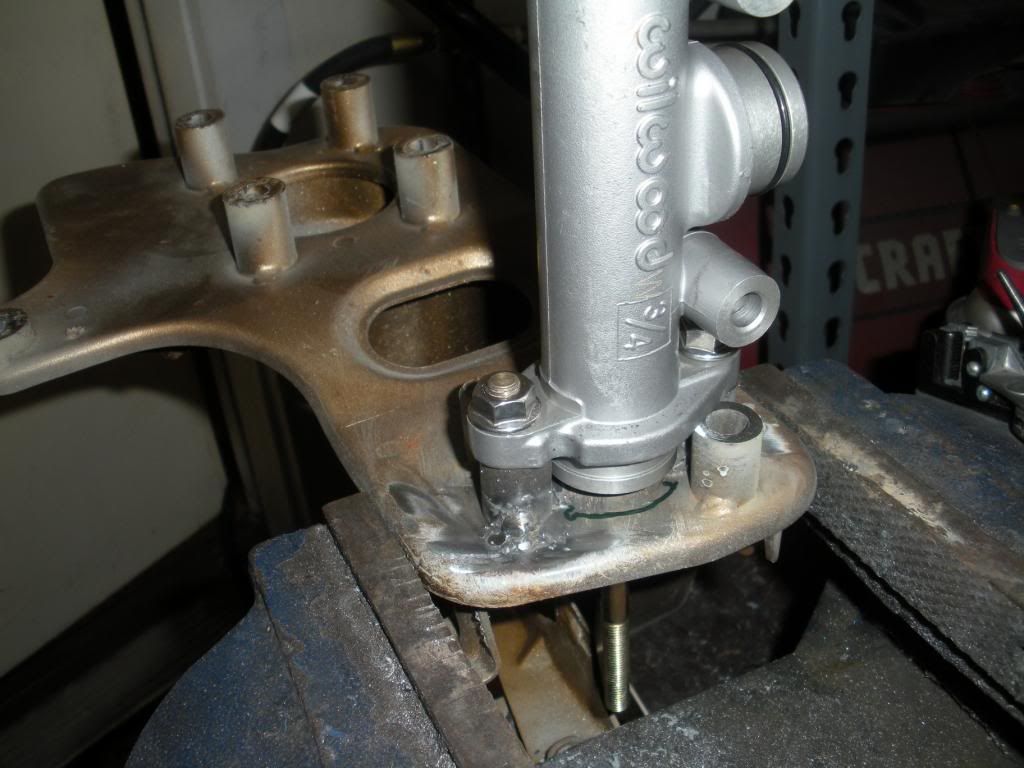 Basically I figured the alignment of the MC bolts and welded on tubing to support the firewall at the new hole locations. Copying the factory setup seemed like the thing to do. I just used a slightly larger size of tubing since it's not critical or anything. 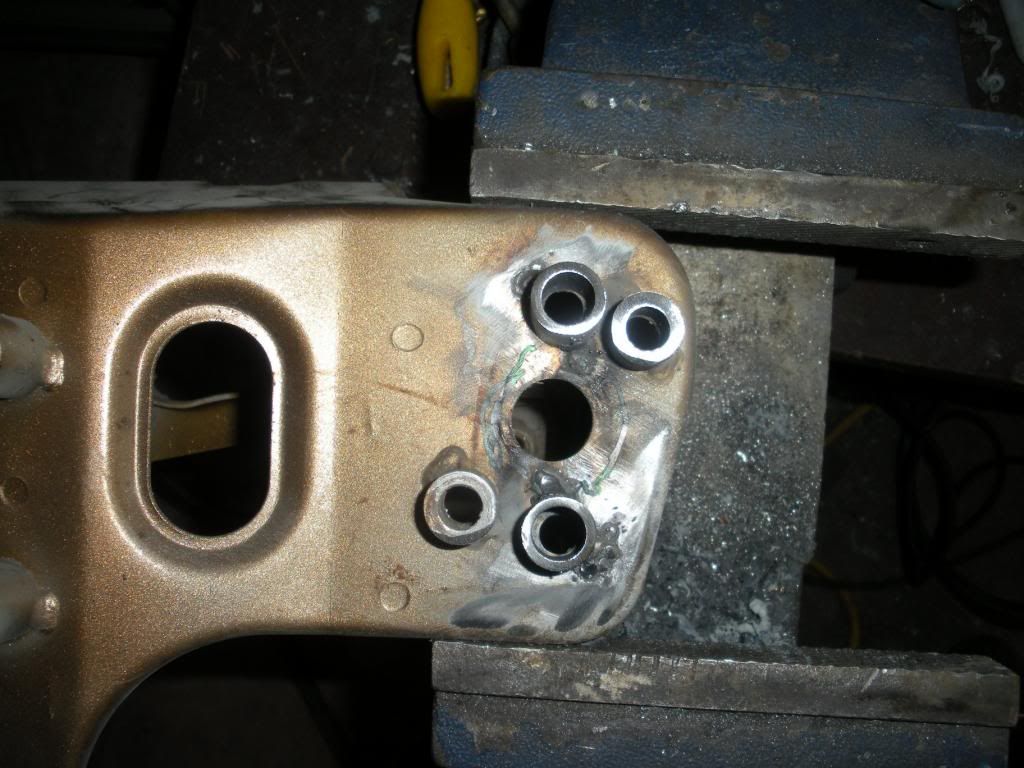 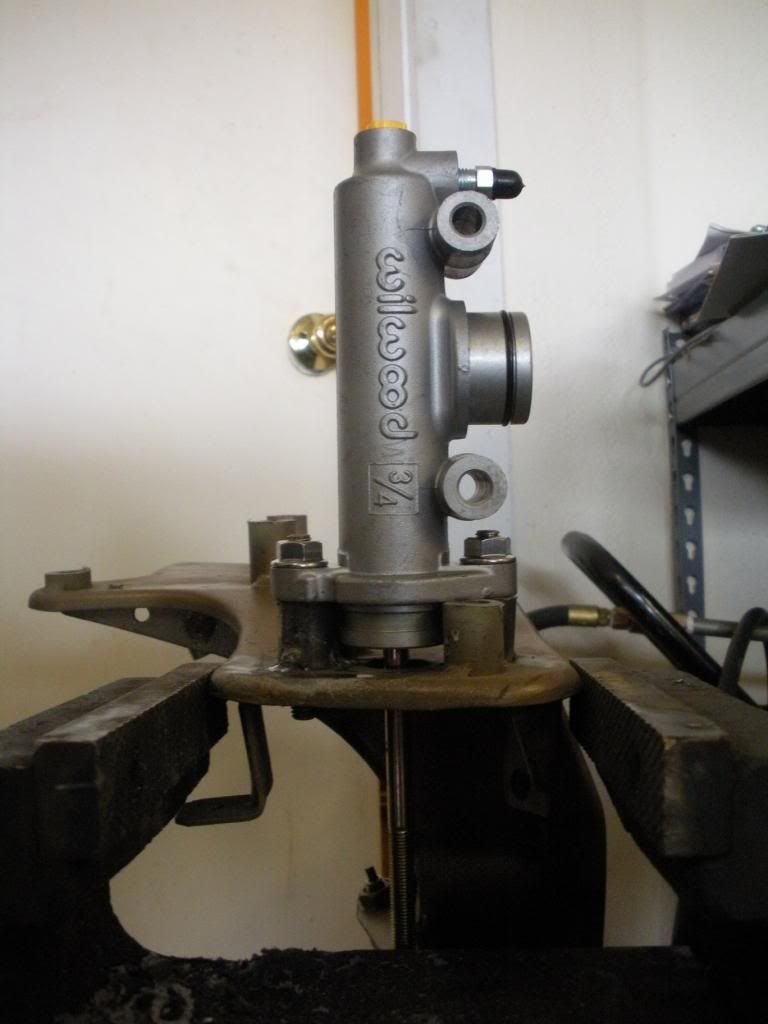
|
|
|
|
|
02-25-2013, 01:05 AM
|
#4 |
|
Rotary Fan in Training
Join Date: Nov 2012
Posts: 58
Rep Power: 13 |
The next pic in the camera was this, but it jumps past some other stuff. I guess I forgot to take some pics, get over it I guess.
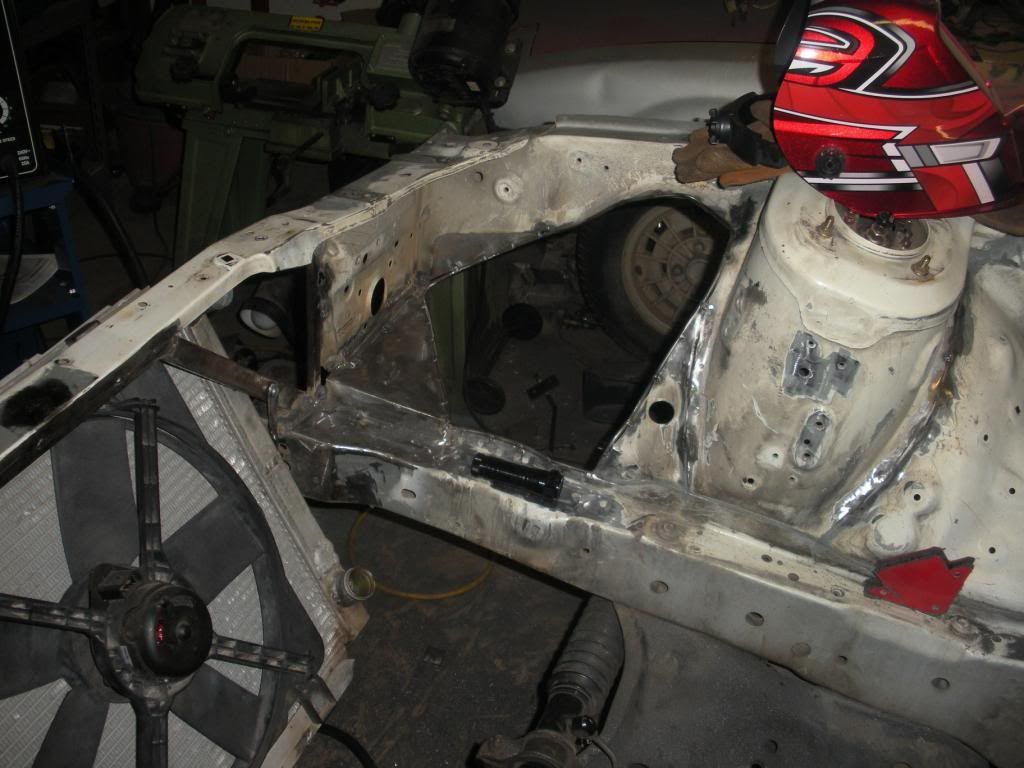
 You can see the radiator bracket changed quite a bit. Still had the bent rod passing through the diagonal square tubes at this point. That was again revised. I have heard you never dead head pipe into a frame rail......so I did that first thing as my approach to extending the frame rails lol......oops. Well I did leave some other stuff welded less so it can crush. We will come back to that. Added the mount tabs for the radiator bracket to the round frame extensions. The radiator is just hanging there in the pic trapped not actually mounted in any way. Got this stuff powdercoated. 
|
|
|
|
|
02-25-2013, 01:19 AM
|
#5 |
|
Rotary Fan in Training
Join Date: Nov 2012
Posts: 58
Rep Power: 13 |
Added some round stock to the inside edge of the fender well holes since I'm leaving the hole open and I don't feel like getting cut everytime I touch any of that.
 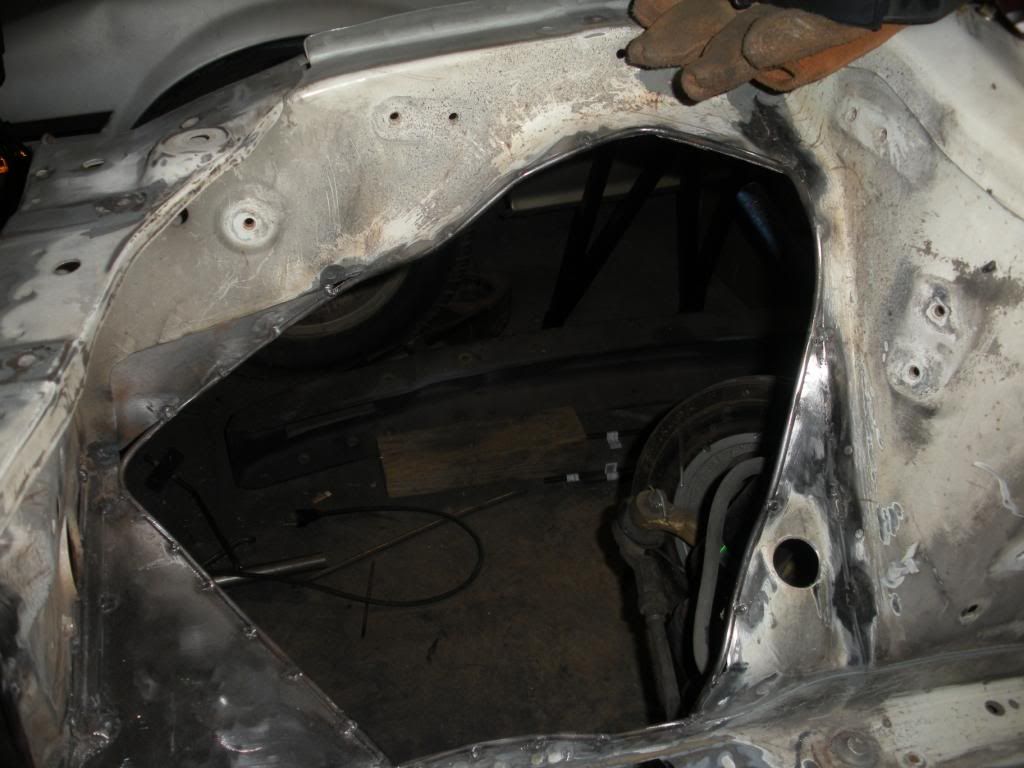 Had the subframe powdercoated. 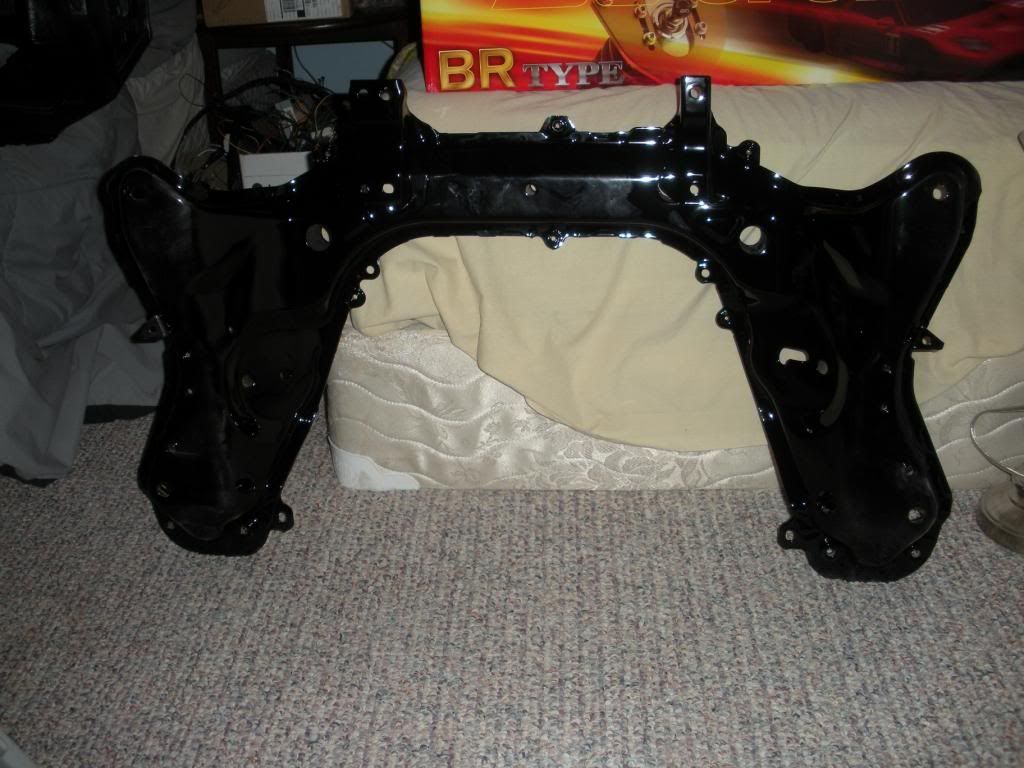 Pretty sure this is the pic just before I started prepping the engien bay for paint. Took everything off the chassis, then sanded, and sanded, and wire wheeled and basically it took forever since I can't dedicate huge amounts of time to teh car all at once. You can see there was a couple improvements made to the frame rail extensions. 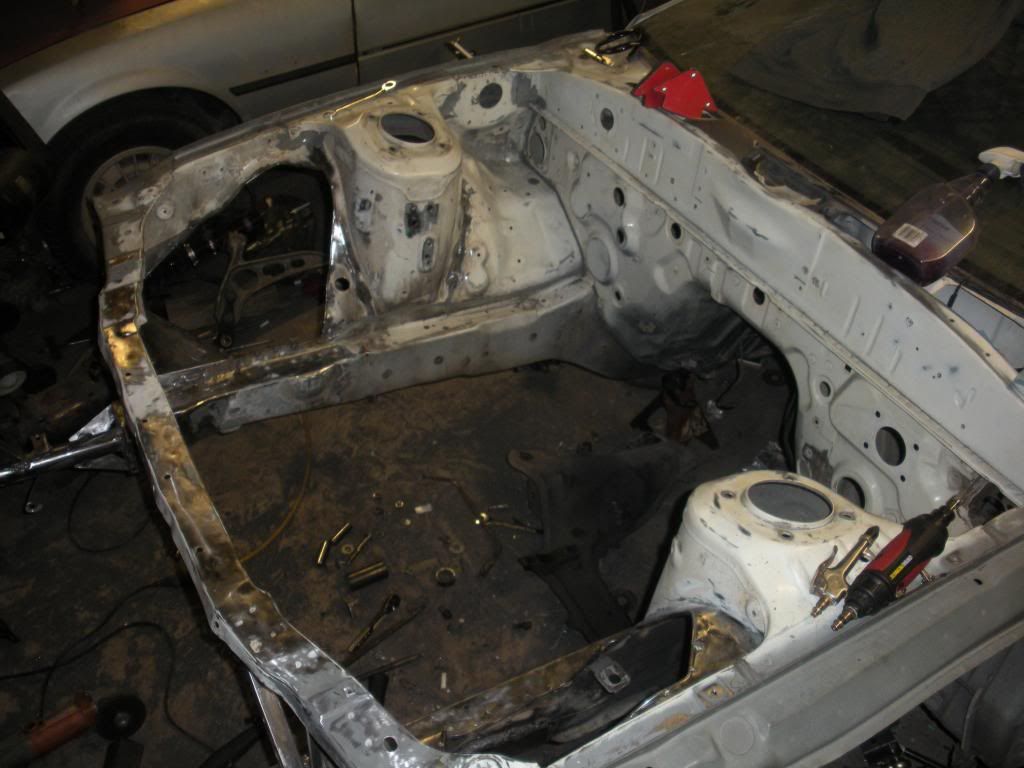 Seam sealer and some primer happened. 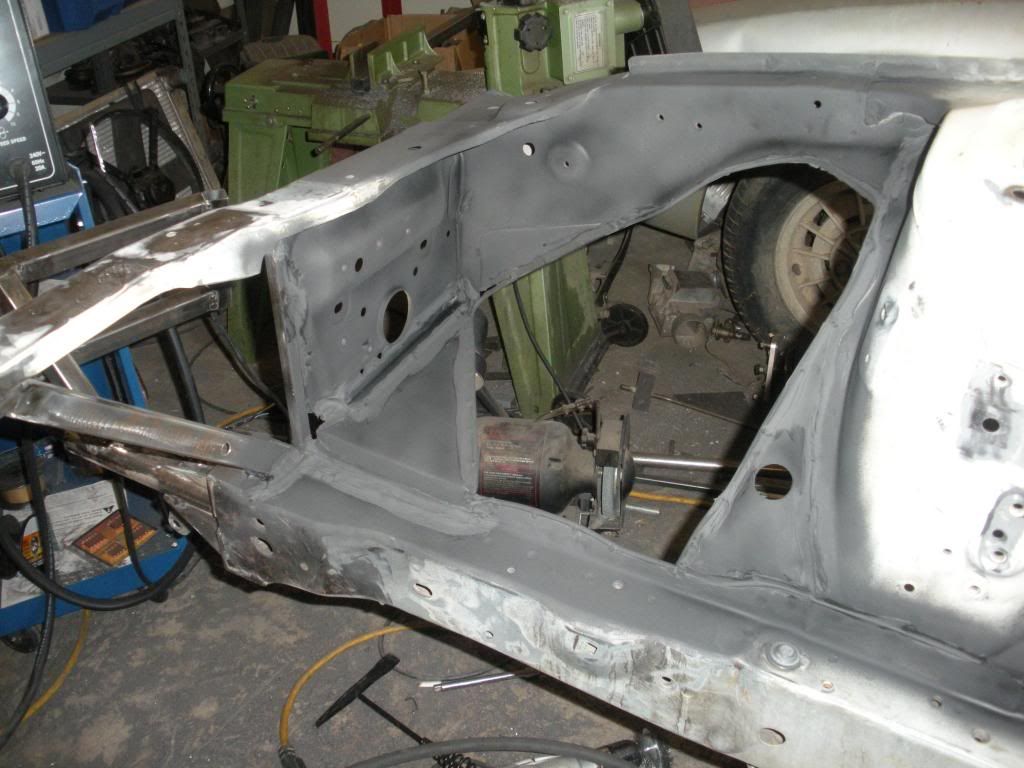 Bought a couple hundred dollars of stainless steel 3/16" tubing and fittings for the brake system. Bought more later lol. 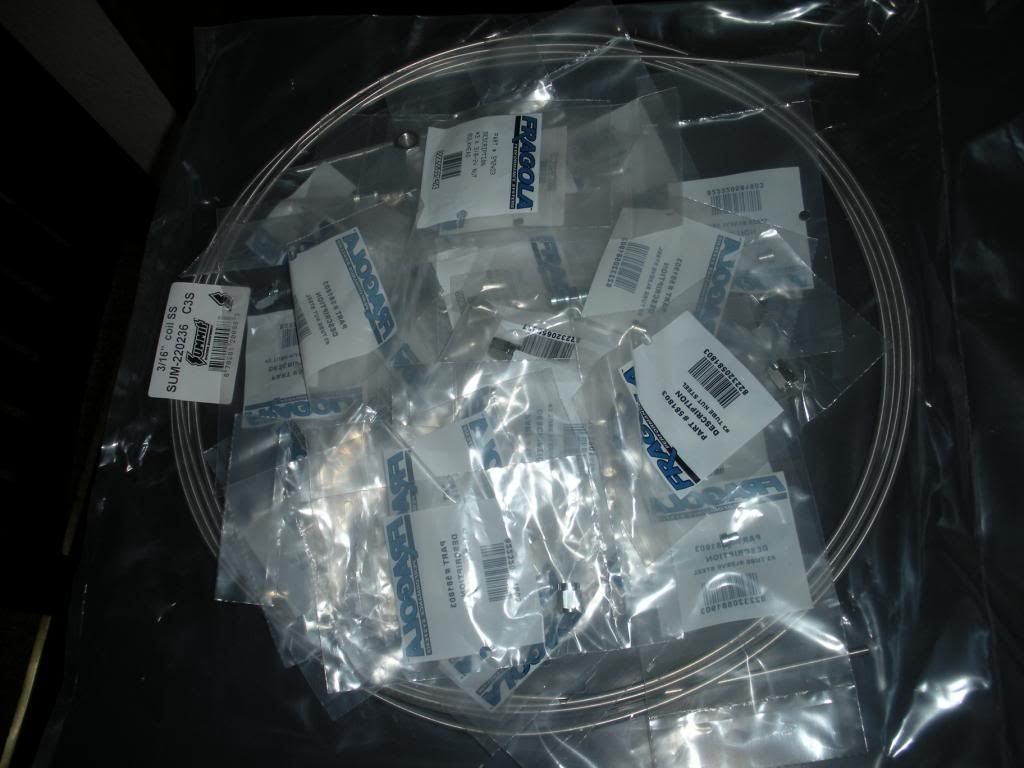 Bought an ASD hydro E-brake 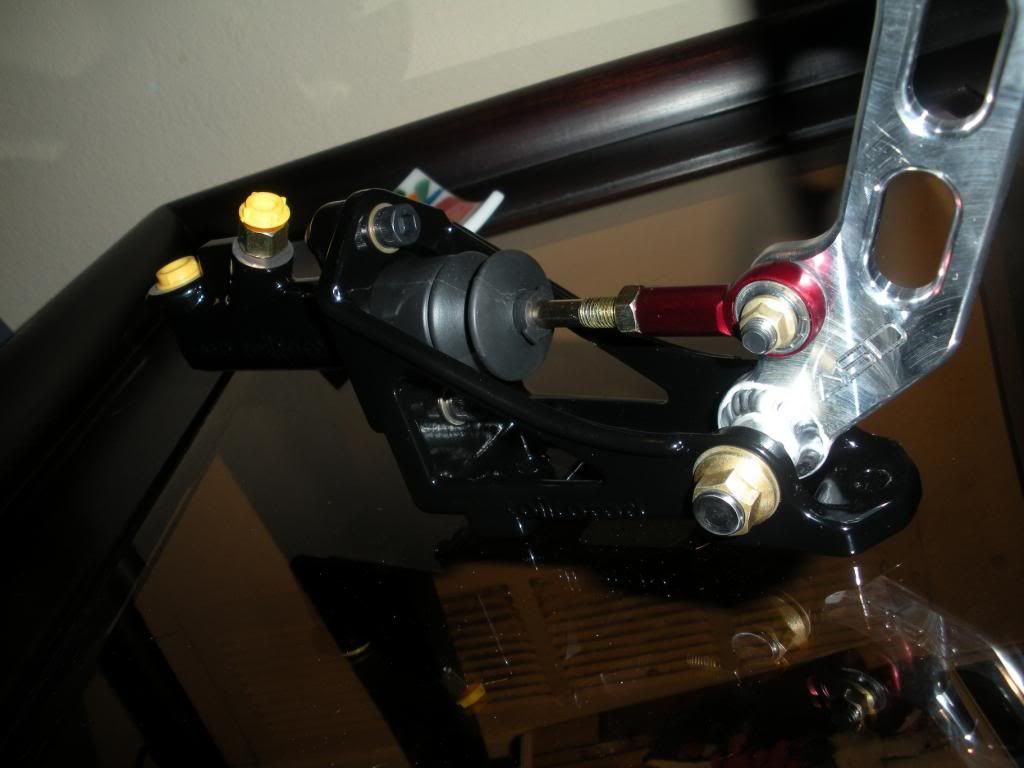 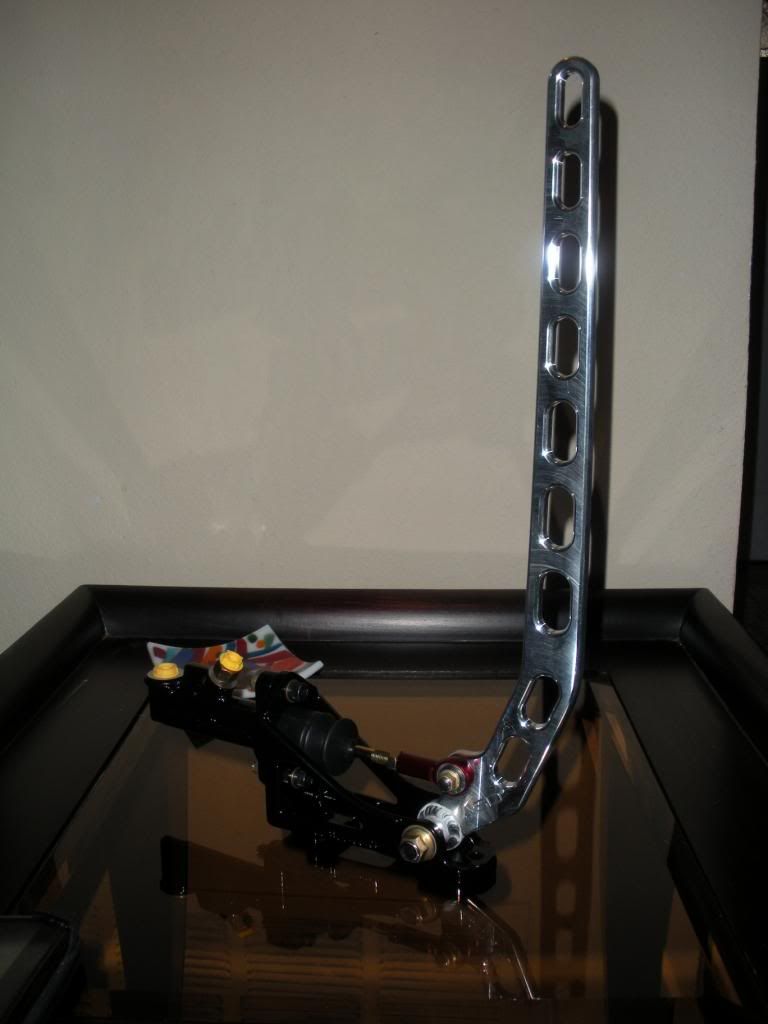 Cut my broken windshield out and finished primering the engine bay. 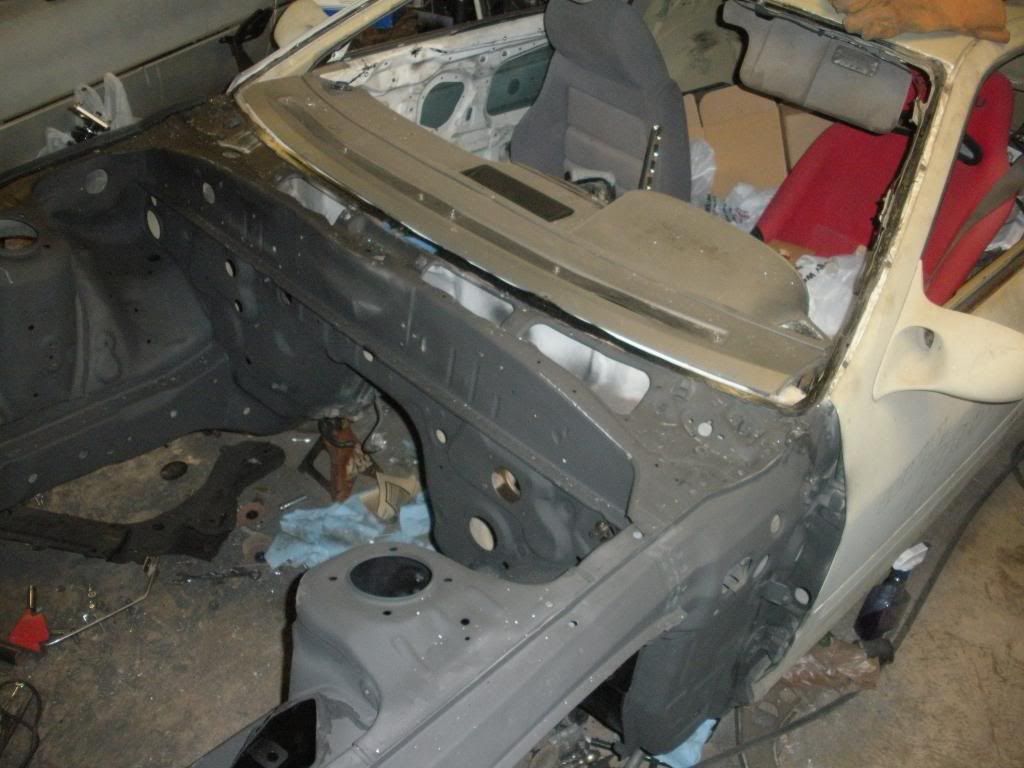 This stuff comes off super easy with a razor blade and then a soft wirewheel in a drill.  No windshield status 
|
|
|
|
|
02-25-2013, 01:33 AM
|
#6 |
|
Rotary Fan in Training
Join Date: Nov 2012
Posts: 58
Rep Power: 13 |
Then we skip ahead in time again.
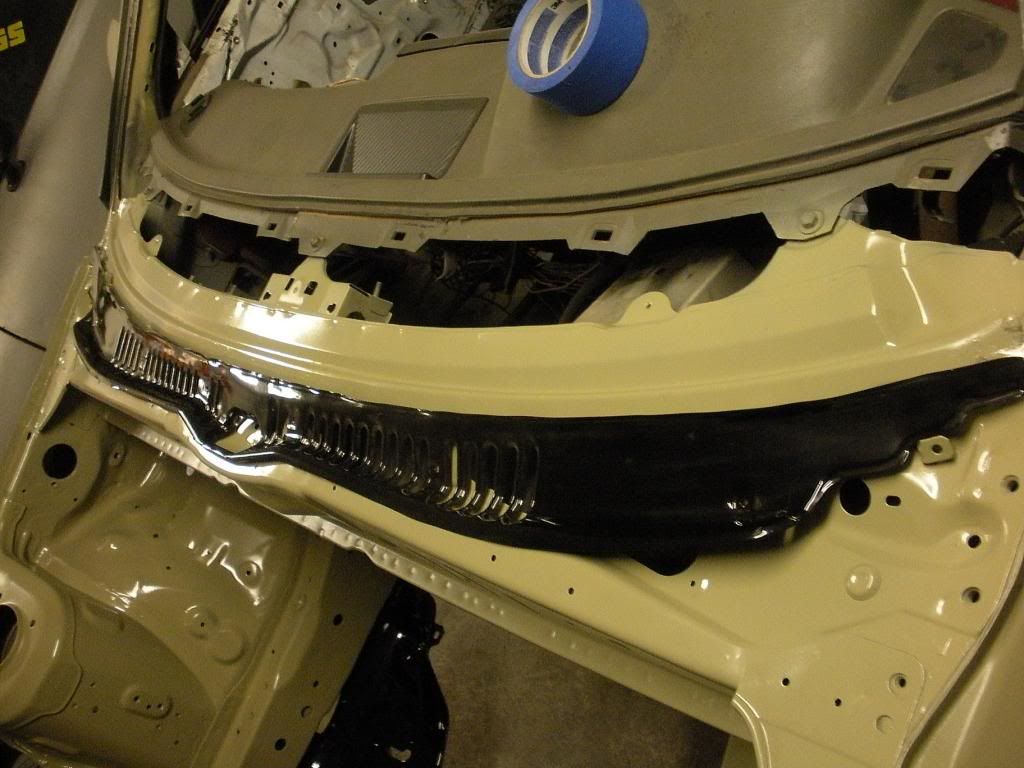
And........................................ Painted. 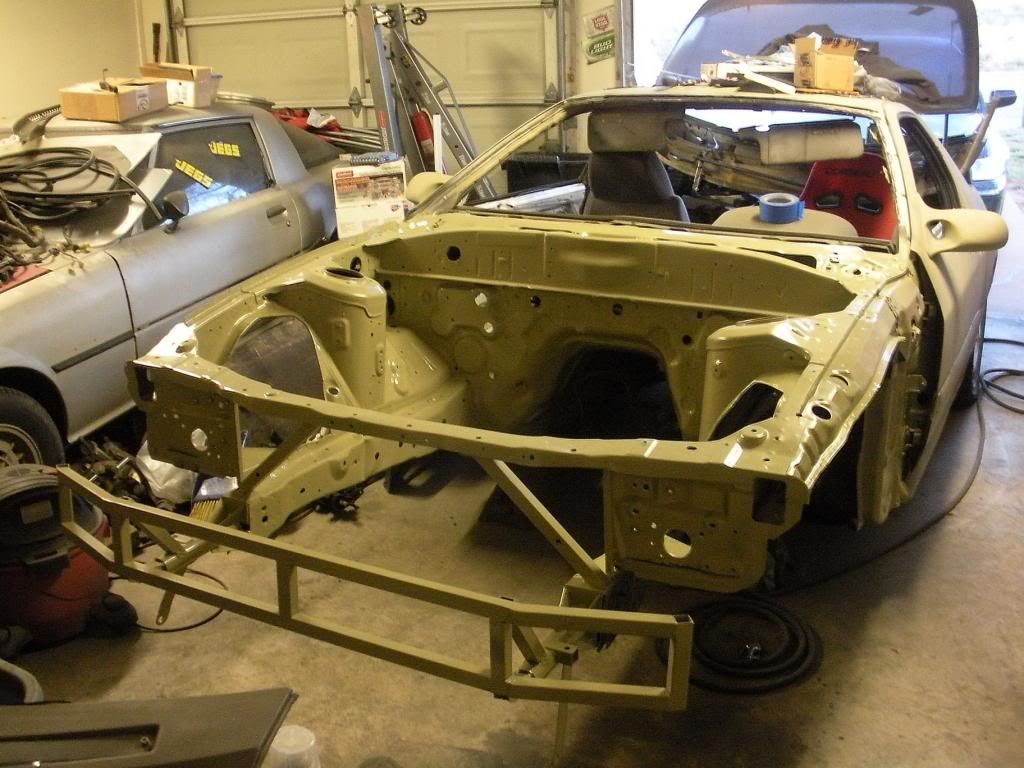  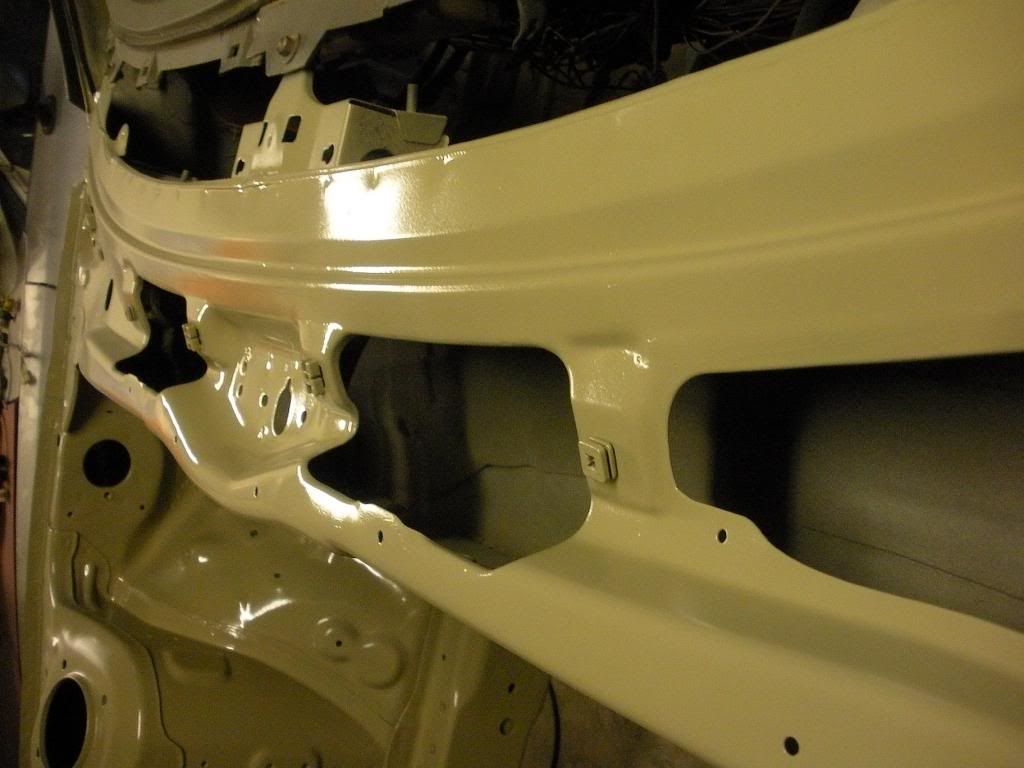 Paint came out pretty nice. I dig it. The whole car will be painted that color when it's all said and done. One the "bumper" I tried to stay away from doing too much heavy welding in hopes that this stuff will be destroyed in case of a say 20mph or more impact. hopefully it's a sound thought process. Also hopefully I never find out. To be realistic it is a drift car so the coolers will probably be destroyed in a decent speed collision. Painted the wheelwells also. They will get all scratched up of course but figured it could start by looking decent and then I won't care about what happens later really. 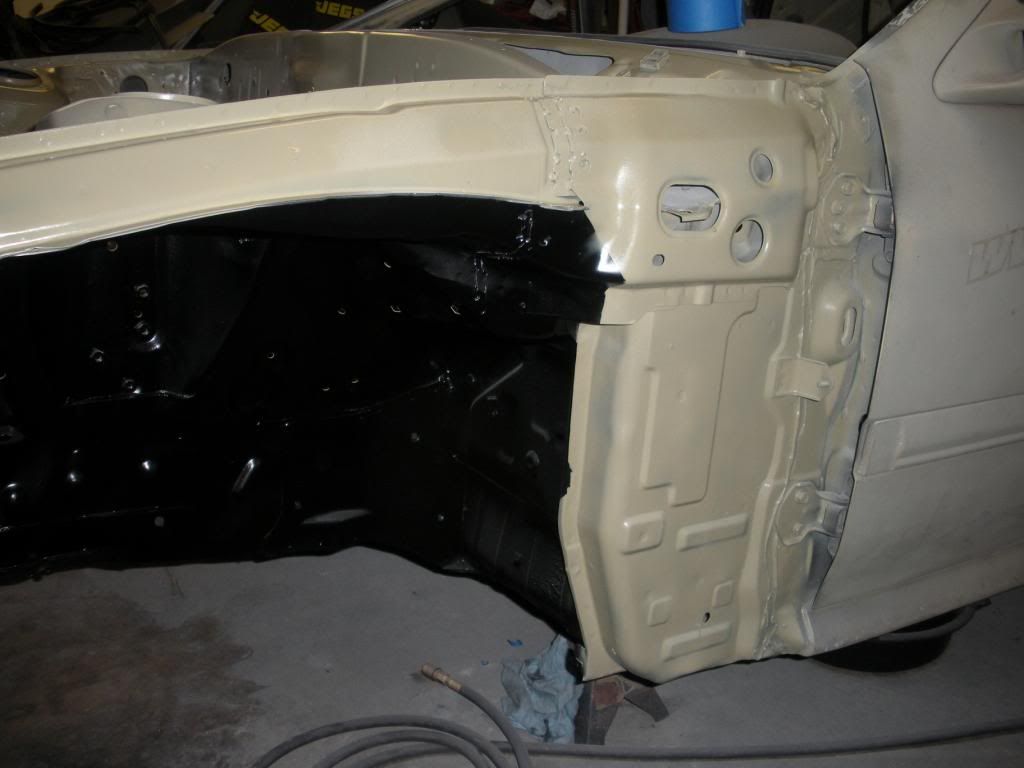 Installed the subframe 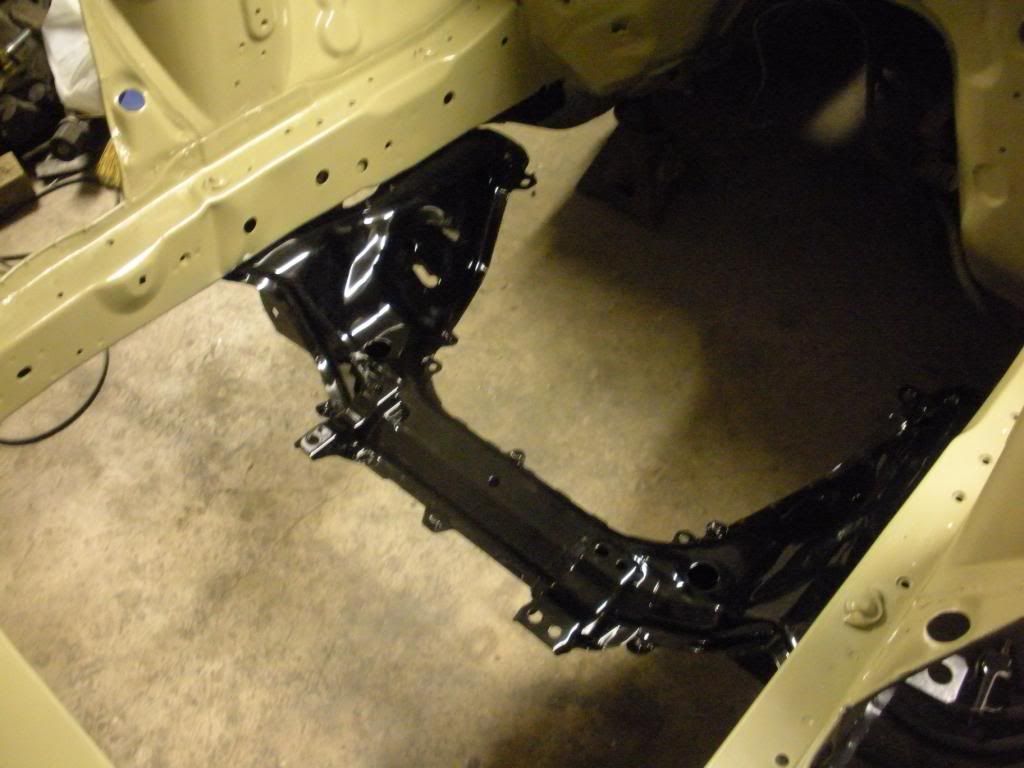
|
|
|
|
|
02-25-2013, 01:47 AM
|
#7 |
|
Rotary Fan in Training
Join Date: Nov 2012
Posts: 58
Rep Power: 13 |
Something happened here
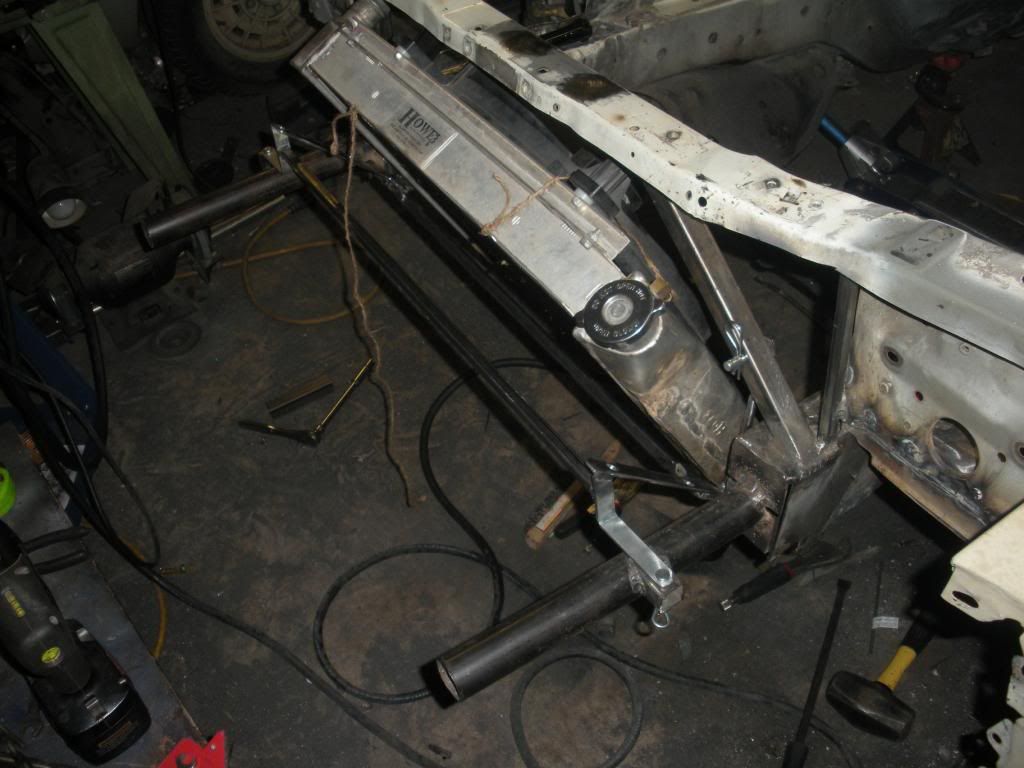
 More stuff goes to be powdercoated. The x-brace, the radiator bracket (revised for the third time), the slave cylinder mount, the steering rack brackets, the front LCA brackets, the engine cradle, and the trans bracket. Maybe some other stuff I don't know it's hard to keep track off honestly. 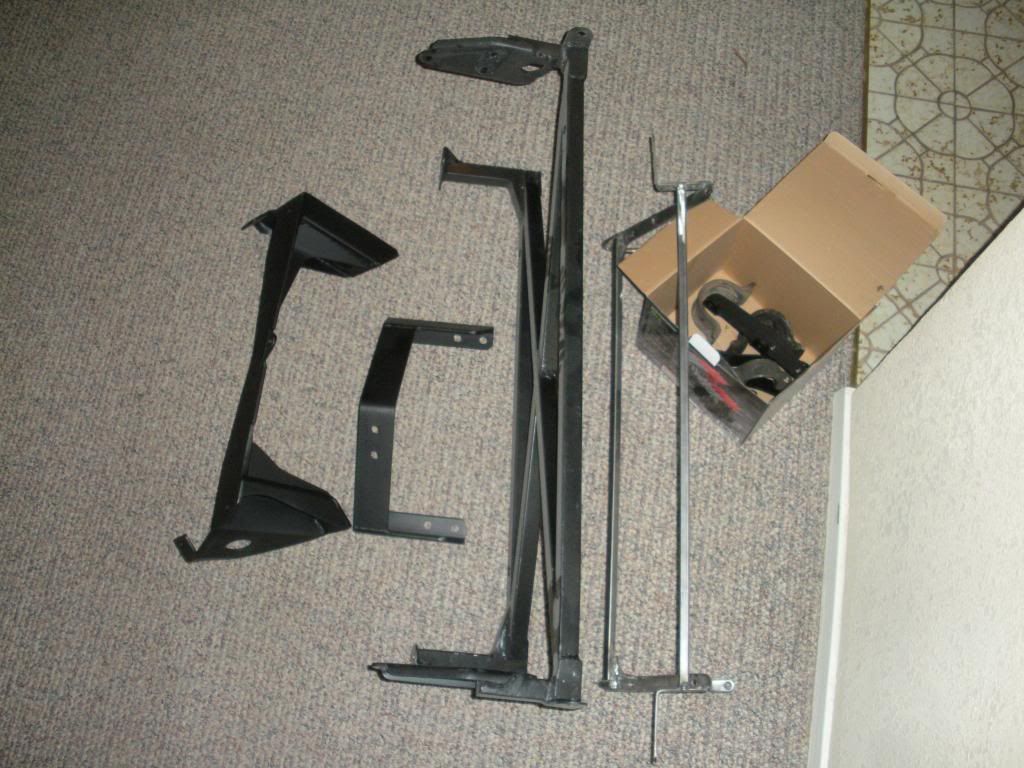 A neat picture with tubing nuts and sleeves lol 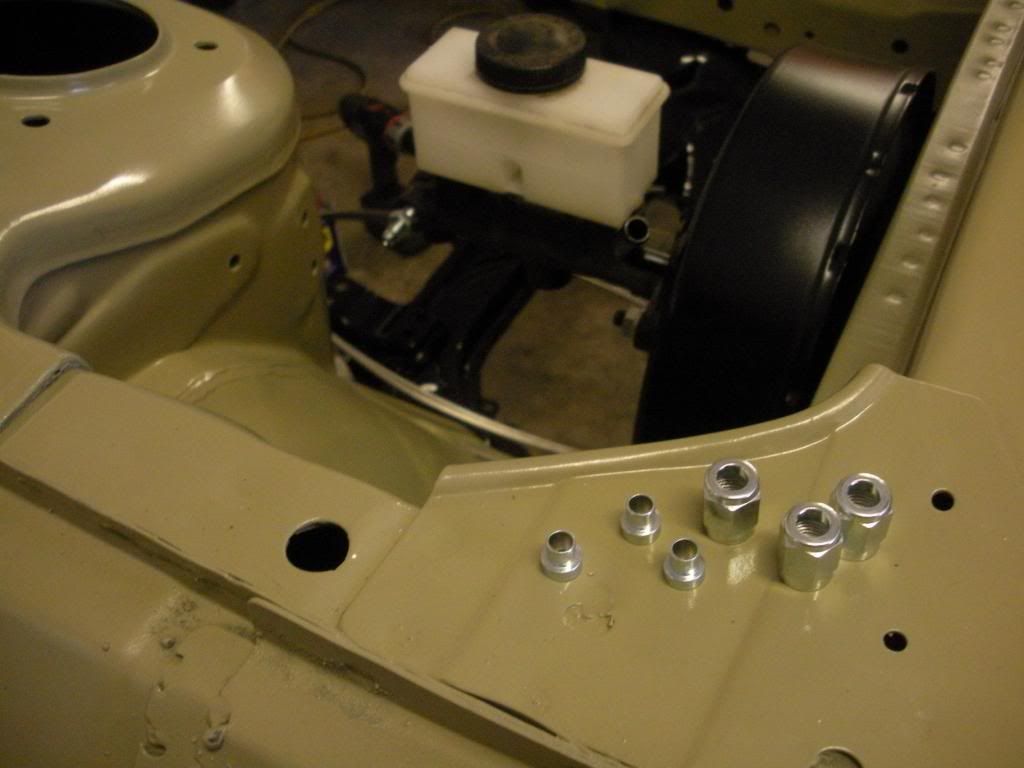 Painted the brake booster and loosely mounted it and the brake master cylinder. Began the process of building the MC lines to the firewall bulkheads. The proportioning valve will be inside the car. One problem with the FC factory MC is that it has two front outputs right off the MC. I had to buy a plug for one of the outputs so that there would be just the one. The fronts brakes divide after the proportioning valve now, more on that later. 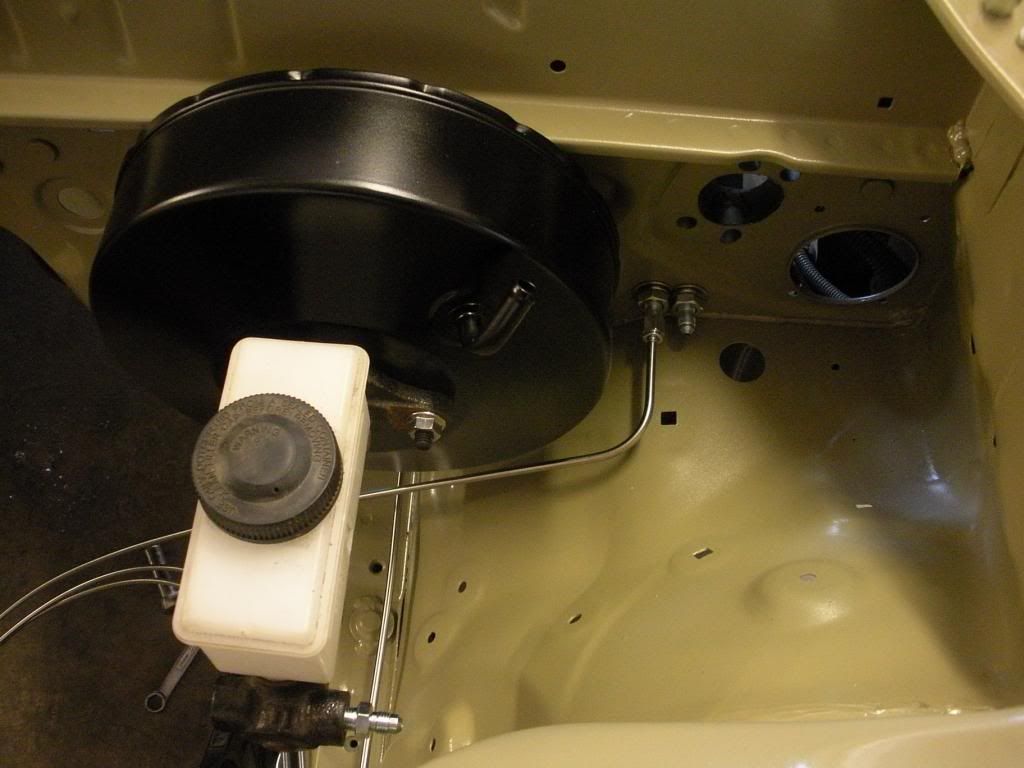 Built the front brake lines up to teh bulkheads in the firewall as well. almost a finished product at this point. 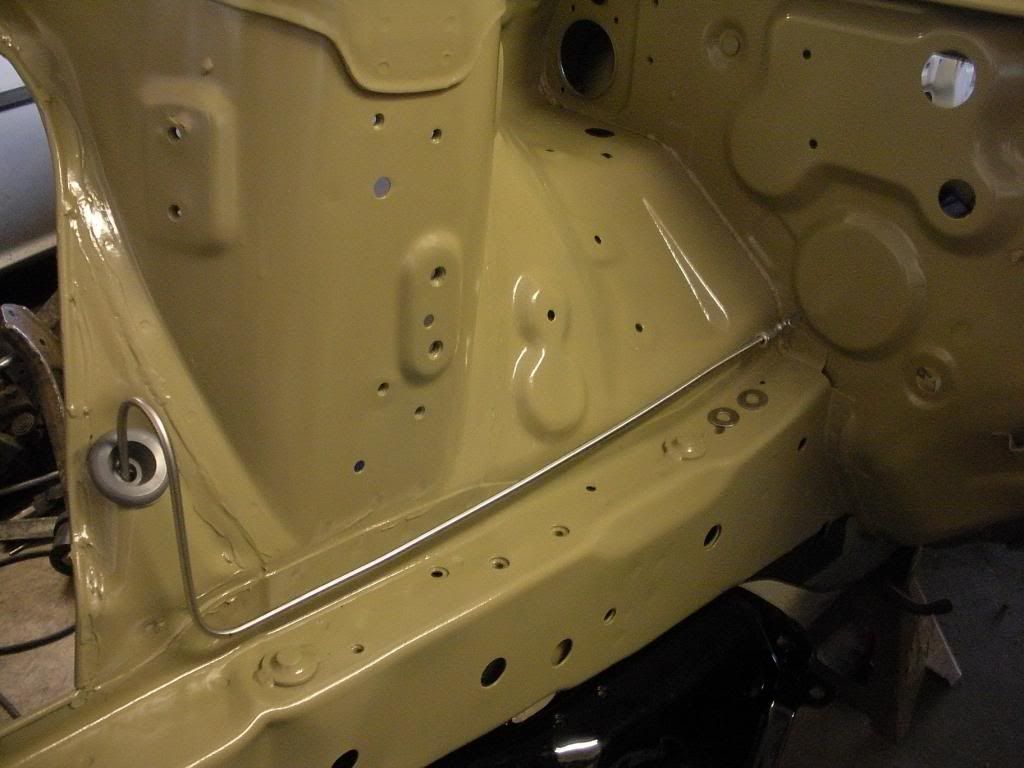 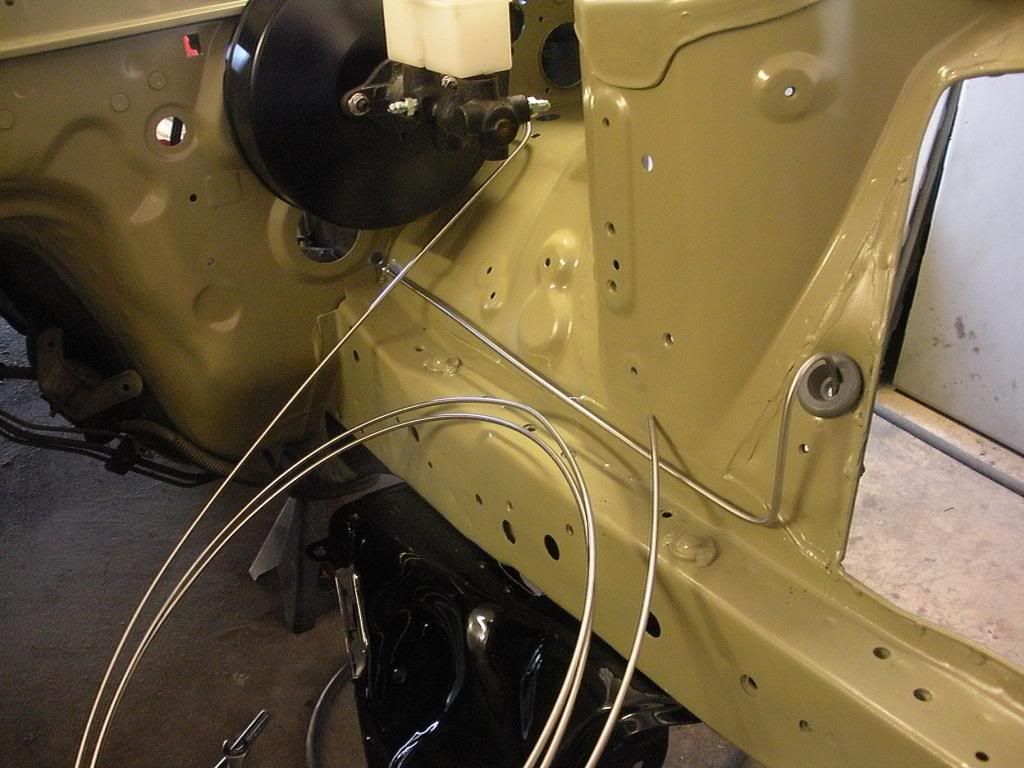 I didn't like how the rear MC brake line was laying out so I started over lol. 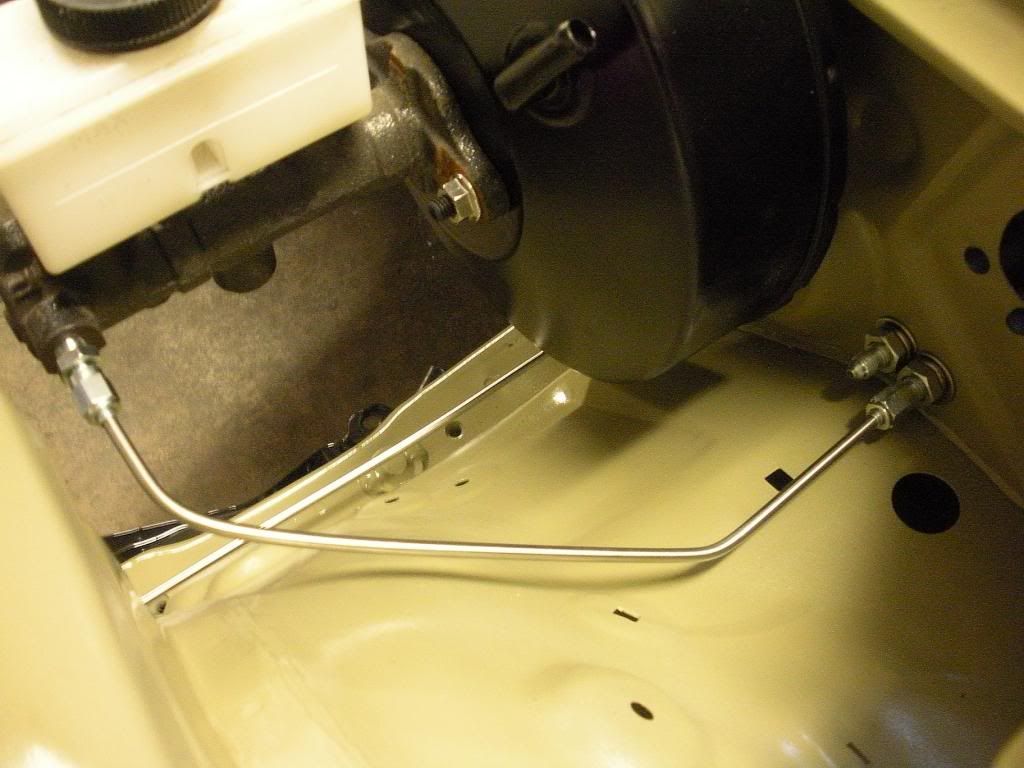 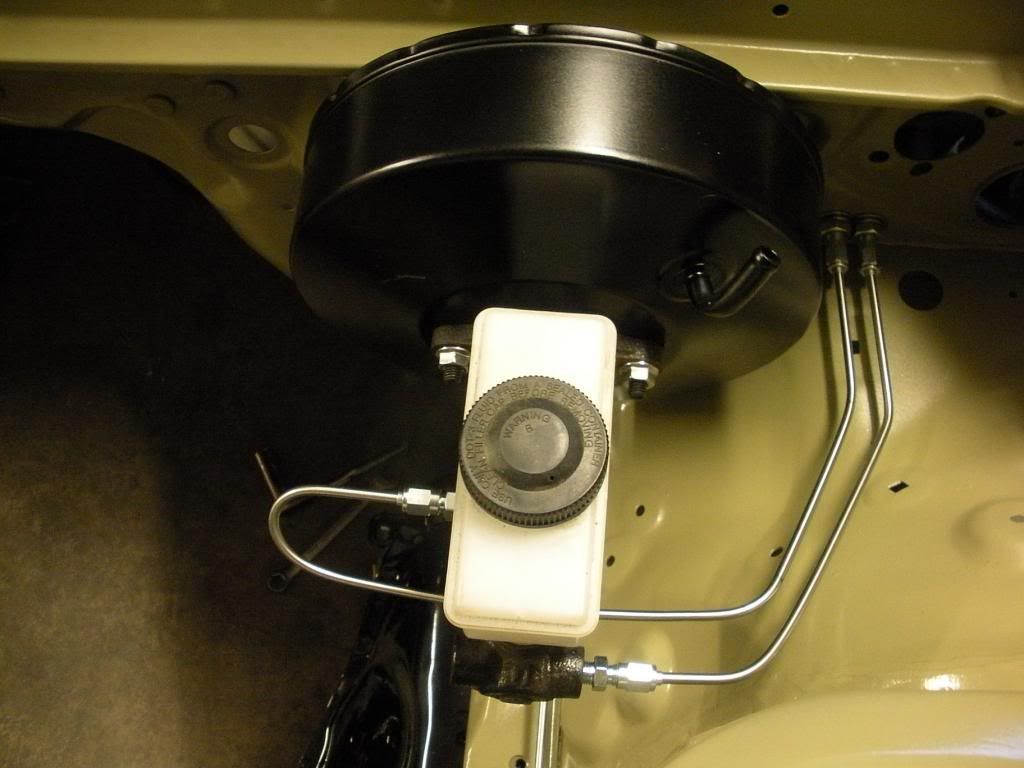 Front line is on the right in the picture at the firewall. Here's what's in the wheelwells. I used a staright -3AN bulkhead and bolted that through the brake line holder. All the brake stuff is now -3AN no more inverted flare stuff or any of that. Doing 37 degree flares is far faster and easier then doing double 45 degree flares, plus it looks cooler. I chose steel stuff due to the fact that is far more resilient than aluminium stuff. I don't need a brake line failure because a little rock popped a hole in something. Also the stainless stuff weighs such a small amount more it's not even worth mentioning really. 
|
|
|
|
|
| Bookmarks |
| Thread Tools | |
| Display Modes | |
|
|


 Hybrid Mode
