|
|||||||


| RX-7 2nd Gen Specific (1986-92) RX-7 1986-92 Discussion including performance modifications and technical support sections. |
 |
|
|
Thread Tools | Display Modes |
|
|||||||
| RX-7 2nd Gen Specific (1986-92) RX-7 1986-92 Discussion including performance modifications and technical support sections. |
|
|
|
Thread Tools | Display Modes |
 10-09-2010, 02:13 AM
|
#1 |
|
RCC Contributor

Join Date: Mar 2008
Posts: 505
Rep Power: 18  |
Plain Jane OEM nothing to see here rebuild
I'm bored and new to RCC so I figured I'd post up pics of where my car is...let everyone get to know me, what I'm doing...etc etc.
History on the car, it's a JDM 13B swapped 89 vert. I daily drove the engine with no rebuild for something like 3 years. I had put the typical mods on the car 13B turbo and tranny -engine supplied by Atkins/swap done by AIM Tuning N370 ECU and modified N/A harness S4 differential RB REV TII full exhaust FCD Cosmo MAF FD fuel pump 550/800 primary/secondary injectors FD alt airpump removed Tokico blues and Tein springs and a pretty nice upper-end but lowkey stereo system Mine is the one in the background  I was running with no aftermarket control (boost, fuel, etc), but was running rich and rarely romped on the gas. I had been waiting for Rtek S5 TII chips to come out of beta. BUT detonated the engine and blew the front housing. |

|

|
|
10-09-2010, 02:35 AM
|
#2 |
|
RCC Contributor
Join Date: Mar 2008
Posts: 505
Rep Power: 18 |
This is my first rebuild of any kind, so at least so far I'm keeping the rebuild OEM. Not doing any porting or other modifications. Though if I found some used FD stationary gears I'd do that and modify the e-shaft oil jets. I need to replace my stat gear bearings, so if I found some used FD gears in good shape I'd consider that modification
 Apex seal corner broke on front rotor  It spun around a couple of times, took out the housing and rotor   Had a hard time getting pics of apex groove that got damaged  
|
|
|
|
|
10-09-2010, 02:39 AM
|
#3 |
|
RCC Contributor
Join Date: Mar 2008
Posts: 505
Rep Power: 18 |
IIRC the bad apex seal groove was still within FSM specs for overall clearance. BUT it varied by like .002 or .003 from the good side to the damaged side. I was afraid that much difference from one end to the other would cause problems so the rotor was replaced.
|
|
|
|
|
10-09-2010, 02:41 AM
|
#4 |
|
RCC Contributor
Join Date: Mar 2008
Posts: 505
Rep Power: 18 |
Cool pic I got while snapping pics of the teardown and cleanup

|
|
|
|
|
10-09-2010, 02:45 AM
|
#5 |
|
RCC Contributor
Join Date: Mar 2008
Posts: 505
Rep Power: 18 |
Front Stat gear
 Rear Stat gear 
|
|
|
|
|
10-09-2010, 05:06 AM
|
#6 | ||
|
RCC Addict
Join Date: Mar 2008
Location: Honolulu, Hawaii USA
Posts: 1,813
Rep Power: 19 |
Quote:
The front FD3S stat gear is machined differently than the FC3S stat gears. You might need to change out all the "front guts" in the oil cover to FD3S parts - thrust bearing plates x2, Torrington bearings x2, spacer. -Ted
__________________
reted_2000@yahoo.com Technical Advisor FC3S Pro http://fc3spro.com/ Quote:
|
||
|
|
|
|
10-09-2010, 10:20 AM
|
#7 |
|
RCC Contributor
Join Date: Mar 2008
Posts: 505
Rep Power: 18 |
^thanks for the heads up Ted, from what I had read so far I thought I could use just the gears and didn't need any other modifications other than extending the e-shaft jet grooves.
This is why I created the thread, in case I miss something. I'll be sure to reread the info I had found before doing anything. If there is any doubt I'll keep the stat gears I already have. I'm not building a high rev, high output engine so I really don't need the hardened stat gears. One question, are the Cosmo 13B-RE gears a direct swap? I'm still researching that one, but had been told they are hardened but a direct swap...but they also do NOT have the better bearings that the FD and RX-8 have. Just to complete the conversation for anyone who is searching for related info. I had read conflicting info about using RX8 gears. Some said they are a direct swap and other said you need to shave off like .001 on 13B e-shaft to accommodate the gear. |
|
|
|
|
10-09-2010, 10:42 AM
|
#8 |
|
RCC Contributor
Join Date: Mar 2008
Posts: 505
Rep Power: 18 |
Another updated
Before removing the engine I had random smoking exhaust, but couldn't find the source. I first noticed while looking for a hose leaking coolant. I had replaced my water pump and had a coolant leak that seemed to only leak while the car was running and hot. I drove the car around the block to heat it up and while still running I jacked up the front. Found it was a clamp I hadn't tightened down enough so it only leaked when it got hot. Point of that story is that while the car was running and jacked up it created a smoke screen. In general it had a smokey exhaust that I only noticed when looking at the tailpipes. But from that day on it would occasionally smoke screen while driving. Turns out my turbo had thrust play in it. I measured by pressing the shaft as far away as possible with a dial indicator on the shaft. Then pushed it all the way the opposite way so I'd get a reading of the full play. It was like .001-.002 IIRC That has been replaced with a S5 that has no play. |
|
|
|
|
10-09-2010, 10:54 AM
|
#9 |
|
RCC Contributor
Join Date: Mar 2008
Posts: 505
Rep Power: 18 |
I've gotten bored while waiting for the rebuild to come together so I painted. I wanted something I hadn't seen done before so I went with black and copper
 The rear housing in the pic is the bad housing that will be replaced. I pushed everything together to get a better idea how it would look and if I liked it    I'm still not sure if I'll keep that paint or not. It might be too different. I also may have the intakes powder coated rather than rattle can painted. I may repaint the irons and front cover silver or aluminum. And have also considered going full fanboy and making the intakes white with a rising sun painted over them. Who knows might even airbrush some artsy BS on there. |
|
|
|
|
10-09-2010, 12:16 PM
|
#10 | |||
|
RCC Addict
Join Date: Mar 2008
Location: Honolulu, Hawaii USA
Posts: 1,813
Rep Power: 19 |
Quote:
 The Cosmo (20B only?) runs a 3-window bearing on the stat gears. The 3 windows are slotted. Mazda Comp (now Mazdaspeed) used to sell them as "Mazda competition bearings" back in the day. The FD3S 13B-REW runs a 9-window bearing - 9 drilled holes throughout the stat gear bearing. It's arguable whether which is better, but the 13B-REW ones are the newest design and therefore arguably better. Quote:
I don't mess with RX-8 stuff. For me, the RX-8 wasn't turbo'd so why try and use "NA" parts in our turbo'd application? -Ted
__________________
reted_2000@yahoo.com Technical Advisor FC3S Pro http://fc3spro.com/ Quote:
|
|||
|
|
|
|
10-09-2010, 02:46 PM
|
#11 |
|
RCC Contributor
Join Date: Mar 2008
Posts: 505
Rep Power: 18 |
^Thanks again for the feedback
I saw pics of the 13B RE gears and they look the exact same as 13B, no difference in the bearing either. From what I was told the only difference is the gear is hardened. I doubt I'll change the stat gears or anything else internal. OEM was serving me well enough. I was happy with external mods and 12psi boost. I don't want to do anything on the engine thats irreversible and will affect driveability and reliability. I want the engine to be able to daily drive if needed, pass e'check if needed. |
|
|
|
|
10-10-2010, 04:36 PM
|
#12 |
|
I-had-a-bad-experience...

Join Date: Feb 2008
Location: M'boro
Posts: 1,046
Rep Power: 19 |
I have done the exact same thing with a vert... jspecc TII, na harness, 550,750s... and I got the Rtek 2.0 just recently... for a basically stock setup it works great by helping fine tune things, monitor stock sensors, and gets rid of the need for a FCD. if getting a bigger turbo I would get a little nervous about not having a more powerful standalone though as you can't boost over 14 and I'd like the ability to use faster reacting sensors and remove the MAF.
It does do some pretty cool things though... fyi I have no emissions, hence the non CEL codes. but it datalogs fairly decent and accepts my wideband signal. 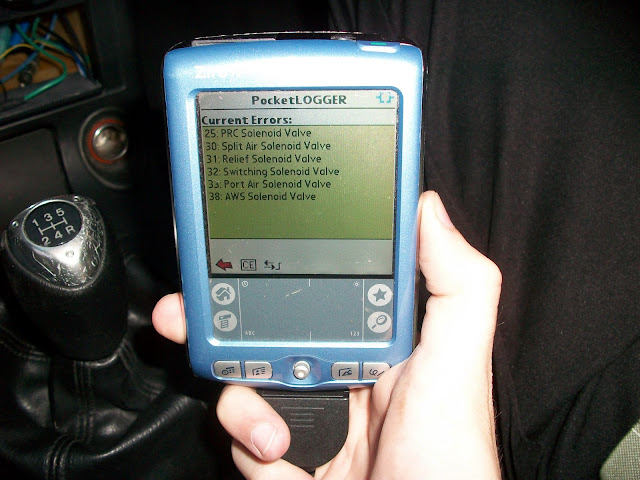
__________________
 '15 Juke Nismo '06 MX-5 GT SOLD '04 S Silver RX-8 GT Track Day Use SOLD '90 Black TII vert w/ Sprint RE stock port/turbo DD dyno (242.6whp@5500rpm @12psi 8psi@redline) and (250ftlbtq@4800rpm @13psi) SOLD '89 GTUs 6p TII SOLD, '87 sport SOLD, '79 SA stock SOLD '91 B2600i 4x4 w/ Rx-8 LSD SOLD |
|
|
|
|
10-10-2010, 11:32 PM
|
#13 |
|
Big Ugly

Join Date: Apr 2009
Location: Fredericksburg, Va
Posts: 591
Rep Power: 17 |
Pulled from Mazdatrix who actually recommend the Renesis stationary gears. They are already hardend.
"If using the RX8 rear gear in an earlier 13b engine, you must add sealant where the rear gear o-ring WOULD be. There is no groove to hold the o-ring because the Renesis engine mounts the o-ring in the side housing rather than on the gear. We recommend using Hylomar, but a THIN layer of silicone sealant will also suffice." The 3 window bearing IMO opinion is just as good as the REW multi window.
__________________
Boosted Big Body On 335's PS3 ID: Rotordad 1986 Mazda RX7 GXL - Street ported 13BT, Haltech, 62mm, ect. 2006 MazdaSpeed 6 - Eagle, Wiseco, Cobb, ect. |
|
|
|
|
10-11-2010, 03:37 PM
|
#14 | |
|
RCC Contributor
Join Date: Mar 2008
Posts: 505
Rep Power: 18 |
Quote:
http://rotaryaviation.com/oil_injector_pump_adaptors.htm I'm curious which pins you swapped on the N/A harness, not the VDI pin at the ECU, but IIRC there are two pins that need swapped further up the harness on the two plugs that attach to the dash harness. I've got two spare N/A harnesses and compared them to my modified harness...I can't find any wires different. |
|
|
|
|
|
10-11-2010, 03:39 PM
|
#15 | |
|
RCC Contributor
Join Date: Mar 2008
Posts: 505
Rep Power: 18 |
Quote:
|
|
|
|
|
|
| Bookmarks |
| Thread Tools | |
| Display Modes | |
|
|


 Linear Mode

