|
|||||||
| RX-7 2nd Gen Specific (1986-92) RX-7 1986-92 Discussion including performance modifications and technical support sections. |
|
|
Thread Tools | Display Modes |
|
|||||||
| RX-7 2nd Gen Specific (1986-92) RX-7 1986-92 Discussion including performance modifications and technical support sections. |
|
|
Thread Tools | Display Modes |
|
|
#1 |
|
Rotary Fan in Training
Join Date: Nov 2012
Posts: 58
Rep Power: 14  |
FC steering rack rebuild
So it was time for a rebuild on my drift car steering rack (Rebuilding most of the car actually). I figured I'd share the experience for those who may be capable of undertaking this, but just aren't sure of how to do it or what all is involved. I'll try to explain as much as possible about the process. I've rebuilt quite a few steering racks over the years, this is only the second FC one but lots of others, mostly Hondas, some Nissans.
Anyways the first place to start is to order the seal kit. It comes with every seal you need and some you don't. Since steering racks are made by just a few companies there are many that are very similar so the kits may contain parts you don't need as well. I ordered mine from Autozone online, it costs $33.99 at the time of this writing. http://www.autozone.com/autozone/par...ier=17169_0_0_ Important to note that it's called a rack and pinion seal kit when searching for it. You can also find it on rock auto and many other sites. It's all the same kit. I also had ordered the steering rack bushing from J-Auto they cost $45 to me it was worth it, the bushings were pretty ragged and soaked in liquids of unknown origins. There website is here: http://www.j-auto.net/ So after that stuff showed up and I finally had a day off I got after this thing. It started off looking like this. Pretty terrible and dirty as hell. it didn't leak much just mostly seeped a bit on the driver's side under the rack boot. 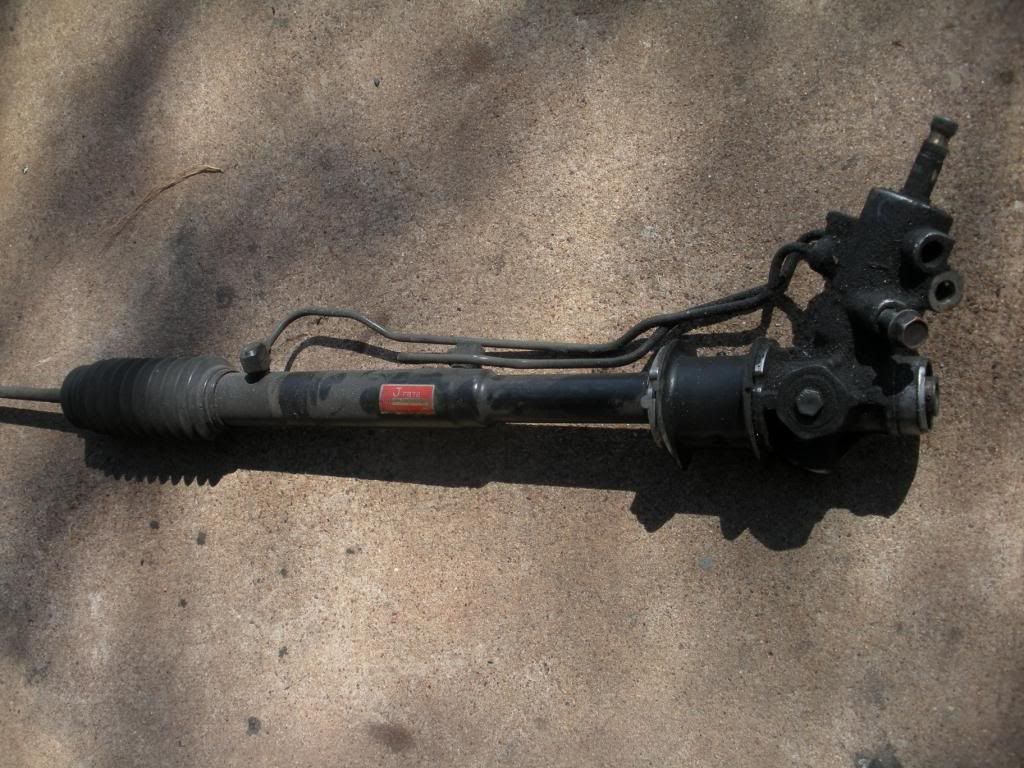 Start by taking the hardlines off. Remember how they go or your steering will not work. 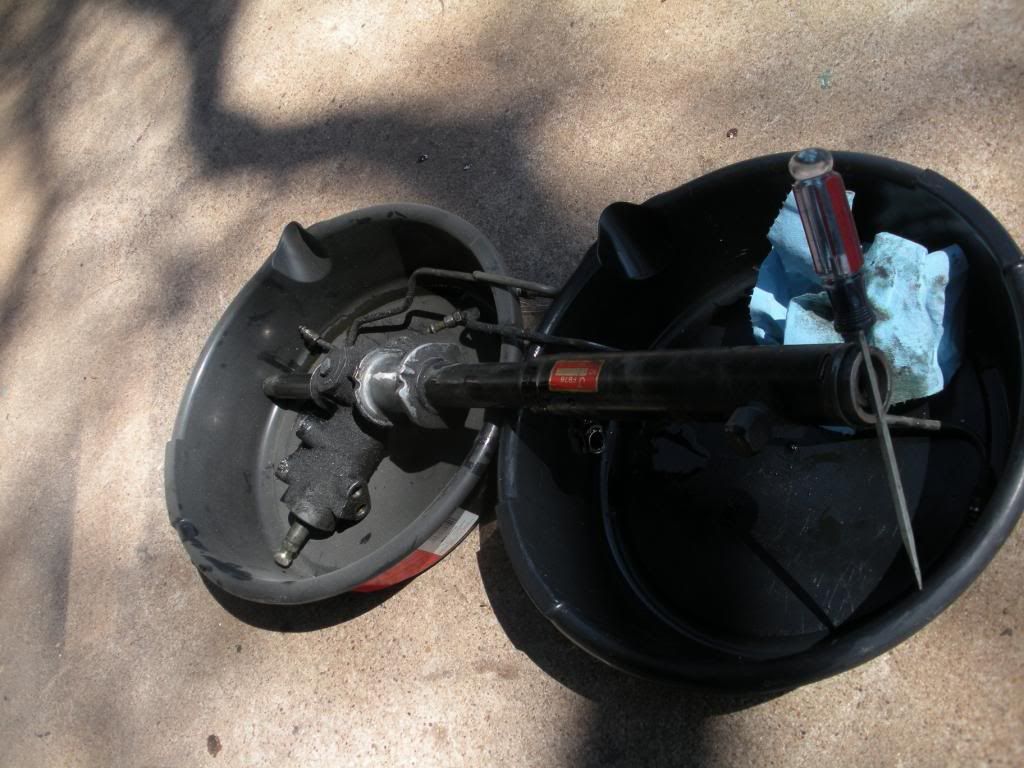 These style rack stoppers can be a pain in the ass to remove, depending on the condition of the rack. If it comes apart properly you can easily turn the end by just putting a screwdriver between the slots. It's not a threaded piece just O-ringed in. the only thing retaining it is the wire clip thingy. Rotate the end till the tail shows up in the access hole. If the end is stuck or doesn't turn then you need to get creative with WD-40 and moving it back and forth till the rust break free. it will eventually spin after you work it for a while. This rack was super easy I could have probably moved it by hand if I had tried that first. 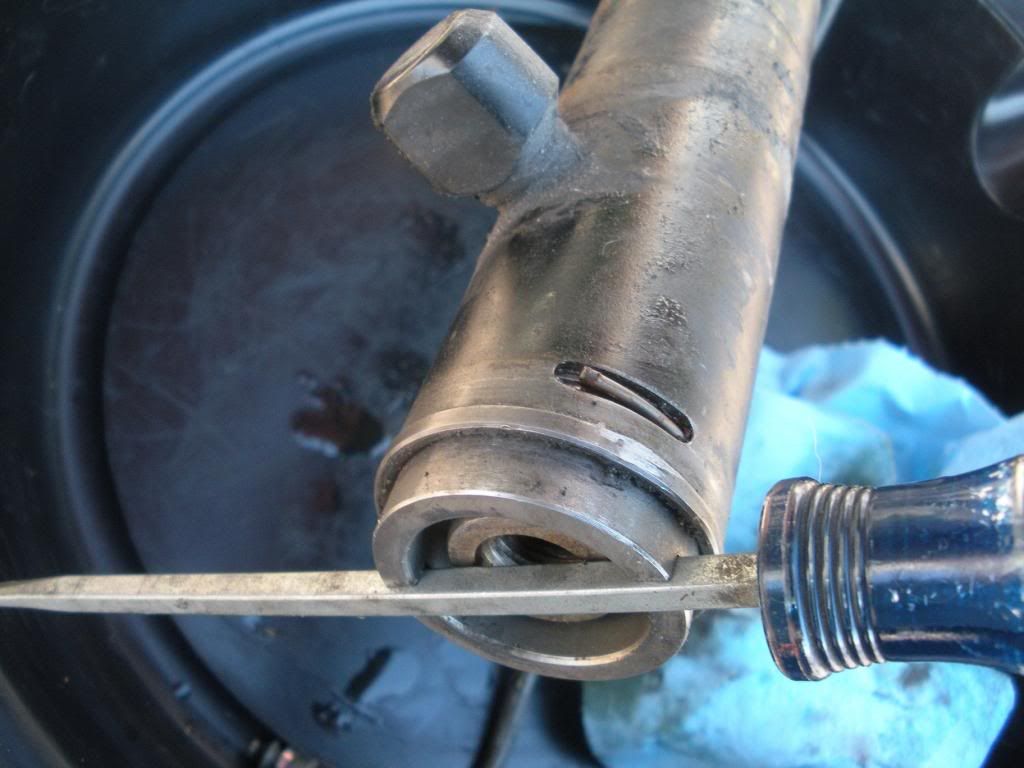 Sometimes you have to help the tail out of the hole, sometimes it pops up like it's suppose too. After it does rotate the rack stopper the opposite way or whichever way makes sense to unwind the wire from the end, like this. 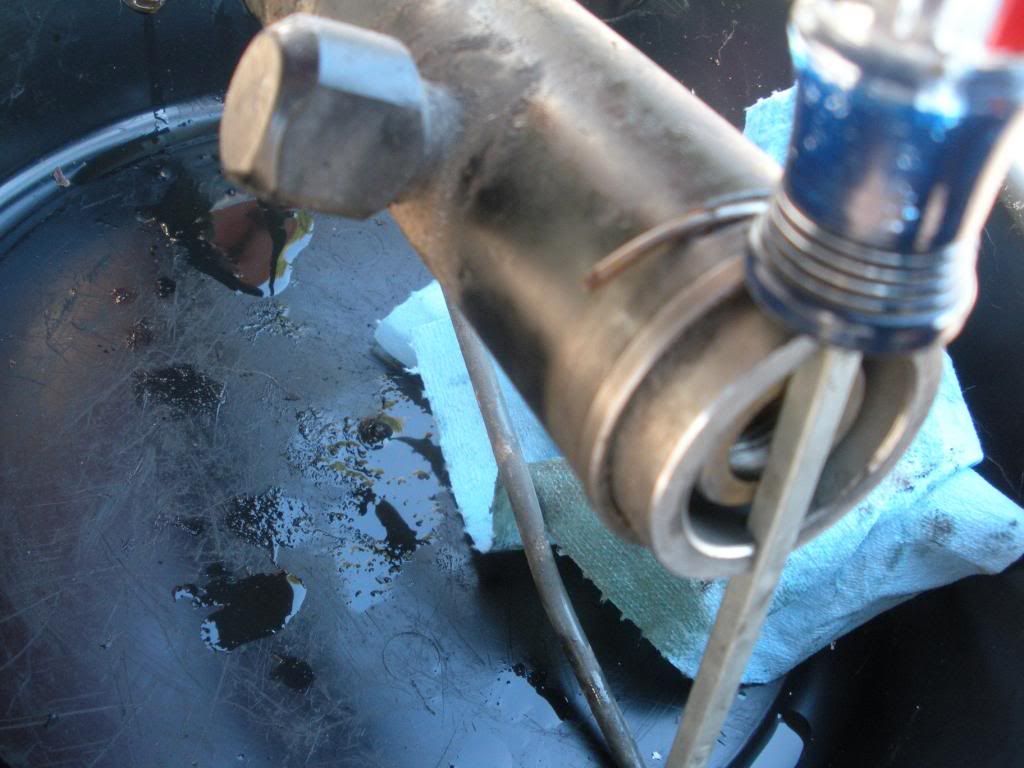 Here's the wire after I removed it. Now that you can see the shape it will make sense when you go to do yours. Basically you unwind it till you get to the part where the "tail" is bent at 90 degrees then you just pull it out with your fingers. 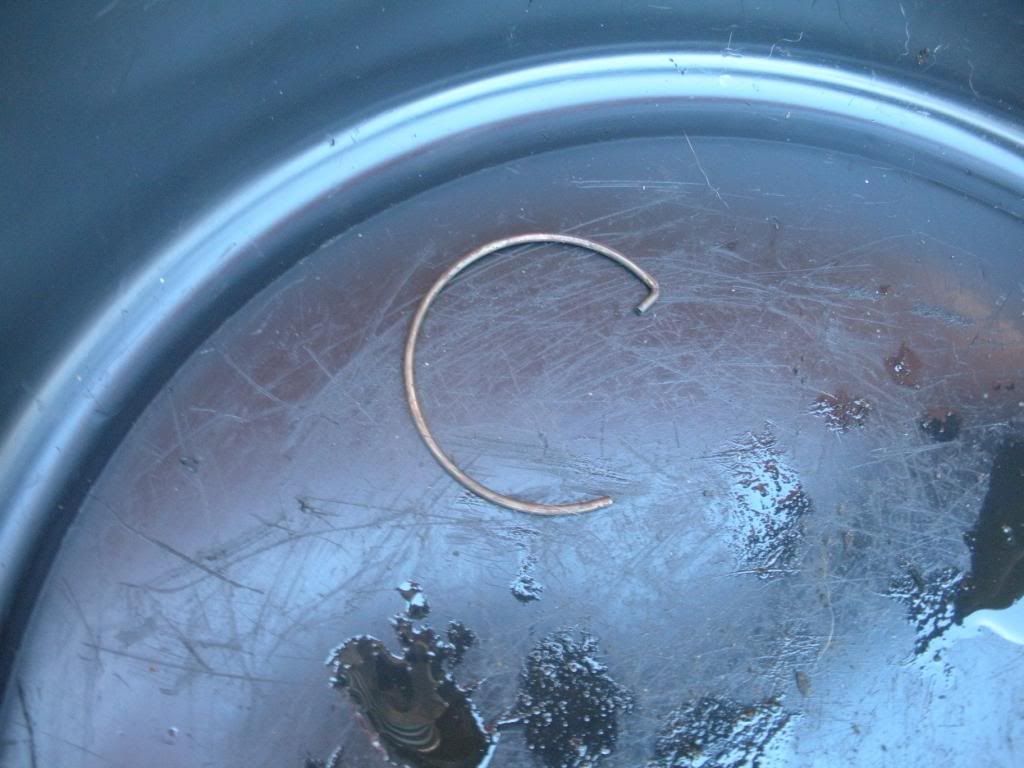 Next remove the rack stopper. If you have a fairly rust one this could prove difficult. It does just pull out though. 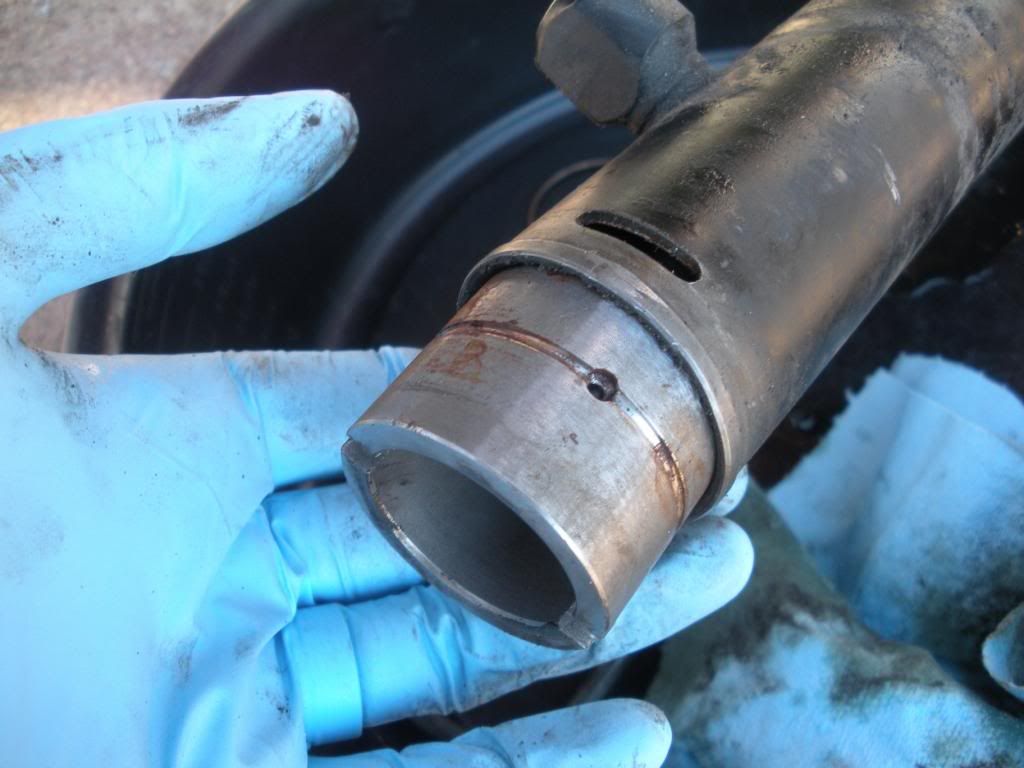 Here's what the rack stopper looks like when it's out. 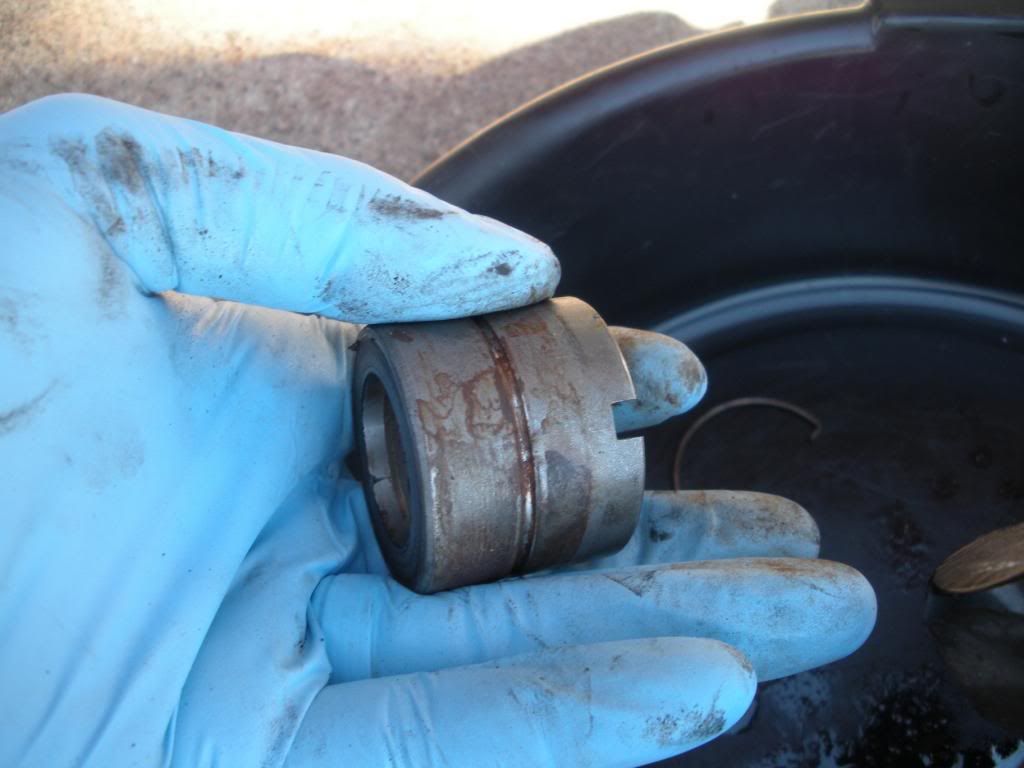 Next I usually pull out the rack support, spring, yoke plug and locknut. This allows all the tension to be relieved between the rack and the pinion (Makes moving the rack back and forth easier). This can be very tight (The big lock nut) it must be loosened before the yoke plug. I ended up using a flathead screwdriver and hammer to loosen this one, it did get all beat up in the process. It was kind of a last resort, due to teh fact I could not find a socket big enough to use an impact gun, which makes it super easy btw. After you spin that off you can unscrew the yoke plug, which is slightly spring loaded (By the spring under it, imagine that  . After you remove those the rack support piece could be stuck in there with grease, don't worry it can just sit there if you can't get it out yet. It won't matter at all and it will probably just fall out during some of the rest of the disassembly. Here's a pic of all those parts layed out. As you can see in the picture the rack support piece was still in the hole. . After you remove those the rack support piece could be stuck in there with grease, don't worry it can just sit there if you can't get it out yet. It won't matter at all and it will probably just fall out during some of the rest of the disassembly. Here's a pic of all those parts layed out. As you can see in the picture the rack support piece was still in the hole.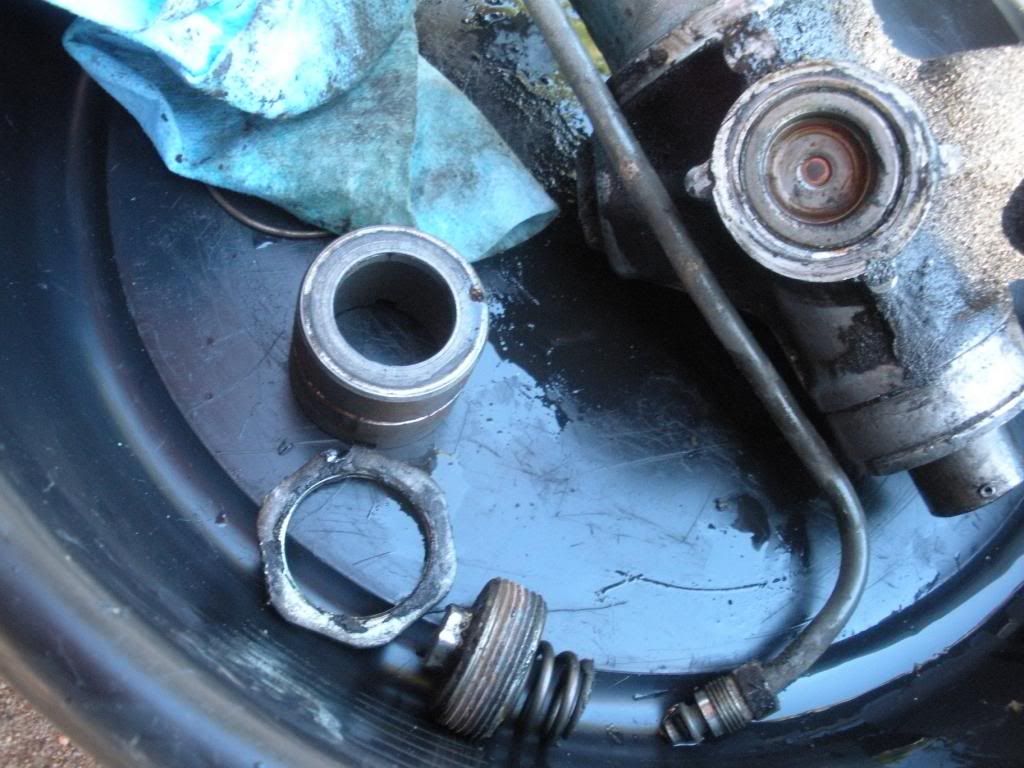 Next you will need to remove the pinion plug. It is staked from the factory. Best thing to do it tap it with an impact gun and loosen it. 24mm I think it was, you'll figure it out.  Under that you'll find the lock nut for the pinion. 17mm I believe. Again impact gun is best. If you don't have one then hold the smooth part of the pinion shaft with a vise grip on the otehr end and break it loose with hand tools. After I loosen it I put it back on a couple turns by hand so I can drive the pinion out with a hammer (Lightly though, but not yet, just preperation for the next couple steps). 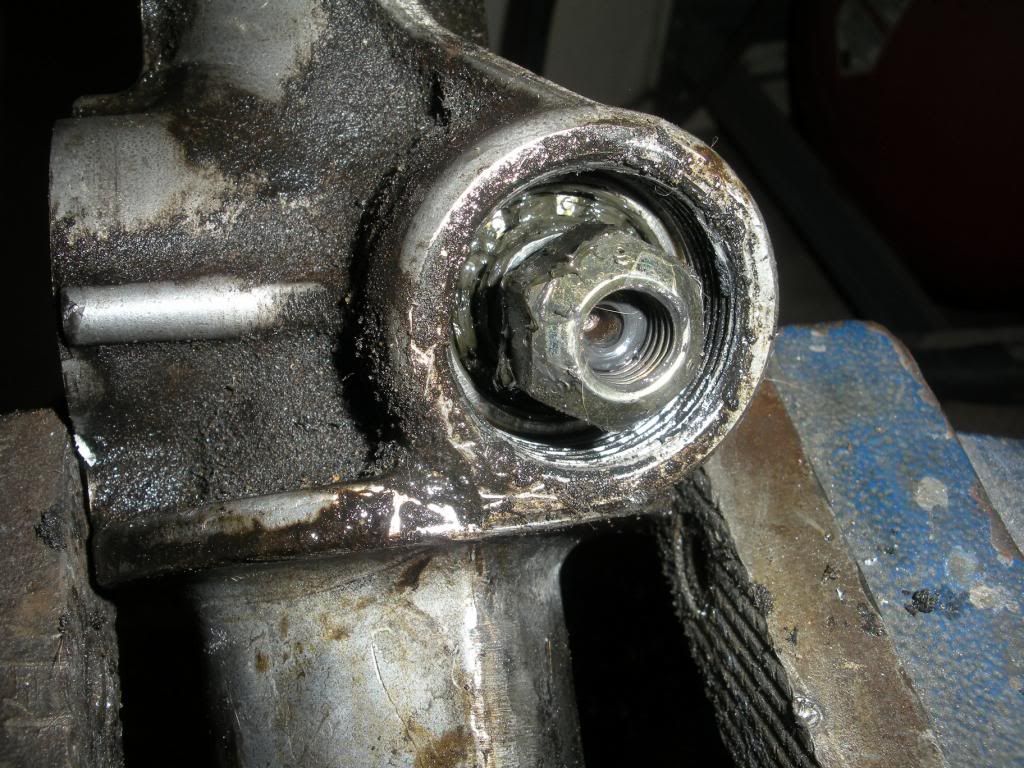 That's what's behind the nut if you were wondering Just a bearing no washers or anything. 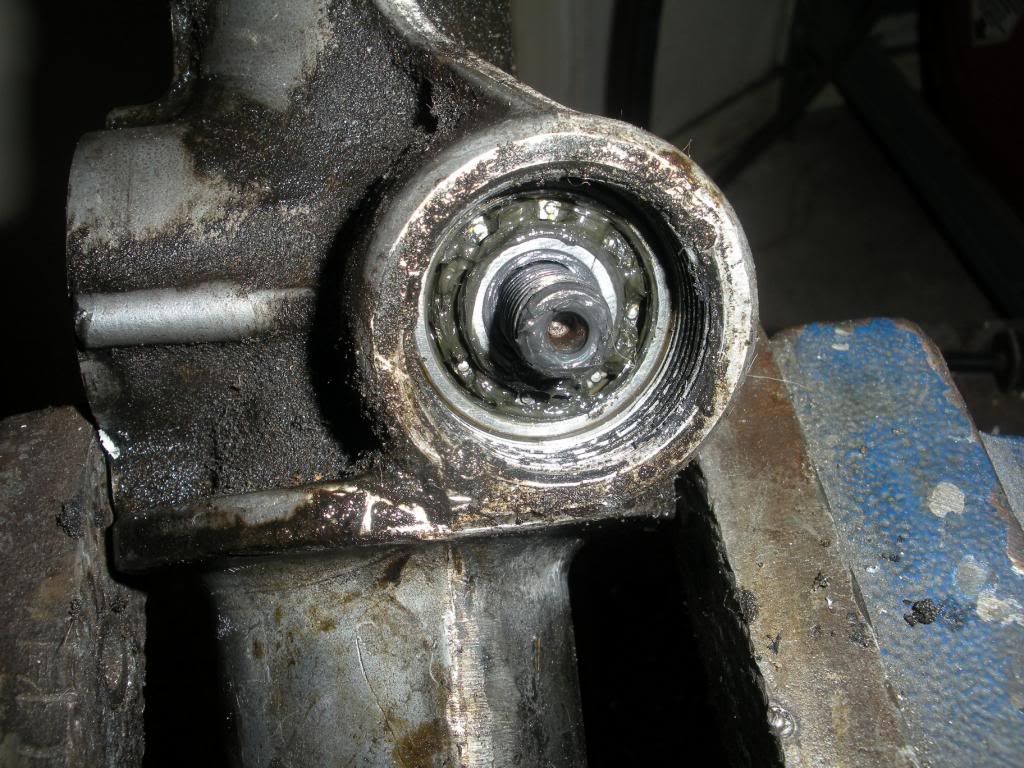 Moving to the top of the pinion we need to remove the dust cover. Just dig it out however you want witha little screwdriver or whatever. there's a new one in the kit. Don't beat up the aluminium any more than necessary though as the new dust cover won't seal well. 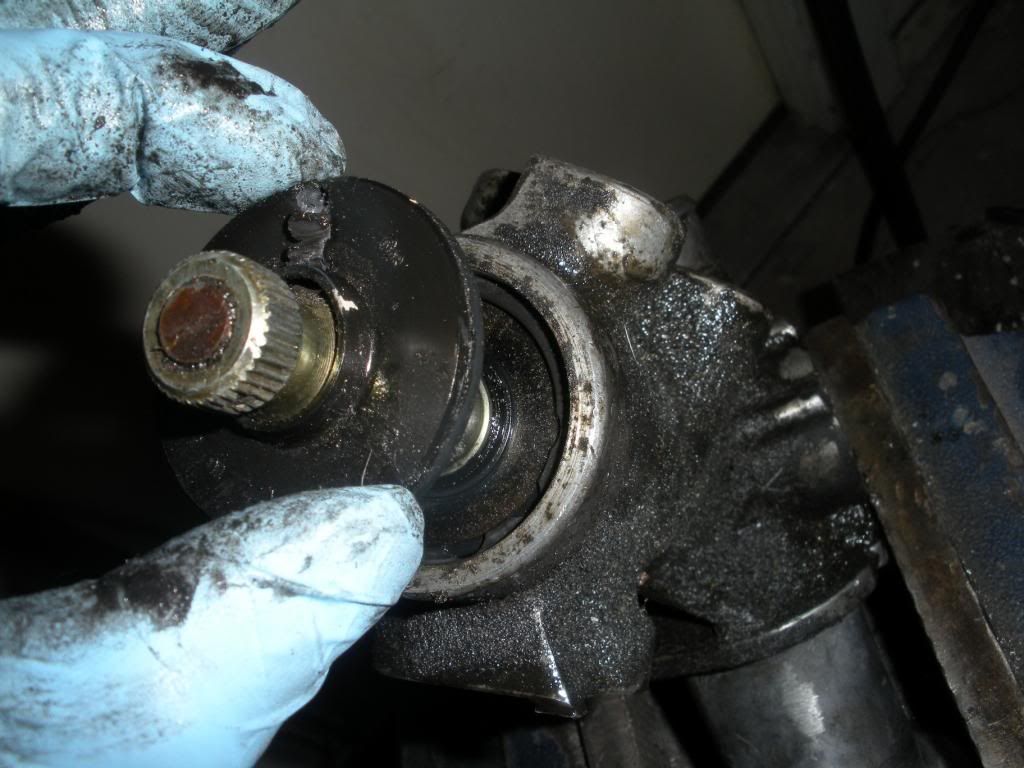 Grab a pair of snap ring pliers and take the snap ring out next. 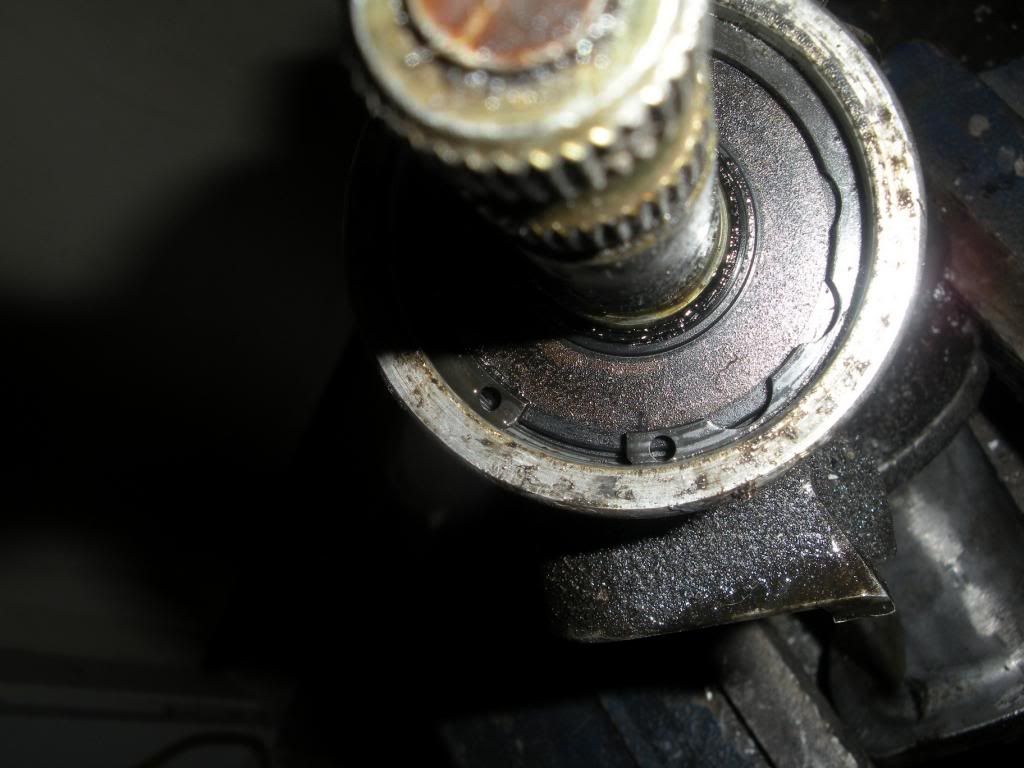 Like so. 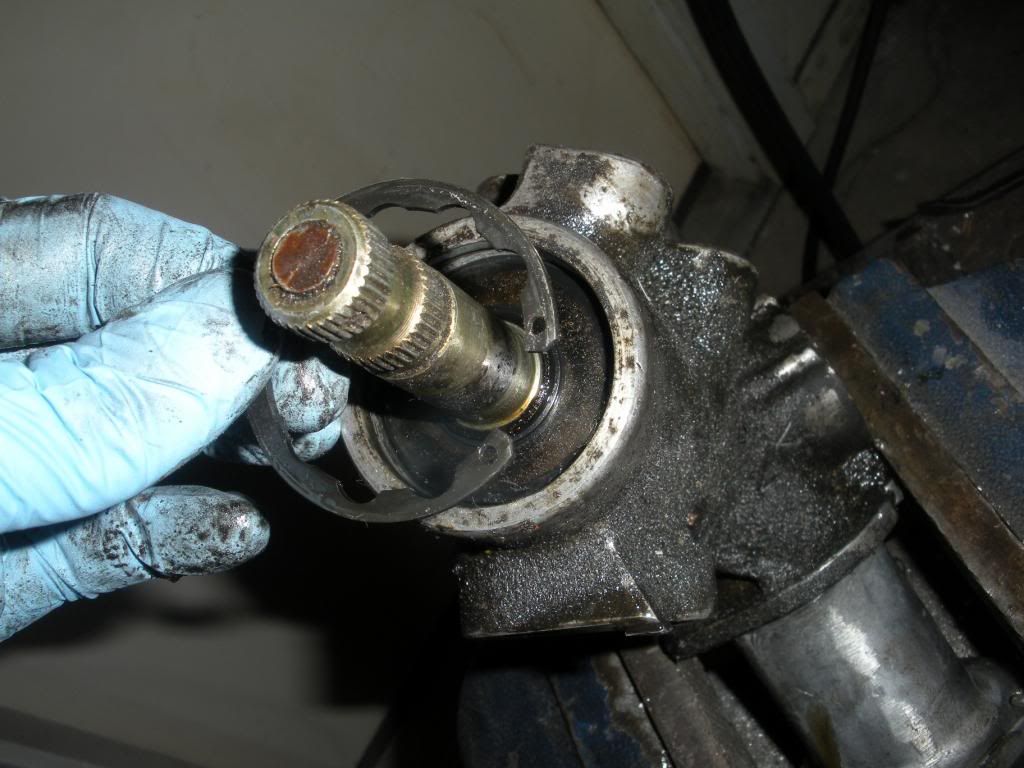 Under the snap ring is the top oil seal. Just leave it there for now, it's about to come out super easy. Now that the snap ring is removed we can proceed with the light tapping on the lock nut with a hammer I talked about a few steps back. tap it a couple times till the pinion starts to move then unscrew the lock nut and remove it. 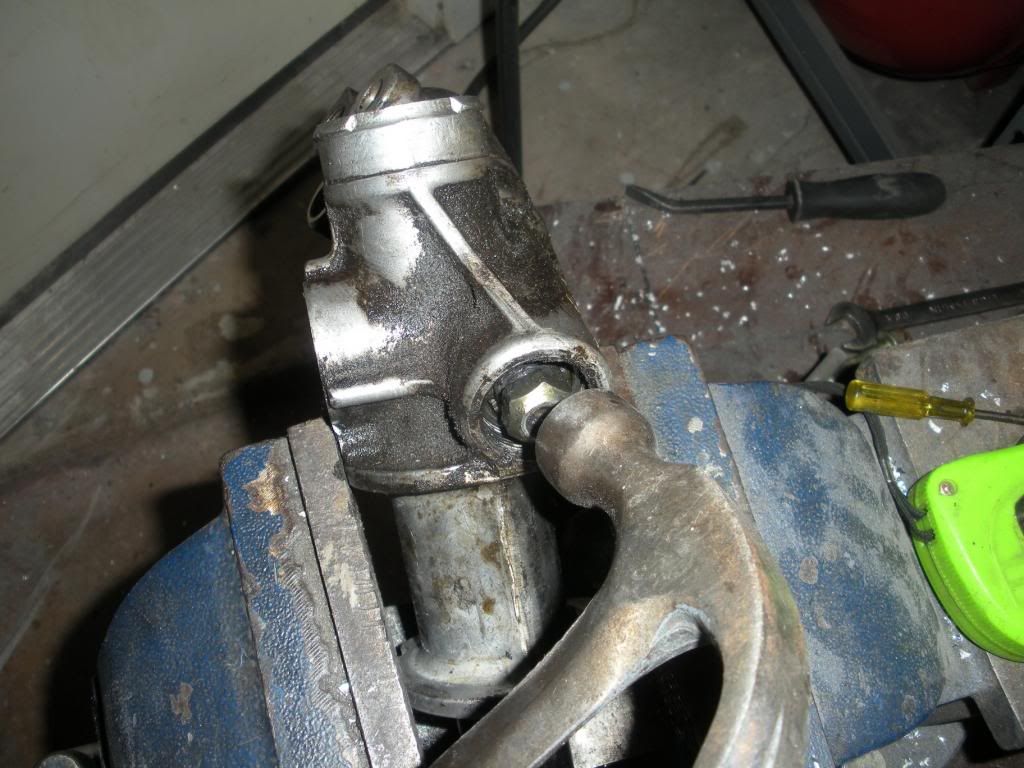 Pull the pinion from it's bore. The top oil seal will be on the pinion. Now just slide it off and throw it away. it's the black part closest to my hand in the picture. 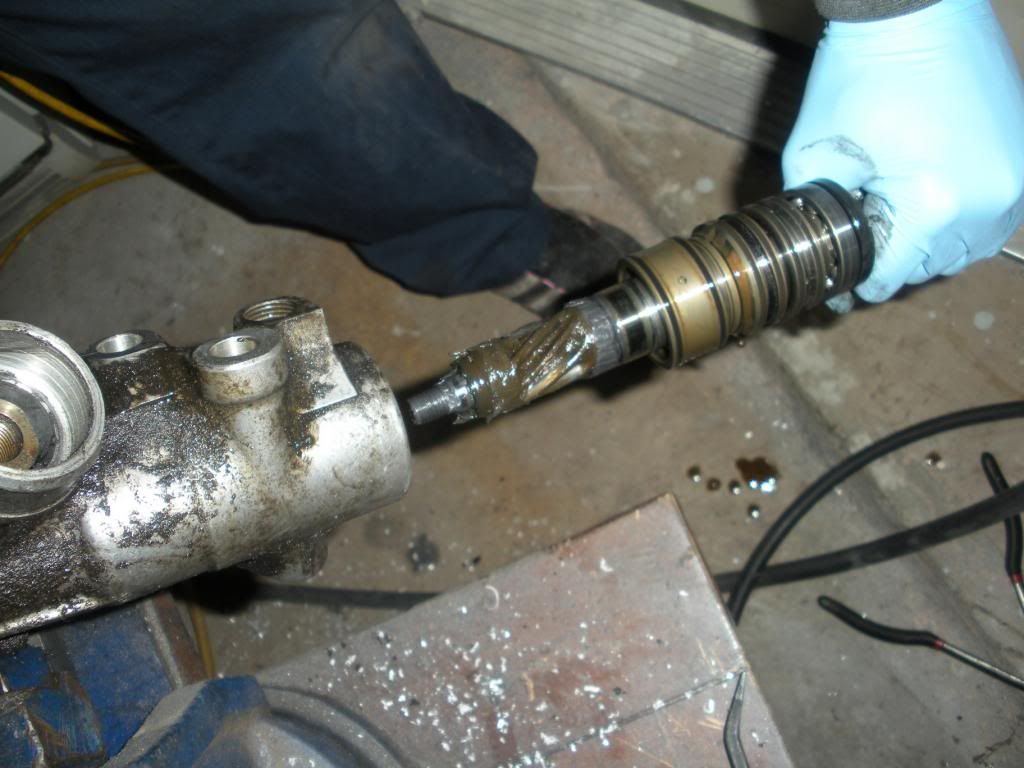
Last edited by StephenSheppard; 02-27-2013 at 10:54 PM. |
|
|

|
| Bookmarks |
|
|