|
|||||||


| RX-7 3rd Gen Specific (1993-2002) RX-7 1993-2002 Discussion including performance modifications and Technical Support Sections. |
|
|
Thread Tools | Display Modes |
|
|||||||
| RX-7 3rd Gen Specific (1993-2002) RX-7 1993-2002 Discussion including performance modifications and Technical Support Sections. |
|
|
Thread Tools | Display Modes |
 03-31-2011, 12:15 PM
|
#1 |
|
Bubble Tech

Join Date: Oct 2008
Posts: 161
Rep Power: 18  |
Bubble Tech Passenger Handle
First off, I'm studying Industrial Design @ NJIT college. As I'm nearing the end of my Jr year, I'm trying to gather my portfolio together. In addition, I'm trying to improve my prototyping skills. So, I thought I would attempt the passenger side door handle as it could be useful to others.
My main objective is to create and improved door handle from the OEM version for prototyping practice and portfolio use. If the quality comes out to my standards I will look into selling them as well. With that said, production/sale is not my primary goal. When I first bought the car my handle was actually broken. To remedy this issue, I just fiberglassed it solid to the trim piece. So to begin Prototyping an improved piece, I had to order a new one. I went cheap and bought one that was broken. So the first step was to repair the handle. The clear part is the added "cast" I did to fix the "missing/broken tab." 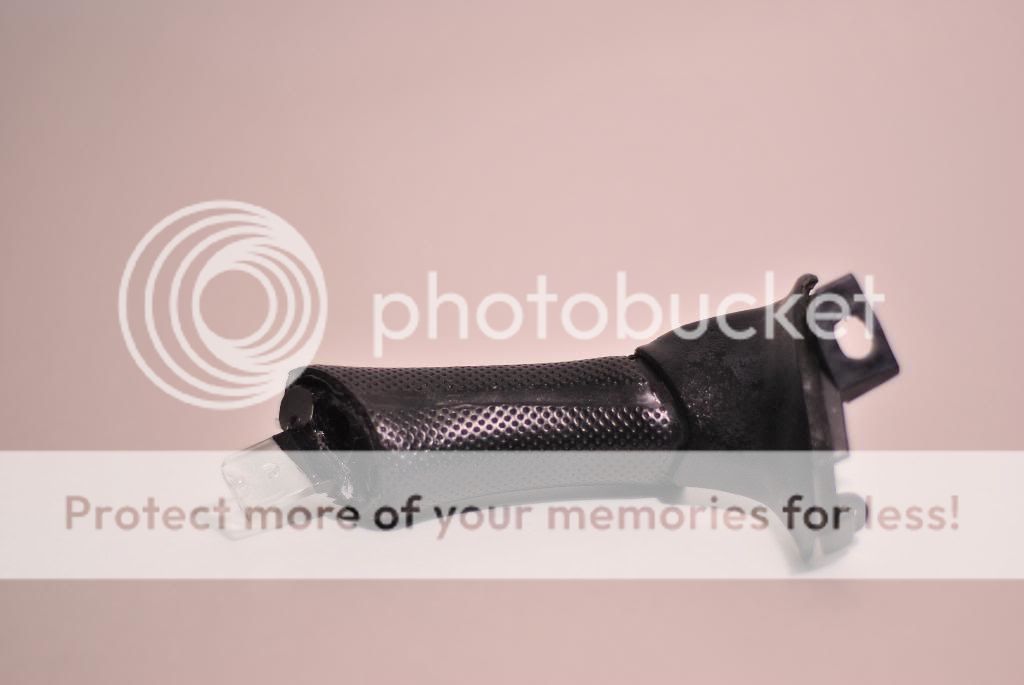  Next step I stripped the cheap tacky "vinyl?" handle cover and prepped the handle to cast the mold. A little body filler and some sanding did the trick. The first modification I did was fill in the voids under the tabs with body filler. In the new piece, this will translate to a stiffer and more robust tab support. This also gets rid of 2 undercuts to ease the casting process. (Forgot to take pics) After I had a " rough sketch model" plug, I began to cast the mold. Even though there were a few imperfections and known adjustments, this was simply a test to see if I could successfully cast a new piece due to its complexity and undercuts) To compensate for some of the under cuts, I ended up going with a 3 piece mold 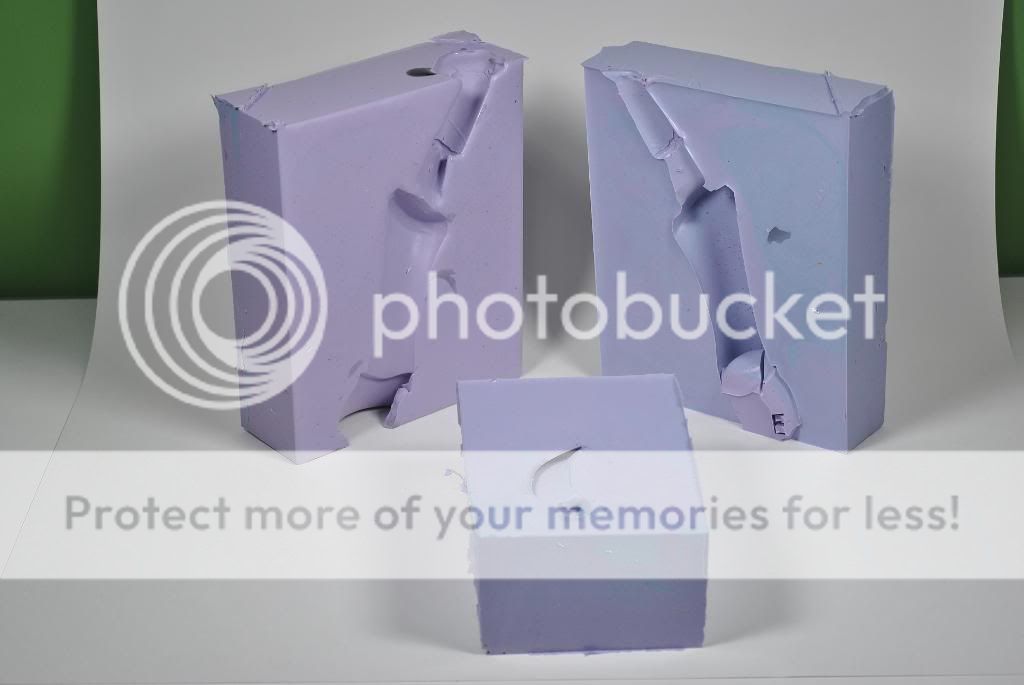 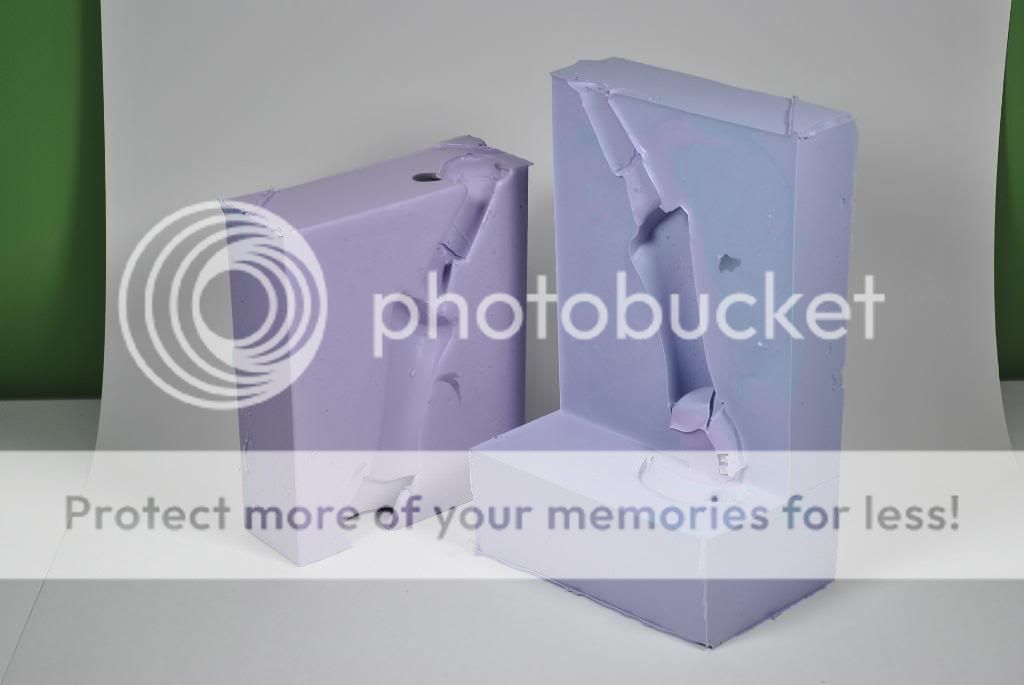 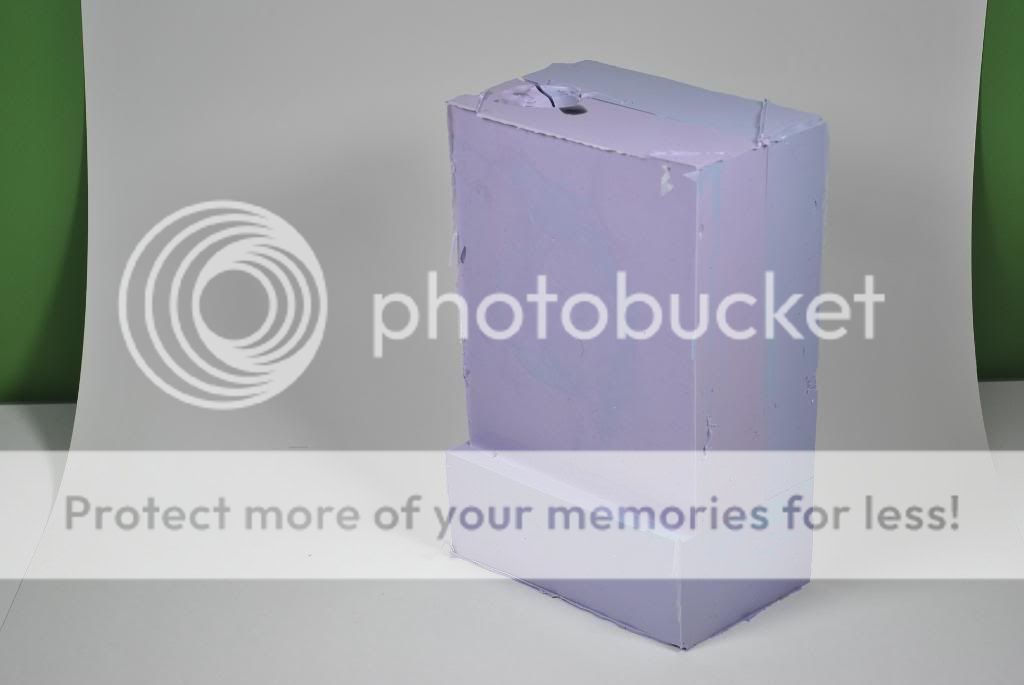 opposite view 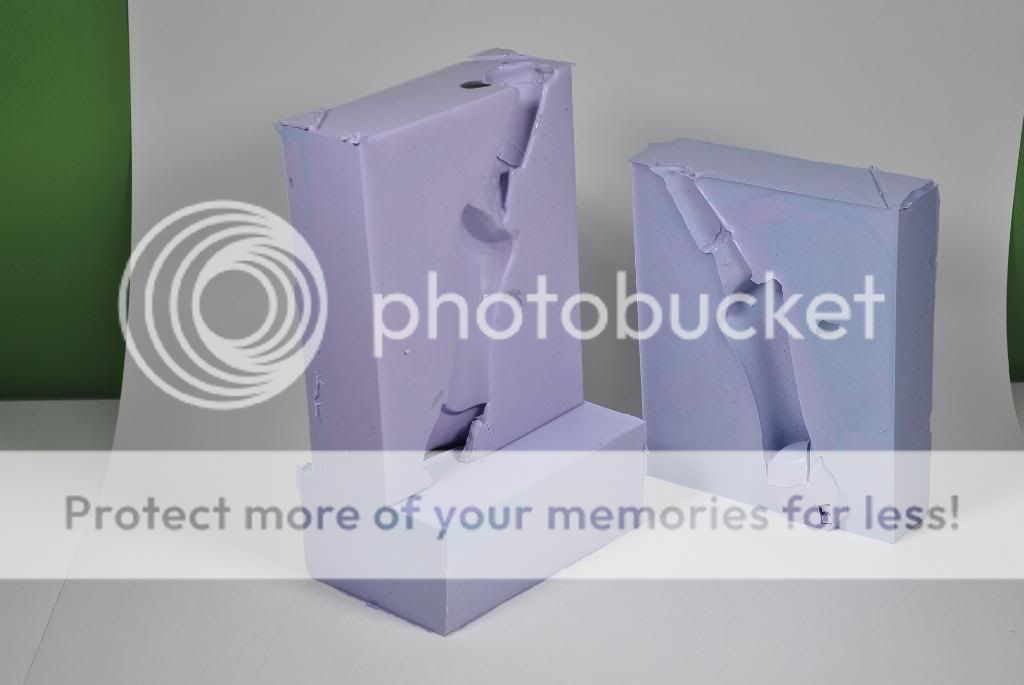 I made a few cast and shortly found out some flaws. I had found some trapped air bubbles and errors in the mold itself. I drilled an hole for one air bubble to vent and the other one was solves by angling the mold when I poured the cast. some pics of the first revision with flaws. Also im using a Clear resin that is suppose to be for artistic purposes so the next step is looking for a more durable resin. (The black color is from a pigment dye)  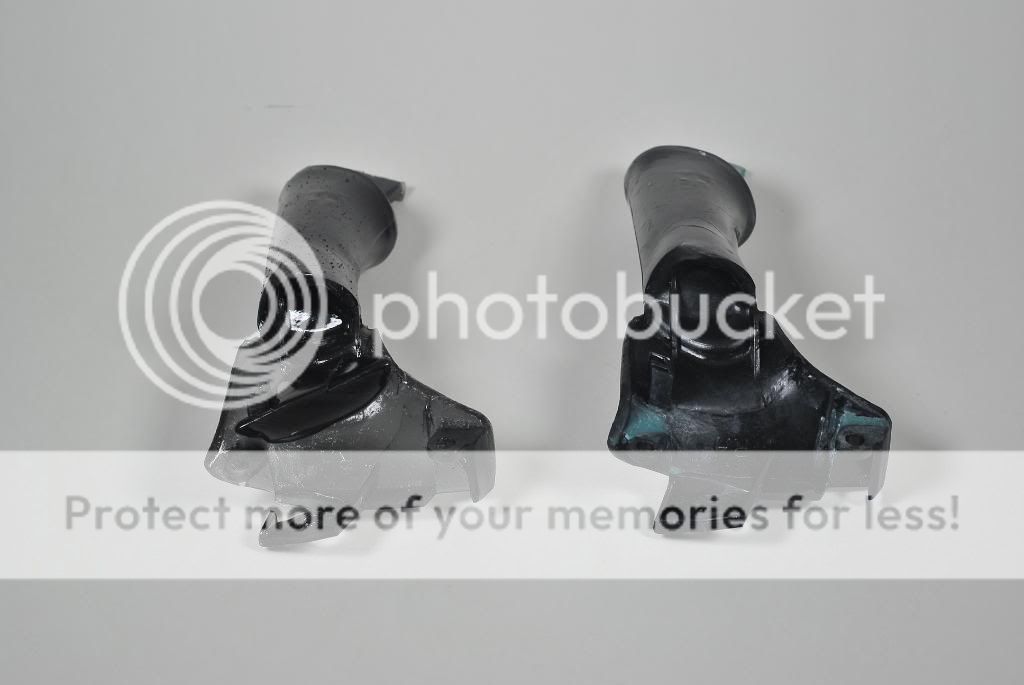 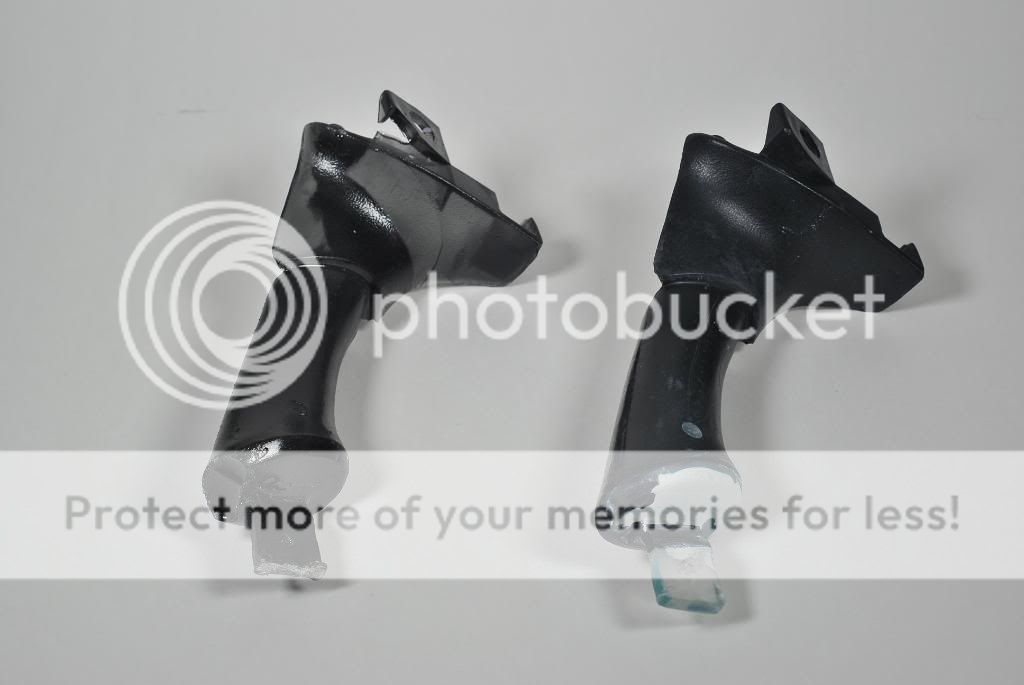 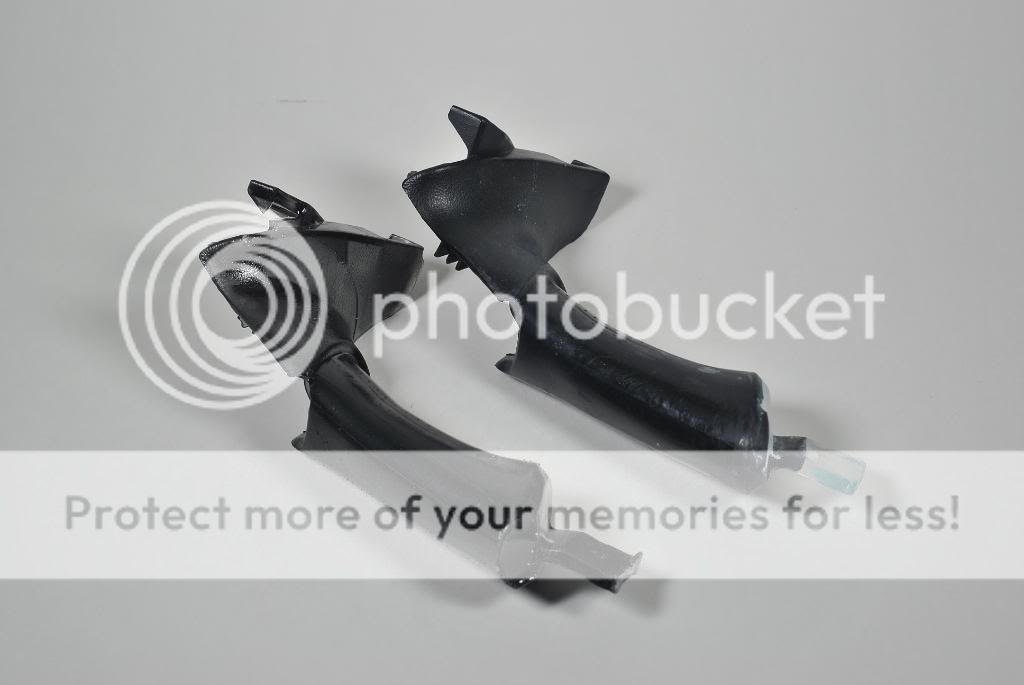 Feel free to post comments, interests and concerns! 
|

|

|
| Bookmarks |
|
|


 Threaded Mode