|
|||||||


| Old School Rotary (Pre-1979) Pre-1979 Discussion including performance modifications and technical support sections |
 |
|
|
Thread Tools | Display Modes |
|
|||||||
| Old School Rotary (Pre-1979) Pre-1979 Discussion including performance modifications and technical support sections |
|
|
|
Thread Tools | Display Modes |
|
|
 10-05-2011, 11:45 PM
|
#1 |
|
Rotary Fanatic

Join Date: Aug 2011
Location: crockett ca.
Posts: 176
Rep Power: 0  |
well to start the build is awesome so far , i have a 73 rx2 2 door with a turbo and i have a couple questions ,1 i have an s5 trans also, how do you do the shortened shifter housing mod and 2 how do those pwr heat exchangers work compaired to a normal intercooler ?and how good are they for street use (daily driving) ?
|

|

|
|
11-16-2011, 05:28 AM
|
#2 | |
|
Rotary Fan in Training
Join Date: Nov 2009
Location: Tasmania, Australia
Posts: 53
Rep Power: 17 |
Quote:
remove the gearstick take the cover off the side of the extension housing, and withdraw the grub screw that holds the shifter cup socket to the inner selection rod remove the shifter assembly from the back of the box ( undo the bolts holding it to the rear of the box ) remove the outer tube.. ( it should pull out with rubber seal on the end ) the shifter assembly will have several sets of bolt holes which attach it to the box the idea is to cut away from this extension housing the entire front set of holes and move the entire shifter assembly forwards onto the next set of holes ( everything moves forward one set of holes as the front pair are cut off just forward of the next set of holes ) now, the outer tube need shortening this same amount. ( cant recall the dimensions, its been a while , but its easily measured ) hacksaw will do... now, the inner rod ( that's normally inside the outer tube ) requires this same length removed and a new hole drilled and tapped for the grub screw ( to hold the cup socket which is the bottom of the shifter ) re - assemble..... the shifter should now be over the top of the rear of the box ( and not behind it ) pretty easy to do, not easy to picture without some pics... ( and buggered if i am dragging mine out to take pics ) measure twice, cut once The distance you cut it will be the distance the housing is moved foward, which is in this case the distance between the front and rear hole centers. Hope this helps.
__________________
RX4 coupe 20B conversion http://www.rotarycarclub.com/rotary_...ead.php?t=9884 |
|
|
|
|
|
09-22-2012, 01:22 AM
|
#3 |
|
Rotary Fan in Training
Join Date: Nov 2009
Location: Tasmania, Australia
Posts: 53
Rep Power: 17 |
Holy Shit! Nearly 12 months since last update.
 Well I've had a bit on the go with a few home projects, work, family and serious case of CBF at times. In the meantime I purchased a Toyota Hilux diff with the mounts already at the correct width for my RX4 with the axles machined and drilled for 4 x 110 studs and SV RX7 disks. I removed the old diff and as you can see it was painted purple. Only on the rear side and over dirt, grease and grime.  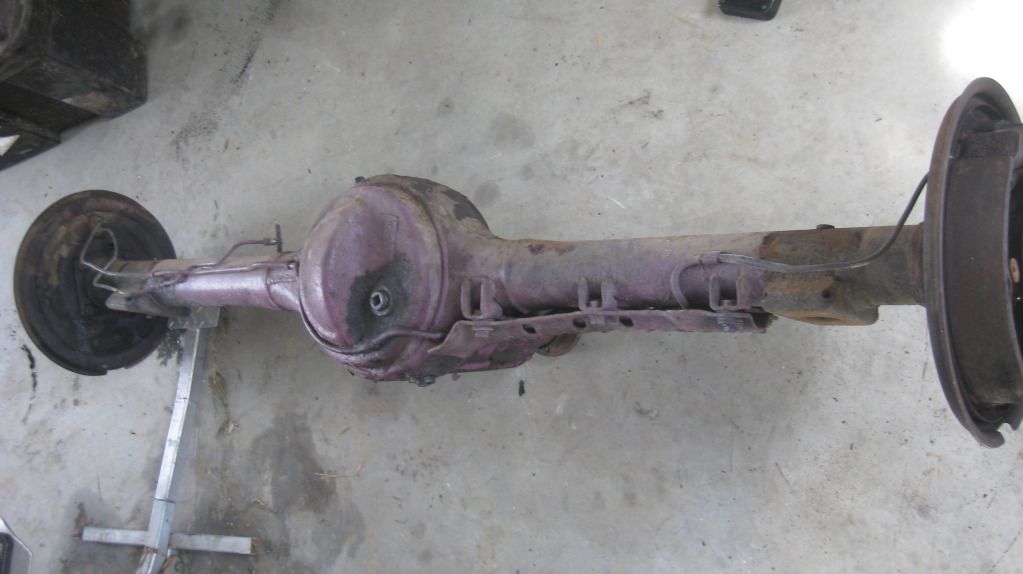 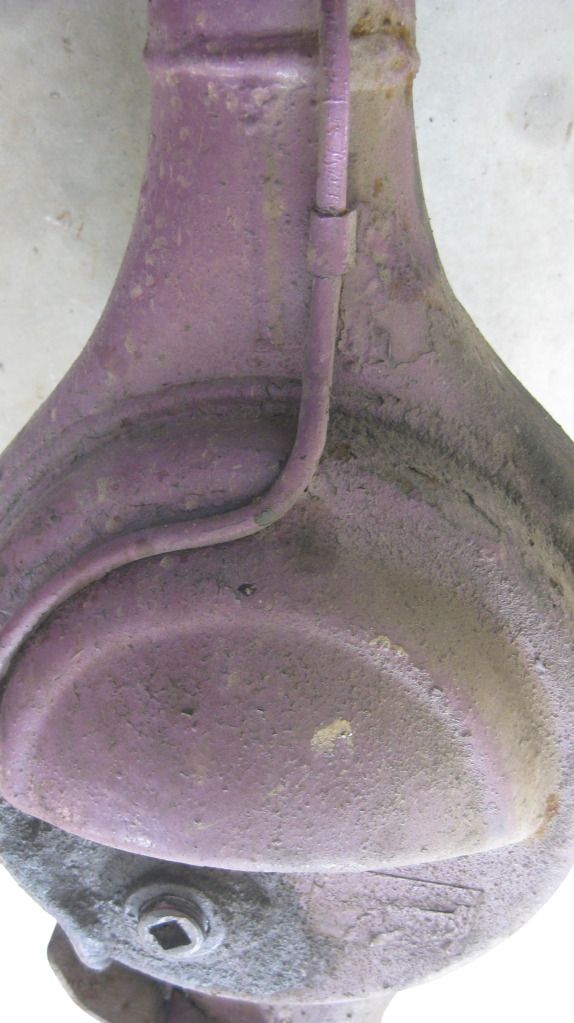 I went to test fit the Hilux housing and found the holes used to locate the housing on the spring spigots was too small. :wallbash: 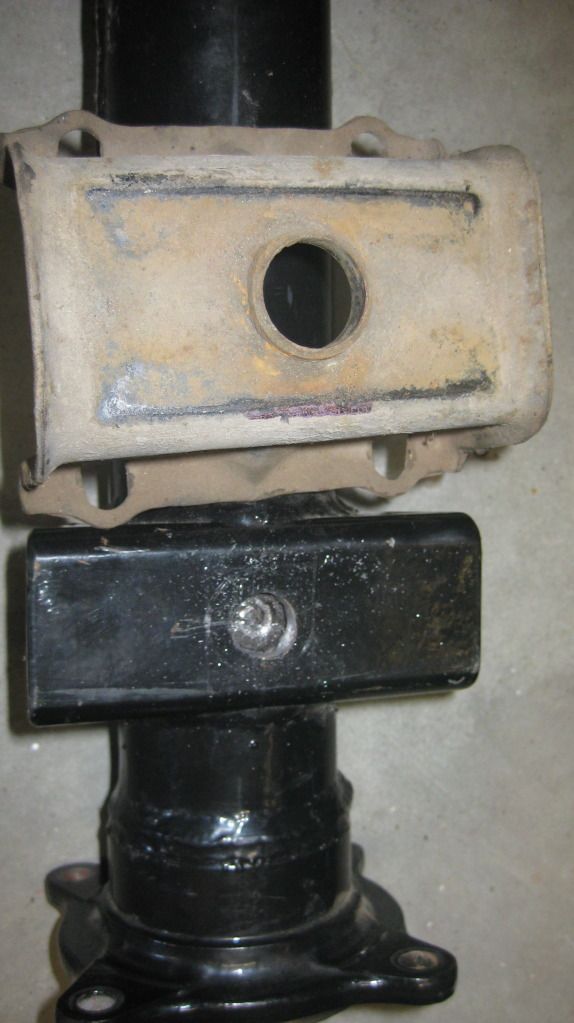 So off to the local tool supplier and bought a 29mm hole saw. I cut a hole in a scrap bit of flat bar and then tack welded centrally around the hole on the housing. 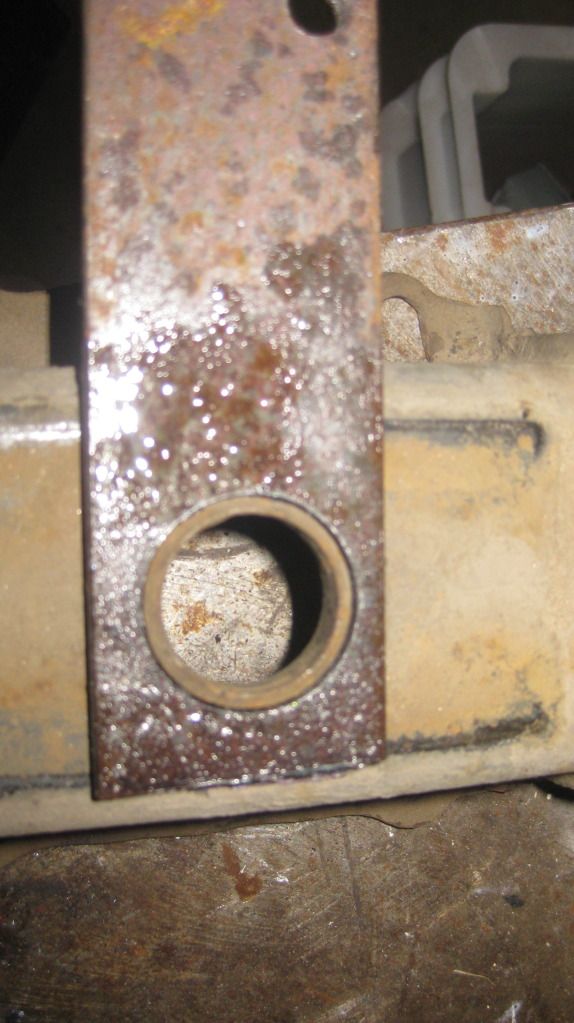 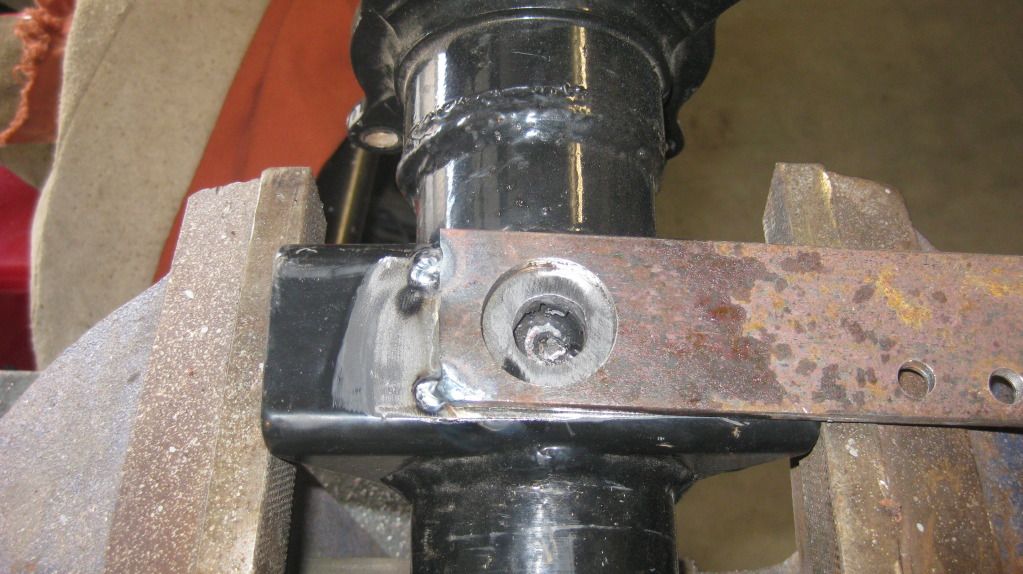 I took the center drill out of the hole saw arbour and drilled a larger hole in the spring mount. 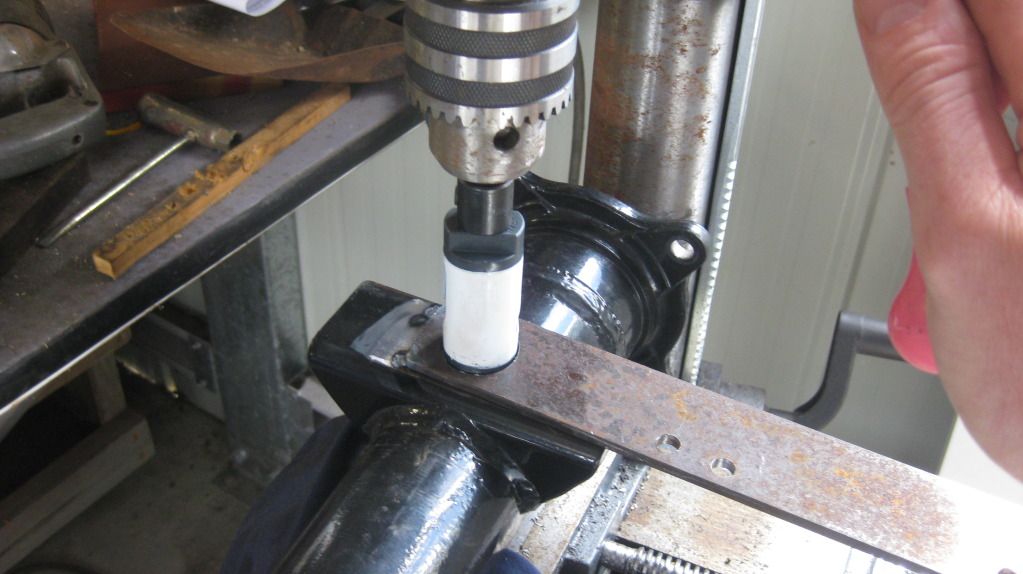 I cleaned the spring saddles and repainted them. Did the same to the otherside then test fitted the housing. Even got to see what my Simmons look like on for the first time. 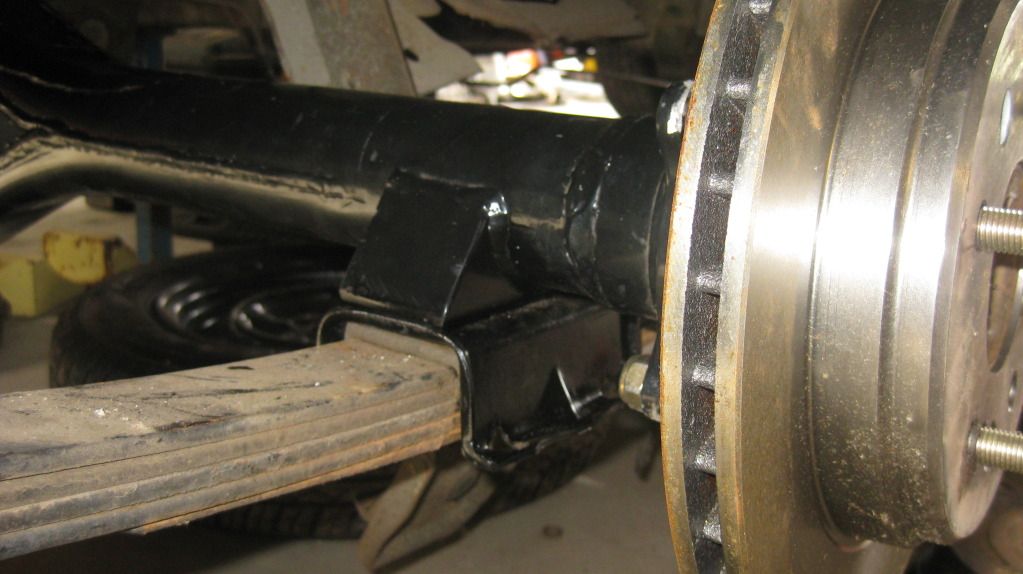 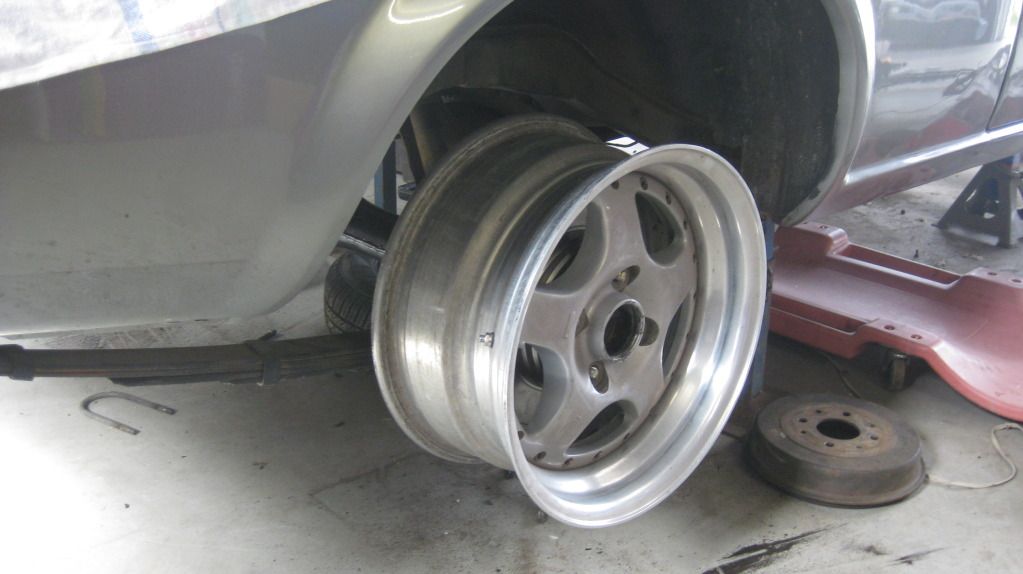 Now I am planning to duplicate the factory diff torque rods and mounts fitted factory to some rare RX4s but with some adjustability. 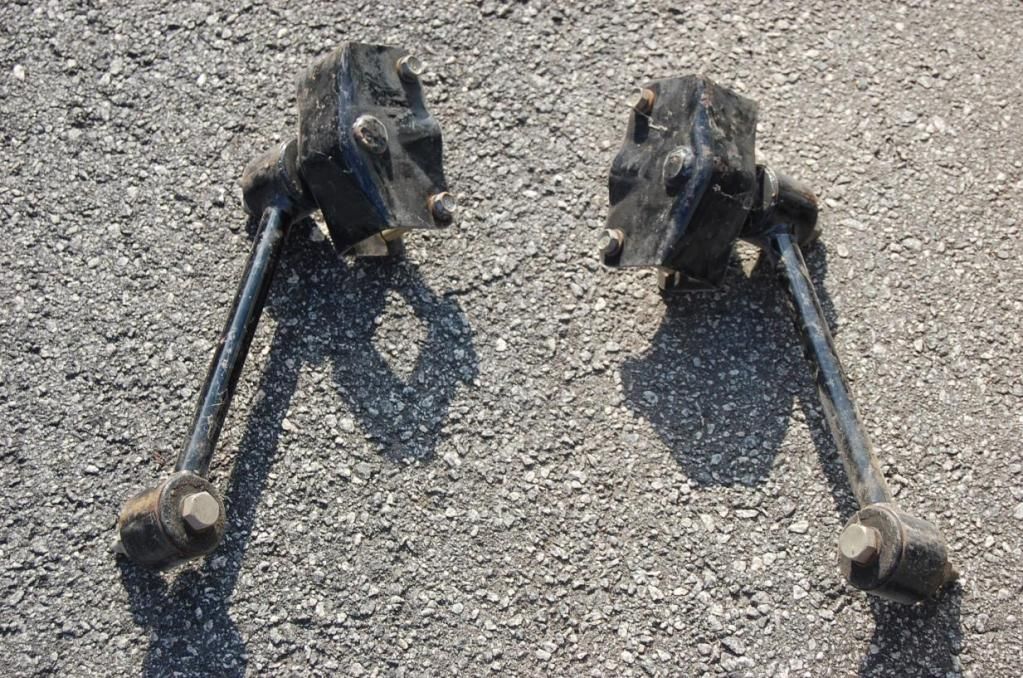
__________________
RX4 coupe 20B conversion http://www.rotarycarclub.com/rotary_...ead.php?t=9884 |
|
|
|
|
| Bookmarks |
| Tags |
| 20b, mazda rx-4 |
| Thread Tools | |
| Display Modes | |
|
|


 Hybrid Mode
